編輯:Android開發教程
一.背景
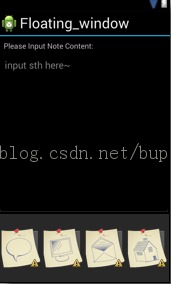
可能很多人跟我一樣,做了好久的android程序,卻一直沒有認真地坐下來好好學習下xml文件的布局。其實有的時候我們用view繪制或是利用ADT的圖形界面功能就可以輕松搞定布局,但是最好還是靜下來學習下xml的布局文件具體寫法。這一節我們要繪制如下圖所示的界面。
二基礎知識
首先我們要了解android到底有那些布局,和每個布局類型的區別。
線性布局分兩種。一種是水平布局,一種是垂直布局。下面我們根據上圖舉例子。
先把上圖的代碼貼出來吧!
<?xml version="1.0" encoding="utf-8"?>
<LinearLayout android:orientation="vertical"
    android:layout_width="fill_parent" android:layout_height="fill_parent"
    xmlns:android="http://schemas.android.com/apk/res/android">
    <TextView android:layout_height="wrap_content" android:text="@string/note_title"
        android:layout_width="wrap_content" android:padding="10dp"></TextView>
    <LinearLayout android:layout_height="fill_parent"
        android:layout_width="fill_parent" android:layout_weight="1">
        <EditText android:id="@+id/EditText02" android:layout_width="fill_parent"
            android:layout_height="fill_parent" android:gravity="left"
            android:hint="@string/edithint"></EditText>
    </LinearLayout>
    <LinearLayout android:layout_height="fill_parent"
        android:layout_width="fill_parent" android:layout_weight="2"
        android:gravity="center"<p class="p1">                android:orientation<span class="s1">=</span><span class="s2">"horizontal"</span></p>                >
        <ImageButton android:id="@+id/ImageButton01"
            android:layout_width="72dp" android:layout_height="72dp"
            android:src="@drawable/sketchy_paper_003" android:layout_margin="3dp"></ImageButton>
        <ImageButton android:id="@+id/ImageButton02"
            android:layout_width="72dp" android:layout_height="72dp"
            android:src="@drawable/sketchy_paper_004" android:layout_margin="3dp"></ImageButton>
        <ImageButton android:id="@+id/ImageButton03"
            android:layout_width="72dp" android:layout_height="72dp"
            android:src="@drawable/sketchy_paper_007" android:layout_margin="3dp"></ImageButton>
        <ImageButton android:id="@+id/ImageButton04"
            android:layout_width="72dp" android:layout_height="72dp"
            android:src="@drawable/sketchy_paper_011" android:layout_margin="3dp"></ImageButton>
    </LinearLayout>
</LinearLayout>
可以看到,上圖是由三部分組成。在大的LinearLayout從上而下垂直分布著三個內容:TextView,LinearLayout,LinearLayout。所以總體的LinearLayout是垂直布局
android:orientation="vertical"
下面我們來看水平布局
其實就是上圖中的最下面那個LinearLayout。四個圖標平行排列。
android:orientation="horizontal"
 Android GUI系統之SurfaceFlinger(7) 應用程序的典型繪圖流程
1.1.1 應用程序的典型繪圖流程我們知道,BufferQueue有最多達32個BufferSlot,這樣設計的目的是什麼?一個可能的原因就是提高圖形渲染速度。因為假如只
 Android自定義View之弧線展示圖
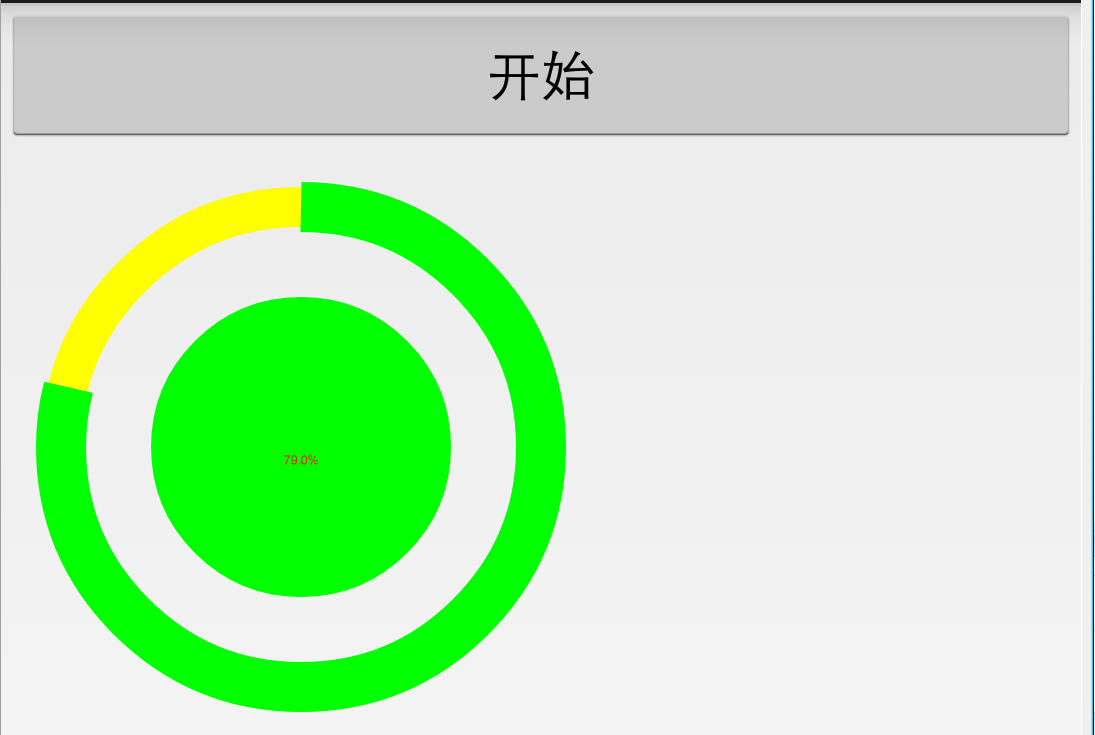
前面我也寫了有幾個自定義進度的控件,那麼,今天,我再加一個控件,原理跟前面講的差不多,先看看效果:這個是一個以弧線為依托的進度控件,主要包括了兩個圓弧、一個圓、一個文本。
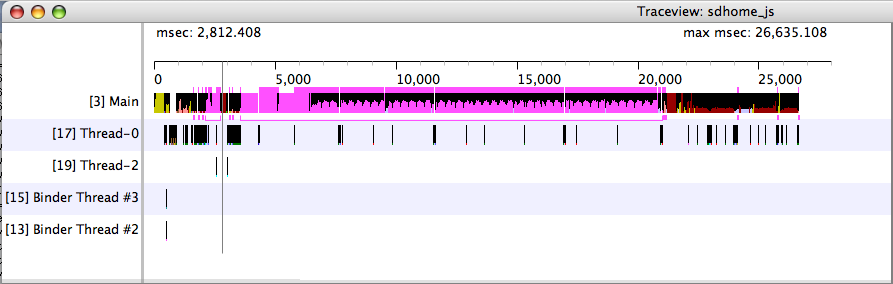 Android代碼調試工具traceview 和 dmtracedump簡介
Android 程序調試工具 Google為我們提供的代碼調試工具的亮點:traceview和 dmtracedump 。有了這兩個工具,我們調試程序分析bug
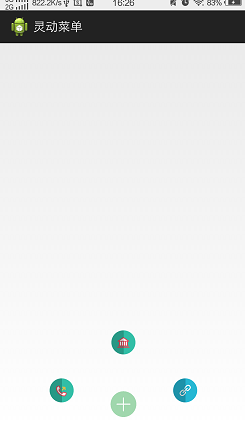 Android屬性動畫之實現靈動菜單效果
前段時間,我學習了自定義View,基本能夠繪制一些比較好看的控件,那麼今天開始,我將會學習屬性動畫。前面我也簡單的看過屬性動畫的概念,然後也是看了一下效果,了解了一些基本