編輯:關於android開發
ImageView的講解
一、src和background的區別
background我們通常理解是背景,而src是內容,當使用src填入圖片的時候是以圖片的大小直接填充,並不會進行拉伸,而background填入圖片會根據指定的大小對圖片進行縮放拉伸。
<?xml version="1.0" encoding="utf-8"?>
<LinearLayoutxmlns:android="http://schemas.android.com/apk/res/android"
    android:layout_width="match_parent"
    android:layout_height="match_parent"
    android:orientation="vertical"
    android:background="#ffffff">
    <ImageView
        android:layout_width="wrap_content"
        android:layout_height="wrap_content"
        android:background="@mipmap/ic_launcher"/>
    <ImageView
        android:layout_width="200dp"
        android:layout_height="wrap_content"
        android:background="@mipmap/ic_launcher"/>
    <ImageView
        android:layout_width="wrap_content"
        android:layout_height="wrap_content"
        android:src="@mipmap/ic_launcher"/>
    <ImageView
        android:layout_width="200dp"
        android:layout_height="wrap_content"
        android:src="@mipmap/ic_launcher"/>

</LinearLayout>
當我們設置寬和高都是wrap_content的時候background和src都是原圖片的大小,但是當我們將layout_height設置了高度的時候差別就顯然可見,我們會發現src屬性的時候圖片的寬度沒有那麼寬,這時圖片就會自動居中,同時如果寬和高設置都不能滿足圖片的要求的時候這時就是涉及到了圖片縮放了ScaleType屬性。同時如果兩者結合使用還有其他的一些效果。
二.設置圖片的透明度
前面所過兩個屬性的區別,現在我們聊一下如何設置一個圖片的透明度,很簡單,我們只需要在Java代碼調用setAlpha方法就可以了
但是我們需要注意的是,這個方法只能對src屬性的控件有作用,參數是float類型的。
三、adjustViewBounds設置縮放是否保持原圖的長寬比例
這個屬性單獨的使用沒有什麼作用,我們需要同過maxHeight和maxWidth結合使用才能起作用
maxHeight:是imageView的最大高度
maxeWidth:是imageView的最大寬度
<?xml version="1.0" encoding="utf-8"?><LinearLayout
    xmlns:android="http://schemas.android.com/apk/res/android"
    android:layout_width="match_parent"
    android:layout_height="match_parent"
    android:orientation="vertical"
    android:background="#ffffff">
    <ImageView
        android:id="@+id/image1"
        android:layout_width="wrap_content"
        android:layout_height="wrap_content"
        android:src="@mipmap/women"
        />
    <ImageView
        android:layout_width="wrap_content"
        android:layout_height="wrap_content"
        android:layout_marginTop="20dp"
        android:src="@mipmap/women"
        android:adjustViewBounds="true"
        android:maxHeight="200dp"
        android:maxWidth="200dp"/>
</LinearLayout>
四、圖片的縮放ScaleType
android:ScaleType通過設置縮放或者移動的類型來滿足ImageView的大小,同樣我們也可以在Java代碼中調用imageView
.setScaleType(ImageView.ScaleType.CENTER)進行縮放或者移動,可選參數:
fitXY:對圖片進行縱橫比例進行縮放,是圖片能夠完全適應ImageView,但是縱橫比例可能會發生變化。
fitStart:對圖片進行縱橫比進行縮放,以致可以是ImageView(適應imageView中高度或者寬度較小的一個),在縮放變化的過程中縱橫比不會發生變化,並且將縮放好的圖片放在ImageView的左上角。
fitCenter:同fitStart基本一樣,只是最後將縮放好的圖片放在ImageView的中間。
fitEnd:同fitStart也基本一樣,只是最後將縮放好的圖片放在ImageView的右下角。
center:保持原圖的大小,顯示在ImageView的中心,原圖的大小超過ImageView設定的大小的時候需要圖片進行裁剪。
centerCrop:保持原圖縱橫縮放比例,直到完全覆蓋ImageView,可能會出現圖片不完整的現象。
centerInside:保持原圖縱橫縮放比例,直到ImageView可以完全的顯示出來。
matrix:默認值,不改變圖片的大小,從ImageView的左上角開始繪制圖片,原圖超過ImageView的時候回對圖片進行裁剪。
上面的解釋應該已經很清楚,如果有興趣就可以自己動手去試試。
五、自定義圓形的ImageView
package com.example.test3;

import android.content.Context;
import android.graphics.Bitmap;
import android.graphics.BitmapFactory;
import android.graphics.Canvas;
import android.graphics.Paint;
import android.graphics.PaintFlagsDrawFilter;
import android.graphics.Path;
import android.graphics.Rect;
import android.graphics.Region;
import android.util.AttributeSet;
import android.widget.ImageView;

/**
 * Created by coder-tu on 2016/1/7.
 */
public class RoundImageView extends ImageView{
    private Bitmap bitmap = BitmapFactory.decodeResource(getResources(),R.mipmap.women);
    private Rect rect = new Rect();
    private PaintFlagsDrawFilter filter = new PaintFlagsDrawFilter(0, Paint.ANTI_ALIAS_FLAG);
    private Paint paint = new Paint();
    private Path path = new Path();

    public RoundImageView(Context context) {
        super(context);
        init();
    }
    public RoundImageView(Context context, AttributeSet attrs) {
        super(context, attrs);
        init();
    }

    public RoundImageView(Context context, AttributeSet attrs, int defStyleAttr) {
        super(context, attrs, defStyleAttr);
        init();
    }
    private void init() {
        paint.setStyle(Paint.Style.STROKE);
        paint.setFlags(Paint.ANTI_ALIAS_FLAG);
//       抗鋸齒
        paint.setAntiAlias(true);
    }
//    傳入一個bitmap對象
    public void setBitmap(Bitmap bitmap) {
        this.bitmap = bitmap;
    }

    @Override
    protected void onDraw(Canvas canvas) {
        super.onDraw(canvas);
        if (bitmap == null){
            return;
        }
        rect.set(0,0,getWidth(),getHeight());
        canvas.save();
        canvas.setDrawFilter(filter);
        path.addCircle(getWidth() / 2, getWidth() / 2, getHeight() / 2, Path.Direction.CCW);
        canvas.clipPath(path, Region.Op.REPLACE);
        canvas.drawBitmap(bitmap, null, rect, paint);
        canvas.restore();
    }
}
在布局文件中使用
<?xml version="1.0" encoding="utf-8"?>
<LinearLayout
    xmlns:android="http://schemas.android.com/apk/res/android"
    android:layout_width="match_parent"
    android:layout_height="match_parent"
    android:orientation="vertical"
    android:background="#ffffff">
    <com.example.test3.RoundImageView
        android:id="@+id/image1"
        android:layout_width="200dp"
        android:layout_height="200dp"/>
</LinearLayout>
效果圖
 android:Spinner(下拉框)控件的使用,androidspinner
android:Spinner(下拉框)控件的使用,androidspinner 1.效果圖 2.創建頁面文件(main.xml)&n
 Android應用開發教程之十九:模仿iPhone列表數據View刷新動畫詳解
因為我本人很喜歡在不同的頁面之間跳轉時加點好玩的動畫,今天無意間看到一個動畫效果感覺不錯,幾種效果圖如下:既然好玩就寫在博客中,直接說就是:該效果類
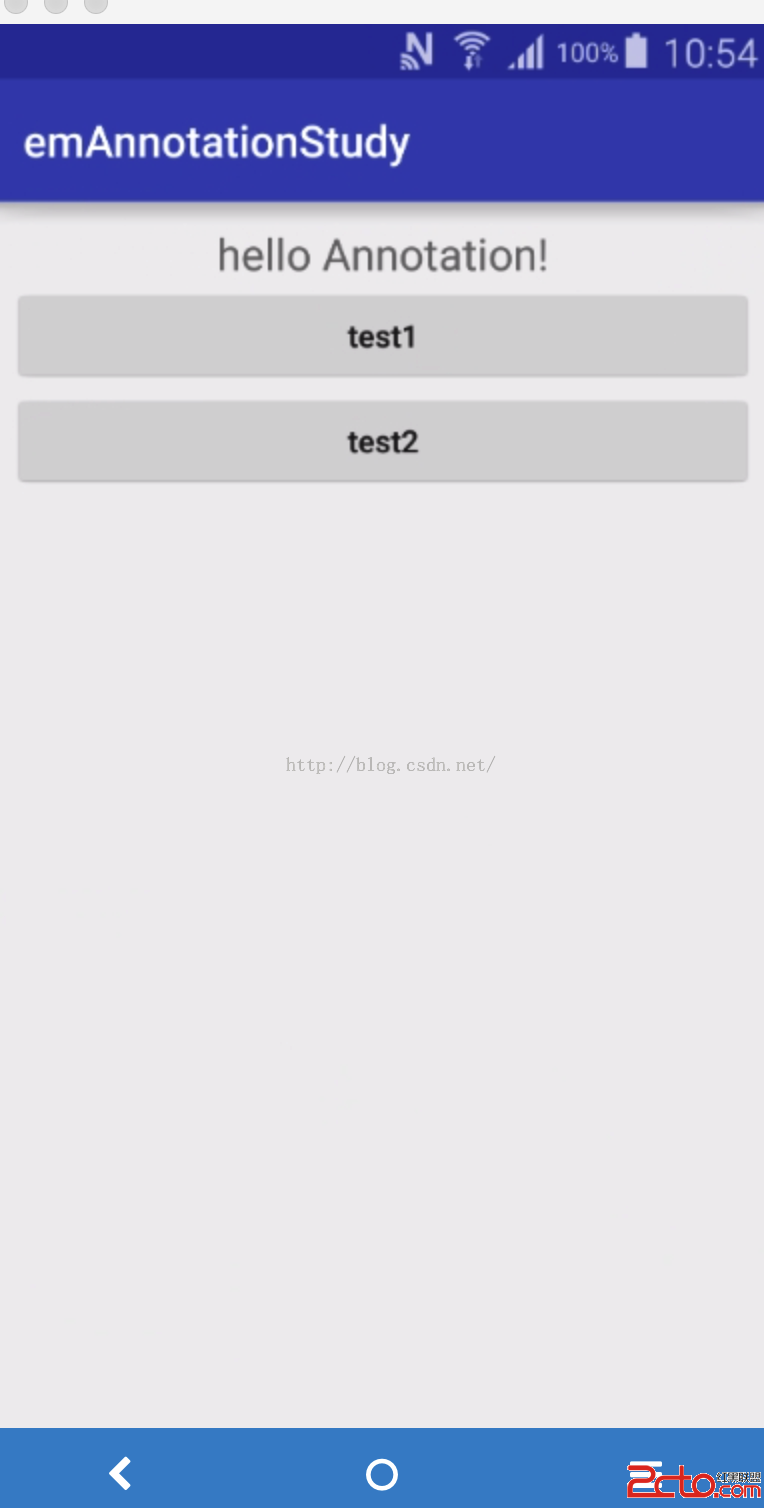 Android開發學習之路--Annotation注解簡化view控件之初體驗
Android開發學習之路--Annotation注解簡化view控件之初體驗 一般我們在寫android Activity的時候總是會在onCreate方法中加上s
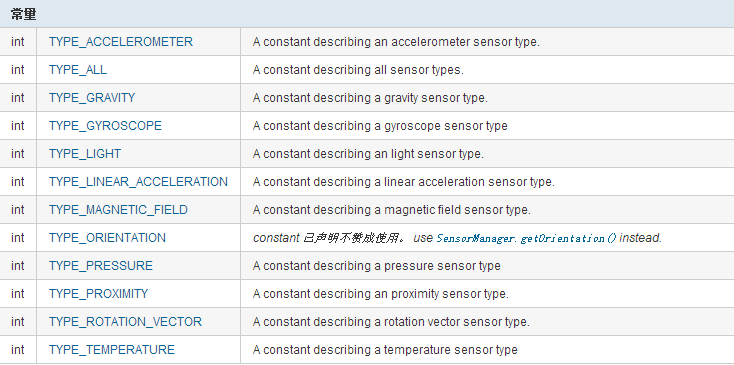 Android之SensorManager,sensormanager
Android之SensorManager,sensormanager Android設備中大多都內置了