編輯:關於android開發
首先了解一下即時通信的概念。通過消息通道 傳輸消息對象,一個賬號發往另外一賬號,只要賬號在線,可以即時獲取到消息,這就是最簡單的即使通訊。消息通道可由TCP/IP UDP實現。通俗講就是把一個人要發送給另外一個人的消息對象(文字,音視頻,文件)通過消息通道(C/S實時通信)進行傳輸的服務。即時通訊應該包括四種形式,在線直傳、在線代理、離線代理、離線擴展。在線直傳指不經過服務器,直接實現點對點傳輸。在線代理指消息經過服務器,在服務器實現中轉,最後到達目標賬號。離線代理指消息經過服務器中轉到達目標賬號,對方不在線時消息暫存服務器的數據庫,在其上線再傳發。離線擴展指將暫存消息以其它形式,例如郵件、短信等轉發給目標賬號。
此外,我們還需要認識一下計算機網絡相關的概念。經典的計算機網絡四層模型中,TCP和UDP是傳輸層協議,包含著消息通信內容。ip為網絡層協議,是一種網絡地址。TCP/IP,即傳輸控制協議/網間協議,定義了主機如何連入因特網及數據如何在它們之間傳輸的標准。Socket,又稱“套接字”, 在應用層和傳輸層之間的一個抽象層,用於描述 IP 地址和端口,是一個通信連的句柄,應用程序通常通過“套接字”向網絡發送請求或者應答網絡請求,它就是網絡通信過程中端點的抽象表示。它把TCP/IP層復雜的操作抽象為幾個簡單的接口供應用層調用已實現進程在網絡中通信。XMPP(可擴展消息處理現場協議)是基於可擴展標記語言(XML)的協議,應用於即時通訊場景的應用層協議,底層通過Socket實現。它用於即時消息(IM)以及在線現場探測。它在促進服務器之間的准即時操作。這個協議可能最終允許因特網用戶向因特網上的其他任何人發送即時消息, 即使其操作系統和浏覽器不同。這樣實現即時通訊就有兩種方案,一是從套接字入手,直接利用socket提供的接口進行數據的傳送。二是借助開源工具(服務器openfire),用XMPPConnection創建連接。
XMPP是實現即時通訊使用較為普遍的做法。XMPP中,各項工作都是通過在一個 XMPP 流上發送和接收 XMPP 節來完成的。核心 XMPP 工具集由三種基本節組成,這三種節分別為<presence>、出席<message>、<iq>。XMPP 流由兩份 XML 文檔組成,通信的每個方向均有一份文檔。這份文檔有一個根元素<stream:stream>,這個根元素的子元素由可路由的節以及與流相關的頂級子元素構成。xmpp協議同樣包括客戶端和服務器。客戶端基於 Android 平台進行開發。負責初始化通信過程,進行即時通信時,由客戶端負責向服務器發起創建連接請求。系統通過 GPRS 無線網絡與Internet 網絡建立連接,通過服務器實現與 Android 客戶端的即時通信腳。服務器端則采用 Openfire 作為服務器。 允許多個客戶端同時登錄並且並發的連接到一個服務器上。服務器對每個客戶端的連接進行認證,對認證通過的客戶端創建會話,客戶端與服務器端之間的通信就在該會話的上下文中進行。使用了 asmark 開源框架實現的即時通訊功能.該框架基於開源的 XMPP 即時通信協議,采用 C/S 體系結構,通過 GPRS 無線網絡用TCP 協議連接到服務器,以架設開源的 Openfn'e 服務器作為即時通訊平台。xmpp消息通道的創建:
先配置通道信息進行連接
ConnectionConfiguration configuration = new ConnectionConfiguration(HOST, PORT),
設置Debug信息和安全模式
configuration.setDebuggerEnabled(true);
configuration.setSecurityMode(SecurityMode.disabled),
最後才是建立連接
conn.connect();
在ContentObserver的實現類中觀察消息變化。XMPPConnection.getRoster()獲取聯系人列表對象。用xmpp協議編寫通訊協議的大致思路可以如下。進入登陸界面,通過xmppconnection的login方法實現登陸,登陸成功進入主界面。主界面包含兩個Fragment,分別用來顯示聯系人和聊天記錄。創建聯系人和短信的數據觀察者,在聯系人、短信服務中分別設定監聽RosterListener()、ChatManagerListener(),接受聯系人和短信信息,同時將相關信息添加到內容提供者中。在內容提供者中設定一個內容觀察者,當數據發生變化時通知界面更新。
本文的重點是利用Socket的接口實現即時通訊,因為絕大多數即時通訊的底層都是通過Socket實現的。其基本的業務邏輯可描述如下。用戶進入登陸界面後,提交賬號密碼 經服務端確定,返回相關參數用於確定連接成功。進入聊天界面或好友界面。點擊聯系人或聊天記錄的條目,進入聊天界面。當移動端再次向服務器發送消息時,由服務器轉發消息內容給目標賬號。同時更新界面顯示。這樣就完成即時通訊的基本功能。當然,也可以添加一個後台服務,當用戶推出程序時,在後台接受消息。不難看出,對於即時通訊來講,有三個關注點:消息通道、消息內容、消息對象。因此,主要邏輯也是圍繞這三個點展開。消息通道實現傳輸消息對象的發送和接收。為Socket(String host, int port)傳入服務其地址和端口號,即可創建連接。消息內容的格式應該與服務器保持一致。接受數據時,獲取輸入流並用DataInputStream包裝,通過輸入流讀取server發來的數據。發送數據時,獲取輸出流並用DataOutputStream包裝,通過輸出流往server發送數據。消息內容中應該包括發送者、接受者信息、數據類型等。消息對象就是消息的發送者和消息的接受者。接下來在代碼中進行詳細的講解。
創建一個消息的基類,實現xml文件和字符串的轉換,用到Xsream第三方jar包。這樣當創建消息類時,繼承該方法,就可以直接在類中實現數據的轉換。
/**
 * Created by huang on 2016/12/3.
 */
public class ProtacolObjc implements Serializable {
    public String toXml() {
        XStream stream = new XStream();
        //將根節點轉換為類名
        stream.alias(this.getClass().getSimpleName(), this.getClass());
        return stream.toXML(this);
    }

    public Object fromXml(String xml) {
        XStream x = new XStream();
        x.alias(this.getClass().getSimpleName(), this.getClass());
        return x.fromXML(xml);
    }

    //創建Gson數據和字符串之間轉換的方法,適應多種數據
    public String toGson() {
        Gson gson = new Gson();
        return toGson();
    }

    public Object fromGson(String result) {
        Gson gson = new Gson();
        return gson.fromJson(result, this.getClass());
    }
}
創建線程工具,指定方法運行在子線程和主線程中。由於網絡操作需要在子線程中,界面更新需要在主線程中,創建線程工具可以方便選擇線程。
import android.os.Handler;
/**
 * Created by huang on 2016/12/5.
 */
public class ThreadUtils {
    private static Handler handler = new Handler();
    public static void runUIThread(Runnable r){
        handler.post(r);
    }
    public static void runINThread(Runnable r){
        new Thread(r).start();
    }
}
創建消息的工具類,包括消息內容、消息類型、消息本省等。由於服務器返回的內容中包含消息的包名信息所以消息本身的包名應該於服務其保持一直。
/**
 * Created by huang on 2016/12/3.
 * 消息內容
 */
public class QQMessage extends ProtacolObjc {
    public String type = QQmessageType.MSG_TYPE_CHAT_P2P;// 類型的數據 chat login
    public long from = 0;// 發送者 account
    public String fromNick = "";// 昵稱
    public int fromAvatar = 1;// 頭像
    public long to = 0; // 接收者 account
    public String content = ""; // 消息的內容 約不?
    public String sendTime = getTime(); // 發送時間

    public String getTime() {
        Date date = new Date(System.currentTimeMillis());
        java.text.SimpleDateFormat format = new java.text.SimpleDateFormat("mm-DD HH:mm:ss");
        return format.format(date);
    }

    public String getTime(Long time) {
        Date date = new Date(time);
        java.text.SimpleDateFormat format = new java.text.SimpleDateFormat("mm-DD HH:mm:ss");
        return format.format(date);
    }
}

/**
 * Created by huang on 2016/12/3.
 * 消息類型
 */
public class QQmessageType {
    public static final String MSG_TYPE_REGISTER = "register";// 注冊
    public static final String MSG_TYPE_LOGIN = "login";// 登錄
    public static final String MSG_TYPE_LOGIN_OUT = "loginout";// 登出
    public static final String MSG_TYPE_CHAT_P2P = "chatp2p";// 聊天
    public static final String MSG_TYPE_CHAT_ROOM = "chatroom";// 群聊
    public static final String MSG_TYPE_OFFLINE = "offline";// 下線
    public static final String MSG_TYPE_SUCCESS = "success";//成功
    public static final String MSG_TYPE_BUDDY_LIST = "buddylist";// 好友
    public static final String MSG_TYPE_FAILURE = "failure";// 失敗
}

import com.example.huang.imsocket.bean.ProtacolObjc;
/*
 *消息本身 包括 賬號、頭像和昵稱
 *
 */
public class QQBuddy extends ProtacolObjc {
    public long account;
    public String nick;
    public int avatar;
}

/**
 * Created by huang on 2016/12/3.
 */

public class QQBuddyList extends ProtacolObjc {
    public ArrayList<QQBuddy> buddyList = new ArrayList<>();
}
關於socket的創建連接和發送消息、接受消息。
import android.util.Log;
import com.example.huang.imsocket.bean.QQMessage;
import java.io.DataInputStream;
import java.io.DataOutputStream;
import java.io.IOException;
import java.net.Socket;
import java.util.ArrayList;
import java.util.List;

/**
 * Created by huang on 2016/12/3.
 * 連接 服務器
 */
public class QQConnection extends Thread {
    private static final String TAG = "QQConnection";
    private Socket client;
    private DataOutputStream write;
    private DataInputStream read;
    public static final String HOST = "192.168.23.48";
    public static final int POST = 5225;

    private boolean flag = true;

    private List<OnQQmwssagereceiveLisener> mOnQQmwssagereceiveLisener = new ArrayList<>();

    public void addOnQQmwssagereceiveLisener(OnQQmwssagereceiveLisener lisener) {
        mOnQQmwssagereceiveLisener.add(lisener);
    }

    public void removeOnQQmwssagereceiveLisener(OnQQmwssagereceiveLisener lisener) {
        mOnQQmwssagereceiveLisener.remove(lisener);
    }

    public interface OnQQmwssagereceiveLisener {
        public void onReiceive(QQMessage qq);
    }

    @Override
    public void run() {
        super.run();
        while (flag) {
            try {
                String utf = read.readUTF();
                QQMessage message = new QQMessage();
                QQMessage msg = (QQMessage) message.fromXml(utf);
                if (msg != null) {
                    for (OnQQmwssagereceiveLisener lisner : mOnQQmwssagereceiveLisener)
                        lisner.onReiceive(msg);
                }
            } catch (IOException e) {
                e.printStackTrace();
            }
        }
    }

    public void connect() {
            try {
                if (client == null) {
                    client = new Socket(HOST, POST);
                    write = new DataOutputStream(client.getOutputStream());
                    read = new DataInputStream(client.getInputStream());
                    flag = true;
                    this.start();
                    Log.e(TAG, "connect: "+(write==null)+"---"+ (read == null));
                }
            } catch (Exception e) {
                e.printStackTrace();
            }
    }

    public void disconnect() {
        if (client != null) {
            flag = false;
            this.stop();
            try {
                read.close();
            } catch (IOException e) {
                e.printStackTrace();
            }

            try {
                write.close();
            } catch (IOException e) {
                e.printStackTrace();
            }

            try {
                client.close();
            } catch (IOException e) {
                e.printStackTrace();
            }
        }
    }

    public void send(String xml) throws IOException {
        write.writeUTF(xml);
        write.flush();
    }

    public void send(QQMessage qq) throws IOException {
        write.writeUTF(qq.toXml());
        write.flush();
    }
}
閃屏界面的布局
<?xml version="1.0" encoding="utf-8"?>
<RelativeLayout xmlns:android="http://schemas.android.com/apk/res/android"
    xmlns:tools="http://schemas.android.com/tools"
    android:id="@+id/activity_splash"
    android:layout_width="match_parent"
    android:layout_height="match_parent"
    android:background="@mipmap/splash_bg">

    <ImageView
        android:layout_width="wrap_content"
        android:layout_height="wrap_content"
        android:layout_centerInParent="true"
        android:src="@mipmap/conversation_bg_logo" />
</RelativeLayout>
閃屏界面,保持4秒鐘進入登陸界面。一般來見,閃屏界面可以加載數據、獲取版本號、更新版本等操作。這裡沒有做的那麼復雜。
import com.example.huang.imsocket.R;

public class SplashActivity extends AppCompatActivity {

    @Override
    protected void onCreate(Bundle savedInstanceState) {
        super.onCreate(savedInstanceState);
        getSupportActionBar().hide();   //隱藏標欄
        getWindow().setFlags(WindowManager.LayoutParams.FLAG_FULLSCREEN, WindowManager.LayoutParams.FLAG_FULLSCREEN);  //全屏顯示
        setContentView(R.layout.activity_splash);

        new Handler().postDelayed(new Runnable() {
            @Override
            public void run() {
                startActivity(new Intent(SplashActivity.this, LoginActivity.class));
                finish();
            }
        }, 4000);
    }
}
登陸界面的布局
<?xml version="1.0" encoding="utf-8"?>
<LinearLayout xmlns:android="http://schemas.android.com/apk/res/android"
    android:layout_width="match_parent"
    android:layout_height="match_parent"
    android:background="#aabbdd"
    android:gravity="center"
    android:orientation="vertical">

    <TableLayout
        android:layout_width="match_parent"
        android:layout_height="wrap_content">

        <ImageView
            android:layout_width="wrap_content"
            android:layout_height="wrap_content"
            android:src="@mipmap/conversation_bg_logo" />

        <TableRow
            android:layout_width="match_parent"
            android:layout_height="wrap_content"
            android:layout_marginLeft="20dp"
            android:layout_marginRight="20dp"
            android:layout_marginTop="8dp"
            android:gravity="center_horizontal">

            <TextView
                android:layout_width="0dp"
                android:layout_height="wrap_content"
                android:layout_weight="1"
                android:gravity="center"
                android:text="賬號:"
                android:textColor="#000" />

            <EditText
                android:id="@+id/et_accoun"
                android:layout_width="0dp"
                android:layout_height="wrap_content"
                android:layout_weight="3"
                android:gravity="center"
                android:hint="輸入賬號" />
        </TableRow>

        <TableRow
            android:layout_width="match_parent"
            android:layout_height="wrap_content"
            android:layout_marginLeft="20dp"
            android:layout_marginRight="20dp"
            android:layout_marginTop="4dp"
            android:gravity="center_horizontal">

            <TextView
                android:layout_width="0dp"
                android:layout_height="wrap_content"
                android:layout_weight="1"
                android:gravity="center"
                android:text="密碼:"
                android:textColor="#000" />

            <EditText
                android:id="@+id/et_pwd"
                android:layout_width="0dp"
                android:layout_height="wrap_content"
                android:layout_weight="3"
                android:gravity="center"
                android:hint="輸入密碼" />
        </TableRow>

        <Button
            android:id="@+id/btn_login"
            android:layout_width="match_parent"
            android:layout_height="wrap_content"
            android:layout_marginLeft="80dp"
            android:layout_marginRight="80dp"
            android:layout_marginTop="8dp"
            android:onClick="sendmessage"
            android:text="登錄" />

    </TableLayout>
</LinearLayout>
登陸界面,創建和服務器的連接,向服務器發送登陸信息,接受服務器返回的信息。
import android.app.Activity;
import android.content.Intent;
import android.os.Bundle;
import android.util.Log;
import android.view.View;
import android.widget.EditText;
import android.widget.Toast;

import com.example.huang.imsocket.R;
import com.example.huang.imsocket.bean.Myapp;
import com.example.huang.imsocket.bean.QQBuddyList;
import com.example.huang.imsocket.bean.QQMessage;
import com.example.huang.imsocket.bean.QQmessageType;
import com.example.huang.imsocket.core.QQConnection;
import com.example.huang.imsocket.service.IMService;
import com.example.huang.imsocket.util.ThreadUtils;

import java.io.IOException;

/**
 * Created by huang on 2016/12/3.
 */
public class LoginActivity extends Activity {
    private static final String TAG = "LoginActivity";

    private EditText et_accoun;
    private EditText et_pwd;

    private String accoun;
    private QQConnection conn;
    private QQConnection.OnQQmwssagereceiveLisener lisener = new QQConnection.OnQQmwssagereceiveLisener() {
        @Override
        public void onReiceive(final QQMessage qq) {

            final QQBuddyList list = new QQBuddyList();
            final QQBuddyList list2 = (QQBuddyList) list.fromXml(qq.content);
            if (QQmessageType.MSG_TYPE_BUDDY_LIST.equals(qq.type)) {
                ThreadUtils.runUIThread(new Runnable() {
                    @Override
                    public void run() {
                        Toast.makeText(getBaseContext(), "成功", Toast.LENGTH_SHORT).show();

                        Myapp.me = conn;
                        Myapp.username = accoun;
                        Myapp.account = accoun + "@qq.com";

                        Intent intent = new Intent(LoginActivity.this, contactActivity.class);
                        intent.putExtra("list", list2);
                        startActivity(intent);

                        Intent data = new Intent(LoginActivity.this, IMService.class);
                        startService(data);
                        finish();
                    }
                });
            } else {
                ThreadUtils.runUIThread(new Runnable() {
                    @Override
                    public void run() {
                        Toast.makeText(getBaseContext(), "登陸失敗", Toast.LENGTH_SHORT).show();
                    }
                });
            }
        }
    };

    @Override
    protected void onCreate(Bundle savedInstanceState) {
        super.onCreate(savedInstanceState);
        setContentView(R.layout.activity_login);
        et_accoun = (EditText) findViewById(R.id.et_accoun);
        et_pwd = (EditText) findViewById(R.id.et_pwd);
        ThreadUtils.runINThread(new Runnable() {
            @Override
            public void run() {
                try {
                    conn = new QQConnection();
                    conn.addOnQQmwssagereceiveLisener(lisener);
                    conn.connect();
                } catch (Exception e) {
                    e.printStackTrace();
                }
            }
        });
    }

    public void sendmessage(View view) {
        accoun = et_accoun.getText().toString().trim();
        final String password = et_pwd.getText().toString().trim();
        Log.i(TAG, "sendmessage: " + accoun + "#" + password);
        ThreadUtils.runINThread(new Runnable() {
            @Override
            public void run() {
                QQMessage message = new QQMessage();
                message.type = QQmessageType.MSG_TYPE_LOGIN;
                message.content = accoun + "#" + password;
                String xml = message.toXml();
                if (conn != null) {
                    try {
                        conn.send(xml);
                    } catch (IOException e) {
                        e.printStackTrace();
                    }
                }
            }
        });
    }

    @Override
    protected void onDestroy() {
        super.onDestroy();
        conn.removeOnQQmwssagereceiveLisener(lisener);
    }
}
好友列表界面
<?xml version="1.0" encoding="utf-8"?>
<LinearLayout xmlns:android="http://schemas.android.com/apk/res/android"
    android:layout_width="match_parent"
    android:layout_height="match_parent"
    android:background="#aabbcc"
    android:orientation="vertical">

    <TextView
        android:id="@+id/tv_title"
        android:layout_width="match_parent"
        android:layout_height="50dp"
        android:gravity="center"
        android:text="聯系人列表"
        android:textColor="#6d00"
        android:textSize="23dp" />

    <ListView
        android:id="@+id/lv_contact"
        android:layout_width="match_parent"
        android:layout_height="match_parent"></ListView>
</LinearLayout>
好友列表及時收到從哪個服務其發揮的好友更新信息,點擊條目跳到聊天界面。
import android.app.Activity;
import android.content.Intent;
import android.graphics.Color;
import android.os.Bundle;
import android.view.View;
import android.view.ViewGroup;
import android.widget.AdapterView;
import android.widget.ArrayAdapter;
import android.widget.ImageView;
import android.widget.ListView;
import android.widget.TextView;
import android.widget.Toast;

import com.example.huang.imsocket.R;
import com.example.huang.imsocket.bean.Myapp;
import com.example.huang.imsocket.bean.QQBuddyList;
import com.example.huang.imsocket.bean.QQMessage;
import com.example.huang.imsocket.bean.QQmessageType;
import com.example.huang.imsocket.core.QQConnection;
import com.example.huang.imsocket.util.ThreadUtils;

import java.util.ArrayList;

import butterknife.Bind;
import butterknife.ButterKnife;
import cn.itcast.server.bean.QQBuddy;

/**
 * Created by huang on 2016/12/5.
 */

public class contactActivity extends Activity {
    private static final String TAG = "contactActivity";
    @Bind(R.id.tv_title)
    TextView tv_title;
    @Bind(R.id.lv_contact)
    ListView lv_contact;
    private QQBuddyList list;
    private ArrayList<QQBuddy> BuddyList = new ArrayList<>();
    private ArrayAdapter adapter = null;

    private QQConnection.OnQQmwssagereceiveLisener listener = new QQConnection.OnQQmwssagereceiveLisener() {
        @Override
        public void onReiceive(QQMessage qq) {
            if (QQmessageType.MSG_TYPE_BUDDY_LIST.equals(qq.type)) {
                QQBuddyList qqlist = new QQBuddyList();
                QQBuddyList qqm = (QQBuddyList) qqlist.fromXml(qq.content);
                BuddyList.clear();
                BuddyList.addAll(qqm.buddyList);
                ThreadUtils.runUIThread(new Runnable() {
                    @Override
                    public void run() {
                        saveAndNotify();
                    }
                });
            }
        }
    };

    @Override
    protected void onCreate(Bundle savedInstanceState) {
        super.onCreate(savedInstanceState);
        setContentView(R.layout.activity_contact);
        ButterKnife.bind(this);
        Myapp.me.addOnQQmwssagereceiveLisener(listener);
        Intent intent = getIntent();
        list = (QQBuddyList) intent.getSerializableExtra("list");
        BuddyList.clear();
        BuddyList.addAll(list.buddyList);
        saveAndNotify();
    }

    @Override
    protected void onDestroy() {
        super.onDestroy();
        Myapp.me.removeOnQQmwssagereceiveLisener(listener);
    }

    private void saveAndNotify() {
        if (BuddyList.size() < 1) {
            return;
        }
        if (adapter == null) {
            adapter = new ArrayAdapter<QQBuddy>(getBaseContext(), 0, BuddyList) {
                @Override
                public View getView(int position, View convertView, ViewGroup parent) {
                    viewHolder holder;
                    if (convertView == null) {
                        convertView = View.inflate(getContext(), R.layout.item_contacts, null);
                        holder = new viewHolder(convertView);
                        convertView.setTag(holder);
                    } else {
                        holder = (viewHolder) convertView.getTag();
                    }
                    QQBuddy qqBuddy = BuddyList.get(position);
                    holder.tv_nick.setText(qqBuddy.nick);
                    holder.tv_account.setText(qqBuddy.account + "@qq.com");

                    if (Myapp.username.equals(qqBuddy.account + "")) {
                        holder.tv_nick.setText("[自己]");
                        holder.tv_nick.setTextColor(Color.GRAY);
                    } else {
                        holder.tv_nick.setTextColor(Color.RED);
                    }
                    return convertView;
                }
            };
            lv_contact.setAdapter(adapter);

            lv_contact.setOnItemClickListener(new AdapterView.OnItemClickListener() {
                @Override
                public void onItemClick(AdapterView<?> parent, View view, int position, long id) {
                    QQBuddy qqbuddy = BuddyList.get(position);
                    if (Myapp.username.equals(qqbuddy.account + "")) {
                        Toast.makeText(getBaseContext(), "不能和自己聊天", Toast.LENGTH_SHORT).show();
                    } else {
                        Intent intent = new Intent(contactActivity.this, ChatActivity.class);
                        intent.putExtra("account", qqbuddy.account + "");
                        intent.putExtra("nick", qqbuddy.nick + "");
                        startActivity(intent);
                    }
                }
            });
        } else {
            adapter.notifyDataSetChanged();
        }
    }

    static class viewHolder {
        @Bind(R.id.iv_contact)
        ImageView iv_contact;
        @Bind(R.id.tv_nick)
        TextView tv_nick;
        @Bind(R.id.tv_account)
        TextView tv_account;
        public viewHolder(View view) {
            ButterKnife.bind(this, view);
        }
    }
}
聊天界面
<?xml version="1.0" encoding="utf-8"?>
<LinearLayout xmlns:android="http://schemas.android.com/apk/res/android"
    android:layout_width="match_parent"
    android:layout_height="match_parent"
    android:orientation="vertical">

    <TextView
        android:id="@+id/tv_name"
        android:layout_width="match_parent"
        android:layout_height="40dp"
        android:background="#aa119988"
        android:gravity="center"
        android:text="和誰誰聊天中........."
        android:textSize="19dp" />

    <ListView
        android:id="@+id/lv_chat"
        android:layout_width="match_parent"
        android:layout_height="0dp"
        android:layout_weight="1" />

    <LinearLayout
        android:layout_width="match_parent"
        android:layout_height="wrap_content"
        android:orientation="horizontal">

        <EditText
            android:id="@+id/et_sms"
            android:layout_width="0dp"
            android:layout_height="40dp"
            android:layout_weight="1"
            android:hint="輸入聊天" />

        <Button
            android:id="@+id/btn_send"
            android:layout_width="wrap_content"
            android:layout_height="wrap_content"
            android:text="發送" />
    </LinearLayout>
</LinearLayout>
聊天界面中消息接收和消息發送都需要及時更新列表。
import android.app.Activity;
import android.content.Intent;
import android.os.Bundle;
import android.text.TextUtils;
import android.view.View;
import android.view.ViewGroup;
import android.widget.ArrayAdapter;
import android.widget.EditText;
import android.widget.ListView;
import android.widget.TextView;
import android.widget.Toast;

import com.example.huang.imsocket.R;
import com.example.huang.imsocket.bean.Myapp;
import com.example.huang.imsocket.bean.QQMessage;
import com.example.huang.imsocket.bean.QQmessageType;
import com.example.huang.imsocket.core.QQConnection;
import com.example.huang.imsocket.util.ThreadUtils;

import java.io.IOException;
import java.util.ArrayList;

import butterknife.Bind;
import butterknife.ButterKnife;
import butterknife.OnClick;

/**
 * Created by huang on 2016/12/3.
 */
public class ChatActivity extends Activity {
    private static final String TAG = "ChatActivity";
    @Bind(R.id.tv_name)
    TextView tv_name;
    @Bind(R.id.lv_chat)
    ListView lv_chat;
    @Bind(R.id.et_sms)
    EditText et_sms;

    private ArrayAdapter<QQMessage> adapter = null;
    private ArrayList<QQMessage> list = new ArrayList<>();
    private String account;

    @OnClick(R.id.btn_send)
    public void send(View view) {
        String sendsms = et_sms.getText().toString().trim();
        if (TextUtils.isEmpty(sendsms)) {
            Toast.makeText(this, "消息不能為空", Toast.LENGTH_SHORT).show();
            return;
        }
        et_sms.setText("");
        final QQMessage qq = new QQMessage();
        qq.type = QQmessageType.MSG_TYPE_CHAT_P2P;
        qq.content = sendsms;
        qq.from = Long.parseLong(Myapp.username);
        qq.to = Long.parseLong(account);
        list.add(qq);
        setAdapteORNotify();
        ThreadUtils.runINThread(new Runnable() {
            @Override
            public void run() {
                try {
                    Myapp.me.send(qq);
                } catch (IOException e) {
                    e.printStackTrace();
                }
            }
        });
    }

    private QQConnection.OnQQmwssagereceiveLisener listener = new QQConnection.OnQQmwssagereceiveLisener() {
        @Override
        public void onReiceive(final QQMessage qq) {
            if (QQmessageType.MSG_TYPE_CHAT_P2P.equals(qq.type)) {
                ThreadUtils.runUIThread(new Runnable() {
                    @Override
                    public void run() {
                        list.add(qq);
                        setAdapteORNotify();
                    }
                });
            }
        }
    };

    @Override
    protected void onCreate(Bundle savedInstanceState) {
        super.onCreate(savedInstanceState);
        setContentView(R.layout.activity_chat);
        ButterKnife.bind(this);
        Myapp.me.addOnQQmwssagereceiveLisener(listener);
        Intent intent = getIntent();
        account = intent.getStringExtra("account");
        String nick = intent.getStringExtra("nick");
        tv_name.setText("和" + nick + "聊天中......");
        setAdapteORNotify();
    }

    @Override
    protected void onDestroy() {
        super.onDestroy();
        Myapp.me.removeOnQQmwssagereceiveLisener(listener);
    }

    private void setAdapteORNotify() {
        if (list.size() < 1) {
            return;
        }
        if (adapter == null) {
            adapter = new ArrayAdapter<QQMessage>(this, 0, list) {

                @Override
                public int getViewTypeCount() {
                    return 2;
                }

                @Override
                public int getItemViewType(int position) {
                    QQMessage msg = list.get(position);
                    long fromId = Long.parseLong(Myapp.username);
                    if (fromId == msg.from) {
                        return 0;
                    }
                    return 1;
                }

                @Override
                public View getView(int position, View convertView, ViewGroup parent) {
                    int type = getItemViewType(position);
                    if (type == 0) {
                        viewHolder holder1 = null;
                        if (convertView == null) {
                            holder1 = new viewHolder();
                            convertView = View.inflate(getBaseContext(), R.layout.item_sms_send, null);
                            holder1.tv_send_time = (TextView) convertView.findViewById(R.id.tv_send_time);
                            holder1.tv_send = (TextView) convertView.findViewById(R.id.tv_send);
                            convertView.setTag(holder1);
                        } else {
                            holder1 = (viewHolder) convertView.getTag();
                        }
                        QQMessage qqMessage = list.get(position);
                        holder1.tv_send_time.setText(qqMessage.sendTime);
                        holder1.tv_send.setText(qqMessage.content);
                        return convertView;
                    } else if (type == 1) {
                        viewHolder holder2 = null;
                        if (convertView == null) {
                            holder2 = new viewHolder();
                            convertView = View.inflate(getBaseContext(), R.layout.item_sms_receive, null);
                            holder2.tv_receive_time = (TextView) convertView.findViewById(R.id.tv_receive_time);
                            holder2.tv_receive = (TextView) convertView.findViewById(R.id.tv_receive);
                            convertView.setTag(holder2);
                        } else {
                            holder2 = (viewHolder) convertView.getTag();
                        }
                        QQMessage qqMessage = list.get(position);
                        holder2.tv_receive_time.setText(qqMessage.sendTime);
                        holder2.tv_receive.setText(qqMessage.content);
                        return convertView;
                    }
                    return convertView;
                }
            };
            lv_chat.setAdapter(adapter);
        } else {
            adapter.notifyDataSetChanged();
        }

        if (lv_chat.getCount() > 0) {
            lv_chat.setSelection(lv_chat.getCount() - 1);
        }
    }

    class viewHolder {
        TextView tv_send_time;
        TextView tv_send;
        TextView tv_receive_time;
        TextView tv_receive;
    }
}
最後可以添加一個服務當程序退出時,接受消息。
import android.app.Service;
import android.content.Intent;
import android.os.IBinder;
import android.widget.Toast;

import com.example.huang.imsocket.bean.Myapp;
import com.example.huang.imsocket.bean.QQMessage;
import com.example.huang.imsocket.core.QQConnection;
import com.example.huang.imsocket.util.ThreadUtils;

/**
 * Created by huang on 2016/12/7.
 */

public class IMService extends Service {
    private QQConnection.OnQQmwssagereceiveLisener lisener = new QQConnection.OnQQmwssagereceiveLisener() {
        @Override
        public void onReiceive(final QQMessage qq) {
            ThreadUtils.runUIThread(new Runnable() {
                @Override
                public void run() {
                    Toast.makeText(getBaseContext(), "收到好友消息: " + qq.content, Toast.LENGTH_SHORT).show();
                }
            });
        }
    };

    @Override
    public IBinder onBind(Intent intent) {
        return null;
    }

    @Override
    public void onCreate() {
        super.onCreate();
        Toast.makeText(getBaseContext(), "服務開啟", Toast.LENGTH_SHORT).show();
        Myapp.me.addOnQQmwssagereceiveLisener(lisener);
    }

    @Override
    public void onDestroy() {
        Myapp.me.removeOnQQmwssagereceiveLisener(lisener);
        super.onDestroy();
    }
}
Activity和Service節點配置,以及相應的權限。
<?xml version="1.0" encoding="utf-8"?>
<manifest xmlns:android="http://schemas.android.com/apk/res/android"
    package="com.example.huang.imsocket">

    <uses-permission android:name="android.permission.INTERNET" />
    <application
        android:allowBackup="true"
        android:icon="@mipmap/ic_launcher"
        android:label="@string/app_name"
        android:supportsRtl="true"
        android:theme="@style/AppTheme">

        <activity android:name="com.example.huang.imsocket.activity.SplashActivity">
            <intent-filter>
                <action android:name="android.intent.action.MAIN" />

                <category android:name="android.intent.category.LAUNCHER" />
            </intent-filter>
        </activity>
        <activity
            android:name="com.example.huang.imsocket.activity.LoginActivity"
            android:theme="@android:style/Theme.NoTitleBar"></activity>
        <activity
            android:name="com.example.huang.imsocket.activity.ChatActivity"
            android:theme="@android:style/Theme.NoTitleBar"></activity>
        <activity
            android:name="com.example.huang.imsocket.activity.contactActivity"
            android:theme="@android:style/Theme.NoTitleBar"></activity>

        <service android:name=".service.IMService" />
    </application>

</manifest>
 Android特效專輯(十二)——如何仿支付寶咻一咻功能實現波紋擴散特效
Android特效專輯(十二)——如何仿支付寶咻一咻功能實現波紋擴散特效 Android特效專輯(十二)——仿支付寶咻一咻功能實現波紋擴散特效
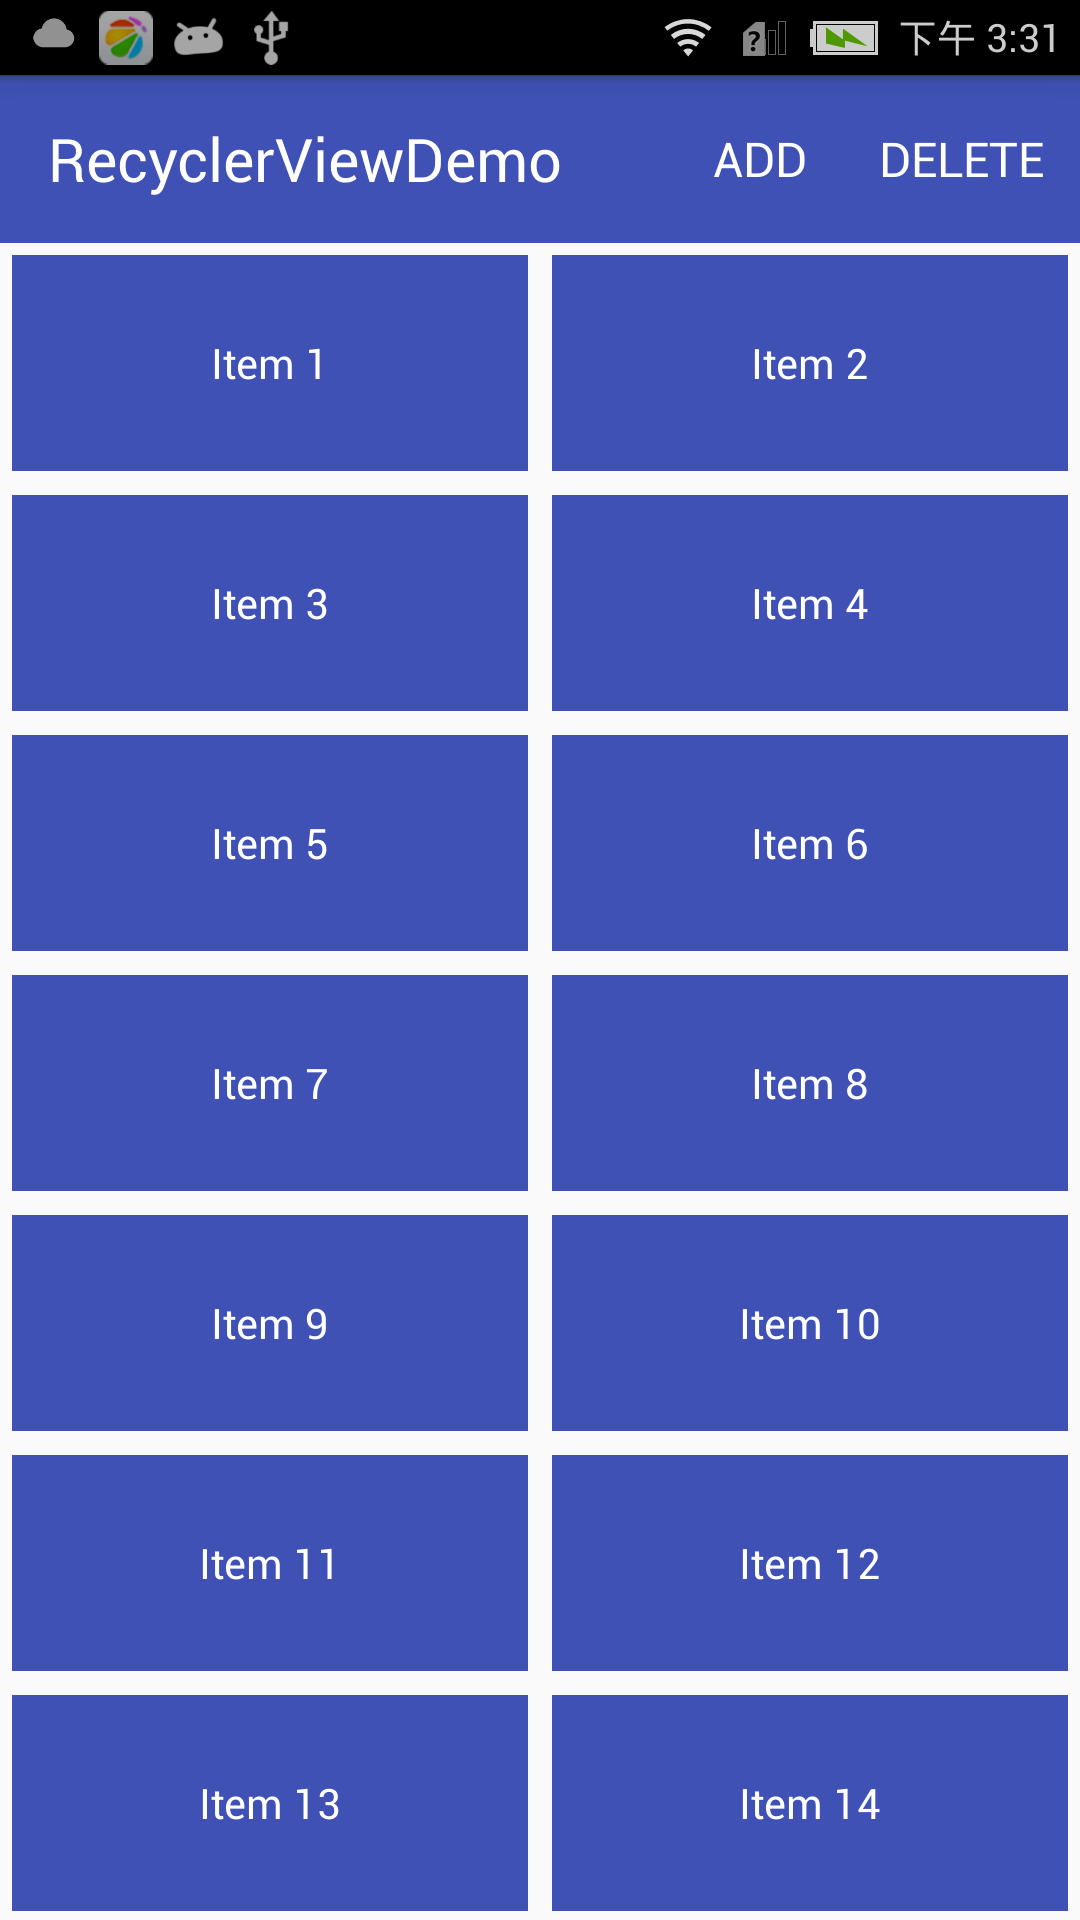 Android RecyclerView的使用,androidrecycler
Android RecyclerView的使用,androidrecyclerRecyclerView是什麼? RecyclerView是一種新的視圖組,目標是為任何基於
 Kotlin中的“忍者”函數 —— 理解泛型的能力(KAD 12),kotlinkad
Kotlin中的“忍者”函數 —— 理解泛型的能力(KAD 12),kotlinkad作者:Antonio Leiva 時間:Feb 8, 2017 原文鏈接:https
 Android應用開發教程之十三:短信庫解析
今天我和同學們討論一下Android平台下如何調用系統方法發送短信、接收短信、系統的短信庫相關的問題。進入正題,我們先使用Eclipse工具模擬給自
 Android應用項目中BaseAdapter、SimpleAdapter和ArrayAdapter中的三種適配器,simplearrayadapter
Android應用項目中BaseAdapter、SimpleAdapte