編輯:關於android開發
在實際工作中,經常遇到客戶需要用代碼設置系統時間的需求,但是Android非系統應用是無法設置系統時間的。於是,我設計了一個使用系統簽名的時間設置服務,客戶通過bind調用服務裡的方法就能達到設置時間的目的。

這裡用到的技術有:
1、Signapk簽名
2、AIDL
3、bind service
將應用變成系統應用
1、AndroidManifest.xml中加入android:sharedUserId="android.uid.system"
2、使用系統密鑰簽名。系統簽名在Android源碼目錄中的位置是"build\target\product\security",下面的platform.pk8和platform.x509.pem兩個文件。然後用Android提供的Signapk工具來簽名,signapk的源代碼是在"build\tools\signapk"下,用法為"signapk platform.x509.pem platform.pk8 input.apk output.apk"
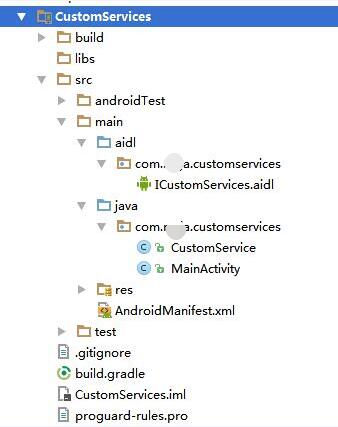
時間設置服務 CustomServices
ICustomServices.aidl 裡定義了設置日期和設置時間方法
1 interface ICustomServices {
2
3      void setDate(int year,int month,int day);
4      void setTime(int hourOfDay, int minute);
5
6 }
CustomService.Java
 1 public class CustomService extends Service {
 2     private static final String TAG = CustomService.class.getSimpleName();
 3
 4     private MyBinder mBinder;
 5
 6     @Override
 7     public void onCreate() {
 8         super.onCreate();
 9
10         if (mBinder == null) {
11             mBinder = new MyBinder();
12         }
13
14     }
15
16
17     @Override
18     public IBinder onBind(Intent intent) {
19         return mBinder;
20     }
21
22
23     class MyBinder extends ICustomServices.Stub {
24
25         @Override
26         public void setDate(int year, int month, int day) throws RemoteException {
27
28             setDate(CustomService.this, year, month - 1, day);
29         }
30
31         @Override
32         public void setTime(int hourOfDay, int minute) throws RemoteException {
33             setTime(CustomService.this, hourOfDay, minute);
34         }
35
36         void setDate(Context context, int year, int month, int day) {
37             Calendar c = Calendar.getInstance();
38
39             c.set(Calendar.YEAR, year);
40             c.set(Calendar.MONTH, month);
41             c.set(Calendar.DAY_OF_MONTH, day);
42             long when = c.getTimeInMillis();
43
44             if (when / 1000 < Integer.MAX_VALUE) {
45                 ((AlarmManager) context.getSystemService(Context.ALARM_SERVICE)).setTime(when);
46             }
47         }
48
49         void setTime(Context context, int hourOfDay, int minute) {
50             Calendar c = Calendar.getInstance();
51
52             c.set(Calendar.HOUR_OF_DAY, hourOfDay);
53             c.set(Calendar.MINUTE, minute);
54             c.set(Calendar.SECOND, 0);
55             c.set(Calendar.MILLISECOND, 0);
56             long when = c.getTimeInMillis();
57
58             if (when / 1000 < Integer.MAX_VALUE) {
59                 ((AlarmManager) context.getSystemService(Context.ALARM_SERVICE)).setTime(when);
60             }
61         }
62     }
63
64 }
AndroidManifest.xml
 1 <?xml version="1.0" encoding="utf-8"?>
 2 <manifest xmlns:android="http://schemas.android.com/apk/res/android"
 3     package="com.rs.customservices" android:sharedUserId="android.uid.system">
 4     <application
 5         android:allowBackup="true"
 6         android:icon="@mipmap/ic_launcher"
 7         android:label="@string/app_name"
 8         android:supportsRtl="true"
 9         android:theme="@style/AppTheme">
10
11
12         <service
13             android:name="com.rs.customservices.CustomService"
14             android:enabled="true"
15             android:exported="true">
16             <intent-filter>
17                 <action android:name="com.rs.CustomService" />
18             </intent-filter>
19         </service>
20     </application>
21
22 </manifest>
編譯完後使用系統簽名將APK文件簽名成系統應用。
客戶程序
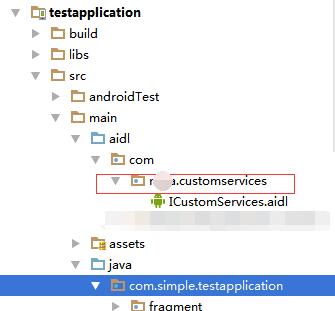
將上面工程中的 ICustomServices.aidl 拷入到客戶工程中,注意:包的目錄結構也需要拷入。
CustomServiceActivity.java
 1 public class CustomServiceActivity extends Activity {
 2     private static  final String TAG="CustomServiceActivity";
 3
 4     ICustomServices mCustomServices;
 5     @Override
 6     protected void onCreate(Bundle savedInstanceState) {
 7         super.onCreate(savedInstanceState);
 8         setContentView(R.layout.activity_custom_service);
 9
10         Intent intentCust = new Intent();
11         intentCust.setAction("com.rs.CustomService");
12         //在5.0及以上版本必須要加上這個
13         intentCust.setPackage("com.rs.customservices");
14         bindService(intentCust, mServiceConnection, Context.BIND_AUTO_CREATE);
15     }
16
17     ServiceConnection mServiceConnection = new ServiceConnection() {
18         @Override
19         public void onServiceConnected(ComponentName componentName, IBinder iBinder) {
20             mCustomServices = ICustomServices.Stub.asInterface(iBinder);
21
22             Log.i(TAG,"mServiceConnection2 onServiceConnected");
23
24
25             try {
26                 mCustomServices.setDate(1999, 5,6);
27                 mCustomServices.setTime(5,45);
28             } catch (RemoteException e) {
29                 e.printStackTrace();
30             }
31
32         }
33
34         @Override
35         public void onServiceDisconnected(ComponentName componentName) {
36
37         }
38     };
39
40
41     @Override
42     protected void onDestroy() {
43         super.onDestroy();
44         unbindService(mServiceConnection);
45     }
46 }
 Android中實現Bitmap在自定義View中的放大與拖動
Android中實現Bitmap在自定義View中的放大與拖動 一基本實現思路: 基於View類實現自定義View –MyImageView類。在使用View
 Hive 1.2.1&Spark&Sqoop安裝指南
Hive 1.2.1&Spark&Sqoop安裝指南Hive 1.2.1&Spark&Sqoop安裝指南.pdf目錄目錄11.前言12.約定23.服務端口
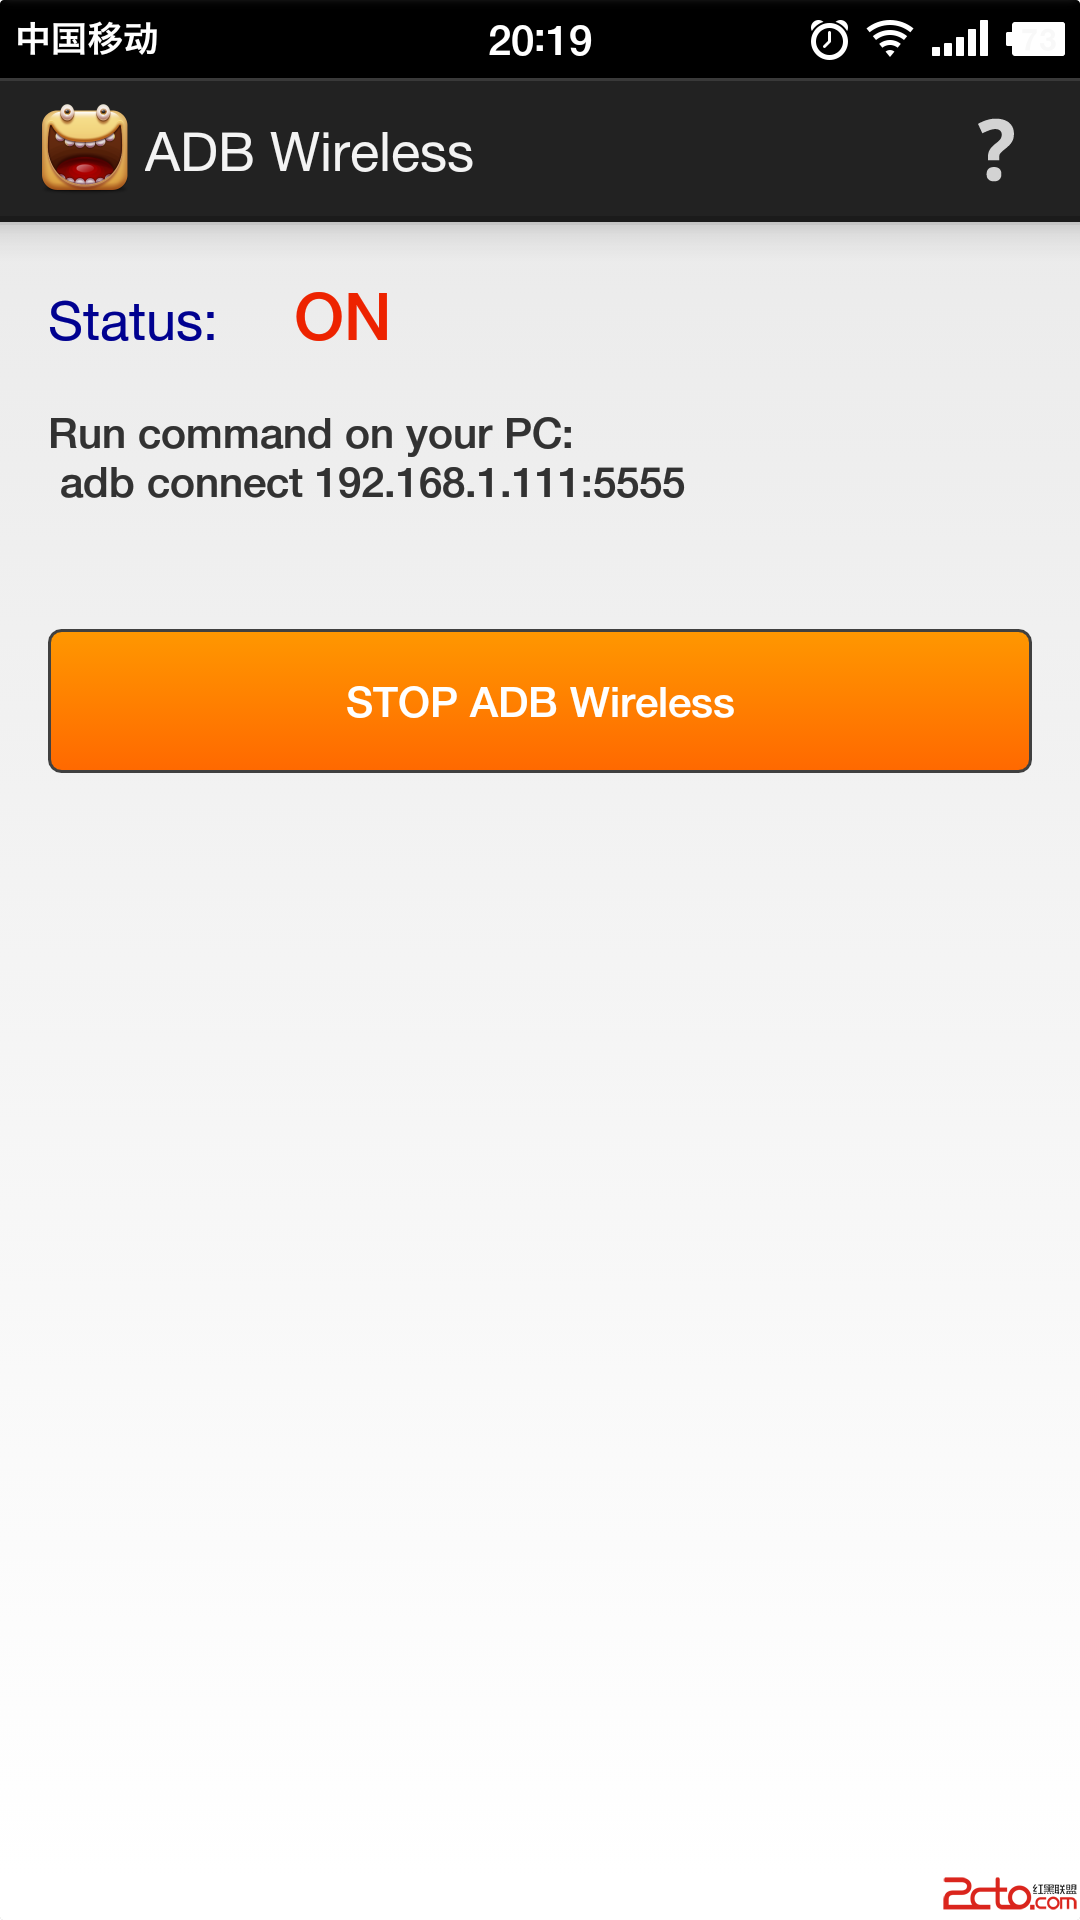 淺談Android 通過ADB Wireless無線調試應用
淺談Android 通過ADB Wireless無線調試應用 使用數據線調試應用難免不方便,本篇博客介紹使用ADB Wireless工具,當手機和電腦處在同一網絡下,實現
 Android提高21篇之六:BroadcastReceiver
前面分別討論了Activity和Service,這次就輪到BroastcastReceiver,B