編輯:關於android開發
分類:C#、Android、VS2015;
創建日期:2016-03-21
Android 提供了以下三種創建動畫的方式:
注意:雖然這三種動畫都可用,但只要有可能,都應該優先考慮用屬性動畫來實現。另外,動畫雖然能吸引人,但不要濫用,否則只會適得其反。
1、畫板動畫(Drawable Animations)
Drawable Animations提供了按幀播放的簡單動畫API,在其他實現技術中一般將其稱為幀動畫(Frame Animations)。這種動畫的播放效果非常類似電影或卡通(cartoon)漫畫。
幀動畫是通過順序播放圖片來產生動畫效果的,下圖通過順序播放6張圖片實現一個人跳起來的動畫效果:
控制動畫序列的畫板資源(XML文件)通常保存在應用程序的/Resource/drawable文件夾中,文件中用<animation-list>元素作為根元素,用<item>元素定義每一幀。
例如,在/Resource/drawable/ch2103DrawableAnimDemo.xml文件中定義動畫序列:
<animation-list xmlns:android="http://schemas.android.com/apk/res/android">
<item android:drawable="@drawable/a01" android:duration="100" />
<item android:drawable="@drawable/a02" android:duration="100" />
<item android:drawable="@drawable/a03" android:duration="100" />
<item android:drawable="@drawable/a04" android:duration="100" />
<item android:drawable="@drawable/a05" android:duration="100" />
<item android:drawable="@drawable/a06" android:duration="100" />
</animation-list>
此動畫包含六個幀。其中,a01~a06是圖片文件,android:duration屬性聲明每個幀顯示的時間。定義動畫序列以後,只需要在布局文件中指定該文件,Android就會自動按順序加載和顯示動畫。
2、視圖動畫(View Animations)
在Android系統中,視圖動畫(或者叫補間動畫)有4種表現方式:漸變、縮放、平移、旋轉。利用View動畫能完成一系列諸如位置、大小、不透明度、旋轉等簡單的變化。例如對程序中的某個ImageView實現動畫處理等。
View動畫位於Android.View.Animation命名空間中,在代碼中可通過下面的方法對View對象進行動畫處理:
AlphaAnimation:控制不透明度變化的動畫類
Rotate Animation:控制旋轉的動畫類
ScaleAnimation:控制縮放變化的動畫類
TranslateAnimation:控制平移變化的動畫類
AnimationSet:控制動畫屬性的集合類
動畫變換文件一般保存在/Resources/anim文件夾中。另外,雖然此API是早期版本提供的,但是由於它的簡單性,因此仍然有用。
注意:保存在/Resources/anim文件夾中的XML文件是聲明View動畫的首選辦法,因為這種方式更易於閱讀和維護。該XML文件必須用以下元素之一作為根元素:
默認情況下,Android會同時應用該XML文件中的所有動畫。要使動畫按指定的順序變化,將android:startOffset屬性設置在上面定義的元素之一即可。
也可以內插器改變動畫速率,如加速、重復、減速等動畫效果:
具體用法見本節示例中的“視圖動畫示例”。在這個例子中,動畫效果是先將圖像沿水平和垂直方向縮放,然後將圖像逆時針旋轉45度同時縮小圖像的大小。
3、屬性動畫(Property Animations)
這種動畫可對任何對象的屬性進行處理(包括View),是首選的執行動畫的方式,即使動畫對象不可見也一樣能對其進行處理。
屬性動畫API的靈活性在於還能將動畫封裝在不同的類中,使代碼共享更加方便。
所有屬性動畫都是通過Animator子類的實例來創建:
使用動畫是,可能還需要下面的特殊類:
如果正在進行動畫處理的屬性不是float、int或Color,可通過實現ITypeEvaluator接口創建他們自己的計算類型。
(1)ValueAnimator
通過調用下面的方法之一,可獲取得ValueAnimator的實例:
下面的代碼演示如何將值從 0 到 100進行動畫處理,動畫持續時間為1000毫秒。
ValueAnimator animator = ValueAnimator.OfInt(0, 100);
animator.SetDuration(1000);
animator.Start();
但是,僅有這些代碼還不夠,這是因為雖然執行了動畫但是並沒有將目標更新為新的值,因此還需要引入相關的事件:
MyCustomObject myObj = new MyCustomObject();
myObj.SomeIntegerValue = -1;
animator.Update += (object sender, ValueAnimator.AnimatorUpdateEventArgs e) =>
{
int newValue = (int) e.Animation.AnimatedValue;
// Apply this new value to the object being animated.
myObj.SomeIntegerValue = newValue;
};
(2)ObjectAnimator
ObjectAnimator是ViewAnimator的子類,它將計時引擎和ValueAnimator結合在一起實現動畫。例如:
MyCustomObject myObj = new MyCustomObject();
myObj.SomeIntegerValue = -1;
ObjectAnimator animator = ObjectAnimator.OfFloat(myObj, "SomeIntegerValue”, 0, 100);
animator.SetDuration(1000);
animator.Start();
與前面的代碼相比,這樣做可減少代碼量。
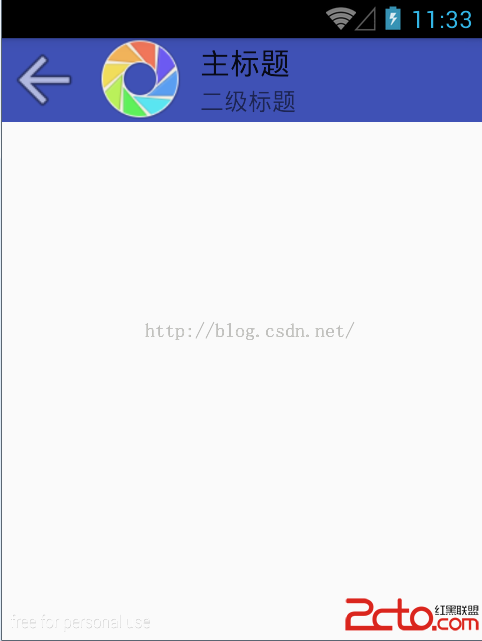
1、運行截圖
2、設計步驟
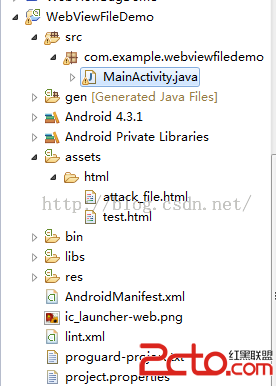
(1)添加圖片
在Drawable文件夾下添加6個圖片(ch2103asteroid01.png~ch2103asteroid06.png),這些圖片用於演示幀動畫的用法。
然後再添加一個ch2103ship.png圖片,該圖片用於演示視圖動畫的用法。
(2)添加ch2103DrawableAnimDemo.xml
在Resources/Drawable文件夾下添加該文件。
<?xml version="1.0" encoding="UTF-8" ?>
<animation-list xmlns:android="http://schemas.android.com/apk/res/android" >
  <item android:drawable="@drawable/ch2103asteroid01" android:duration="100" />
  <item android:drawable="@drawable/ch2103asteroid02" android:duration="100" />
  <item android:drawable="@drawable/ch2103asteroid03" android:duration="100" />
  <item android:drawable="@drawable/ch2103asteroid04" android:duration="100" />
  <item android:drawable="@drawable/ch2103asteroid05" android:duration="100" />
  <item android:drawable="@drawable/ch2103asteroid06" android:duration="100" />
</animation-list>
(3)添加ch2103ViewAnimDemo.xml
在Resources/anim文件夾下添加該文件。
<?xml version="1.0" encoding="utf-8" ?>
<set xmlns:android="http://schemas.android.com/apk/res/android"
     android:shareInterpolator="false">

  <scale android:interpolator="@android:anim/accelerate_decelerate_interpolator"
         android:fromXScale="1.0"
         android:toXScale="1.4"
         android:fromYScale="1.0"
         android:toYScale="0.6"
         android:pivotX="50%"
         android:pivotY="50%"
         android:fillEnabled="true"
         android:fillAfter="false"
         android:duration="700" />

  <set android:interpolator="@android:anim/accelerate_interpolator">
    <scale android:fromXScale="1.4"
           android:toXScale="0.0"
           android:fromYScale="0.6"
           android:toYScale="0.0"
           android:pivotX="50%"
           android:pivotY="50%"
           android:fillEnabled="true"
           android:fillBefore="false"
           android:fillAfter="true"
           android:startOffset="700"
           android:duration="400" />

    <rotate android:fromDegrees="0"
            android:toDegrees="-45"
            android:toYScale="0.0"
            android:pivotX="50%"
            android:pivotY="50%"
            android:fillEnabled="true"
            android:fillBefore="false"
            android:fillAfter="true"
            android:startOffset="700"
            android:duration="400" />
  </set>
</set>
(4)添加ch2103Main.axml
在Resources/layout文件夾下添加該文件。
<?xml version="1.0" encoding="utf-8"?>
<LinearLayout xmlns:android="http://schemas.android.com/apk/res/android"
    android:orientation="vertical"
    android:layout_width="match_parent"
    android:layout_height="match_parent"
    android:minWidth="25px"
    android:minHeight="25px">
    <TextView
        android:text="畫板動畫示例"
        android:textAppearance="?android:attr/textAppearanceSmall"
        android:layout_width="fill_parent"
        android:layout_height="wrap_content"
        android:gravity="center"
        android:background="@color/myGray"
        android:layout_marginTop="5dp" />
    <ImageView
        android:src="@android:drawable/ic_menu_gallery"
        android:layout_width="match_parent"
        android:layout_height="wrap_content"
        android:id="@+id/ch2103_imageView_DrawableDemo"
        android:layout_marginTop="5dp" />
    <TextView
        android:text="視圖動畫示例"
        android:textAppearance="?android:attr/textAppearanceSmall"
        android:layout_width="fill_parent"
        android:layout_height="wrap_content"
        android:gravity="center"
        android:background="@color/myGray"
        android:layout_marginTop="5dp" />
    <ImageView
        android:src="@android:drawable/ic_menu_gallery"
        android:layout_width="match_parent"
        android:layout_height="wrap_content"
        android:id="@+id/ch2103_imageView_ViewDemo"
        android:layout_marginLeft="20dp"
        android:layout_marginTop="5dp" />
    <Button
        android:text="開始"
        android:layout_width="wrap_content"
        android:layout_height="wrap_content"
        android:id="@+id/ch2103_btnViewDemoStart"
        android:layout_gravity="center" />
    <TextView
        android:text="屬性動畫示例(拖放滑動條觀察進度條動畫)"
        android:textAppearance="?android:attr/textAppearanceSmall"
        android:layout_width="fill_parent"
        android:layout_height="wrap_content"
        android:gravity="center"
        android:background="@color/myGray"
        android:layout_marginTop="5dp" />
    <FrameLayout
        android:minWidth="25px"
        android:minHeight="35px"
        android:layout_width="fill_parent"
        android:layout_height="wrap_content"
        android:id="@+id/frameLayout1"
        android:layout_marginTop="15dp"
        android:layout_marginBottom="5dp">
        <MyDemos.SrcDemos.ch2103MyView
            android:layout_width="fill_parent"
            android:layout_height="wrap_content"
            android:layout_marginLeft="8dp"
            android:layout_marginRight="8dp"
            android:id="@+id/ch2103myview1" />
    </FrameLayout>
    <SeekBar
        android:layout_width="fill_parent"
        android:layout_height="wrap_content"
        android:id="@+id/ch2103seekBar1"
        android:max="100"
        android:progress="50"
        android:layout_marginLeft="8dp"
        android:layout_marginRight="8dp"
        android:layout_marginTop="10dp" />
</LinearLayout>
(5)添加ch2103MyView.cs
using System;
using Android.Content;
using Android.Views;
using Android.Graphics;
using Android.Util;
using Android.Animation;

namespace MyDemos.SrcDemos
{
    /// <summary>
    /// 演示進度條動畫控制的基本用法
    /// </summary>
    public class ch2103MyView : View
    {
        private const int DefaultHeight = 20;
        private const int DefaultWidth = 120;

        private Paint mNegativePaint;
        private double mPosition = 0.5;
        private Paint mPositivePaint;

        public ch2103MyView(Context context, IAttributeSet attrs)
            : this(context, attrs, 0)
        {
            Initialize();
        }

        public ch2103MyView(Context context, IAttributeSet attrs, int defStyle)
            : base(context, attrs, defStyle)
        {
            Initialize();
        }

        public double CurrentValue
        {
            get { return mPosition; }
            set
            {
                mPosition = Math.Max(0f, Math.Min(value, 1f));
                Invalidate();
            }
        }

        public void SetCurentValue(double value, bool animate)
        {
            if (!animate)
            {
                CurrentValue = value;
                return;
            }
            ValueAnimator animator = ValueAnimator.OfFloat((float)mPosition, (float)Math.Max(0f, Math.Min(value, 1f)));
            animator.SetDuration(500);

            animator.Update += (sender, e) => CurrentValue = (double)e.Animation.AnimatedValue;
            animator.Start();
        }

        protected override void OnDraw(Canvas canvas)
        {
            base.OnDraw(canvas);
            float middle = canvas.Width * (float)mPosition;

            canvas.DrawPaint(mNegativePaint);

            canvas.DrawRect(0, 0, middle, canvas.Height, mPositivePaint);
        }

        protected override void OnMeasure(int widthMeasureSpec, int heightMeasureSpec)
        {
            int width = MeasureSpec.GetSize(widthMeasureSpec);
            SetMeasuredDimension(width < DefaultWidth ? DefaultWidth : width, DefaultHeight);
        }

        private void Initialize()
        {
            mPositivePaint = new Paint
            {
                AntiAlias = true,
                Color = Color.Rgb(0x99, 0xcc, 0),
            };
            mPositivePaint.SetStyle(Paint.Style.FillAndStroke);

            mNegativePaint = new Paint
            {
                AntiAlias = true,
                Color = Color.Rgb(0xff, 0x44, 0x44)
            };
            mNegativePaint.SetStyle(Paint.Style.FillAndStroke);
        }
    }
}
(6)添加ch2103MainActivity.cs
using Android.App;
using Android.OS;
using Android.Widget;
using Android.Views.Animations;

namespace MyDemos.SrcDemos
{
    [Activity(Label = "【例21-3】動畫基本用法")]
    public class ch2103MainActivity : Activity
    {
        protected override void OnCreate(Bundle savedInstanceState)
        {
            base.OnCreate(savedInstanceState);

            SetContentView(Resource.Layout.ch2103Main);

            //畫板動畫Demo
            var img1 = FindViewById<ImageView>(Resource.Id.ch2103_imageView_DrawableDemo);
            img1.SetImageResource(Resource.Drawable.ch2103DrawableAnimDemo);

            //視圖動畫Demo
            var btn1 = FindViewById<Button>(Resource.Id.ch2103_btnViewDemoStart);
            btn1.Click += (sender, args) => {
                Animation animation = AnimationUtils.LoadAnimation(this, Resource.Animation.ch2103ViewAnimDemo);
                var img2 = FindViewById<ImageView>(Resource.Id.ch2103_imageView_ViewDemo);
                img2.SetImageResource(Resource.Drawable.ch2103ship);
                img2.StartAnimation(animation);
            };

            //屬性動畫Demo
            var myView = FindViewById<ch2103MyView>(Resource.Id.ch2103myview1);
            var seekBar = FindViewById<SeekBar>(Resource.Id.ch2103seekBar1);
            seekBar.StopTrackingTouch += (sender, args) =>
            {
                double currentValue = ((double)seekBar.Progress) / seekBar.Max;
                 myView.SetCurentValue(currentValue, true);
            };
        }
    }
}
 百度地圖開發的學習(二)——地圖定位,百度地圖
百度地圖開發的學習(二)——地圖定位,百度地圖定位是地圖開發的必經重要的環節,我也在不斷學習中,就自己了解寫一下這些。 一、配置 1.百度的定位是有自己jar包和so文件
 Android開發錯誤匯總,android開發匯總
Android開發錯誤匯總,android開發匯總【錯誤信息】 [2011-01-19 16:39:10 - ApiDemos] WARNING: Application
 Android筆記——Android中數據的存儲方式(二),android筆記
Android筆記——Android中數據的存儲方式(二),android筆記 我們在實際開發中,有的時候需要儲存或者備份比較復雜的數據。這些數據的特點是,內容多、結構
 Android中AlarmManager使用示例(持續更新,已經更改),alarmmanager
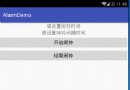
Android中AlarmManager使用示例(持續更新,已經更改),alarmmanager現在普遍的手機都會有一個鬧鐘的功能,如果使用Android來實現一個鬧鐘可