編輯:Android開發實例
本文實例講述了Android編程實現等比例顯示圖片的方法。分享給大家供大家參考,具體如下:
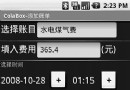
在android中,由於密度的影響,如果想得到圖片的寬高是不行的,具體為什麼我就大概說一下,具體的請搜索度娘或者古哥吧。 原因是如果你把圖片放在drawable-mdpi裡,而手機是屬於drawable-hdpi的話,圖片是被自動放大,就這樣取到的寬與高未必就是正確的。那麼如何讓android上面顯示的圖片是基於原來圖片的比例呢,首先你可以在res目錄下創建一個drawable-nodpi的目錄,這個目錄下的圖片是不根據dpi的多少來進行拉伸或者縮小滴。然後,就是根據屏幕的寬 和 圖片的寬高 得出圖片在屏幕顯示的高,寬是固定的,就是屏幕的寬,所以不用算了。
private void getWidth_Height() {
  Display display = getWindowManager().getDefaultDisplay();
  int width = display.getWidth(); // deprecated
  int height = display.getHeight(); // deprecated
  Bitmap mBitmap = createImageWithResouce(R.drawable.history4);
  image.setLayoutParams(new LayoutParams(width, width / getBitmapWidth(mBitmap) * getBitmapHeight(mBitmap)));
  image.setImageBitmap(createImageWithResouce(R.drawable.history4));
}
private Bitmap createImageWithResouce(int resourceID) {
  Bitmap bit = BitmapFactory.decodeResource(getResources(), R.drawable.history4);
  return bit;
}
private int getBitmapWidth(Bitmap bitmap){
  return bitmap.getWidth();
}
private int getBitmapHeight(Bitmap bitmap){
  return bitmap.getHeight();
}
// 釋放bitmap
private void releaseBitmap(Bitmap bitmap){
  if (bitmap!=null && !bitmap.isRecycled()) {
   bitmap.recycle();
   bitmap = null;
  }
}
建議使用如下的這種,應用了LruCache作為管理
public class ImageUtil {
 private LruCache<String, Bitmap> mMemoryCache;
 private final Context mContext;
 private static ImageUtil imageUtil;
 private static Object obj = new Object();
 private int memClass;
 private int cacheSize;
 private ImageUtil(Context mContext) {
  this.mContext = mContext;
  createLruCache(mContext);
 }
 private void createLruCache(Context mContext) {
  memClass = ((ActivityManager) mContext.getSystemService(Context.ACTIVITY_SERVICE)).getMemoryClass();
  cacheSize = 1024 * 1024 * memClass / 8;
  mMemoryCache = new LruCache<String, Bitmap>(cacheSize) {
   @Override
   protected int sizeOf(String key, Bitmap value) {
    // TODO Auto-generated method stub
    return value.getRowBytes();
   }
  };
 }
 public static ImageUtil getInstance(Context mContext) {
  if (imageUtil == null) {
   synchronized (obj) {
    if (imageUtil == null) {
     imageUtil = new ImageUtil(mContext);
    }
   }
  }
  return imageUtil;
 }
 public void adjustImageSize(ImageView imageView, int imageResourceId) {
  Bitmap mBitmap = null;
  Display display = ((MainActivity) mContext).getWindowManager().getDefaultDisplay();
  int width = display.getWidth(); // deprecated
  int height = display.getHeight(); // deprecated
  Bitmap bitmapCache = mMemoryCache.get(imageResourceId + "");
  if (bitmapCache != null) {
   mBitmap = bitmapCache;
  } else {
   mBitmap = createImageWithResouce(mContext, imageResourceId);
   mMemoryCache.put(imageResourceId + "", mBitmap);
  }
  RelativeLayout.LayoutParams layoutParams = new RelativeLayout.LayoutParams(width, width
    / getBitmapWidth(mBitmap) * getBitmapHeight(mBitmap));
  layoutParams.addRule(RelativeLayout.ALIGN_PARENT_BOTTOM);
  imageView.setLayoutParams(layoutParams);
  imageView.setBackgroundDrawable(new BitmapDrawable(mBitmap));
  // imageView.setImageBitmap(mBitmap);
 }
 private static Bitmap createImageWithResouce(Context context, int resourceID) {
  Bitmap bit = BitmapFactory.decodeResource(context.getResources(), R.drawable.ic_launcher);
  return bit;
 }
 private int getBitmapWidth(Bitmap bitmap) {
  return bitmap.getWidth();
 }
 private int getBitmapHeight(Bitmap bitmap) {
  return bitmap.getHeight();
 }
}
希望本文所述對大家Android程序設計有所幫助。
 Android中的windowSoftInputMode屬性詳解
在前面的一篇文章中,簡單的介紹了一下如何實現軟鍵盤不自動彈出,使用的方法是設置android:windowSoftInput
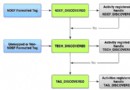 Android系統NFC開發之實例講解
很多Android設備已經支持NFC(近距離無線通訊技術)了。本文就以實例的方
 Android學習筆記(二)之電話撥號器
目前Android已經在只能手機市場已經具有強大的霸主地位,也吸引了越來越多的追捧者。Android的學習也越來越火。但是,報名費用確實大多人望而卻步 一、新建項
 Android開發自學筆記(三):APP布局上
hello,大家好,本文主要介紹如何開始開發一個美觀、有情調、人見人愛的Android應用程序,已知我們在市面上有不少布局極其精美,在視覺上讓人愛不釋手的應用程序