編輯:Android開發實例
本文實例講述了android編程實現局部界面動態切換的方法。分享給大家供大家參考,具體如下:
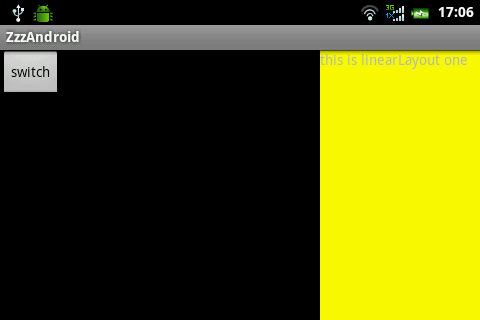
局部界面固定,局部界面可以動態切換。效果如下:
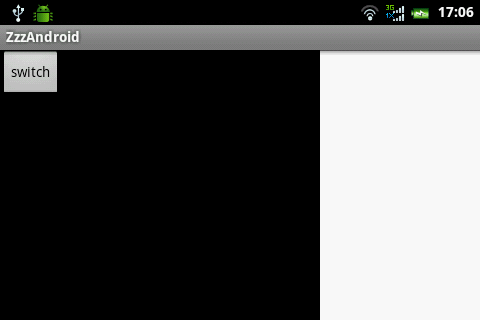
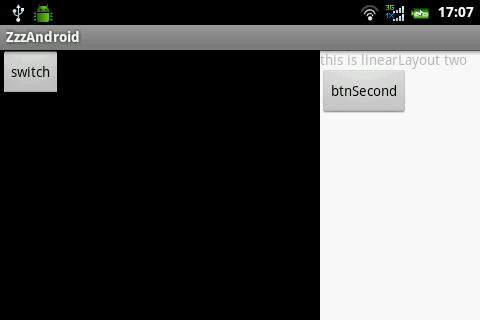
這個效果由3個layout構成
main.xml
<?xml version="1.0" encoding="utf-8"?>
<LinearLayout xmlns:android="http://schemas.android.com/apk/res/android"
  android:layout_width="fill_parent"
  android:layout_height="fill_parent"
  android:orientation="horizontal" >
  <LinearLayout
    android:layout_width="fill_parent"
    android:layout_height="fill_parent"
    android:layout_weight="1"
    android:background="@android:color/black" >
    <Button
      android:id="@+id/btnSwitch"
      android:layout_width="wrap_content"
      android:layout_height="wrap_content"
      android:text="switch" />
    <Button
      android:id="@+id/btnScreen"
      android:layout_width="wrap_content"
      android:layout_height="wrap_content"
      android:text="screen" />
  </LinearLayout>
  <LinearLayout
    android:id="@+id/frameSwitch"
    android:layout_width="160dp"
    android:layout_height="fill_parent"
    android:background="@android:color/white" >
  </LinearLayout>
</LinearLayout>
one.xml
<?xml version="1.0" encoding="utf-8"?>
<LinearLayout xmlns:android="http://schemas.android.com/apk/res/android"
  android:layout_width="fill_parent"
  android:layout_height="fill_parent"
  android:background="@color/yellow"
  android:orientation="vertical" >
  <TextView
    android:layout_width="wrap_content"
    android:layout_height="wrap_content"
    android:text="this is linearLayout one" />
</LinearLayout>
two.xml
<?xml version="1.0" encoding="utf-8"?>
<LinearLayout xmlns:android="http://schemas.android.com/apk/res/android"
  android:layout_width="match_parent"
  android:layout_height="match_parent"
  android:orientation="vertical" >
  <TextView
    android:layout_width="wrap_content"
    android:layout_height="wrap_content"
    android:text="this is linearLayout two" />
  <Button
    android:id="@+id/btnSecond"
    android:layout_width="wrap_content"
    android:layout_height="wrap_content"
    android:text="btnSecond" />
</LinearLayout>
下面是Java代碼
public class ZzzAndroidActivity extends Activity {
  private LinearLayout frameSwitch;
  /** Called when the activity is first created. */
  @Override
  public void onCreate(Bundle savedInstanceState) {
    super.onCreate(savedInstanceState);
    setContentView(R.layout.main);
    frameSwitch = (LinearLayout) findViewById(R.id.frameSwitch);
    Button btnSwitch = (Button) findViewById(R.id.btnSwitch);
    btnSwitch.setOnClickListener(new OnClickListener() {
      boolean boo = false;
      @Override
      public void onClick(View v) {
        boo = !boo;
        if (boo) {
          getViewOne();
        } else {
          getViewSecond();
        }
      }
    });
    /*
     * 是否全屏
     */
    Button btnScreen = (Button) findViewById(R.id.btnScreen);
    btnScreen.setOnClickListener(new OnClickListener() {
      boolean isScreen = false;
      @Override
      public void onClick(View v) {
        isScreen = !isScreen;
        if (isScreen) {
          frameSwitch.setVisibility(android.view.View.GONE);
        } else {
          frameSwitch.setVisibility(android.view.View.VISIBLE);
        }
      }
    });
  }
  public void getViewOne() {
    View viewOne = getLayoutInflater().inflate(R.layout.one, null);
    frameSwitch.removeAllViews();
    frameSwitch.addView(viewOne, LayoutParams.FILL_PARENT,
        LayoutParams.FILL_PARENT);
  }
  public void getViewSecond() {
    View viewSecond = getLayoutInflater().inflate(R.layout.two, null);
    Button btn = (Button) viewSecond.findViewById(R.id.btnSecond);
    btn.setOnClickListener(new OnClickListener() {
      @Override
      public void onClick(View v) {
        Toast.makeText(ZzzAndroidActivity.this, "hello world",
            Toast.LENGTH_LONG).show();
      }
    });
    frameSwitch.removeAllViews();
    frameSwitch.addView(viewSecond, LayoutParams.FILL_PARENT,
        LayoutParams.FILL_PARENT);
  }
}
希望本文所述對大家Android程序設計有所幫助。
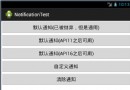 Android中Notification用法實例總結
本文實例總結了 Android中Notification用法。分享給大家供大家參考,具體如下: 我們在用手機的時候,如果來了短信,而我們沒有點擊查看的話,是不是在
 Android MediaPlayer(多媒體播放)
Android提供了許多方法來控制播放的音頻/視頻文件和流。其中該方法是通過一類稱為MediaPlayer。Android是提供MediaPlayer類訪問內置的媒體播放
 Android開發技巧之像QQ一樣輸入文字和表情圖像
EditText和TextView一樣,也可以進行圖文混排。所不同的是,TextView只用於顯示圖文混排效果,而EditText不僅可顯示,也可混合輸入文字和圖
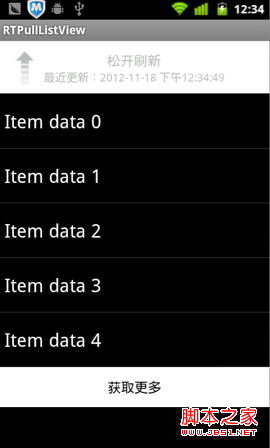 Android下拉刷新ListView——RTPullListView(demo)
下拉刷新在越來越多的App中使用,已經形成一種默認的用戶習慣,遇到列表顯示的內容時,用戶已經開始習慣性的拉拉。在交互習慣上已經形成定性。之前在我的文章《IOS學習