編輯:Android開發實例
一般來說,Android自身就包含了常用於嵌入式系統的SQLite,這樣就免去了開發者自己移植安裝的功夫。SQLite 支持多數SQL92標准,很多常用的SQL命令都能在SQLite上面使用,除此之外Android還提供了一系列自定義的方法去簡化對SQLite數據庫的操作。不過有跨平台需求的程序還是建議使用標准的SQL語句,畢竟這樣容易在多個平台之間進行移植。
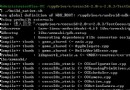
先來貼出本文程序運行的結果圖:
本文實例程序主要講解了SQLite的基本用法,如:創建數據庫,使用SQL命令查詢數據表、插入數據,關閉數據庫,以及使用GridView實現了一個分頁欄(關於GridView的用法),用於把數據分頁顯示。
分頁欄的pagebuttons.xml的源碼如下:
<?xml version="1.0" encoding="utf-8"?>
<RelativeLayout xmlns:android="http://schemas.android.com/apk/res/android"
 android:layout_height="wrap_content" android:paddingBottom="4dip"
 android:layout_width="fill_parent">
 <TextView android:layout_width="wrap_content"
 android:layout_below="@+id/ItemImage" android:layout_height="wrap_content"
 android:text="TextView01" android:layout_centerHorizontal="true"
 android:id="@+id/ItemText">
 </TextView>
</RelativeLayout>
main.xml的源碼如下:
<?xml version="1.0" encoding="utf-8"?>
<LinearLayout xmlns:android="http://schemas.android.com/apk/res/android"
 android:orientation="vertical" android:layout_width="fill_parent"
 android:layout_height="fill_parent">
 <Button android:layout_height="wrap_content"
 android:layout_width="fill_parent" android:id="@+id/btnCreateDB"
 android:text="創建數據庫"></Button>
 <Button android:layout_height="wrap_content"
 android:layout_width="fill_parent" android:text="插入一串實驗數據" android:id="@+id/btnInsertRec"></Button>
 <Button android:layout_height="wrap_content" android:id="@+id/btnClose"
 android:text="關閉數據庫" android:layout_width="fill_parent"></Button>
 <EditText android:text="@+id/EditText01" android:id="@+id/EditText01"
 android:layout_width="fill_parent" android:layout_height="256dip"></EditText>
 <GridView android:id="@+id/gridview" android:layout_width="fill_parent"
 android:layout_height="32dip" android:numColumns="auto_fit"
 android:columnWidth="40dip"></GridView>
</LinearLayout>
Java程序源碼如下:
package com.testSQLite;
import java.util.ArrayList;
import java.util.HashMap;
import android.app.Activity;
import android.database.Cursor;
import android.database.SQLException;
import android.database.sqlite.SQLiteDatabase;
import android.os.Bundle;
import android.util.Log;
import android.view.View;
import android.widget.AdapterView;
import android.widget.AdapterView.OnItemClickListener;
import android.widget.Button;
import android.widget.EditText;
import android.widget.GridView;
import android.widget.SimpleAdapter;
public class testSQLite extends Activity {
  /** Called when the activity is first created. */
  Button btnCreateDB, btnInsert, btnClose;
  EditText edtSQL;//顯示分頁數據
  SQLiteDatabase db;
  int id;//添加記錄時的id累加標記,必須全局
  static final int PageSize=10;//分頁時,每頁的數據總數
  private static final String TABLE_NAME = "stu";
  private static final String ID = "id";
  private static final String NAME = "name";
  SimpleAdapter saPageID;// 分頁欄適配器
  ArrayList<HashMap<String, String>> lstPageID;// 分頁欄的數據源,與PageSize和數據總數相關
  @Override
  public void onCreate(Bundle savedInstanceState) {
    super.onCreate(savedInstanceState);
    setContentView(R.layout.main);
    btnCreateDB = (Button) this.findViewById(R.id.btnCreateDB);
    btnCreateDB.setOnClickListener(new ClickEvent());
    btnInsert = (Button) this.findViewById(R.id.btnInsertRec);
    btnInsert.setOnClickListener(new ClickEvent());
    btnClose = (Button) this.findViewById(R.id.btnClose);
    btnClose.setOnClickListener(new ClickEvent());
    edtSQL=(EditText)this.findViewById(R.id.EditText01);
    GridView gridview = (GridView) findViewById(R.id.gridview);//分頁欄控件
    // 生成動態數組,並且轉入數據
    lstPageID = new ArrayList<HashMap<String, String>>();
    // 生成適配器的ImageItem <====> 動態數組的元素,兩者一一對應
    saPageID = new SimpleAdapter(testSQLite.this, // 沒什麼解釋
        lstPageID,// 數據來源
        R.layout.pagebuttons,//XML實現
        new String[] { "ItemText" },
        new int[] { R.id.ItemText });

    // 添加並且顯示
    gridview.setAdapter(saPageID);
    // 添加消息處理
    gridview.setOnItemClickListener(new OnItemClickListener(){
      @Override
      public void onItemClick(AdapterView<?> arg0, View arg1, int arg2,
          long arg3) {
        LoadPage(arg2);//根據所選分頁讀取對應的數據
      }
    });
  }
  class ClickEvent implements View.OnClickListener {
    @Override
    public void onClick(View v) {
      if (v == btnCreateDB) {
        CreateDB();
      } else if (v == btnInsert) {
        InsertRecord(16);//插入16條記錄
        RefreshPage();
      }else if (v == btnClose) {
        db.close();
      }
    }
  }
  /*
   * 讀取指定ID的分頁數據
   * SQL:Select * From TABLE_NAME Limit 9 Offset 10;
   * 表示從TABLE_NAME表獲取數據,跳過10行,取9行
   */
  void LoadPage(int pageID)
  {
    String sql= "select * from " + TABLE_NAME +
    " Limit "+String.valueOf(PageSize)+ " Offset " +String.valueOf(pageID*PageSize);
    Cursor rec = db.rawQuery(sql, null);
    setTitle("當前分頁的數據總數:"+String.valueOf(rec.getCount()));
    // 取得字段名稱
    String title = "";
    int colCount = rec.getColumnCount();
    for (int i = 0; i < colCount; i++)
      title = title + rec.getColumnName(i) + "   ";
    // 列舉出所有數據
    String content="";
    int recCount=rec.getCount();
    for (int i = 0; i < recCount; i++) {//定位到一條數據
      rec.moveToPosition(i);
      for(int ii=0;ii<colCount;ii++)//定位到一條數據中的每個字段
      {
        content=content+rec.getString(ii)+"   ";
      }
      content=content+"/r/n";
    }

    edtSQL.setText(title+"/r/n"+content);//顯示出來
    rec.close();
  }
  /*
   * 在內存創建數據庫和數據表
   */
  void CreateDB() {
    // 在內存創建數據庫
    db = SQLiteDatabase.create(null);
    Log.e("DB Path", db.getPath());
    String amount = String.valueOf(databaseList().length);
    Log.e("DB amount", amount);
    // 創建數據表
    String sql = "CREATE TABLE " + TABLE_NAME + " (" + ID
        + " text not null, " + NAME + " text not null " + ");";
    try {
      db.execSQL("DROP TABLE IF EXISTS " + TABLE_NAME);
      db.execSQL(sql);
    } catch (SQLException e) {}
  }
  /*
   * 插入N條數據
   */
  void InsertRecord(int n) {
    int total = id + n;
    for (; id < total; id++) {
      String sql = "insert into " + TABLE_NAME + " (" + ID + ", " + NAME
          + ") values('" + String.valueOf(id) + "', 'test');";
      try {
        db.execSQL(sql);
      } catch (SQLException e) {
      }
    }
  }
  /*
   * 插入之後刷新分頁
   */
  void RefreshPage()
  {
    String sql = "select count(*) from " + TABLE_NAME;
    Cursor rec = db.rawQuery(sql, null);
    rec.moveToLast();
    long recSize=rec.getLong(0);//取得總數
    rec.close();
    int pageNum=(int)(recSize/PageSize) + 1;//取得分頁數

    lstPageID.clear();
    for (int i = 0; i < pageNum; i++) {
      HashMap<String, String> map = new HashMap<String, String>();
      map.put("ItemText", "No." + String.valueOf(i));
      lstPageID.add(map);
    }
    saPageID.notifyDataSetChanged();
  }
}
感興趣的讀者可以動手測試一下本實例代碼,希望能對大家進行Android項目開發起到一定的參考借鑒作用。
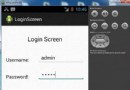 Android登錄實例
登錄應用程序的屏幕,詢問憑據登錄到一些特定的應用。可能需要登錄到Facebook,微博等本章介紹了,如何創建一個登錄界面,以及如何管理安全問題和錯誤嘗試。首先,必須定義兩
 android顯示TextView文字的倒影效果實現代碼
今天記錄一下TextView的倒影效果,顯示一串文字,然後在文字的下方顯示出它的倒影,先上效果圖: 最重要的就是View中getDrawingCache()方法
 cocos2d
我用的是cocos2d-2.0-x-2.0.3 之前弄了一天也沒成功 今天來了下載了最新的ndk8 更新了sdk 又重新是了一遍 居然成功了,不知道是工具的版本問
 Android加載Spinner
可以顯示在的Android任務,通過加載進度條的進展。進度條有兩種形狀。加載欄和加載微調(spinner)。在本章中,我們將討論微調(spinner)。Spinner 用