編輯:關於Android編程
簡介
本文模仿實現的是360手機衛士基礎效果,同時後續會補充一些WindowManager的原理知識。

整體思路
360手機衛士的內存球其實就是一個沒有畫面的應用程序,整個應用程序的主體是一個Service。我們的程序開始以後,啟動一個service,同時關閉activity即可:
public class MainActivity extends Activity {
  private static final String TAG = MainActivity.class.getSimpleName();
  @Override
  protected void onCreate(Bundle savedInstanceState) {
    super.onCreate(savedInstanceState);
    startService(new Intent(this, FloatWindowService.class));
    finish();
  }
}
import android.os.IBinder;
import android.util.Log;

import java.util.Timer;
import java.util.TimerTask;

public class FloatWindowService extends Service {
  private static final String TAG = FloatWindowService.class.getSimpleName();

  public FloatWindowService() {
  }
  @Override
  public int onStartCommand(Intent intent, int flags, int startId) {
    Log.d(TAG, "on start command");
    FloatWindowManager.instance(getApplicationContext()).createFloatWindow();
    return super.onStartCommand(intent, flags, startId);
  }

  @Override
  public IBinder onBind(Intent intent) {
    // TODO: Return the communication channel to the service.
    throw new UnsupportedOperationException("Not yet implemented");
  }

}
我們要注意的是,傳統的Service默認是運行在UI線程中的,這點與封裝了一個Thread和Handler的intentService不同,所以我們可以直接在Service中更改UI相關的內容。
再來看一下FloatWindowManager中的方法:
  public void createFloatWindow() {
    if (isWindowShowing()) return;
    WindowManager windowManager = getWindowManger(context);
    int screenWidth = windowManager.getDefaultDisplay().getWidth();
    int screenHeight = windowManager.getDefaultDisplay().getHeight();
    if (floatLayout == null) {
      floatLayout = new FloatLayout(context);
      if (smallLayoutParams == null) {
        smallLayoutParams = new WindowManager.LayoutParams();
        smallLayoutParams.type = WindowManager.LayoutParams.TYPE_PHONE;
        smallLayoutParams.format = PixelFormat.RGBA_8888;
        smallLayoutParams.flags = WindowManager.LayoutParams.FLAG_NOT_TOUCH_MODAL
            | WindowManager.LayoutParams.FLAG_NOT_FOCUSABLE;
        smallLayoutParams.gravity = Gravity.LEFT | Gravity.TOP;
        smallLayoutParams.width = FloatLayout.viewWidth;
        smallLayoutParams.height = FloatLayout.viewHeight;
        smallLayoutParams.x = screenWidth;
        smallLayoutParams.y = screenHeight / 2;
      }
    }
    windowManager.addView(floatLayout,smallLayoutParams);
  }
以及自定義的View:
<?xml version="1.0" encoding="utf-8"?>
<LinearLayout xmlns:android="http://schemas.android.com/apk/res/android"
  android:id="@+id/small_layout"
  android:background="@drawable/bg_small"
  android:orientation="vertical" android:layout_width="60dip"
  android:layout_height="25dip">
<TextView
  android:layout_width="match_parent"
  android:gravity="center"
  android:text="懸浮窗"
  android:layout_height="match_parent" />
</LinearLayout>
public class FloatLayout extends LinearLayout {
  public static int viewWidth;
  public static int viewHeight;
  private WindowManager windowManager;
  public FloatLayout(final Context context) {
    super(context);
    windowManager = (WindowManager) context.getSystemService(Context.WINDOW_SERVICE);
    LayoutInflater.from(context).inflate(R.layout.small_layout, this);
    View view = findViewById(R.id.small_layout);
    viewWidth = view.getLayoutParams().width;
    viewHeight = view.getLayoutParams().height;
    setOnTouchListener(new OnTouchListener() {
      @Override
      public boolean onTouch(View v, MotionEvent event) {
        FloatWindowManager.instance(context).createFloatMenu();
        return true;
      }
    });
  }

}
自定義的View除了加載了一個布局,就是設置了一個Touch監聽器,用於點擊懸浮窗彈出菜單。注意這裡要使用 view.getLayoutParams() 來獲取視圖的寬和高,因為在構造方法中,這個View並沒有被measure完成,所以采用view.getHeight得到的寬高是0。
創建菜單的方法類似,同樣通過WindowManager:
  public void createFloatMenu() {
    if (menuLayout != null) return;
    Log.d(TAG, "create float menu");
    WindowManager windowManager = getWindowManger(context);
    if (menuLayout == null){
      menuLayout = new MenuLayout(context);
      menuLayoutParams = new WindowManager.LayoutParams();
      menuLayoutParams.type = WindowManager.LayoutParams.TYPE_PHONE;
      menuLayoutParams.format = PixelFormat.RGBA_8888;

    }
    windowManager.addView(menuLayout,menuLayoutParams);

  }
自定義的菜單將背景設置成半透明,同時分成上下兩部分,上部分點擊刪除菜單,下部分是一些展示的內容:
<?xml version="1.0" encoding="utf-8"?>
<LinearLayout xmlns:android="http://schemas.android.com/apk/res/android"
  android:orientation="vertical" android:layout_width="match_parent"
  android:background="#96000000"
  android:layout_height="match_parent">
<LinearLayout
  android:layout_width="match_parent"
  android:id="@+id/trans_part"
  android:orientation="horizontal"
  android:layout_weight="1"
  android:layout_height="0dp"></LinearLayout>
  <LinearLayout
    android:layout_width="match_parent"
    android:layout_weight="1"
    android:background="@color/colorPrimary"
    android:layout_height="0dp">
    <TextView
      android:layout_width="match_parent"
      android:text="存放content"
      android:layout_height="match_parent" />

  </LinearLayout>
</LinearLayout>
public class MenuLayout extends LinearLayout {
  public MenuLayout(final Context context) {
    super(context);
    LayoutInflater.from(context).inflate(R.layout.transparent_layout,this);
    View view = findViewById(R.id.trans_part);
    view.setOnClickListener(new OnClickListener() {
      @Override
      public void onClick(View v) {
        FloatWindowManager.instance(context).removeMenuLayout();
      }
    });
  }
}
可以看見,實現懸浮窗,其實就是通過windowManager.addView 時,在LayoutParam 的type設置為TYPE_PHONE,這樣你的視圖就是系統級視圖,可以覆蓋在全部程序的最上面。其余的,更多的是自定義View的知識。
以上就是本文的全部內容,希望對大家的學習有所幫助,也希望大家多多支持本站。
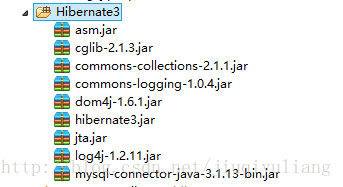
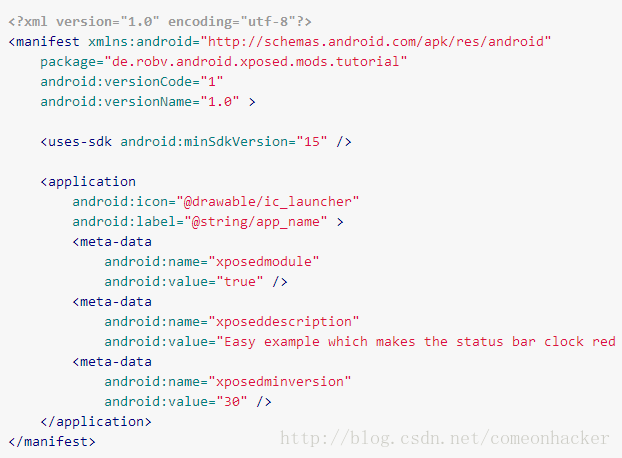 Xpoded模塊開發教程
當然,你可以去學習如何創建一個Xposed模塊。所以你可以閱讀這篇教程(官方教程)去學習怎樣解決這個問題。這不僅僅講解如何新建模塊、如何編寫模塊,我們要往更深處思考,為什
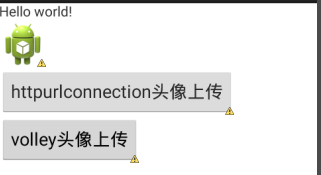 Volley學習(五)HttpUrlConnection、Volley 2種方式實現頭像上傳
這篇博客是來了解下,頭像上傳如何實現,我們httpurlconnection和Volley來實現首先了解下布局文件我們先看httpurl如何實現頭像上傳的?頭像上傳其實本
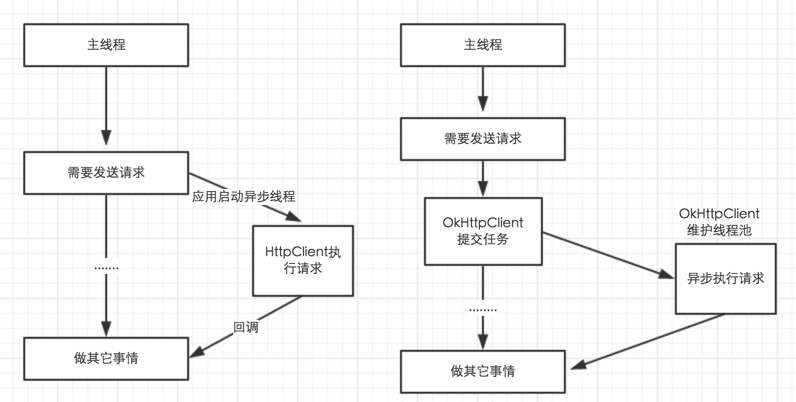 Android app開發中Retrofit框架的初步上手使用
Retrofit 2.0先來說一下Retrofit 2.0版本中一些引人注意的地方。在Retrofit 2.0中,最大的改動莫過於減小庫的體積,首先,Retrofit 2
 Android IPC機制(四)用ContentProvider進行進程間通信
ContentProvider為存儲和獲取數據提供統一的接口,它可以在不同的應用程序之間共享數據,本身就是適合進程間通信的。ContentProvider底層實現也是Bi