編輯:關於Android編程
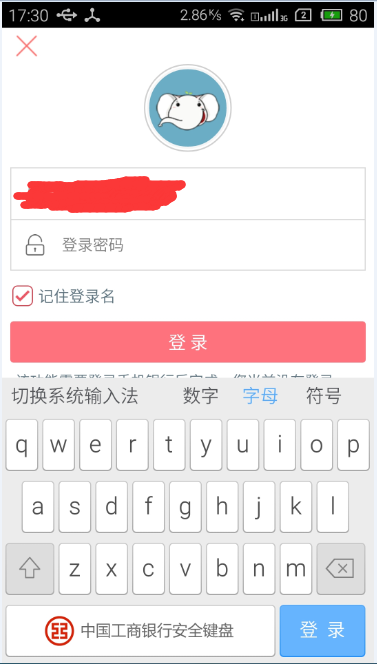
本文介紹了Android:利用SharedPreferences實現自動登錄,具體如下:
主要代碼:
public class LoginActivity extends Activity {
 private EditText username;
 private EditText userpassword;
 private CheckBox remember;
 private CheckBox autologin;
 private Button login;
 private SharedPreferences sp;
 private String userNameValue,passwordValue;


 @Override
 protected void onCreate(Bundle savedInstanceState) {
  // TODO Auto-generated method stub
  super.onCreate(savedInstanceState);
  setContentView(R.layout.login);


  // 初始化用戶名、密碼、記住密碼、自動登錄、登錄按鈕
  username = (EditText) findViewById(R.id.username);
  userpassword = (EditText) findViewById(R.id.userpassword);
  remember = (CheckBox) findViewById(R.id.remember);
  autologin = (CheckBox) findViewById(R.id.autologin);
  login = (Button) findViewById(R.id.login);

  sp = getSharedPreferences("userInfo", 0);
  String name=sp.getString("USER_NAME", "");
  String pass =sp.getString("PASSWORD", "");


  boolean choseRemember =sp.getBoolean("remember", false);
  boolean choseAutoLogin =sp.getBoolean("autologin", false);
 //  Toast.makeText(this, name, Toast.LENGTH_SHORT).show();

  //如果上次選了記住密碼,那進入登錄頁面也自動勾選記住密碼,並填上用戶名和密碼
  if(choseRemember){
   username.setText(name);
   userpassword.setText(pass);
   remember.setChecked(true);
  }
  //如果上次登錄選了自動登錄,那進入登錄頁面也自動勾選自動登錄
  if(choseAutoLogin){
   autologin.setChecked(true);
  }


  login.setOnClickListener(new OnClickListener() {

   // 默認可登錄帳號tinyphp,密碼123
   @Override
   public void onClick(View arg0) {
    userNameValue = username.getText().toString();
    passwordValue = userpassword.getText().toString();
    SharedPreferences.Editor editor =sp.edit();

    // TODO Auto-generated method stub
    if (userNameValue.equals("tinyphp")
      && passwordValue.equals("123")) {
     Toast.makeText(LoginActivity.this, "登錄成功",
       Toast.LENGTH_SHORT).show();

     //保存用戶名和密碼
     editor.putString("USER_NAME", userNameValue);
     editor.putString("PASSWORD", passwordValue);

     //是否記住密碼
     if(remember.isChecked()){
      editor.putBoolean("remember", true);
     }else{
      editor.putBoolean("remember", false);
     }


     //是否自動登錄
      if(autologin.isChecked()){
       editor.putBoolean("autologin", true);
      }else{
       editor.putBoolean("autologin", false);
      }
     editor.commit();

     //跳轉
     Intent intent =new Intent(LoginActivity.this,SuccessActivity.class);
     startActivity(intent);
    } else {
     Toast.makeText(LoginActivity.this, "用戶名或密碼錯誤,請重新登錄!",
       Toast.LENGTH_SHORT).show();
    }

   }

  });

 }

}
<?xml version="1.0" encoding="utf-8"?>
<LinearLayout xmlns:android="http://schemas.android.com/apk/res/android"
 android:layout_width="match_parent"
 android:layout_height="match_parent"
 android:orientation="vertical"
 android:padding="10dp" >

 <TextView
  android:layout_width="wrap_content"
  android:layout_height="wrap_content"
  android:text="用戶名:" />

 <EditText
  android:id="@+id/username"
  android:layout_width="match_parent"
  android:layout_height="wrap_content"
  android:ems="10"
  android:inputType="textPersonName" >
 </EditText>

 <TextView
  android:layout_width="wrap_content"
  android:layout_height="wrap_content"
  android:layout_marginTop="10dp"
  android:text="密碼:" />

 <EditText
  android:id="@+id/userpassword"
  android:layout_width="match_parent"
  android:layout_height="wrap_content"
  android:ems="10"
  android:inputType="textPassword" >
 </EditText>

 <CheckBox
  android:id="@+id/remember"
  android:layout_width="wrap_content"
  android:layout_height="wrap_content"
  android:text="記住密碼" />

 <CheckBox
  android:id="@+id/autologin"
  android:layout_width="wrap_content"
  android:layout_height="wrap_content"
  android:text="自動登錄" />

 <Button
  android:id="@+id/login"
  android:layout_width="match_parent"
  android:layout_height="wrap_content"
  android:text="登錄" />

</LinearLayout>
源碼下載:源碼
以上就是本文的全部內容,希望對大家的學習有所幫助,也希望大家多多支持本站。
 Android網絡編程(六)OkHttp3用法全解析
前言上一篇介紹了OkHttp2.x的用法,這一篇文章我們來對照OkHttp2.x版本來看看,OkHttp3使用起來有那些變化。1.使用前准備Android Studio
 Android 仿QQ分組管理可拖動Item的ListView(附源碼)
趁著周一休息,更新一下博客。最近項目中使用到了分組管理,需要實現Listview的Item拖動處理。查略一下資料和借鑒了別人的代碼將功能實現了。現在整理一下代碼,方便自己
 DELPHI XE Android 開發筆記
第一次編譯時,設定android SDK:F:\RAD Studio XE6\PlatformSDKs\adt-bundle-windows-x86-20131030\s
 Shiro Review——使用ini文件進行授權測試
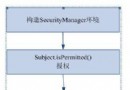
一,shiro授權 授權流程:跟用戶的認證流程類似,shrio在用戶授權的時候,最後還是去Realm獲取信息。 shiro的三種授權方式: