編輯:關於Android編程
接著上一篇博客,上一篇博客跟大家分享了三種開始頁面的定時跳轉,根據項目需求接下來就說一下向導頁面吧!幾乎每一個APP都有自己的向導頁面,一般都是第一次安裝的時或者第一次進入應用時才有向導頁面的,就是只出現一次向導頁面,向導頁面顧名思義是指引客戶大概了解APP的功能,向客戶介紹APP的主要內容和使用方式,給客戶一種期待已久的感覺,向導頁面的實現方法有很多,現在我就以我之前做的項目為例給大家介紹用ViewPager去實現向導頁面吧!
現在就給你們先看看效果圖,是很酷吧!


一、判斷開始頁面是否跳轉到向導頁面(如果是第一次進入APP,則開始頁面跳轉到想到頁面;如果不是第一次進入APP了,則開始頁面跳轉到主頁面。這就是向導頁面只出現一次的邏輯構思)
// 判斷是否進入向導界面還是主界面
        if (SpTools.getBoolean(getApplicationContext(), MyConstants.ISSETUP, false)){
          //true,設置過,直接進入主界面
          //
          Intent main = new Intent(SplashActivity.this,MainActivity.class);
          startActivity(main);//主界面
        } else {
          //false,沒設置過,進入設置向導界面

          Intent intent = new Intent(SplashActivity.this,GuideActivity.class);
          startActivity(intent);//向導界面
        }
二、向導頁面GuideActivity.class的實現,用ViewPager來實現。 (默認第一次進入APP的,不然開始頁面就不會跳轉到向導頁面了)如果有對ViewPager不熟悉的,也可以查一下Android API幫助文檔,地址:http://android-doc.com/reference/android/support/v4/view/ViewPager.html
import android.app.Activity;
import android.content.Intent;
import android.os.Bundle;
import android.support.v4.view.PagerAdapter;
import android.support.v4.view.ViewPager;
import android.support.v4.view.ViewPager.OnPageChangeListener;
import android.view.View;
import android.view.View.OnClickListener;
import android.view.ViewGroup;
import android.view.ViewTreeObserver.OnGlobalLayoutListener;
import android.view.Window;
import android.view.WindowManager;
import android.widget.Button;
import android.widget.ImageView;
import android.widget.LinearLayout;
import android.widget.LinearLayout.LayoutParams;
import android.widget.RelativeLayout;
import com.zsml.fashiongou.sputils.DensityUtil;
import com.zsml.fashiongou.sputils.MyConstants;
import com.zsml.fashiongou.sputils.SpTools;
import java.util.ArrayList;
import java.util.List;
public class GuideActivity extends Activity
{
private ViewPager vp_guids;
private LinearLayout ll_points;
private View v_redpoint;
private Button bt_startExp;
private List<ImageView> guids;
private MyAdapter adapter;
private int disPoints;//
@Override
protected void onCreate(Bundle savedInstanceState) {
super.onCreate(savedInstanceState);
requestWindowFeature(Window.FEATURE_NO_TITLE);//去掉標題
// Full Screen
getWindow().setFlags(WindowManager.LayoutParams.FLAG_FULLSCREEN,
WindowManager.LayoutParams.FLAG_FULLSCREEN);
initView();// 初始化界面
initData();//初始化數據
initEvent();//初始化組件事件
}
private void initEvent() {
//
v_redpoint.getViewTreeObserver().addOnGlobalLayoutListener(new OnGlobalLayoutListener() {
@Override
public void onGlobalLayout() {
//
v_redpoint.getViewTreeObserver().removeGlobalOnLayoutListener(this);
//
disPoints = (ll_points.getChildAt(1).getLeft() - ll_points.getChildAt(0)
.getLeft());
}
});
//給開始體驗按鈕添加點擊事件
bt_startExp.setOnClickListener(new OnClickListener() {
@Override
public void onClick(View v) {
//保存設置的狀態
SpTools.setBoolean(getApplicationContext(), MyConstants.ISSETUP, true);//保存設置完成的狀態
//進入主界面
Intent main = new Intent(GuideActivity.this,MainActivity.class);
startActivity(main);//啟動主界面
//關閉自己
finish();
}
});
//
vp_guids.setOnPageChangeListener(new OnPageChangeListener() {
@Override
public void onPageSelected(int position) {
//當前viewpager顯示的頁碼
//如果viewpager滑動到第三頁碼(最後一頁),顯示button
if (position == guids.size() - 1) {
bt_startExp.setVisibility(View.VISIBLE);//設置按鈕的顯示
} else {
//隱藏該按鈕
bt_startExp.setVisibility(View.GONE);
}
}
@Override
public void onPageScrolled(int position, float positionOffset,
int positionOffsetPixels) {
//
//
float leftMargin = disPoints * (position + positionOffset);
//
RelativeLayout.LayoutParams layoutParams = (RelativeLayout.LayoutParams) v_redpoint.getLayoutParams();
layoutParams.leftMargin = Math.round(leftMargin);//
//
v_redpoint.setLayoutParams(layoutParams);
}
@Override
public void onPageScrollStateChanged(int state) {
}
});
}
private void initData() {
// viewpaper adapter適配器 list容器
// 圖片的數據(數組)
int[] pics = new int[] { R.mipmap.img_guide_1, R.mipmap.img_guide_2,
R.mipmap.img_guide_3};
//定義viewpager使用的容器
guids = new ArrayList<ImageView>();
//創建viewpager的適配器
for (int i = 0; i < pics.length; i++) {
ImageView iv_temp = new ImageView(getApplicationContext());
iv_temp.setBackgroundResource(pics[i]);
//添加界面的數據
guids.add(iv_temp);
//
View v_point = new View(getApplicationContext());
// v_point.setBackgroundResource(R.drawable.gray_point);//紅點背景色
int dip = 10;
//
LayoutParams params = new LayoutParams(DensityUtil.dip2px(getApplicationContext(), dip), DensityUtil.dip2px(getApplicationContext(), dip));// dp
//
//
if (i != 0)//
params.leftMargin = 47;//
v_point.setLayoutParams(params);//
//
ll_points.addView(v_point);
}
//
// 創建viewpager的適配器
adapter = new MyAdapter();
// 設置適配器
vp_guids.setAdapter(adapter);
}
//viewpager的適配器
private class MyAdapter extends PagerAdapter
{
@Override
public int getCount() {
return guids.size();// 返回數據的個數
}
@Override
public boolean isViewFromObject(View arg0, Object arg1) {
return arg0 == arg1;// 過濾和緩存的作用
}
@Override
public void destroyItem(ViewGroup container, int position, Object object) {
container.removeView((View) object);//從viewpager中移除掉
}
@Override
public Object instantiateItem(ViewGroup container, int position) {
// container viewpaper
//獲取View
View child = guids.get(position);
// 添加View
container.addView(child);
return child;
}
}
private void initView() {
setContentView(R.layout.activity_guide);
// ViewPage組件
vp_guids = (ViewPager) findViewById(R.id.vp_guide_pages);
// 動態加點容器
ll_points = (LinearLayout) findViewById(R.id.ll_guide_points);
// 點
v_redpoint = findViewById(R.id.v_guide_redpoint);
//確定開始體驗按鈕
bt_startExp = (Button) findViewById(R.id.bt_guide_startexp);
}
}
注、關於是否是第一次進入,實現方式比較簡單,用過使用SharedPreferences保存使用狀態,將他封裝到工具類中便於使用!這裡我就直接貼出SharedPreferences封裝好的3個工具類了
(一)、
import android.content.Context;

/**
 * Created by Administrator on 2016/11/1 0001.
 */

public class DensityUtil {

  public static int dip2px(Context context, float dpValue) {
    final float scale = context.getResources().getDisplayMetrics().density;
    return (int) (dpValue * scale + 0.5f);
  }

  /**
   *
   */
  public static int px2dip(Context context, float pxValue) {
    final float scale = context.getResources().getDisplayMetrics().density;
    return (int) (pxValue / scale + 0.5f);
  }
}
(二)、
/**
 * Created by Administrator on 2016/11/1 0001.
 */

public interface MyConstants
{
  String CONFIGFILE = "cachevalue";//sp的文件名
  String ISSETUP = "issetup";//是否設置向導界面設置過數據
}
(三)、
import android.content.Context;
import android.content.SharedPreferences;

/**
 * Created by Administrator on 2016/11/1 0001.
 */

public class SpTools {

  public static void setBoolean(Context context, String key, boolean value){
    SharedPreferences sp = context.getSharedPreferences(MyConstants.CONFIGFILE, Context.MODE_PRIVATE);
    sp.edit().putBoolean(key, value).commit();//提交保存鍵值對

  }


  public static boolean getBoolean(Context context,String key,boolean defValue){
    SharedPreferences sp = context.getSharedPreferences(MyConstants.CONFIGFILE, Context.MODE_PRIVATE);
    return sp.getBoolean(key, defValue);
  }
}
三、XML的布局實現
<?xml version="1.0" encoding="utf-8"?>
<RelativeLayout xmlns:android="http://schemas.android.com/apk/res/android"
  android:layout_width="match_parent"
  android:layout_height="match_parent" >

  <android.support.v4.view.ViewPager
    android:id="@+id/vp_guide_pages"
    android:layout_width="match_parent"
    android:layout_height="match_parent" >
  </android.support.v4.view.ViewPager>

  <RelativeLayout
    android:layout_width="wrap_content"
    android:layout_height="wrap_content"
    android:layout_alignParentBottom="true"
    android:layout_centerHorizontal="true"
    android:layout_marginBottom="30dip" >

    <LinearLayout
      android:id="@+id/ll_guide_points"
      android:layout_width="wrap_content"
      android:layout_height="wrap_content"
      android:orientation="horizontal" >
    </LinearLayout>

    <View
      android:id="@+id/v_guide_redpoint"
      android:layout_width="10dip"
      android:layout_height="10dip"
      android:layout_marginBottom="0.7dp"
      android:background="@drawable/red_point" />
  </RelativeLayout>

  <Button
    android:id="@+id/bt_guide_startexp"
    android:background="@drawable/btn_selector"
    android:layout_alignParentBottom="true"
    android:layout_centerHorizontal="true"
    android:layout_marginBottom="45dip"
    android:paddingTop="5dip"
    android:paddingBottom="5dip"
    android:paddingLeft="10dip"
    android:paddingRight="10dip"
    android:textColor="@color/btn_colors"
    android:layout_width="wrap_content"
    android:layout_height="wrap_content"
    android:text="開始體驗"
    android:visibility="gone"
    android:textSize="18sp" />

</RelativeLayout>
注、關於圓點、Button按鈕的狀態、等UI效果的設置
(一)、自己畫圓點,定義顏色
外面的大圓big_point.xml:
<?xml version="1.0" encoding="utf-8"?>
<shape xmlns:android="http://schemas.android.com/apk/res/android"
  android:shape="oval">

  <corners android:radius="5dip"></corners>

  <solid android:color="#ffffff"></solid>
</shape>
裡面的圓點small_point.xml
<?xml version="1.0" encoding="utf-8"?>
<shape xmlns:android="http://schemas.android.com/apk/res/android"
  android:shape="oval">

  <corners android:radius="5dip"></corners>

  <solid android:color="#fff"></solid>
</shape>
(二)、Button的顏色、以及狀態選擇
背景狀態選擇器btn_selector.xml
<?xml version="1.0" encoding="utf-8"?>
<selector xmlns:android="http://schemas.android.com/apk/res/android">

  <!-- 按鈕按下的狀態 -->
  <item android:drawable="@drawable/button_red_pressed" android:state_pressed="true"></item>
  <!-- 按鈕松開的狀態 -->
  <item android:drawable="@drawable/button_red_normal" android:state_pressed="false"></item>

</selector>
文本顏色選擇器btn_colors.xml
<?xml version="1.0" encoding="utf-8"?>
<selector xmlns:android="http://schemas.android.com/apk/res/android">
   <!-- 按鈕按下的狀態 黑色 -->
  <item android:color="#000000" android:state_pressed="true"></item>
  <!-- 按鈕松開的狀態 白色 -->
  <item android:color="#ffffff" ></item>

</selector>
以上就是本文的全部內容,希望對大家的學習有所幫助,也希望大家多多支持本站。
 Android開發之模仿微信打開網頁的進度條效果(高仿)
一,為什麼說是真正的高仿? 闡述這個問題前,先說下之前網上的,各位可以復制這段字,去百度一下 仿微信打開網頁的進度條效果 ,你會看到有很多類似的文章,不過他
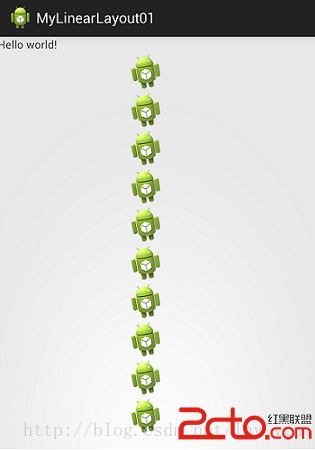 Android學習系列(二)布局管理器之線性布局及其自定義實現
LinearLayout是Android控件中的線性布局控件,它包含的子控件將以橫向(HORIZONTAL)或豎向(VERTICAL)的方式排
 Android - UI(User Interface)的基本設計
UI(User Interface)的基本設計 本文地址: http://blog.csdn.net/caroline_wendy UI(User Interfa
 Android AnalogClock簡單使用方法實例
本文實例講述了Android AnalogClock簡單使用方法。分享給大家供大家參考,具體如下:AnalogClock組件的使用很簡單,先來看看效果圖:AnalogCl
 android:用sql server2005(或Excel+sql server2005)+sqlserver2sqlite_converter工具
自己寫db文件方法有兩種:1、用sql server2005+sqlse