編輯:關於Android編程
Android 背景圖片的縮放
ONE Goal ,ONE Passion !
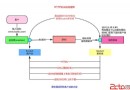
我們看到一些效果,控件中的背景圖片會慢慢變大,但是控件不會隨著圖片的放大而變大.效果如下:

分析:
想讓圖片變大,而且控件本身大小不能改變,那麼就要改變圖片自身大小,而不能改變控件大小.
實現原理:
1,首先拿到我們要放大的圖片bitmap.
2,使用Bitmap.createBitmap().創建一個bitmap的副本.
3,使用matrix去改變圖片副本本身大小
4,使用ValueAnimator去根據變化率將副本繪制出來.
自定義View
 public class ScaleImage extends View {

  /**
   * 設置的背景圖片
   */
  private Drawable background;
  /**
   * 畫布的背景圖片
   */
  private Bitmap bitmapCopy;
  /**
   * 跟隨動畫實時更新的 放大比例
   */
  float scal = 1f;

  /**
   * 讓原圖放大 1.3倍,這個值可以隨意更改.目的是讓原圖填充滿控件
   */
  private float orgFrac = 1.3f;
  /**
   * 控件寬
   */
  private int widthSize;
  /**
   * 控件高
   */
  private int heightSize;
  private float downY;
  private float downX;


  public ScaleImage(Context context) {
    this(context, null);
  }

  public ScaleImage(Context context, AttributeSet attrs) {
    this(context, attrs, 0);
  }

  public ScaleImage(Context context, AttributeSet attrs, int defStyleAttr) {
    super(context, attrs, defStyleAttr);
  }

  @Override
  protected void onMeasure(int widthMeasureSpec, int heightMeasureSpec) {
    super.onMeasure(widthMeasureSpec, heightMeasureSpec);


    widthSize = MeasureSpec.getSize(widthMeasureSpec);
    heightSize = MeasureSpec.getSize(heightMeasureSpec);


  }

  @Override
  protected void onDraw(final Canvas canvas) {
    super.onDraw(canvas);


    if (background != null) {
      BitmapDrawable bd = (BitmapDrawable) background;
      final Bitmap bitmap = bd.getBitmap();


      final Matrix matrix = new Matrix();

      bitmapCopy = Bitmap.createBitmap(bitmap, 0, 0,
          bitmap.getWidth(), bitmap.getHeight(),
          matrix, true);


      /**
       * float sx, float sy, float px, float py
       *
       * sx,sy x,y方向縮放比例
       * px,py 以px py為軸心進行縮放
       * 放大比例加了默認的orgFrac.是為了在還沒有開始縮放時
       * 放圖片能夠填充控件.如果圖片過小的話,可能控件和圖片
       * 之間會有邊界空白
       *
       * 注意: 這裡的px py :matrix作用於哪個對象上,那麼px,py就是對象上的坐標點
       * 如 : 這裡就是 bitmapCopy 上的px,py坐標點.
       */

      matrix.setScale(orgFrac + scal, 1, bitmapCopy.getWidth() / 2, bitmapCopy.getHeight() / 2);


      canvas.drawBitmap(bitmapCopy, matrix, null);

    }


  }

  /**
   * 開始縮放
   *
   * @param drawableId 需要放大的背景圖片
   */
  public void startScale(int drawableId) {


    background = getResources().getDrawable(drawableId);
    if (background == null) {
      throw new RuntimeException("background must not null");
    } else {


      ValueAnimator animator = ValueAnimator.ofFloat(0, 1);
      animator.addUpdateListener(new ValueAnimator.AnimatorUpdateListener() {
        @Override
        public void onAnimationUpdate(ValueAnimator animation) {

          float fraction = (float) animation.getAnimatedValue();

          scal = (float) (0.5 * fraction);
          invalidate();


        }
      });

      animator.setDuration(5000);
      animator.setInterpolator(new BounceInterpolator());

      animator.start();

    }

  }

  @Override
  public boolean onTouchEvent(MotionEvent event) {

    switch (event.getAction()) {
      case MotionEvent.ACTION_DOWN:

        downY = event.getY();
        downX = event.getX();

        break;
      case MotionEvent.ACTION_UP:

        float upY = event.getY();
        float upX = event.getX();


        if (Math.abs(upY - downY) < 5 && Math.abs(upX - downX) < 5) {
          listener.backgroundClick();
        }

        break;
    }


    return true;
  }

  OnBackgroundCilckListener listener;

  /**
   * 點擊事件的監聽
   *
   * @param listener
   */
  public void addBackgroundCilckListener(OnBackgroundCilckListener listener) {
    this.listener = listener;
  }


  public interface OnBackgroundCilckListener {
    void backgroundClick();
  }


  }
跑起來
 image = (ScaleImage) findViewById(R.id.image);

    image.startScale(R.drawable.parallax_img);

    image.addBackgroundCilckListener(new ScaleImage.OnBackgroundCilckListener() {
      @Override
      public void backgroundClick() {

      }
    });
小提琴家

matrix使用待續
好了.直接使用控件,我們將資源文件中的Drawable傳入就可以了.
感謝閱讀,希望能幫助到大家,謝謝大家對本站的支持!
 Android 實現圖片模糊、高斯模糊、毛玻璃效果的三種方法
在前幾天寫過一個使用glide-transformations的方法實現高斯模糊的方法,今天偶然間有發現一個大神寫的另一個方法,感覺挺不錯的,分享一下:效果圖:原文鏈接:
 AndroidStudio上面最好用的插件
AndroidStudio上面最好用的插件Android ButterKnife Zelezny在Activity,Fragment,Adapter中選中布局xml自動生
 Android之自定義Transition動畫
曾經(或者現在)很多人說起Android和iOS都會拿Android的UI設計來開黑, “你看看人家iOS的設計, 再來看看Android的, 差距怎麼就這麼
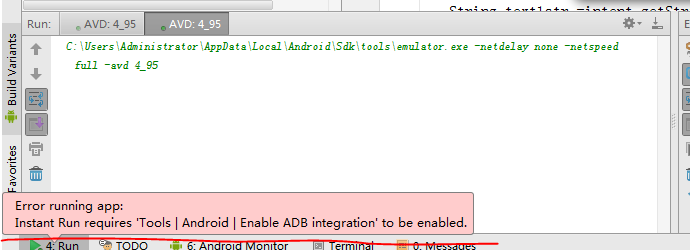 Error running app: Instant Run requires 'Tools | Android | Enable ADB integration' to be enabled.
今早起來運行程序 一直報這個錯Error running app: Instant Run requires ‘Tools | Android | Enabl