編輯:關於Android編程
一 概述:
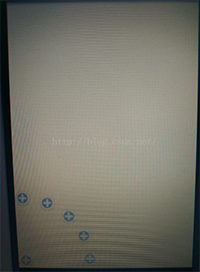
最近一直致力於Android自定義VIew的學習,主要在看《android群英傳》,還有CSDN博客鴻洋大神和wing大神的一些文章,寫的很詳細,自己心血來潮,學著寫了個實現了類似衛星效果的一個自定義的View,分享到博客上,望各位指點一二。寫的比較粗糙,見諒。(因為是在Linux系統下寫的,效果圖我直接用手機拍的,難看,大家講究下就看個效果,勿噴)。
先來看個效果圖,有點不忍直視:
自定義VIew准備:
(1)創建繼承自View的類;
(2)重寫構造函數;
(3)定義屬性。
(4)重寫onMeasure(),onLayout()方法。
好了,廢話不說了,准備上菜。
二 相關實現
首先是自定義的View,重寫構造函數,我這裡是直接繼承的VIewGroup,貼上代碼:
public MoonView(Context context) {
this(context,null);
}
public MoonView(Context context, AttributeSet attrs) {
this(context, attrs,0);
}
public MoonView(Context context, AttributeSet attrs, int defStyleAttr) {
super(context, attrs, defStyleAttr);
}
這裡需要讀取自定義的屬性,所以調用含三個參數的構造函數。
自定義的屬性,我這裡知定義了兩個,一個是菜單弧形的半徑,還有個是菜單在屏幕的位置,這裡可以設置在左上角,左下角,右上角,右下角。代碼如下:
<?xml version="1.0" encoding="utf-8"?>
<resources>
<declare-styleable name="MoonAttrs">
<attr name="mRadius" format="integer"></attr><!--菜單圓形半徑-->
<attr name="mPosition"><!--衛星菜單屏幕所在位置-->
<enum name="leftTop" value="-2"></enum><!--左上角-->
<enum name="leftBottom" value="-1"></enum><!--左下角-->
<enum name="rightTop" value="-3"></enum><!--右上角-->
<enum name="rightBottom" value="-4"></enum><!--右下角-->
</attr>
</declare-styleable>
</resources>
然後在布局文件裡面引用自定義的View,配置屬性:
<?xml version="1.0" encoding="utf-8"?>
<com.example.liujibin.testmyview3.myView.MoonView
xmlns:android="http://schemas.android.com/apk/res/android"
xmlns:custom="http://schemas.android.com/apk/res/com.example.liujibin.testmyview3"
android:orientation="vertical"
android:layout_width="match_parent"
android:layout_height="match_parent"
custom:mRadius="400"
custom:mPosition="rightBottom"
>
<ImageView
android:layout_width="wrap_content"
android:layout_height="wrap_content"
android:background="@mipmap/sapi_icon_add_account"/>
<ImageView
android:layout_width="wrap_content"
android:layout_height="wrap_content"
android:background="@mipmap/sapi_icon_add_account"/>
<ImageView
android:layout_width="wrap_content"
android:layout_height="wrap_content"
android:background="@mipmap/sapi_icon_add_account"/>
<ImageView
android:layout_width="wrap_content"
android:layout_height="wrap_content"
android:background="@mipmap/sapi_icon_add_account"/>
<ImageView
android:layout_width="wrap_content"
android:layout_height="wrap_content"
android:background="@mipmap/sapi_icon_add_account"/>
<ImageView
android:layout_width="wrap_content"
android:layout_height="wrap_content"
android:background="@mipmap/sapi_icon_add_account"/>
</com.example.liujibin.testmyview3.myView.MoonView>
最後我們需要在自定義的View類中的構造函數裡,獲取相關的屬性值:
public MoonView(Context context, AttributeSet attrs, int defStyleAttr) {
super(context, attrs, defStyleAttr);
//獲取相關屬性
TypedArray ta = context.getTheme().obtainStyledAttributes(attrs, R.styleable.MoonAttrs,
defStyleAttr,0);
mRaius = ta.getInt(R.styleable.MoonAttrs_mRadius,500);
position = ta.getInt(R.styleable.MoonAttrs_mPosition,-1);
}
做完以上的准備工作,我們就可以對組件進行測量,布局。
@Override
protected void onMeasure(int widthMeasureSpec, int heightMeasureSpec) {
super.onMeasure(widthMeasureSpec, heightMeasureSpec);
count = getChildCount()-1;
angle = 90/(count-1);

int count = getChildCount();
for(int i =0;i< count;i++){
measureChild(getChildAt(i),widthMeasureSpec,heightMeasureSpec);
}
}
count獲取按鈕的數量,有一個是中心點,不參與計算,angle是每個按鈕離基准線的角度,這裡以90度為准,固定在這個范圍裡面均勻分配。
首先先把中心點固定好位置:
@Override
protected void onLayout(boolean b, int i, int i1, int i2, int i3) {
if(isChanged){
layoutBottom();
}
}
private void layoutBottom(){
View view = getChildAt(0);
switch (position){
case -1:
btml = 0;
btmt = getMeasuredHeight() - view.getMeasuredHeight();
btmr = view.getMeasuredWidth();
btmb = getMeasuredHeight();
break;
case -2:
btml = 0;
btmt = 0;
btmr = view.getMeasuredWidth();
btmb = view.getMeasuredHeight();
break;
case -3:
btml = getMeasuredWidth() - view.getMeasuredWidth();
btmt = 0;
btmr = getMeasuredWidth();
btmb = view.getMeasuredHeight();
break;
case -4:
btml = getMeasuredWidth() - view.getMeasuredWidth();
btmt = getMeasuredHeight() - view.getMeasuredHeight();
btmr = getMeasuredWidth();
btmb = getMeasuredHeight();
break;
}
btmWidth = view.getMeasuredWidth();
btmHeight = view.getMeasuredHeight();
view.setOnClickListener(this);
view.layout(btml,btmt,btmr,btmb);
}
position的值看屬性就明白了,對中心點進行固定位置。並且注冊點擊事件。
現在開始給剩下的按鈕布局,並隱藏按鈕:
@Override
protected void onLayout(boolean b, int i, int i1, int i2, int i3) {
if(isChanged){
layoutBottom();
int count = getChildCount();
for(int k = 0;k < count - 1;k++){
View view = getChildAt(k+1);
int childWidth = view.getMeasuredWidth();
int childHeight = view.getMeasuredHeight();
int childX = (int)(mRaius*(Math.sin(angle*(k)*Math.PI/180)));
int childY = (int)(mRaius*(Math.cos(angle*(k)*Math.PI/180)));
int left = 0;
int top = 0;
int right = 0;
int bottom = 0;
switch(position){
case -1:
left = childX+btmWidth/2-childWidth/2;
top =getMeasuredHeight() - (childY+childHeight/2+btmHeight/2);
right = childX+btmWidth/2+childWidth/2;
bottom =getMeasuredHeight() - (childY + btmHeight/2) + childHeight/2;
break;
case -2:
left = childX+btmWidth/2-childWidth/2;
top =childY-childHeight/2+btmHeight/2;
right = childX+btmWidth/2+childWidth/2;
bottom = childY + btmHeight/2 + childHeight/2;
break;
case -3:
left = getMeasuredWidth() - (childX+btmWidth/2+childWidth/2);
top =childY-childHeight/2+btmHeight/2;
right = getMeasuredWidth() - (childX+btmWidth/2+childWidth/2)+childWidth;
bottom = childY + btmHeight/2 + childHeight/2;
break;
case -4:
left = getMeasuredWidth() - (childX+btmWidth/2+childWidth/2);
top =getMeasuredHeight() - (childY+childHeight/2+btmHeight/2);
right = getMeasuredWidth() - (childX+btmWidth/2+childWidth/2)+childWidth;
bottom =getMeasuredHeight() - (childY + btmHeight/2) + childHeight/2;
break;
}
view.layout(left,top,right,bottom);
view.setVisibility(View.GONE);
}
}
}
現在我們實現點擊事件:
@Override
public void onClick(View view) {
if(isChanged){
int count = getChildCount();
for(int i = 0;i < count - 1;i++){
View childView = getChildAt(i+1);
int childX = (int)(mRaius*(Math.sin(angle*(i)*Math.PI/180)));
int childY = (int)(mRaius*(Math.cos(angle*(i)*Math.PI/180)));
int childWidth = view.getMeasuredWidth();
int childHeight = view.getMeasuredHeight();
int left = 0;
int top = 0;
TranslateAnimation ta = null;
switch(position){
case -1:
left = childX+btmWidth/2-childWidth/2;
top =getMeasuredHeight() - (childY+childHeight/2+btmHeight/2);
ta = new TranslateAnimation(-(left+childView.getMeasuredWidth()),0,getMeasuredHeight()-top,0);
break;
case -2:
left = childX+btmWidth/2-childWidth/2;
top =childY-childHeight/2+btmHeight/2;
ta = new TranslateAnimation(-(left+childView.getMeasuredWidth()),0,-top,0);
break;
case -3:
left = getMeasuredWidth() - (childX+btmWidth/2+childWidth/2);
top =childY-childHeight/2+btmHeight/2;
ta = new TranslateAnimation(getMeasuredWidth()-(left+childView.getMeasuredWidth()),0,-top,0);
break;
case -4:
left = getMeasuredWidth() - (childX+btmWidth/2+childWidth/2);
top =getMeasuredHeight() - (childY+childHeight/2+btmHeight/2);
ta = new TranslateAnimation(getMeasuredWidth()-(left+childView.getMeasuredWidth()),0,getMeasuredHeight()-top,0);
break;
}
ta.setDuration(500);
childView.setAnimation(ta);
childView.setVisibility(View.VISIBLE);
}
isChanged = false;
}else{
int count = getChildCount();
for(int i = 0;i < count - 1;i++){
View childView = getChildAt(i+1);
int childX = (int)(mRaius*(Math.sin(angle*(i)*Math.PI/180)));
int childY = (int)(mRaius*(Math.cos(angle*(i)*Math.PI/180)));
int childWidth = view.getMeasuredWidth();
int childHeight = view.getMeasuredHeight();
int left = 0;
int top = 0;
TranslateAnimation ta = null;
switch(position){
case -1:
left = childX+btmWidth/2-childWidth/2;
top =getMeasuredHeight() - (childY+childHeight/2+btmHeight/2);
ta = new TranslateAnimation(0,-(left+childView.getMeasuredWidth()),0,getMeasuredHeight()-top);
break;
case -2:
left = childX+btmWidth/2-childWidth/2;
top =childY-childHeight/2+btmHeight/2;
ta = new TranslateAnimation(0,-(left+childView.getMeasuredWidth()),0,-top);
break;
case -3:
left = getMeasuredWidth() - (childX+btmWidth/2+childWidth/2);
top =childY-childHeight/2+btmHeight/2;
ta = new TranslateAnimation(0,getMeasuredWidth()-(left+childView.getMeasuredWidth()),0,-top);
break;
case -4:
left = getMeasuredWidth() - (childX+btmWidth/2+childWidth/2);
top =getMeasuredHeight() - (childY+childHeight/2+btmHeight/2);
ta = new TranslateAnimation(0,getMeasuredWidth()-(left+childView.getMeasuredWidth()),0,getMeasuredHeight()-top);
break;
}
ta.setDuration(500);
childView.setAnimation(ta);
childView.setVisibility(View.GONE);
}
isChanged = true;
}
}
設置點擊顯示以及隱藏,並且帶飄動的動畫效果。
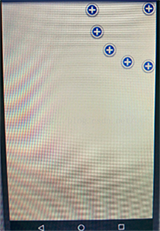
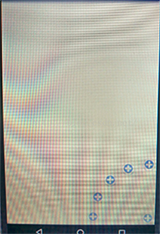
四個角落效果如下:
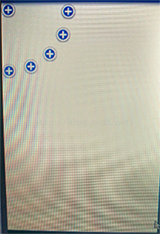
以上所述是小編給大家介紹的Android自定義VIew實現衛星菜單效果淺析,希望對大家有所幫助,如果大家有任何疑問請給我留言,小編會及時回復大家的。在此也非常感謝大家對本站網站的支持!
 Android中Canvas繪圖之Shader使用圖文詳解
概述我們在用Android中的Canvas繪制各種圖形時,可以通過Paint.setShader(shader)方法為畫筆Paint設置shader,這樣就可以繪制出多彩
 Android WebView In NestedScrollView 加載騰訊新聞頁面 點擊彈出層 bug 小記
Android WebView In NestedScrollView 加載騰訊新聞頁面 點擊彈出層 bug 小記。目的是: CoordinatorLayou+AppBa
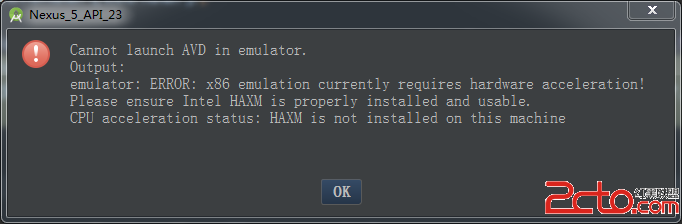 Android Studio創建AVD
Android Studio是專門為Android開發設計的IDE,比Eclipse開發Android更加方便、快捷。安裝Android Studio以後,想運行AVD,
 安卓實戰開發之CardView的selector及GrideView的item按下狀態保留selector(state_activated)的實現
android的selector對於android開發者而言再熟悉不過了,只要定義一個drawable目錄下定義一個selector的xml文件,在布局文件中backgr