編輯:關於Android編程
很不錯的手電筒APP,分享給大家,希望大家喜歡。
1. Java代碼
package com.example.goo.gfire;

import android.app.Activity;
import android.hardware.Camera;
import android.hardware.Camera.Parameters;
import android.os.Bundle;
import android.view.View;
import android.widget.Button;


public class FireActivity extends Activity {
  private Button button;
  private Camera camera = Camera.open();
  private Parameters parameters;
  private boolean islight=true;

  public void onCreate(Bundle savedInstanceState) {
   super.onCreate(savedInstanceState);
   setContentView(R.layout.activity_fire);
   button = (Button) this.findViewById(R.id.bn);
   button.setOnClickListener(new View.OnClickListener() {
     @Override
     public void onClick(View v) {
      if (islight) {
        camera.startPreview();
        parameters = camera.getParameters();
        parameters.setFlashMode(Parameters.FLASH_MODE_TORCH);
        camera.setParameters(parameters);
        islight = false
        ;
        button.setText("關");
      } else {
        parameters = camera.getParameters();
        parameters.setFlashMode(Parameters.FLASH_MODE_OFF);
        camera.setParameters(parameters);
        islight = true;
        button.setText("開");
      }
     }

   });
  }
}
2. FireActivity.java
package com.example.goo.gfire;

import android.app.Activity;
import android.hardware.Camera;
import android.hardware.Camera.Parameters;
import android.os.Bundle;
import android.view.View;
import android.widget.Button;


public class FireActivity extends Activity {
  private Button button;
  private Camera camera = Camera.open();
  private Parameters parameters;
  private boolean islight=true;

  public void onCreate(Bundle savedInstanceState) {
   super.onCreate(savedInstanceState);
   setContentView(R.layout.activity_fire);
   button = (Button) this.findViewById(R.id.bn);
   button.setOnClickListener(new View.OnClickListener() {
     @Override
     public void onClick(View v) {
      if (islight) {
        camera.startPreview();
        parameters = camera.getParameters();
        parameters.setFlashMode(Parameters.FLASH_MODE_TORCH);
        camera.setParameters(parameters);
        islight = false
        ;
        button.setText("關");
      } else {
        parameters = camera.getParameters();
        parameters.setFlashMode(Parameters.FLASH_MODE_OFF);
        camera.setParameters(parameters);
        islight = true;
        button.setText("開");
      }
     }

   });
  }
}
3. content_fire.xml
<?xml version="1.0" encoding="utf-8"?>
<RelativeLayout xmlns:android="http://schemas.android.com/apk/res/android"
  xmlns:app="http://schemas.android.com/apk/res-auto"
  xmlns:tools="http://schemas.android.com/tools"
  android:layout_width="match_parent"
  android:layout_height="match_parent"
  android:paddingBottom="@dimen/activity_vertical_margin"
  android:paddingLeft="@dimen/activity_horizontal_margin"
  android:paddingRight="@dimen/activity_horizontal_margin"
  android:paddingTop="@dimen/activity_vertical_margin"
  app:layout_behavior="@string/appbar_scrolling_view_behavior"
  tools:context="com.example.goo.gfire.FireActivity"
  tools:showIn="@layout/activity_fire">

  <TextView
    android:layout_width="match_parent"
    android:layout_height="wrap_content"
    android:text="電筒模式"
    android:textSize="34sp"
    android:text
    android:gravity="center"/>
  <Button
    android:layout_width="match_parent"
    android:layout_height="wrap_content"
    android:id="@+id/bn"
    android:textOff="關"
    android:textOn="開"
    android:height="400dp"
    android:layout_alignParentBottom="true"
    android:layout_centerHorizontal="true"
    android:layout_marginBottom="59dp"
    android:fontFeatureSettings="@string/auth_google_play_services_client_facebook_display_name"
    android:textColor="@color/common_signin_btn_dark_text_focused"
    android:text
    android:textSize="100sp"
    />


</RelativeLayout>
以上就是本文的全部內容,希望對大家的學習有所幫助,也希望大家多多支持本站。
 Android 離線緩存的快速實現
離線緩存是指在有網絡的狀態下將從服務器獲取的網絡數據,如Json 數據緩存到本地,在斷網的狀態下啟動APP時讀取本地緩存數據顯示在界面上,常用的APP(網易新聞、知乎等等
 (Android review)打開Activity返回結果
一、基本知識點其實要完成這個功能很簡單:1、MainActivitystartActivityForResult(intent, 100);//第二個是請求碼@Overr
 Android 使用OpenCV之編譯環境非CygWin方式(Win7+Eclipse+ADT+CDT+NDK)
只有簡單的三步,官網寫的非常簡明全面,非常佩服 【准備】 1. Eclipse(Indigo) 2. ADT: 這個不說了,無非就是eclipse添加個an
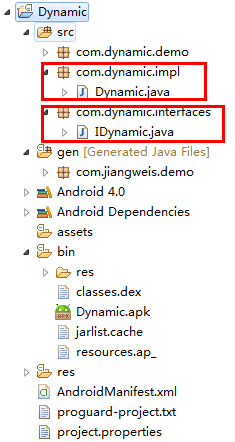 Android 動態加載機制
在目前的軟硬件環境下,Native App與Web App在用戶體驗上有著明顯的優勢,但在實際項目中有些會因為業務的頻繁變更而頻繁的升級客戶端,造成較差的用戶體驗,而這也