編輯:關於Android編程
一直都在看自定義View,經過一個星期的堅持,基本上能夠寫出一些比較實用的控件效果了,今天天氣太熱,就待在家裡玩手機,然後手機沒電了,在充電的時候,看到了手機的充電動畫,覺得挺酷,然後自己我就仔細的分析了一下這裡的動畫內容,就覺得,這個我也能寫出來,所以就有了這篇博客。純屬原創。
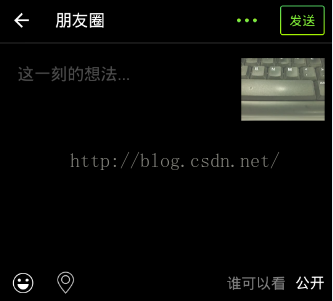
先看看效果,因為圖片的原因,只能看到靜態的。

這個就是效果圖了。當然了,這麼看好像不怎麼樣,但是配上了動畫,還是挺好看的。
自定義控件的話,其實做的多了,運用的多了,就會覺得自定義View,跟在Photo shop 裡面畫圖一樣,我們通過建立圖層,然後再圖層裡面繪制自己想要的效果。
這裡其實也是一樣的,運用到了我前面講的一些知識,比如這篇:
Android自定義View弧線進度控件,原理上大體相當,結合這次的效果,我們看看,這裡面是有四個弧形,兩個圓,還有一個類似於時鐘刻度的效果。所以知道這些的話,這就比較容易實現了。
首先,新建一個類,取名為VIVOPhone,然後繼承自View,重載三個構造函數,然後進入主題。
同樣的,我們先看看運用到了哪些變量
 // 定義五個畫筆
 private Paint mSmileRing, mBigRing, mInCrilePaint, mInLine, mTextPaint;
 // 控件的高寬
 private float mWidth, mHeight;
 // 矩形的空間
 private RectF mRectF;
 // 四個弧線的開始角度
 private float startAngle = 270, startAngle2 = 270, startAngle3 = 270,
  startAngle4 = 270, sweepAngle = 90;
 // 文字
 private String text = "70%";
 // 文字的大小
 private float tvSize = 80;
 // 刻度的進度
 private float progress;
然後我們開始初始化數據。
private void initView() {
 mSmileRing = new Paint();
 mSmileRing.setAntiAlias(true);
 mSmileRing.setStrokeWidth(5);
 mSmileRing.setStyle(Style.STROKE);
 mSmileRing.setColor(Color.parseColor("#12ADFF"));

 mBigRing = new Paint();
 mBigRing.setAntiAlias(true);
 mBigRing.setStrokeWidth(20);
 mBigRing.setStyle(Style.STROKE);
 mBigRing.setColor(Color.parseColor("#12ADFF"));

 mInCrilePaint = new Paint();
 mInCrilePaint.setAntiAlias(true);
 mInCrilePaint.setStrokeWidth((float) 0.5);
 mInCrilePaint.setStyle(Style.STROKE);
 mInCrilePaint.setColor(Color.parseColor("#eeeeee"));

 mInLine = new Paint();
 mInLine.setAntiAlias(true);
 mInLine.setStrokeWidth(3);
 mInLine.setColor(Color.parseColor("#00ff00"));

 mTextPaint = new Paint();
 mTextPaint.setAntiAlias(true);
 mTextPaint.setStrokeWidth(3);
 mTextPaint.setTextSize(tvSize);
 mTextPaint.setColor(Color.parseColor("#ffffff"));
 }
這裡主要是對畫筆進行初始化,包括設置大小、寬度、樣式、顏色等等。這個方法,最後還是要在構造函數裡面調用。
畫筆初始化好了,接下來就看看怎麼給變量賦值;
一樣的,我們還是在onSizeChange()方法裡面寫賦值的操作。代碼如下:
 @Override
 protected void onSizeChanged(int w, int h, int oldw, int oldh) {
 super.onSizeChanged(w, h, oldw, oldh);
 mWidth = w;
 mHeight = h;

 }
這裡很簡單,就是給高跟寬賦值。
好了,最後看看onDraw方法是怎麼寫的。
 @Override
 protected void onDraw(Canvas canvas) {
 super.onDraw(canvas);
 canvasOutArc1(canvas, mRectF);
 canvasOutArc2(canvas, mRectF);
 canvasOutArc3(canvas, mRectF);
 canvasOutArc4(canvas, mRectF);
 drawCircle(canvas);
 drawCircleIn(canvas);
 canvasDrawText(canvas);

 }
沒錯,我這裡把每一個的繪制都抽成了方法,這樣是為了更好的管理和閱讀。看到一個:
 /**
 * 繪制最外面的弧線
 *
 * @param canvas
 */
 private void canvasOutArc1(Canvas canvas, RectF mRectF) {
 mRectF = new RectF((float) (mWidth * 0.1), (float) (mWidth * 0.1),
  (float) (mWidth * 0.9), (float) (mWidth * 0.9));
 canvas.drawArc(mRectF, startAngle, sweepAngle + 90, false, mSmileRing);
 }
這個是最外層的圓,接下來就是第二個,第三個,第四個,我全部列出來。
/**
 * 繪制外層的第二個
 *
 * @param canvas
 * @param mRectF
 */
 private void canvasOutArc2(Canvas canvas, RectF mRectF) {
 mRectF = new RectF((float) (mWidth * 0.14), (float) (mWidth * 0.14),
  (float) (mWidth * 0.85), (float) (mWidth * 0.85));
 canvas.drawArc(mRectF, startAngle2, sweepAngle + 30, false, mBigRing);
 }
第三個:
/**
 * 繪制裡面第二個小的
 *
 * @param canvas
 */
 private void canvasOutArc3(Canvas canvas, RectF mRectF) {
 mRectF = new RectF((float) (mWidth * 0.22), (float) (mWidth * 0.22),
  (float) (mWidth * 0.795), (float) (mWidth * 0.795));
 canvas.drawArc(mRectF, startAngle3, sweepAngle, false, mSmileRing);
 }
第四個:
 /**
 * 繪制裡面第二個小的
 *
 * @param canvas
 */
 private void canvasOutArc4(Canvas canvas, RectF mRectF) {
 mRectF = new RectF((float) (mWidth * 0.255), (float) (mWidth * 0.255),
  (float) (mWidth * 0.75), (float) (mWidth * 0.75));
 canvas.drawArc(mRectF, startAngle4, sweepAngle, false, mBigRing);
 }
然後就是兩個圓了:
第一個圓,這裡面還包含了鋸齒:
// 繪制內切圓和鋸齒
 private void drawCircle(Canvas canvas) {
 float radius = (float) (mHeight - (mHeight * 0.3) * 2 - (mWidth * 0.17));
 float yuanX = (float) (mHeight / 2);
 float yuanY = (float) (mWidth / 2);

 canvas.drawCircle(yuanX, yuanY, radius, mInCrilePaint);
 canvas.save();

 float nowWidth = (float) (getMeasuredWidth());
 float nowHeight = getMeasuredHeight();
 for (int i = 0; i < 72; i++) {
  // canvas.drawLine(nowWidth / 2, nowHeight / 2 - nowWidth / 2,
  // nowWidth / 2, nowHeight / 2 - nowWidth / 2 + 30, mInLine);

  if (i >= progress) {
  mInLine.setColor(Color.parseColor("#555555"));
  } else {
  mInLine.setColor(Color.parseColor("#00ff00"));
  }

  canvas.drawLine(nowWidth / 2,
   (float) (nowHeight / 2 - nowWidth / 2 + mWidth / 3.7),
   nowWidth / 2, (float) (nowHeight / 2 - nowWidth / 2
    + mWidth * 0.05 + mWidth / 3.7), mInLine);

  canvas.rotate(5, getWidth() / 2, getHeight() / 2);

 }

 }
第二個圓:
// 繪制最裡面的圓
 private void drawCircleIn(Canvas canvas) {
 float radius = (float) (mHeight - (mHeight * 0.3) * 2 - (mWidth * 0.22));
 float yuanX = (float) (mHeight / 2);
 float yuanY = (float) (mWidth / 2);

 canvas.drawCircle(yuanX, yuanY, radius, mInCrilePaint);
 canvas.save();

 }
最後暴露給外面一個方法,用於動畫效果:
 public void setData(int startAngle, float d) {
 this.startAngle = startAngle;
 this.startAngle2 = 360 - startAngle;
 this.startAngle3 = startAngle;
 this.startAngle4 = 360 - startAngle;
 progress = d / 4;
 postInvalidateDelayed(500);
 }
這裡為了效果更明顯,我讓它五毫秒的速度更新UI,這裡就是View的全部內容,下面,我把所有的代碼都列出來:
布局文件:
<RelativeLayout xmlns:android="http://schemas.android.com/apk/res/android"
 xmlns:tools="http://schemas.android.com/tools"
 android:layout_width="match_parent"
 android:layout_height="match_parent"
 android:background="@drawable/bg"
 tools:context=".MainActivity" >

 <com.example.vivoopen.weight.VivoView
 android:id="@+id/vivo"
 android:layout_width="180dip"
 android:layout_height="180dip"
 android:layout_centerInParent="true" />

</RelativeLayout>
MainActivity.java:
public class MainActivity extends Activity {
 private VivoView view;
 private boolean isRun = true;

 @Override
 protected void onCreate(Bundle savedInstanceState) {
 super.onCreate(savedInstanceState);
 setContentView(R.layout.activity_main);
 view = (VivoView) findViewById(R.id.vivo);

 new Thread(new Runnable() {
  public void run() {
  synchronized (view) {

   while (isRun) {
   Message msg;
   for (int i = 0; i < n2; i = i + 10) {
    msg = new Message();
    msg.obj = i;
    SystemClock.sleep(100);
    msg.what = 1;
    handler.sendMessage(msg);
   }
   msg = new Message();
   msg.what = 2;
   handler.sendMessage(msg);
   }
  }
  }
 }).start();

 }

 int n2 = 2;
 private Handler handler = new Handler() {
 public void handleMessage(android.os.Message msg) {

  switch (msg.what) {
  case 1:
  int a = (Integer) msg.obj;
  view.setData(a, a);
  break;
  case 2:
  n2 = 359;
  break;
  default:
  break;
  }

 };
 };

}
VivoView.java:
public class VivoView extends View {
 // 定義五個畫筆
 private Paint mSmileRing, mBigRing, mInCrilePaint, mInLine, mTextPaint;
 // 控件的高寬
 private float mWidth, mHeight;
 // 矩形的空間
 private RectF mRectF;
 // 四個弧線的開始角度
 private float startAngle = 270, startAngle2 = 270, startAngle3 = 270,
  startAngle4 = 270, sweepAngle = 90;
 // 文字
 private String text = "70%";
 // 文字的大小
 private float tvSize = 80;
 // 刻度的進度
 private float progress;

 public VivoView(Context context, AttributeSet attrs, int defStyle) {
 super(context, attrs, defStyle);
 initView();

 }

 public VivoView(Context context, AttributeSet attrs) {
 super(context, attrs);
 initView();
 }

 public VivoView(Context context) {
 super(context);
 initView();
 }

 private void initView() {
 mSmileRing = new Paint();
 mSmileRing.setAntiAlias(true);
 mSmileRing.setStrokeWidth(5);
 mSmileRing.setStyle(Style.STROKE);
 mSmileRing.setColor(Color.parseColor("#12ADFF"));

 mBigRing = new Paint();
 mBigRing.setAntiAlias(true);
 mBigRing.setStrokeWidth(20);
 mBigRing.setStyle(Style.STROKE);
 mBigRing.setColor(Color.parseColor("#12ADFF"));

 mInCrilePaint = new Paint();
 mInCrilePaint.setAntiAlias(true);
 mInCrilePaint.setStrokeWidth((float) 0.5);
 mInCrilePaint.setStyle(Style.STROKE);
 mInCrilePaint.setColor(Color.parseColor("#eeeeee"));

 mInLine = new Paint();
 mInLine.setAntiAlias(true);
 mInLine.setStrokeWidth(3);
 mInLine.setColor(Color.parseColor("#00ff00"));

 mTextPaint = new Paint();
 mTextPaint.setAntiAlias(true);
 mTextPaint.setStrokeWidth(3);
 mTextPaint.setTextSize(tvSize);
 mTextPaint.setColor(Color.parseColor("#ffffff"));
 }

 @Override
 protected void onSizeChanged(int w, int h, int oldw, int oldh) {
 super.onSizeChanged(w, h, oldw, oldh);
 mWidth = w;
 mHeight = h;

 }

 @Override
 protected void onDraw(Canvas canvas) {
 super.onDraw(canvas);
 canvasOutArc1(canvas, mRectF);
 canvasOutArc2(canvas, mRectF);
 canvasOutArc3(canvas, mRectF);
 canvasOutArc4(canvas, mRectF);
 drawCircle(canvas);
 drawCircleIn(canvas);
 canvasDrawText(canvas);

 }

 // 繪制文字
 private void canvasDrawText(Canvas canvas) {
 float textSize = mTextPaint.measureText(text);
 float x = mWidth / 2 - textSize / 2;
 float y = mHeight / 2 + textSize / 5;
 canvas.drawText(text, x, y, mTextPaint);
 }

 // 繪制最裡面的圓
 // 繪制內切圓和鋸齒
 private void drawCircleIn(Canvas canvas) {
 float radius = (float) (mHeight - (mHeight * 0.3) * 2 - (mWidth * 0.22));
 float yuanX = (float) (mHeight / 2);
 float yuanY = (float) (mWidth / 2);

 canvas.drawCircle(yuanX, yuanY, radius, mInCrilePaint);
 canvas.save();

 }

 // 繪制內切圓和鋸齒
 private void drawCircle(Canvas canvas) {
 float radius = (float) (mHeight - (mHeight * 0.3) * 2 - (mWidth * 0.17));
 float yuanX = (float) (mHeight / 2);
 float yuanY = (float) (mWidth / 2);

 canvas.drawCircle(yuanX, yuanY, radius, mInCrilePaint);
 canvas.save();

 float nowWidth = (float) (getMeasuredWidth());
 float nowHeight = getMeasuredHeight();
 for (int i = 0; i < 72; i++) {
  // canvas.drawLine(nowWidth / 2, nowHeight / 2 - nowWidth / 2,
  // nowWidth / 2, nowHeight / 2 - nowWidth / 2 + 30, mInLine);

  if (i >= progress) {
  mInLine.setColor(Color.parseColor("#555555"));
  } else {
  mInLine.setColor(Color.parseColor("#00ff00"));
  }

  canvas.drawLine(nowWidth / 2,
   (float) (nowHeight / 2 - nowWidth / 2 + mWidth / 3.7),
   nowWidth / 2, (float) (nowHeight / 2 - nowWidth / 2
    + mWidth * 0.05 + mWidth / 3.7), mInLine);

  canvas.rotate(5, getWidth() / 2, getHeight() / 2);

 }

 }

 /**
 * 繪制最外面的弧線
 *
 * @param canvas
 */
 private void canvasOutArc1(Canvas canvas, RectF mRectF) {
 mRectF = new RectF((float) (mWidth * 0.1), (float) (mWidth * 0.1),
  (float) (mWidth * 0.9), (float) (mWidth * 0.9));
 canvas.drawArc(mRectF, startAngle, sweepAngle + 90, false, mSmileRing);
 }

 /**
 * 繪制外層的第二個
 *
 * @param canvas
 * @param mRectF
 */
 private void canvasOutArc2(Canvas canvas, RectF mRectF) {
 mRectF = new RectF((float) (mWidth * 0.14), (float) (mWidth * 0.14),
  (float) (mWidth * 0.85), (float) (mWidth * 0.85));
 canvas.drawArc(mRectF, startAngle2, sweepAngle + 30, false, mBigRing);
 }

 /**
 * 繪制裡面第二個小的
 *
 * @param canvas
 */
 private void canvasOutArc3(Canvas canvas, RectF mRectF) {
 mRectF = new RectF((float) (mWidth * 0.22), (float) (mWidth * 0.22),
  (float) (mWidth * 0.795), (float) (mWidth * 0.795));
 canvas.drawArc(mRectF, startAngle3, sweepAngle, false, mSmileRing);
 }

 /**
 * 繪制裡面第二個小的
 *
 * @param canvas
 */
 private void canvasOutArc4(Canvas canvas, RectF mRectF) {
 mRectF = new RectF((float) (mWidth * 0.255), (float) (mWidth * 0.255),
  (float) (mWidth * 0.75), (float) (mWidth * 0.75));
 canvas.drawArc(mRectF, startAngle4, sweepAngle, false, mBigRing);
 }

 public void setData(int startAngle, float d) {
 this.startAngle = startAngle;
 this.startAngle2 = 360 - startAngle;
 this.startAngle3 = startAngle;
 this.startAngle4 = 360 - startAngle;
 progress = d / 4;
 postInvalidateDelayed(500);
 }

}
以上就是本文的全部內容,希望對大家的學習有所幫助,也希望大家多多支持本站。
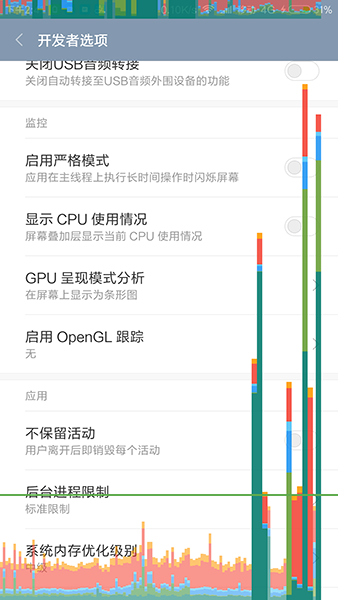 Android群英傳知識點回顧——第十章:Android性能優化
知識點目錄 10.1 布局優化 10.1.1 Android UI渲染機制 10.1.2 避免Overdraw 10.1.3 優化布局層級 10.1.4 避免嵌套過多無用
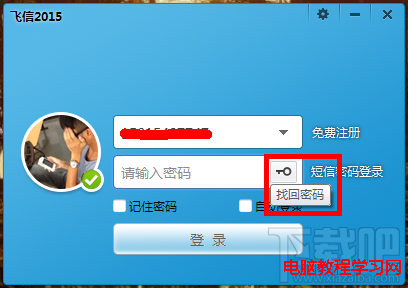 飛信忘記密碼怎麼辦?
飛信現在在生活之中運用越來越廣泛,他是中國移動推出的一款可以免費點對點短信的軟件,那麼如果我們把密碼忘記了怎麼辦呢?怎樣修改呢?下面小編來給大家介紹怎樣去找
 手機SD卡損壞的修復方法
經常會網友遇到手機使用時間較久後會遇到提示“SD卡已損壞,您可能必須將其重新格式化”故障,導致手機SD卡無法使用。最近身邊有朋友手機
 Android自定義控件LinearLayout實例講解
很多時候Android常用的控件不能滿足我們的需求,那麼我們就需要自定義一個控件了。今天做了一個自定義控件的實例,來分享下。首先定義一個layout實現按鈕內部布局:&n