編輯:關於Android編程
(一).前言:
這兩天QQ進行了重大更新(6.X)尤其在UI風格上面由之前的藍色換成了白色居多了,側滑效果也發生了一些變化,那我們今天來模仿實現一個QQ6.X版本的側滑界面效果。今天我們還是采用神器ViewDragHelper來實現.
本次實例具體代碼已經上傳到下面的項目中,歡迎各位去star和fork一下。
https://github.com/jiangqqlmj/DragHelper4QQ
FastDev4Android框架項目地址:https://github.com/jiangqqlmj/FastDev4Android
(二).ViewGragHelper的基本使用
前面我們學習ViewGragHelper的基本使用方法,同時也知道了裡邊的若干個方法的用途,下面我們還是把基本的使用步驟溫習一下。要使用ViewGragHelper實現子View拖拽移動的步驟如下:
創建ViewGragHelper實例(傳入Callback)
重寫事件攔截處理方法onInterceptTouch和onTouchEvent
實現Callback,實現其中的相關方法tryCaptureView以及水平或者垂直方向移動的距離方法
更加具體分析大家可以看前一篇博客,或者我們今天這邊會通過具體實例講解一下。
(三).QQ5.X側滑效果實現分析:
在正式版本QQ中的側滑效果如下:
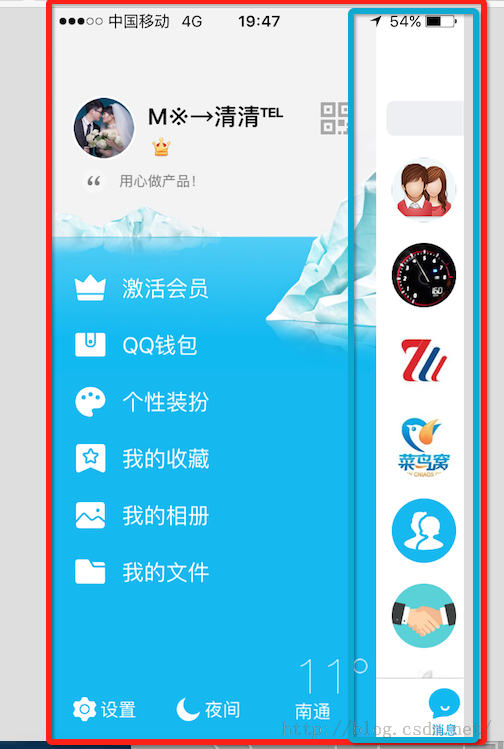
觀察上面我們可以理解為兩個View,一個是底部的相當於左側功能View,另外一個是上層主功能內容View,我們在上面進行拖拽上層View或者左右滑動的時候,上層和下層的View相應進行滑動以及View大小變化,同時加入相關的動畫。當然我們點擊上層的View可以進行打開或者關閉側滑菜單。
(四).側滑效果自定義組件實現
1.首先我們這邊集成自FrameLayout創建一個自定義View DragLayout。內部的定義的一些變量如下(主要包括一些配置類,手勢,ViewDragHelper實例,屏幕寬高,拖拽的子視圖View等)
//是否帶有陰影效果
private boolean isShowShadow = true;
//手勢處理類
private GestureDetectorCompat gestureDetector;
//視圖拖拽移動幫助類
private ViewDragHelper dragHelper;
//滑動監聽器
private DragListener dragListener;
//水平拖拽的距離
private int range;
//寬度
private int width;
//高度
private int height;
//main視圖距離在ViewGroup距離左邊的距離
private int mainLeft;
private Context context;
private ImageView iv_shadow;
//左側布局
private RelativeLayout vg_left;
//右側(主界面布局)
private CustomRelativeLayout vg_main;
然後在內部還定義了一個回調接口主要處理拖拽過程中的一些頁面打開,關閉以及滑動中的事件回調:
/**
* 滑動相關回調接口
*/
public interface DragListener {
//界面打開
public void onOpen();
//界面關閉
public void onClose();
//界面滑動過程中
public void onDrag(float percent);
}
2.開始創建ViewDragHelper實例,依然在自定義View DragLayout初始化的時候創建,使用ViewGragHelper的靜態方法:
public DragLayout(Context context,AttributeSet attrs, int defStyle) {
super(context, attrs, defStyle);
gestureDetector = new GestureDetectorCompat(context, new YScrollDetector());
dragHelper =ViewDragHelper.create(this, dragHelperCallback);
}
其中create()方法創建的時候傳入了一個dragHelperCallBack回調類,將會在第四點中講到。
3.接著需要重寫ViewGroup中事件方法,攔截觸摸事件給ViewGragHelper內部進行處理,這樣達到拖拽移動子View視圖的目的;
/**
* 攔截觸摸事件
* @param ev
* @return
*/
@Override
public boolean onInterceptTouchEvent(MotionEvent ev) {
return dragHelper.shouldInterceptTouchEvent(ev) &&gestureDetector.onTouchEvent(ev);
}
/**
* 將攔截的到事件給ViewDragHelper進行處理
* @param e
* @return
*/
@Override
public boolean onTouchEvent(MotionEvent e){
try {
dragHelper.processTouchEvent(e);
} catch (Exception ex) {
ex.printStackTrace();
}
return false;
}
這邊我們在onInterceptTouchEvent攔截讓事件從父控件往子View中轉移,然後在onTouchEvent方法中攔截讓ViewDragHelper進行消費處理。
4.開始自定義創建ViewDragHelper.Callback的實例dragHelperCallback分別實現一個抽象方法tryCaptureView以及重寫以下若干個方法來實現側滑功能,下面一個個來看一下。
/**
* 攔截所有的子View
* @param child Child the user is attempting to capture
* @param pointerId ID of the pointer attempting the capture
* @return
*/
@Override
public boolean tryCaptureView(Viewchild, int pointerId) {
return true;
}
該進行攔截ViewGroup(本例中為:DragLayout)中所有的子View,直接返回true,表示所有的子View都可以進行拖拽移動。
/**
* 水平方向移動
* @param child Child view beingdragged
* @param left Attempted motion alongthe X axis
* @param dx Proposed change inposition for left
* @return
*/
@Override
public int clampViewPositionHorizontal(View child, int left, int dx) {
if (mainLeft + dx < 0) {
return 0;
} else if (mainLeft + dx >range) {
return range;
} else {
return left;
}
}
實現該方法表示水平方向滑動,同時方法中會進行判斷邊界值,例如當上面的main view已經向左移動邊界之外了,直接返回0,表示向左最左邊只能x=0;然後向右移動會判斷向右最變得距離range,至於range的初始化後邊會講到。除了這兩種情況之外,就是直接返回left即可。
/**
* 設置水平方向滑動的最遠距離
*@param child Child view to check 屏幕寬度
* @return
*/
@Override
public int getViewHorizontalDragRange(View child) {
return width;
}
該方法有必要實現,因為該方法在Callback內部默認返回0,也就是說,如果的view的click事件為true,那麼會出現整個子View沒法拖拽移動的情況了。那麼這邊直接返回left view寬度了,表示水平方向滑動的最遠距離了。
/**
* 當拖拽的子View,手勢釋放的時候回調的方法, 然後根據左滑或者右滑的距離進行判斷打開或者關閉
* @param releasedChild
* @param xvel
* @param yvel
*/
@Override
public void onViewReleased(View releasedChild, float xvel, float yvel) {
super.onViewReleased(releasedChild,xvel, yvel);
if (xvel > 0) {
open();
} else if (xvel < 0) {
close();
} else if (releasedChild == vg_main&& mainLeft > range * 0.3) {
open();
} else if (releasedChild == vg_left&& mainLeft > range * 0.7) {
open();
} else {
close();
}
}
該方法在拖拽子View移動手指釋放的時候被調用,這是會判斷移動向左,向右的意圖,進行打開或者關閉man view(上層視圖)。下面是實現的最後一個方法:onViewPositionChanged
/**
* 子View被拖拽 移動的時候回調的方法
* @param changedView View whoseposition changed
* @param left New X coordinate of theleft edge of the view
* @param top New Y coordinate of thetop edge of the view
* @param dx Change in X position fromthe last call
* @param dy Change in Y position fromthe last call
*/
@Override
public void onViewPositionChanged(View changedView, int left, int top,
int dx, int dy) {
if (changedView == vg_main) {
mainLeft = left;
} else {
mainLeft = mainLeft + left;
}
if (mainLeft < 0) {
mainLeft = 0;
} else if (mainLeft > range) {
mainLeft = range;
}
if (isShowShadow) {
iv_shadow.layout(mainLeft, 0,mainLeft + width, height);
}
if (changedView == vg_left) {
vg_left.layout(0, 0, width,height);
vg_main.layout(mainLeft, 0,mainLeft + width, height);
}
dispatchDragEvent(mainLeft);
}
};
該方法是在我們進行拖拽移動子View的過程中進行回調,根據移動坐標位置,然後進行重新定義left view和main view。同時調用dispathDragEvent()方法進行拖拽事件相關處理分發同時根據狀態來回調接口:
/**
* 進行處理拖拽事件
* @param mainLeft
*/
private void dispatchDragEvent(int mainLeft) {
if (dragListener == null) {
return;
}
float percent = mainLeft / (float)range;
//根據滑動的距離的比例
animateView(percent);
//進行回調滑動的百分比
dragListener.onDrag(percent);
Status lastStatus = status;
if (lastStatus != getStatus()&& status == Status.Close) {
dragListener.onClose();
} else if (lastStatus != getStatus()&& status == Status.Open) {
dragListener.onOpen();
}
}
該方法中有一行代碼float percent=mainLeft/(float)range;算到一個百分比後面會用到
5.至於子View布局的獲取初始化以及寬高和水平滑動距離的大小設置方法:
/**
* 布局加載完成回調
* 做一些初始化的操作
*/
@Override
protected void onFinishInflate() {
super.onFinishInflate();
if (isShowShadow) {
iv_shadow = new ImageView(context);
iv_shadow.setImageResource(R.mipmap.shadow);
LayoutParams lp = new LayoutParams(LayoutParams.MATCH_PARENT, LayoutParams.MATCH_PARENT);
addView(iv_shadow, 1, lp);
}
//左側界面
vg_left = (RelativeLayout)getChildAt(0);
//右側(主)界面
vg_main = (CustomRelativeLayout)getChildAt(isShowShadow ? 2 : 1);
vg_main.setDragLayout(this);
vg_left.setClickable(true);
vg_main.setClickable(true);
}
以及控件大小發生變化回調的方法:
@Override
protected void onSizeChanged(int w, int h,int oldw, int oldh) {
super.onSizeChanged(w, h, oldw, oldh);
width = vg_left.getMeasuredWidth();
height = vg_left.getMeasuredHeight();
//可以水平拖拽滑動的距離 一共為屏幕寬度的80%
range = (int) (width *0.8f);
}
在該方法中我們可以實時獲取寬和高以及拖拽水平距離。
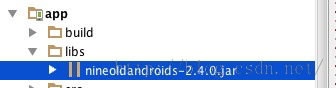
6.上面的所有核心代碼都為使用ViewDragHelper實現子控件View拖拽移動的方法,但是根據我們這邊側滑效果還需要實現動畫以及滑動過程中View的縮放效果,所以我們這邊引入了一個動畫開源庫:
然後根據前面算出來的百分比來縮放View視圖:
/**
* 根據滑動的距離的比例,進行平移動畫
* @param percent
*/
private void animateView(float percent) {
float f1 = 1 - percent * 0.5f;
ViewHelper.setTranslationX(vg_left,-vg_left.getWidth() / 2.5f + vg_left.getWidth() / 2.5f * percent);
if (isShowShadow) {
//陰影效果視圖大小進行縮放
ViewHelper.setScaleX(iv_shadow, f1* 1.2f * (1 - percent * 0.10f));
ViewHelper.setScaleY(iv_shadow, f1* 1.85f * (1 - percent * 0.10f));
}
}
7.當然除了上面這些還缺少一個效果就是,當我們滑動過程中假如我們手指釋放,按照常理來講view就不會在進行移動了,那麼這邊我們需要一個加速度當我們釋放之後,還能保持一定的速度,該怎麼樣實現呢?答案就是實現computeScroll()方法。
/**
* 有加速度,當我們停止滑動的時候,該不會立即停止動畫效果
*/
@Override
public void computeScroll() {
if (dragHelper.continueSettling(true)){
ViewCompat.postInvalidateOnAnimation(this);
}
}
OK上面關於DragLayout的核心代碼就差不多這麼多了,下面是使用DragLayout類來實現側滑效果啦!
(五).側滑效果組件使用
1.首先使用的布局文件如下:
<com.chinaztt.widget.DragLayout
xmlns:android="http://schemas.android.com/apk/res/android"
android:id="@+id/dl"
android:layout_width="match_parent"
android:layout_height="match_parent"
android:background="@android:color/transparent"
>
<!--下層 左邊的布局-->
<includelayoutincludelayout="@layout/left_view_layout"/>
<!--上層 右邊的主布局-->
<com.chinaztt.widget.CustomRelativeLayout
android:layout_width="match_parent"
android:layout_height="match_parent"
android:background="#FFFFFF"
>
<LinearLayout
android:layout_width="fill_parent"
android:layout_height="fill_parent"
android:orientation="vertical"
>
<RelativeLayout
android:id="@+id/rl_title"
android:layout_width="match_parent"
android:layout_height="49dp"
android:gravity="bottom"
android:background="@android:color/holo_orange_light"
>
<includelayoutincludelayout="@layout/common_top_bar_layout"/>
</RelativeLayout>
<!--中間內容後面放入Fragment-->
<FrameLayout
android:layout_width="fill_parent"
android:layout_height="fill_parent"
>
<fragment
android:id="@+id/main_info_fragment"
class="com.chinaztt.fragment.OneFragment"
android:layout_width="fill_parent"
android:layout_height="fill_parent"/>
</FrameLayout>
</LinearLayout>
</com.chinaztt.widget.CustomRelativeLayout>
</com.chinaztt.widget.DragLayout>
該布局文件中父層View就是DragLayout,然後內部有兩個RelativeLayout布局,分別充當下一層布局和上一層主布局。
2.下面我們來看一下下層菜單布局,這邊我專門寫了一個left_view_layout.xml文件,其中主要分為三塊,第一塊頂部為頭像個人基本信息布局,中間為功能入口列表,底部是設置等功能,具體布局代碼如下:
<RelativeLayout
xmlns:android="http://schemas.android.com/apk/res/android"
xmlns:app="http://schemas.android.com/apk/res-auto"
android:layout_width="match_parent"
android:layout_height="match_parent"
android:paddingTop="70dp"
android:background="@drawable/sidebar_bg"
>
<LinearLayout
android:id="@+id/ll1"
android:paddingLeft="30dp"
android:layout_width="fill_parent"
android:layout_height="wrap_content"
android:orientation="vertical">
<!--頭像,昵稱信息-->
<LinearLayout
android:layout_width="match_parent"
android:layout_height="70dp"
android:orientation="horizontal"
android:gravity="center_vertical"
>
<com.chinaztt.widget.RoundAngleImageView
android:id="@+id/iv_bottom"
android:layout_width="50dp"
android:layout_height="50dp"
android:scaleType="fitXY"
android:src="@drawable/icon_logo"
app:roundWidth="25dp"
app:roundHeight="25dp"/>
<LinearLayout
android:layout_width="fill_parent"
android:layout_height="wrap_content"
android:gravity="center_vertical"
android:layout_gravity="center_vertical"
android:orientation="vertical">
<RelativeLayout
android:layout_width="fill_parent"
android:layout_height="wrap_content"
>
<TextView
android:layout_width="wrap_content"
android:layout_height="wrap_content"
android:layout_centerVertical="true"
android:layout_marginLeft="15dp"
android:text="名字:jiangqqlmj"
android:textColor="@android:color/black"
android:textSize="15sp" />
<ImageButton
android:layout_alignParentRight="true"
android:layout_centerVertical="true"
android:layout_marginRight="100dp"
android:layout_width="22dp"
android:layout_height="22dp"
android:background="@drawable/qrcode_selector"/>
</RelativeLayout>
<TextView
android:layout_width="wrap_content"
android:layout_height="wrap_content"
android:layout_gravity="center_vertical"
android:layout_marginLeft="15dp"
android:text="QQ:781931404"
android:textColor="@android:color/black"
android:textSize="13sp" />
</LinearLayout>
</LinearLayout>
<LinearLayout
android:layout_width="fill_parent"
android:layout_height="wrap_content"
android:gravity="center_vertical"
android:orientation="horizontal">
<ImageView
android:layout_width="17dp"
android:layout_height="17dp"
android:scaleType="fitXY"
android:src="@drawable/sidebar_signature_nor"/>
<TextView
android:layout_marginLeft="5dp"
android:textSize="13sp"
android:textColor="#676767"
android:layout_width="fill_parent"
android:layout_height="wrap_content"
android:text="用心做產品!"/>
</LinearLayout>
</LinearLayout>
<!--底部功能條-->
<includelayoutincludelayout="@layout/left_view_bottom_layout"
android:id="@+id/bottom_view"
/>
<!--中間列表-->
<ListView
android:id="@+id/lv"
android:layout_width="match_parent"
android:layout_height="wrap_content"
android:layout_above="@id/bottom_view"
android:layout_below="@id/ll1"
android:layout_marginBottom="30dp"
android:layout_marginTop="70dp"
android:cacheColorHint="#00000000"
android:listSelector="@drawable/lv_click_selector"
android:divider="@null"
android:scrollbars="none"
android:textColor="#ffffff"/>
</RelativeLayout>
該布局還是比較簡單的,對於上層主內容布局這邊就放一個頂部導航欄和中的Fragment內容信息,留著後期大家功能擴展即可。
3.主Activity使用如下:
public class MainActivity extends BaseActivity {
private DragLayout dl;
private ListView lv;
private ImageView iv_icon, iv_bottom;
private QuickAdapter<ItemBean> quickAdapter;
@Override
protected void onCreate(Bundle savedInstanceState) {
super.onCreate(savedInstanceState);
setContentView(R.layout.activity_main);
setStatusBar();
initDragLayout();
initView();
}
private void initDragLayout() {
dl = (DragLayout) findViewById(R.id.dl);
dl.setDragListener(new DragLayout.DragListener() {
//界面打開的時候
@Override
public void onOpen() {
}
//界面關閉的時候
@Override
public void onClose() {
}
//界面滑動的時候
@Override
public void onDrag(float percent) {
ViewHelper.setAlpha(iv_icon, 1 - percent);
}
});
}
private void initView() {
iv_icon = (ImageView) findViewById(R.id.iv_icon);
iv_bottom = (ImageView) findViewById(R.id.iv_bottom);
lv = (ListView) findViewById(R.id.lv);
lv.setAdapter(quickAdapter=new QuickAdapter<ItemBean>(this,R.layout.item_left_layout, ItemDataUtils.getItemBeans()) {
@Override
protected void convert(BaseAdapterHelper helper, ItemBean item) {
helper.setImageResource(R.id.item_img,item.getImg())
.setText(R.id.item_tv,item.getTitle());
}
});
lv.setOnItemClickListener(new OnItemClickListener() {
@Override
public void onItemClick(AdapterView<?> arg0, View arg1,
int position, long arg3) {
Toast.makeText(MainActivity.this,"Click Item "+position,Toast.LENGTH_SHORT).show();
}
});
iv_icon.setOnClickListener(new OnClickListener() {
@Override
public void onClick(View arg0) {
dl.open();
}
});
}
}
初始化控件,設置滑動監聽器,以及左側菜單功能列表設置即可了,不過上面大家應該看了QuickAdapter的使用,該為BaseAdapterHelper框架使用,我們需要在項目build.gradle中作如下配置:
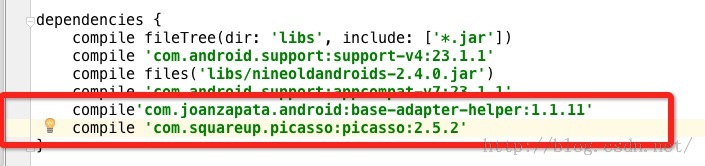
具體關於BaseAdapter的使用講解博客地址如下:
4.正式運行效果如下:
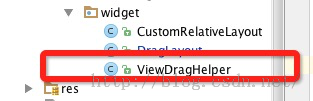
5.因為這邊底層需要ViewDragHelper類,所以大家在使用的時候需要導入V4包的,不過我這邊直接把ViewGragHelper類的源代碼復制到項目中了。
(六).DragLayout源代碼帶注釋
上面主要分析DragLayout的具體實現,不過我這邊也貼一下DragLayout帶有注釋的全部源代碼讓大家可以更好的了解DragLayout的具體實現代碼:
/**
*使用ViewRragHelper實現側滑效果功能
*/
publicclass DragLayout extends FrameLayout {
private boolean isShowShadow = true;
//手勢處理類
private GestureDetectorCompat gestureDetector;
//視圖拖拽移動幫助類
private ViewDragHelper dragHelper;
//滑動監聽器
private DragListener dragListener;
//水平拖拽的距離
private int range;
//寬度
private int width;
//高度
private int height;
//main視圖距離在ViewGroup距離左邊的距離
private int mainLeft;
private Context context;
private ImageView iv_shadow;
//左側布局
private RelativeLayout vg_left;
//右側(主界面布局)
private CustomRelativeLayout vg_main;
//頁面狀態 默認為關閉
private Status status = Status.Close;
public DragLayout(Context context) {
this(context, null);
}
public DragLayout(Context context,AttributeSet attrs) {
this(context, attrs, 0);
this.context = context;
}
public DragLayout(Context context,AttributeSet attrs, int defStyle) {
super(context, attrs, defStyle);
gestureDetector = new GestureDetectorCompat(context, new YScrollDetector());
dragHelper =ViewDragHelper.create(this, dragHelperCallback);
}
class YScrollDetector extends SimpleOnGestureListener {
@Override
public boolean onScroll(MotionEvent e1,MotionEvent e2, float dx, float dy) {
return Math.abs(dy) <=Math.abs(dx);
}
}
/**
* 實現子View的拖拽滑動,實現Callback當中相關的方法
*/
private ViewDragHelper.Callback dragHelperCallback = new ViewDragHelper.Callback() {
/**
* 水平方向移動
* @param child Child view beingdragged
* @param left Attempted motion alongthe X axis
* @param dx Proposed change inposition for left
* @return
*/
@Override
public int clampViewPositionHorizontal(View child, int left, int dx) {
if (mainLeft + dx < 0) {
return 0;
} else if (mainLeft + dx >range) {
return range;
} else {
return left;
}
}
/**
* 攔截所有的子View
* @param child Child the user isattempting to capture
* @param pointerId ID of the pointerattempting the capture
* @return
*/
@Override
public boolean tryCaptureView(View child, int pointerId) {
return true;
}
/**
* 設置水平方向滑動的最遠距離
*@param child Child view to check 屏幕寬度
* @return
*/
@Override
public int getViewHorizontalDragRange(View child) {
return width;
}
/**
* 當拖拽的子View,手勢釋放的時候回調的方法, 然後根據左滑或者右滑的距離進行判斷打開或者關閉
* @param releasedChild
* @param xvel
* @param yvel
*/
@Override
public void onViewReleased(View releasedChild, float xvel, float yvel) {
super.onViewReleased(releasedChild,xvel, yvel);
if (xvel > 0) {
open();
} else if (xvel < 0) {
close();
} else if (releasedChild == vg_main&& mainLeft > range * 0.3) {
open();
} else if (releasedChild == vg_left&& mainLeft > range * 0.7) {
open();
} else {
close();
}
}
/**
* 子View被拖拽 移動的時候回調的方法
* @param changedView View whoseposition changed
* @param left New X coordinate of theleft edge of the view
* @param top New Y coordinate of thetop edge of the view
* @param dx Change in X position fromthe last call
* @param dy Change in Y position fromthe last call
*/
@Override
public void onViewPositionChanged(View changedView, int left, int top,
int dx, int dy) {
if (changedView == vg_main) {
mainLeft = left;
} else {
mainLeft = mainLeft + left;
}
if (mainLeft < 0) {
mainLeft = 0;
} else if (mainLeft > range) {
mainLeft = range;
}
if (isShowShadow) {
iv_shadow.layout(mainLeft, 0,mainLeft + width, height);
}
if (changedView == vg_left) {
vg_left.layout(0, 0, width,height);
vg_main.layout(mainLeft, 0,mainLeft + width, height);
}
dispatchDragEvent(mainLeft);
}
};
/**
* 滑動相關回調接口
*/
public interface DragListener {
//界面打開
public void onOpen();
//界面關閉
public void onClose();
//界面滑動過程中
public void onDrag(float percent);
}
public void setDragListener(DragListener dragListener) {
this.dragListener = dragListener;
}
/**
* 布局加載完成回調
* 做一些初始化的操作
*/
@Override
protected void onFinishInflate() {
super.onFinishInflate();
if (isShowShadow) {
iv_shadow = new ImageView(context);
iv_shadow.setImageResource(R.mipmap.shadow);
LayoutParams lp = new LayoutParams(LayoutParams.MATCH_PARENT, LayoutParams.MATCH_PARENT);
addView(iv_shadow, 1, lp);
}
//左側界面
vg_left = (RelativeLayout)getChildAt(0);
//右側(主)界面
vg_main = (CustomRelativeLayout)getChildAt(isShowShadow ? 2 : 1);
vg_main.setDragLayout(this);
vg_left.setClickable(true);
vg_main.setClickable(true);
}
public ViewGroup getVg_main() {
return vg_main;
}
public ViewGroup getVg_left() {
return vg_left;
}
@Override
protected void onSizeChanged(int w, int h,int oldw, int oldh) {
super.onSizeChanged(w, h, oldw, oldh);
width = vg_left.getMeasuredWidth();
height = vg_left.getMeasuredHeight();
//可以水平拖拽滑動的距離 一共為屏幕寬度的80%
range = (int) (width * 0.8f);
}
/**
* 調用進行left和main 視圖進行位置布局
* @param changed
* @param left
* @param top
* @param right
* @param bottom
*/
@Override
protected void onLayout(boolean changed,int left, int top, int right, int bottom) {
vg_left.layout(0, 0, width, height);
vg_main.layout(mainLeft, 0, mainLeft +width, height);
}
/**
* 攔截觸摸事件
* @param ev
* @return
*/
@Override
public boolean onInterceptTouchEvent(MotionEvent ev) {
returndragHelper.shouldInterceptTouchEvent(ev) &&gestureDetector.onTouchEvent(ev);
}
/**
* 將攔截的到事件給ViewDragHelper進行處理
* @param e
* @return
*/
@Override
public boolean onTouchEvent(MotionEvent e){
try {
dragHelper.processTouchEvent(e);
} catch (Exception ex) {
ex.printStackTrace();
}
return false;
}
/**
* 進行處理拖拽事件
* @param mainLeft
*/
private void dispatchDragEvent(intmainLeft) {
if (dragListener == null) {
return;
}
float percent = mainLeft / (float)range;
//滑動動畫效果
animateView(percent);
//進行回調滑動的百分比
dragListener.onDrag(percent);
Status lastStatus = status;
if (lastStatus != getStatus()&& status == Status.Close) {
dragListener.onClose();
} else if (lastStatus != getStatus()&& status == Status.Open) {
dragListener.onOpen();
}
}
/**
* 根據滑動的距離的比例,進行平移動畫
* @param percent
*/
private void animateView(float percent) {
float f1 = 1 - percent * 0.5f;
ViewHelper.setTranslationX(vg_left,-vg_left.getWidth() / 2.5f + vg_left.getWidth() / 2.5f * percent);
if (isShowShadow) {
//陰影效果視圖大小進行縮放
ViewHelper.setScaleX(iv_shadow, f1* 1.2f * (1 - percent * 0.10f));
ViewHelper.setScaleY(iv_shadow, f1* 1.85f * (1 - percent * 0.10f));
}
}
/**
* 有加速度,當我們停止滑動的時候,該不會立即停止動畫效果
*/
@Override
public void computeScroll() {
if (dragHelper.continueSettling(true)){
ViewCompat.postInvalidateOnAnimation(this);
}
}
/**
* 頁面狀態(滑動,打開,關閉)
*/
public enum Status {
Drag, Open, Close
}
/**
* 頁面狀態設置
* @return
*/
public Status getStatus() {
if (mainLeft == 0) {
status = Status.Close;
} else if (mainLeft == range) {
status = Status.Open;
} else {
status = Status.Drag;
}
return status;
}
public void open() {
open(true);
}
public void open(boolean animate) {
if (animate) {
//繼續滑動
if(dragHelper.smoothSlideViewTo(vg_main, range, 0)) {
ViewCompat.postInvalidateOnAnimation(this);
}
} else {
vg_main.layout(range, 0, range * 2,height);
dispatchDragEvent(range);
}
}
public void close() {
close(true);
}
public void close(boolean animate) {
if (animate) {
//繼續滑動
if(dragHelper.smoothSlideViewTo(vg_main, 0, 0)) {
ViewCompat.postInvalidateOnAnimation(this);
}
} else {
vg_main.layout(0, 0, width,height);
dispatchDragEvent(0);
}
}
}
(七).最後總結
今天我們實現打造QQ最新版本QQ6.X效果,同時裡邊用到了ViewDragHelper,BaseAdapterHelper的運用,具體該知識點的使用方法,我已經在我的博客中更新講解的文章,歡迎大家查看。
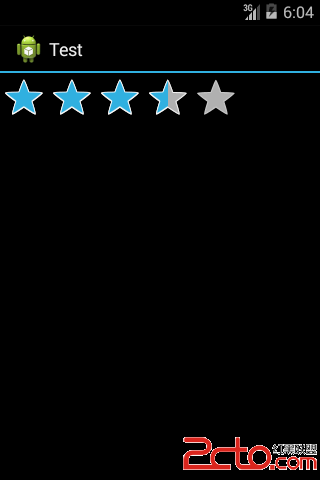 Android開發之RatingBar控件
RatingBar控件為用戶提供一個評分操作的模式。 控件的幾個常用方法:1.setMax()設置RatingBar星級滑塊的最大值.2.setNumStars
 Android變形(Transform)之Camera使用介紹
引言接Android變形(Transform)之Matrix,來總結下Camera的使用,Camera主要實現3D的變形,有轉動,旋轉等,Camera的源碼是由Nativ
 Android仿微信發表說說實現拍照、多圖上傳功能
本文實例為大家分享了Android仿微信發表說說、心情功能,供大家參考,具體內容如下既能實現拍照,選圖庫,多圖案上傳的案例,目前好多App都有類似微信朋友圈的功能,能過發
 Android使用GridView實現日歷功能示例(詳細代碼)
Android使用GridView實現日歷功能示例,代碼有點多,發個圖先:如果懶得往下看的,可以直接下載源碼吧,最近一直有人要,由於時間太久了,懶得找出來整理,今天又看到