編輯:關於Android編程
還是比較有新意,復雜度也不是非常高,所以就花時間整理一下,我們先一起看下原gif圖效果:

從效果上看,我們需要考慮以下幾個問題:
總的看起來,需要注意和麻煩的地方主要是以上幾點,當然還有一些細節問題,比如最左邊是圓弧等等;
那接下來我們將效果進行分解,然後逐個擊破:
整個效果來說,我們需要的圖主要是飛動的小葉子和右邊旋轉的風扇,其他的部分都可以用色值進行繪制,當然我們為了方便,就連底部框一起切了;
先從gif 圖裡把飛動的小葉子和右邊旋轉的風扇、底部框摳出來,小葉子圖如下:

我們需要處理的主要有兩個部分:
我們先處理第一部分 - 隨著進度往前繪制的進度條:
進度條的位置根據外層傳入的 progress 進行計算,可以分為圖中 1、2、3 三個階段:

首先根據進度條的寬度和當前進度、總進度算出當前的位置:
//mProgressWidth為進度條的寬度,根據當前進度算出進度條的位置
mCurrentProgressPosition = mProgressWidth * mProgress / TOTAL_PROGRESS;
然後按照上面的邏輯進行繪制,其中需要計算上圖中的紅色弧角角度,計算方法如下:
// 單邊角度
int angle = (int) Math.toDegrees(Math.acos((mArcRadius - mCurrentProgressPosition)/ (float) mArcRadius));
Math.acos() -反余弦函數;
Math.toDegrees() - 弧度轉化為角度,Math.toRadians 角度轉化為弧度
所以圓弧的起始點為:
int startAngle = 180 - angle;
圓弧劃過的角度為:
2 * angle
這一塊的代碼如下:
// mProgressWidth為進度條的寬度,根據當前進度算出進度條的位置
mCurrentProgressPosition = mProgressWidth * mProgress / TOTAL_PROGRESS;
// 即當前位置在圖中所示1范圍內
if (mCurrentProgressPosition < mArcRadius) {
  Log.i(TAG, "mProgress = " + mProgress + "---mCurrentProgressPosition = "
      + mCurrentProgressPosition
      + "--mArcProgressWidth" + mArcRadius);
  // 1.繪制白色ARC,繪制orange ARC
  // 2.繪制白色矩形

  // 1.繪制白色ARC
  canvas.drawArc(mArcRectF, 90, 180, false, mWhitePaint);

  // 2.繪制白色矩形
  mWhiteRectF.left = mArcRightLocation;
  canvas.drawRect(mWhiteRectF, mWhitePaint);

  // 3.繪制棕色 ARC
  // 單邊角度
  int angle = (int) Math.toDegrees(Math.acos((mArcRadius - mCurrentProgressPosition)
      / (float) mArcRadius));
  // 起始的位置
  int startAngle = 180 - angle;
  // 掃過的角度
  int sweepAngle = 2 * angle;
  Log.i(TAG, "startAngle = " + startAngle);
  canvas.drawArc(mArcRectF, startAngle, sweepAngle, false, mOrangePaint);
} else {
  Log.i(TAG, "mProgress = " + mProgress + "---transfer-----mCurrentProgressPosition = "
      + mCurrentProgressPosition
      + "--mArcProgressWidth" + mArcRadius);
  // 1.繪制white RECT
  // 2.繪制Orange ARC
  // 3.繪制orange RECT

  // 1.繪制white RECT
  mWhiteRectF.left = mCurrentProgressPosition;
  canvas.drawRect(mWhiteRectF, mWhitePaint);

  // 2.繪制Orange ARC
  canvas.drawArc(mArcRectF, 90, 180, false, mOrangePaint);
  // 3.繪制orange RECT
  mOrangeRectF.left = mArcRightLocation;
  mOrangeRectF.right = mCurrentProgressPosition;
  canvas.drawRect(mOrangeRectF, mOrangePaint);

}
接下來再來看葉子部分:
首先根據效果情況基本確定出 曲線函數,標准函數方程為:y = A(wx+Q)+h,其中w影響周期,A影響振幅 ,周期T= 2 * Math.PI/w;
根據效果可以看出,周期大致為總進度長度,所以確定w=(float) ((float) 2 * Math.PI /mProgressWidth);
仔細觀察效果,我們可以發現,葉子飄動的過程中振幅不是完全一致的,產生一種錯落的效果,既然如此,我們給葉子定義一個Type,根據Type 確定不同的振幅;
我們創建一個葉子對象:
private class Leaf {

   // 在繪制部分的位置
   float x, y;
   // 控制葉子飄動的幅度
   StartType type;
   // 旋轉角度
   int rotateAngle;
   // 旋轉方向--0代表順時針,1代表逆時針
   int rotateDirection;
   // 起始時間(ms)
   long startTime;
 }
類型采用枚舉進行定義,其實就是用來區分不同的振幅:
private enum StartType {
  LITTLE, MIDDLE, BIG
}
創建一個LeafFactory類用於創建一個或多個葉子信息:
private class LeafFactory {
  private static final int MAX_LEAFS = 6;
  Random random = new Random();

  // 生成一個葉子信息
  public Leaf generateLeaf() {
    Leaf leaf = new Leaf();
    int randomType = random.nextInt(3);
    // 隨時類型- 隨機振幅
    StartType type = StartType.MIDDLE;
    switch (randomType) {
      case 0:
        break;
      case 1:
        type = StartType.LITTLE;
        break;
      case 2:
        type = StartType.BIG;
        break;
      default:
        break;
    }
    leaf.type = type;
    // 隨機起始的旋轉角度
    leaf.rotateAngle = random.nextInt(360);
    // 隨機旋轉方向(順時針或逆時針)
    leaf.rotateDirection = random.nextInt(2);
    // 為了產生交錯的感覺,讓開始的時間有一定的隨機性
    mAddTime += random.nextInt((int) (LEAF_FLOAT_TIME * 1.5));
    leaf.startTime = System.currentTimeMillis() + mAddTime;
    return leaf;
  }

  // 根據最大葉子數產生葉子信息
  public List<Leaf> generateLeafs() {
    return generateLeafs(MAX_LEAFS);
  }

  // 根據傳入的葉子數量產生葉子信息
  public List<Leaf> generateLeafs(int leafSize) {
    List<Leaf> leafs = new LinkedList<Leaf>();
    for (int i = 0; i < leafSize; i++) {
      leafs.add(generateLeaf());
    }
    return leafs;
  }
}
定義兩個常亮分別記錄中等振幅和之間的振幅差:
// 中等振幅大小
private static final int MIDDLE_AMPLITUDE = 13;
// 不同類型之間的振幅差距
private static final int AMPLITUDE_DISPARITY = 5;
[html] view plain copy 在CODE上查看代碼片派生到我的代碼片
// 中等振幅大小
private int mMiddleAmplitude = MIDDLE_AMPLITUDE;
// 振幅差
private int mAmplitudeDisparity = AMPLITUDE_DISPARITY;
有了以上信息,我們則可以獲取到葉子的Y值:
// 通過葉子信息獲取當前葉子的Y值
private int getLocationY(Leaf leaf) {
  // y = A(wx+Q)+h
  float w = (float) ((float) 2 * Math.PI / mProgressWidth);
  float a = mMiddleAmplitude;
  switch (leaf.type) {
    case LITTLE:
      // 小振幅 = 中等振幅 - 振幅差
      a = mMiddleAmplitude - mAmplitudeDisparity;
      break;
    case MIDDLE:
      a = mMiddleAmplitude;
      break;
    case BIG:
      // 小振幅 = 中等振幅 + 振幅差
      a = mMiddleAmplitude + mAmplitudeDisparity;
      break;
    default:
      break;
  }
  Log.i(TAG, "---a = " + a + "---w = " + w + "--leaf.x = " + leaf.x);
  return (int) (a * Math.sin(w * leaf.x)) + mArcRadius * 2 / 3;
}
接下來,我們開始繪制葉子:
/**
 * 繪制葉子
 *
 * @param canvas
 */
private void drawLeafs(Canvas canvas) {
  long currentTime = System.currentTimeMillis();
  for (int i = 0; i < mLeafInfos.size(); i++) {
    Leaf leaf = mLeafInfos.get(i);
    if (currentTime > leaf.startTime && leaf.startTime != 0) {
      // 繪制葉子--根據葉子的類型和當前時間得出葉子的(x,y)
      getLeafLocation(leaf, currentTime);
      // 根據時間計算旋轉角度
      canvas.save();
      // 通過Matrix控制葉子旋轉
      Matrix matrix = new Matrix();
      float transX = mLeftMargin + leaf.x;
      float transY = mLeftMargin + leaf.y;
      Log.i(TAG, "left.x = " + leaf.x + "--leaf.y=" + leaf.y);
      matrix.postTranslate(transX, transY);
      // 通過時間關聯旋轉角度,則可以直接通過修改LEAF_ROTATE_TIME調節葉子旋轉快慢
      float rotateFraction = ((currentTime - leaf.startTime) % LEAF_ROTATE_TIME)
          / (float) LEAF_ROTATE_TIME;
      int angle = (int) (rotateFraction * 360);
      // 根據葉子旋轉方向確定葉子旋轉角度
      int rotate = leaf.rotateDirection == 0 ? angle + leaf.rotateAngle : -angle
          + leaf.rotateAngle;
      matrix.postRotate(rotate, transX
          + mLeafWidth / 2, transY + mLeafHeight / 2);
      canvas.drawBitmap(mLeafBitmap, matrix, mBitmapPaint);
      canvas.restore();
    } else {
      continue;
    }
  }
}
最後,向外層暴露幾個接口:
/**
 * 設置中等振幅
 *
 * @param amplitude
 */
public void setMiddleAmplitude(int amplitude) {
  this.mMiddleAmplitude = amplitude;
}

/**
 * 設置振幅差
 *
 * @param disparity
 */
public void setMplitudeDisparity(int disparity) {
  this.mAmplitudeDisparity = disparity;
}

/**
 * 獲取中等振幅
 *
 * @param amplitude
 */
public int getMiddleAmplitude() {
  return mMiddleAmplitude;
}

/**
 * 獲取振幅差
 *
 * @param disparity
 */
public int getMplitudeDisparity() {
  return mAmplitudeDisparity;
}

/**
 * 設置進度
 *
 * @param progress
 */
public void setProgress(int progress) {
  this.mProgress = progress;
  postInvalidate();
}

/**
 * 設置葉子飄完一個周期所花的時間
 *
 * @param time
 */
public void setLeafFloatTime(long time) {
  this.mLeafFloatTime = time;
}

/**
 * 設置葉子旋轉一周所花的時間
 *
 * @param time
 */
public void setLeafRotateTime(long time) {
  this.mLeafRotateTime = time;
這些接口用來干嘛呢?用於把我們的動效做成完全可手動調節的,這樣做有什麼好處呢?
1. 更加便於產品、射雞濕查看效果,避免YY,自己手動調節,不會出現要你一遍遍的改參數安裝、查看、再改、再查看... ... N遍之後說 “這好像不是我想要的” -- 瞬間天崩地裂,天昏地暗,感覺被全世界拋棄;
2. 便於體現你是一個考慮全面,思維缜密,會編程、會設計的藝術家,當然這純屬YY,主要還是方便大家;
如此一來,射雞濕們只需要不斷的調節即可實時的看到展現的效果,最後只需要把最終的參數反饋過來即可,萬事大吉,一了百了;
當然,如果對方是個漂亮的妹子,而你又苦於沒有機會搭讪,以上內容就當我沒說,盡情的不按要求寫吧,她肯定會主動找你的,說不定連飯都反過來請了... ...
好啦,言歸正傳,完成收尾部分,我們讓所有的參數都可調節起來:
把剩下的layout 和activity貼出來:
activity:
public class LeafLoadingActivity extends Activity implements OnSeekBarChangeListener,
    OnClickListener {

  Handler mHandler = new Handler() {
    public void handleMessage(Message msg) {
      switch (msg.what) {
        case REFRESH_PROGRESS:
          if (mProgress < 40) {
            mProgress += 1;
            // 隨機800ms以內刷新一次
            mHandler.sendEmptyMessageDelayed(REFRESH_PROGRESS,
                new Random().nextInt(800));
            mLeafLoadingView.setProgress(mProgress);
          } else {
            mProgress += 1;
            // 隨機1200ms以內刷新一次
            mHandler.sendEmptyMessageDelayed(REFRESH_PROGRESS,
                new Random().nextInt(1200));
            mLeafLoadingView.setProgress(mProgress);

          }
          break;

        default:
          break;
      }
    };
  };

  private static final int REFRESH_PROGRESS = 0x10;
  private LeafLoadingView mLeafLoadingView;
  private SeekBar mAmpireSeekBar;
  private SeekBar mDistanceSeekBar;
  private TextView mMplitudeText;
  private TextView mDisparityText;
  private View mFanView;
  private Button mClearButton;
  private int mProgress = 0;

  private TextView mProgressText;
  private View mAddProgress;
  private SeekBar mFloatTimeSeekBar;

  private SeekBar mRotateTimeSeekBar;
  private TextView mFloatTimeText;
  private TextView mRotateTimeText;

  @Override
  protected void onCreate(Bundle savedInstanceState) {
    super.onCreate(savedInstanceState);
    setContentView(R.layout.leaf_loading_layout);
    initViews();
    mHandler.sendEmptyMessageDelayed(REFRESH_PROGRESS, 3000);
  }

  private void initViews() {
    mFanView = findViewById(R.id.fan_pic);
    RotateAnimation rotateAnimation = DXAnimationUtils.initRotateAnimation(false, 1500, true,
        Animation.INFINITE);
    mFanView.startAnimation(rotateAnimation);
    mClearButton = (Button) findViewById(R.id.clear_progress);
    mClearButton.setOnClickListener(this);

    mLeafLoadingView = (LeafLoadingView) findViewById(R.id.leaf_loading);
    mMplitudeText = (TextView) findViewById(R.id.text_ampair);
    mMplitudeText.setText(getString(R.string.current_mplitude,
        mLeafLoadingView.getMiddleAmplitude()));

    mDisparityText = (TextView) findViewById(R.id.text_disparity);
    mDisparityText.setText(getString(R.string.current_Disparity,
        mLeafLoadingView.getMplitudeDisparity()));

    mAmpireSeekBar = (SeekBar) findViewById(R.id.seekBar_ampair);
    mAmpireSeekBar.setOnSeekBarChangeListener(this);
    mAmpireSeekBar.setProgress(mLeafLoadingView.getMiddleAmplitude());
    mAmpireSeekBar.setMax(50);

    mDistanceSeekBar = (SeekBar) findViewById(R.id.seekBar_distance);
    mDistanceSeekBar.setOnSeekBarChangeListener(this);
    mDistanceSeekBar.setProgress(mLeafLoadingView.getMplitudeDisparity());
    mDistanceSeekBar.setMax(20);

    mAddProgress = findViewById(R.id.add_progress);
    mAddProgress.setOnClickListener(this);
    mProgressText = (TextView) findViewById(R.id.text_progress);

    mFloatTimeText = (TextView) findViewById(R.id.text_float_time);
    mFloatTimeSeekBar = (SeekBar) findViewById(R.id.seekBar_float_time);
    mFloatTimeSeekBar.setOnSeekBarChangeListener(this);
    mFloatTimeSeekBar.setMax(5000);
    mFloatTimeSeekBar.setProgress((int) mLeafLoadingView.getLeafFloatTime());
    mFloatTimeText.setText(getResources().getString(R.string.current_float_time,
        mLeafLoadingView.getLeafFloatTime()));

    mRotateTimeText = (TextView) findViewById(R.id.text_rotate_time);
    mRotateTimeSeekBar = (SeekBar) findViewById(R.id.seekBar_rotate_time);
    mRotateTimeSeekBar.setOnSeekBarChangeListener(this);
    mRotateTimeSeekBar.setMax(5000);
    mRotateTimeSeekBar.setProgress((int) mLeafLoadingView.getLeafRotateTime());
    mRotateTimeText.setText(getResources().getString(R.string.current_float_time,
        mLeafLoadingView.getLeafRotateTime()));
  }

  @Override
  public void onProgressChanged(SeekBar seekBar, int progress, boolean fromUser) {
    if (seekBar == mAmpireSeekBar) {
      mLeafLoadingView.setMiddleAmplitude(progress);
      mMplitudeText.setText(getString(R.string.current_mplitude,
          progress));
    } else if (seekBar == mDistanceSeekBar) {
      mLeafLoadingView.setMplitudeDisparity(progress);
      mDisparityText.setText(getString(R.string.current_Disparity,
          progress));
    } else if (seekBar == mFloatTimeSeekBar) {
      mLeafLoadingView.setLeafFloatTime(progress);
      mFloatTimeText.setText(getResources().getString(R.string.current_float_time,
          progress));
    }
    else if (seekBar == mRotateTimeSeekBar) {
      mLeafLoadingView.setLeafRotateTime(progress);
      mRotateTimeText.setText(getResources().getString(R.string.current_rotate_time,
          progress));
    }

  }

  @Override
  public void onStartTrackingTouch(SeekBar seekBar) {

  }

  @Override
  public void onStopTrackingTouch(SeekBar seekBar) {

  }

  @Override
  public void onClick(View v) {
    if (v == mClearButton) {
      mLeafLoadingView.setProgress(0);
      mHandler.removeCallbacksAndMessages(null);
      mProgress = 0;
    } else if (v == mAddProgress) {
      mProgress++;
      mLeafLoadingView.setProgress(mProgress);
      mProgressText.setText(String.valueOf(mProgress));
    }
  }
}
layout:
<?xml version="1.0" encoding="utf-8"?>
<LinearLayout xmlns:android="http://schemas.android.com/apk/res/android"
  android:layout_width="match_parent"
  android:layout_height="match_parent"
  android:background="#fed255"
  android:orientation="vertical" >

  <TextView
    android:layout_width="wrap_content"
    android:layout_height="wrap_content"
    android:layout_gravity="center_horizontal"
    android:layout_marginTop="100dp"
    android:text="loading ..."
    android:textColor="#FFA800"
    android:textSize=" 30dp" />

  <RelativeLayout
    android:id="@+id/leaf_content"
    android:layout_width="match_parent"
    android:layout_height="wrap_content"
    android:layout_marginTop="50dp" >

    <com.baidu.batterysaverDemo.ui.LeafLoadingView
      android:id="@+id/leaf_loading"
      android:layout_width="302dp"
      android:layout_height="61dp"
      android:layout_centerHorizontal="true" />

    <ImageView
      android:id="@+id/fan_pic"
      android:layout_width="wrap_content"
      android:layout_height="wrap_content"
      android:layout_alignParentRight="true"
      android:layout_centerVertical="true"
      android:layout_marginRight="35dp"
      android:src="@drawable/fengshan" />
  </RelativeLayout>

  <ScrollView
    android:layout_width="match_parent"
    android:layout_height="match_parent" >

    <LinearLayout
      android:layout_width="match_parent"
      android:layout_height="match_parent"
      android:orientation="vertical" >

      <LinearLayout
        android:id="@+id/seek_content_one"
        android:layout_width="match_parent"
        android:layout_height="wrap_content"
        android:layout_marginLeft="15dp"
        android:layout_marginRight="15dp"
        android:layout_marginTop="15dp" >

        <TextView
          android:id="@+id/text_ampair"
          android:layout_width="wrap_content"
          android:layout_height="wrap_content"
          android:layout_gravity="center_vertical"
          android:textColor="#ffffa800"
          android:textSize="15dp" />

        <SeekBar
          android:id="@+id/seekBar_ampair"
          android:layout_width="0dp"
          android:layout_height="wrap_content"
          android:layout_marginLeft="5dp"
          android:layout_weight="1" />
      </LinearLayout>

      <LinearLayout
        android:layout_width="match_parent"
        android:layout_height="wrap_content"
        android:layout_marginLeft="15dp"
        android:layout_marginRight="15dp"
        android:layout_marginTop="15dp"
        android:orientation="horizontal" >

        <TextView
          android:id="@+id/text_disparity"
          android:layout_width="wrap_content"
          android:layout_height="wrap_content"
          android:layout_gravity="center_vertical"
          android:textColor="#ffffa800"
          android:textSize="15dp" />

        <SeekBar
          android:id="@+id/seekBar_distance"
          android:layout_width="0dp"
          android:layout_height="wrap_content"
          android:layout_marginLeft="5dp"
          android:layout_weight="1" />
      </LinearLayout>

      <LinearLayout
        android:layout_width="match_parent"
        android:layout_height="wrap_content"
        android:layout_marginLeft="15dp"
        android:layout_marginRight="15dp"
        android:layout_marginTop="15dp"
        android:orientation="horizontal" >

        <TextView
          android:id="@+id/text_float_time"
          android:layout_width="wrap_content"
          android:layout_height="wrap_content"
          android:layout_gravity="center_vertical"
          android:textColor="#ffffa800"
          android:textSize="15dp" />

        <SeekBar
          android:id="@+id/seekBar_float_time"
          android:layout_width="0dp"
          android:layout_height="wrap_content"
          android:layout_marginLeft="5dp"
          android:layout_weight="1" />
      </LinearLayout>

      <LinearLayout
        android:layout_width="match_parent"
        android:layout_height="wrap_content"
        android:layout_marginLeft="15dp"
        android:layout_marginRight="15dp"
        android:layout_marginTop="15dp"
        android:orientation="horizontal" >

        <TextView
          android:id="@+id/text_rotate_time"
          android:layout_width="wrap_content"
          android:layout_height="wrap_content"
          android:layout_gravity="center_vertical"
          android:textColor="#ffffa800"
          android:textSize="15dp" />

        <SeekBar
          android:id="@+id/seekBar_rotate_time"
          android:layout_width="0dp"
          android:layout_height="wrap_content"
          android:layout_marginLeft="5dp"
          android:layout_weight="1" />
      </LinearLayout>

      <Button
        android:id="@+id/clear_progress"
        android:layout_width="match_parent"
        android:layout_height="wrap_content"
        android:layout_marginTop="15dp"
        android:text="去除進度條,玩轉弧線"
        android:textSize="18dp" />

      <LinearLayout
        android:layout_width="match_parent"
        android:layout_height="wrap_content"
        android:layout_marginLeft="15dp"
        android:layout_marginRight="15dp"
        android:layout_marginTop="15dp"
        android:orientation="horizontal" >

        <Button
          android:id="@+id/add_progress"
          android:layout_width="wrap_content"
          android:layout_height="wrap_content"
          android:text="增加進度: "
          android:textSize="18dp" />

        <TextView
          android:id="@+id/text_progress"
          android:layout_width="wrap_content"
          android:layout_height="wrap_content"
          android:layout_gravity="center_vertical"
          android:textColor="#ffffa800"
          android:textSize="15dp" />
      </LinearLayout>
    </LinearLayout>
  </ScrollView>

</LinearLayout>
最終效果如下,本來錄了20+s,但是PS只能轉5s,所以有興趣的大家自己運行的玩吧:

以上就是本文的全部內容,希望對大家的學習有所幫助。
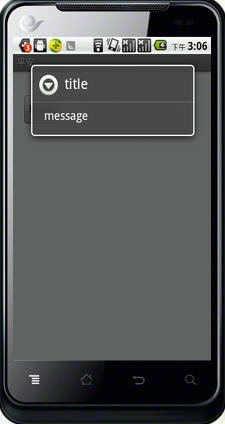 android 對話框彈出位置和透明度的設置具體實現方法
例如,屏幕的上方或下方。要實現這種效果。就需要獲得對話框的Window對象,獲得這個Window對象有多種方法。最容易的就是直接通過AlertDialog類的getWin
 Android 利用ViewPager實現底部圓點導航左右滑動效果以及Fragment頁面切換
上一篇博文我們介紹了利用ViewPager和Fragment實現頂部滑塊左右滑動效果,具體參考(http://blog.csdn.net/a123demi/article
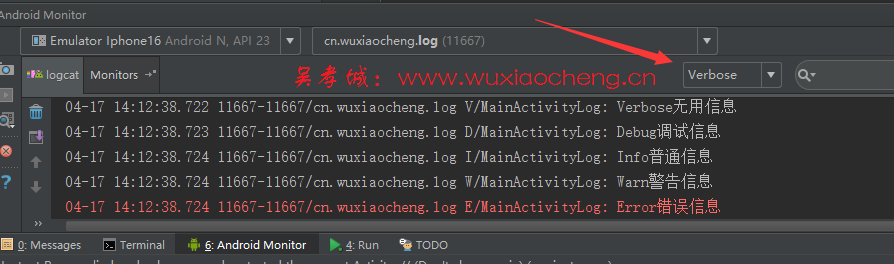
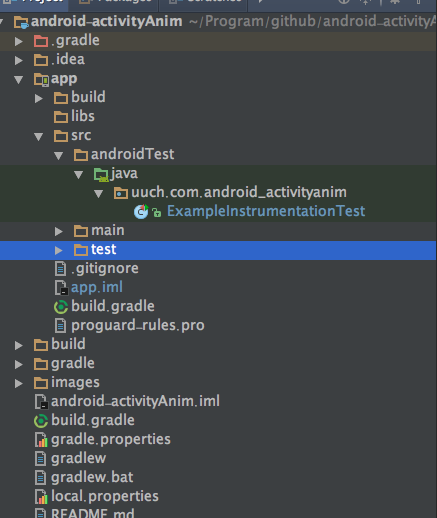 android產品研發(十九)--)android studio中的單元測試
上一篇文章中我們講解了webview中問題集錦,講解了webview的性能優化、webview種入Cookie信息、activity退出的時候清除webview信息報錯、
 Ionic2創建App啟動頁左右滑動歡迎界面
摘要:每個有逼格的App在第一次啟動時都有一個歡迎界面,通常是幾個單頁面或者帶動畫的單頁面滑動到最後一頁有個啟動的按鈕,本文將使用Ionic2來創建,So easy!效果