編輯:關於Android編程
本文實例講述了Android編程設置提醒事件的方法。分享給大家供大家參考,具體如下:
1、啟動service
Intent intent = new Intent(this,AutoTaskService.class);
intent.putExtra("reminder_event", reminderModel);
startService(intent);
2、service file
public class AutoTaskService extends Service {
  private ReminderModel mReminderModel = null;
  @Override
  public IBinder onBind(Intent intent) {
    return null;
  }
  @Override
  public void onCreate() {
    super.onCreate();
  }
  @Override
  public void onDestroy() {
    super.onDestroy();
  }
  @Override
  public void onStart(Intent intent, int startId) {
    if(intent == null)
      return;
    if(intent.hasExtra("reminder_event")) {
      mReminderModel = (ReminderModel) intent.getSerializableExtra("reminder_event");
    }
    setReminderEvent();
    super.onStart(intent, startId);
  }
  /**
   * set reminder event
   */
  private void setReminderEvent() {
    if(mReminderModel == null)
      return;
    if(TextUtils.isEmpty(mReminderModel.reminderStartTime))
      return;
    if(TextUtils.isEmpty(mReminderModel.reminderTime))
      return;
    Calendar cal = getCalendarFromDate(mReminderModel.reminderStartTime);
    String[] array = mReminderModel.reminderTime.split("-");
    for(int i = 0; i < array.length; i++) {
      if(i == 0) {
        cal.set(Calendar.HOUR_OF_DAY, Integer.parseInt(array[0]));
      } else if (i == 1) {
        cal.set(Calendar.MINUTE, Integer.parseInt(array[1]));
      }
    }
    cal.set(Calendar.SECOND, 0);
    Intent intent = new Intent(AutoTaskService.this, AlarmReceiver.class);
    if(!TextUtils.isEmpty(mReminderModel.reminderPath)) {
      intent.putExtra("reminder_pic_path", mReminderModel.reminderPath);
    }
    PendingIntent pi = PendingIntent.getBroadcast(this, 0, intent, PendingIntent.FLAG_CANCEL_CURRENT);
   // 獲取AlarmManager對象
    AlarmManager am = (AlarmManager) getSystemService(ALARM_SERVICE);
   // AlarmManager.RTC_WAKEUP休眠時會運行,如果是AlarmManager.RTC,在休眠時不會運行
    am.set(AlarmManager.RTC_WAKEUP, cal.getTimeInMillis(), pi);
  }
  /**
   * @param date format is 2012-9-18
   * @return Calendar value is after set date's value
   */
  private Calendar getCalendarFromDate(final String date) {
    int year = 0;
    int month = 0;
    int day = 0;
    try {
      String[] array = date.split("-");
      int[] arrayInt = new int[array.length];
      for (int i = 0; i < array.length; i++) {
        arrayInt[i] = Integer.parseInt(array[i]);
        if(i == 0) {
          year = arrayInt[0];
        } else if(i == 1){
          month = arrayInt[1];
        } else if(i == 2){
          day = arrayInt[2];
        }
      }
    } catch (Exception e) {
      e.printStackTrace();
    }
    Calendar cal = Calendar.getInstance();
    if(year > 0 && month >= 0 && day >= 0) {
      cal.set(year, month - 1, day);
    }
    return cal;
  }
}
3、定時接收器
public class AlarmReceiver extends BroadcastReceiver {
  @Override
  public void onReceive(Context context, Intent intent) {
    String path = null;
    if(intent.hasExtra("reminder_pic_path")) {
      path = intent.getStringExtra("reminder_pic_path");
    }
    Log.i("======> AlarmReceiver", path);
    // 啟動通知activity
    Intent it = new Intent(context, FingerPaint.class);
    it.addFlags(Intent.FLAG_ACTIVITY_NEW_TASK);
    if(!TextUtils.isEmpty(path)) {
      it.putExtra("reminder_pic_path", path);
    }
    context.startActivity(it);
  }
}
希望本文所述對大家Android程序設計有所幫助。
 android-----基於XUtils照片上傳客戶端以及服務器端實現
想必大家都在android中或多或少的使用過XUtils框架了吧,今天我們通過他來實現一個照片上傳的Demo,希望能夠對大家有幫助,下一篇再從源碼角度來分析下XUtils
 Android Studio 2.2之布局編輯器
通過布局編輯器創建UI在你Android Studio的布局編輯器中,你可以快速地通過將控件拖入視覺編輯器來代替手寫XML來快速地創建布局。編輯器可以預覽布局在不同版本和
 Android實現底部導航欄功能(選項卡)
現在很多android的應用都采用底部導航欄的功能,這樣可以使得用戶在使用過程中隨意切換不同的頁面,現在我采用TabHost組件來自定義一個底部的導航欄的功能。我們先看下
 Android筆記之:App應用之啟動界面SplashActivity的使用
當前比較成熟一點的應用基本上都會在進入應用之顯示一個啟動界面.這個啟動界面或簡單,或復雜,或簡陋,或華麗,用意不同,風格也不同.下面來觀摩幾個流行的應用的啟動界面.1.
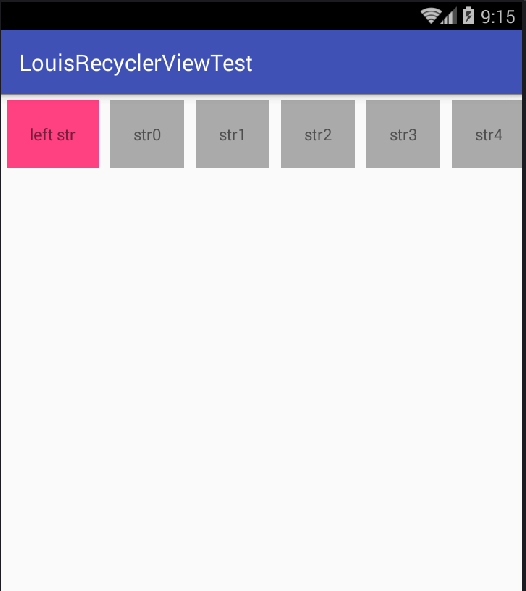 RecyclerView 添加head view頭部 和foot view尾部、設置水平horizontal時左側布局和右側布局
折騰一下午,遇到若干問題:如,設置水平HORIZONTAL時,占用多個跨