編輯:關於Android編程
本文實例講述了Android使用GPS獲取用戶地理位置並監聽位置變化的方法。分享給大家供大家參考,具體如下:
LocationActivity.java
/* LocationActivity.java
 * @author octobershiner
 * 2011 7 22
 * SE.HIT
 * 一個演示定位用戶的位置並且監聽位置變化的代碼
 * */
package uni.location;
import android.app.Activity;
import android.content.Context;
import android.location.Location;
import android.location.LocationListener;
import android.location.LocationManager;
import android.os.Bundle;
import android.os.Vibrator;
import android.util.Log;
import android.widget.TextView;
public class LocationActivity extends Activity {
 /** Called when the activity is first created. */
 //創建lcoationManager對象
 private LocationManager manager;
 private static final String TAG = "LOCATION DEMO";
 @Override
 public void onCreate(Bundle savedInstanceState) {
  super.onCreate(savedInstanceState);
  setContentView(R.layout.main);
  //獲取系統的服務,
  manager = (LocationManager)getSystemService(Context.LOCATION_SERVICE);
  Location location = manager.getLastKnownLocation(LocationManager.GPS_PROVIDER);
  //第一次獲得設備的位置
  updateLocation(location);
  //重要函數,監聽數據測試
  manager.requestLocationUpdates(LocationManager.GPS_PROVIDER, 6000, 10,
   locationListener);
 }
 /*此處更新一下,當activity不處於活動狀態時取消GPS的監聽*/
  public void onPause(){
  super.onPause();
  locationManager.removeListener(locationListener);
 }
 //創建一個事件監聽器
 private final LocationListener locationListener = new LocationListener() {
   public void onLocationChanged(Location location) {
   updateLocation(location);
   }
   public void onProviderDisabled(String provider){
    updateLocation(null);
    Log.i(TAG, "Provider now is disabled..");
   }
   public void onProviderEnabled(String provider){
    Log.i(TAG, "Provider now is enabled..");
   }
   public void onStatusChanged(String provider, int status,Bundle extras){ }
 };
//獲取用戶位置的函數,利用Log顯示
 private void updateLocation(Location location) {
   String latLng;
   if (location != null) {
   double lat = location.getLatitude();
   double lng = location.getLongitude();
   latLng = "Latitude:" + lat + " Longitude:" + lng;
   } else {
   latLng = "Can't access your location";
   }
   Log.i(TAG, "The location has changed..");
   Log.i(TAG, "Your Location:" +latLng);
 }
}
只修改activity文件是不夠的,因為android系統的安全性,對服務采用授權的機制,所以需要修改manifest.xml文件
<?xml version="1.0" encoding="utf-8"?>
<manifest xmlns:android="http://schemas.android.com/apk/res/android"
  package="uni.location"
  android:versionCode="1"
  android:versionName="1.0">
 <uses-sdk android:minSdkVersion="8" />
 <application android:icon="@drawable/icon" android:label="@string/app_name">
  <activity android:name=".LocationActivity"
     android:label="@string/app_name">
   <intent-filter>
    <action android:name="android.intent.action.MAIN" />
    <category android:name="android.intent.category.LAUNCHER" />
   </intent-filter>
  </activity>
 </application>
  <uses-permission android:name="android.permission.ACCESS_FINE_LOCATION" />
</manifest>
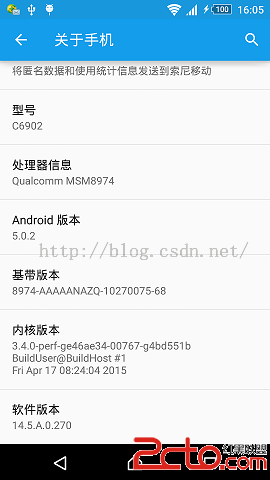
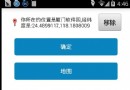
很多朋友可能會有疑問,那就是GPS定位在android虛擬機上的調試問題,其實是可以模擬的,大家啟動虛擬機,然後打開DDMS的界面,左側device欄目會動態顯示虛擬機上各項服務啟動的情況,待出虛擬機現解鎖界面後,單機device欄目下面的emulator行,這時會發現下面的emulator control下面會有 location control ,打開裡面的manual標簽,哈哈相信你已經看到了經緯度,你可以更改。運行你的程序,然後單擊剛才經緯度設置的send按鈕就可以模擬接受到新的地理位置了。

在這個demo中 我用到了Log顯示狀態,推薦使用這種方法,很好用,想了解的朋友可以參考一下我的另一篇文章,學會巧妙的使用Log,跟推薦大家搜一下sundyzlh的教學視頻。
關於LOG的使用可參考上一篇《Android編程之基於Log演示一個activity生命周期實例詳解》
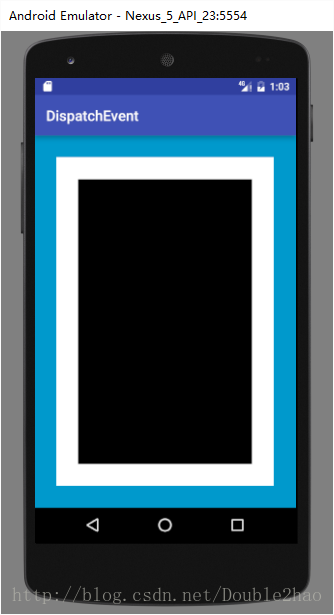
最終效果如下圖所示:

希望本文所述對大家Android程序設計有所幫助。
 Android 5.0中的CoordinatorLayout使用技巧
CoordinatorLayout 實現了多種Material Design中提到的滾動效果。目前這個框架提供了幾種不用寫動畫代碼就能工作的方法,這些效果包括:*讓浮動操
 android取得所在位置的經緯度
android提供了LocationManager來取得位置,用LocationListener來監聽位置的變化 先做一些初始化工作: /** latitude and
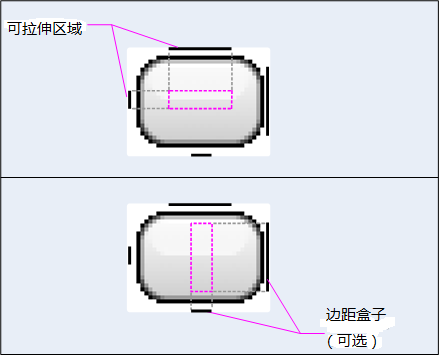 基於App自適應draw9patch不失真背景的方法詳解
這篇文章是android開發人員的必備知識,是我特別為大家整理和總結的,不求完美,但是有用。1.背景自適應且不失真問題的存在 制作自適應背景圖片是UI開發的一個廣泛問題
 android的UI中經常出現的菊花圈(圓形的加載圈)
夜深也是無聊,翻看以前的老代碼,發現那個我們經常用的菊花圈,原來是幀動畫做的,有點意思。突然感覺幀動畫做的東西效果不錯啊,至少看起來聽耐看的。開工上代碼: 先是布局文件: