編輯:關於Android編程
今天在項目中發現我們有一個小細節以前運行好好的視覺效果現在不對了,應該說有一段時間不對了,只是沒有關注這一個小細節,剛好今天改代碼碰到他,就探究了一下,順便把解決方案給記錄一下。
這裡我們來還原一下整個過程,我們就寫一個類似的效果來復現一下整個過程,看看到底是什麼原因。
我有如下一個TextView的布局:
這裡就一個TextView, 內容就直接寫在這裡了,設置的textColor為white,這裡white的定義如下: #ffffff。
之後我們在項目中開始運行,TextView有一個點擊事件,點擊後響應一些邏輯,但是當處於某一個時機的時候TextView的狀態是disable的,不能被點擊的,這時TextView操作如下:
textView.setEnabled(false);
textView.setText("不能操作");
這裡設置了TextView為disable,並且設置了一個文案,這裡就硬編碼了,主要是為了看效果!
坑爹的事情就此發生,運行後文案從白色變成了黑色。這就奇怪了,我並沒有設置這個disable的顏色,那這個黑色是從哪兒來的?
當即我又重新創建了一demo,完全的復現了上面的整個邏輯,但是這次效果是正確的?wtf???
當時就懵逼了,看了看源代碼,但是只看了後面創建的源碼? 發現並沒有什麼問題,又在想是我兩邊設置的主題不一致?兩邊設置為一樣的主題後,發現問題還是存在,這就奇怪了。兩邊代碼基本一致,但是效果截然不同。
後來我就想看看不同的主題是否會影響文字顏色,之後我又重新改變了第一工程的主題,發現disable顏色改變了,從白色變成了灰色,這裡可以得出一個結論,主題會影響TextView的disable狀態的顏色,但是具體是怎麼影響的吶?我查看了整個主題關於TextView的屬性,並沒有設置disable狀態的顏色。我就改變了第二個主題的顏色,但是第二個工程改變了主題顏色還是不會變。你他媽在逗我???
看來此路不通,只好又回到第一步,來比較兩個工程,除了代碼不一致,其他還有什麼地方不一樣?後來還真發現有不一致的地方,發現兩邊的所使用的兼容包版本不一致,出問題的使用的 compile ‘com.android.support:appcompat-v7:23.0.0’, 而正確的使用的是 compile ‘com.android.support:appcompat-v7:23.1.1’,那這裡就可以明確的認為兼容包裡做了不同的操作:
那這裡我就來分別看看不同版本裡面的代碼到底做了啥處理。
兼容包裡的代碼,TextView最終都會走到AppCompatTextView,那我們來看看代碼:
public class AppCompatTextView extends TextView {

    private AppCompatTextHelper mTextHelper;

    public AppCompatTextView(Context context) {
        this(context, null);
    }

    public AppCompatTextView(Context context, AttributeSet attrs) {
        this(context, attrs, android.R.attr.textViewStyle);
    }

    public AppCompatTextView(Context context, AttributeSet attrs, int defStyleAttr) {
        super(context, attrs, defStyleAttr);

        mTextHelper = new AppCompatTextHelper(this);
        mTextHelper.loadFromAttributes(attrs, defStyleAttr);
    }

    @Override
    public void setTextAppearance(Context context, int resId) {
        super.setTextAppearance(context, resId);
        if (mTextHelper != null) {
            mTextHelper.onSetTextAppearance(context, resId);
        }
    }
}
這裡看到AppCompatTextView裡面創建了一個AppCompatTextHelper,在mTextHelper 裡面對TextView進行了處理, mTextHelper.loadFromAttributes(attrs, defStyleAttr)的代碼如下:
void loadFromAttributes(AttributeSet attrs, int defStyleAttr) {
    Context context = mView.getContext();

    // First read the TextAppearance style id
    TypedArray a = context.obtainStyledAttributes(attrs, VIEW_ATTRS, defStyleAttr, 0);
    final int ap = a.getResourceId(0, -1);
    a.recycle();

    // Now check TextAppearance's textAllCaps value
    if (ap != -1) {
        TypedArray appearance = context.obtainStyledAttributes(ap, R.styleable.TextAppearance);
        if (appearance.hasValue(R.styleable.TextAppearance_textAllCaps)) {
            setAllCaps(appearance.getBoolean(R.styleable.TextAppearance_textAllCaps, false));
        }
        appearance.recycle();
    }

    // Now read the style's value
    a = context.obtainStyledAttributes(attrs, TEXT_APPEARANCE_ATTRS, defStyleAttr, 0);
    if (a.hasValue(0)) {
        setAllCaps(a.getBoolean(0, false));
    }
    a.recycle();

    final ColorStateList textColors = mView.getTextColors();
    if (textColors != null && !textColors.isStateful()) {
        // If we have a ColorStateList which isn't stateful, create one which includes
        // a disabled state

        final int disabledTextColor;
        if (Build.VERSION.SDK_INT < Build.VERSION_CODES.LOLLIPOP) {
            // Pre-Lollipop, we will use textColorSecondary with android:disabledAlpha
            // applied
            disabledTextColor = ThemeUtils.getDisabledThemeAttrColor(context,
                    android.R.attr.textColorSecondary);
        } else {
            // With certain styles on Lollipop, there is a StateListAnimator which sets
            // an alpha on the whole view, so we don't need to apply disabledAlpha to
            // textColorSecondary
            disabledTextColor = ThemeUtils.getThemeAttrColor(context,
                    android.R.attr.textColorSecondary);
        }

        mView.setTextColor(ThemeUtils.createDisabledStateList(
                textColors.getDefaultColor(), disabledTextColor));
    }
}
這裡可以看到首先獲取了TextView的ColorStateList值,final ColorStateList textColors = mView.getTextColors();之後當textColors不為空且isStatefull為false,isStatefull又是這麼處理的?
 public boolean isStateful() {
    return mStateSpecs.length > 1;
}
發現當mStateSpecs.length大於1就是true,但是這裡我們只設置了一個顏色值,因此length為1,所有為false,會進入判斷條件,可以發現系統先獲取了一個disable的TextColor,默認讀取的值為textColorSecondary屬性,因此只要你Theme裡面設置了該只,系統最後顯示就是你設置的顏色,之後將默認顏色與disable顏色新創建了一個ColorStateList在設置回TextView, 這也就是為什麼當他disable時會變黑,就算你沒有設置該值,也會變黑。這不是坑爹嘛!!!這也就說明了為什麼項目中會變黑。
我們再來看看23.1.1的代碼:
public AppCompatTextView(Context context, AttributeSet attrs, int defStyleAttr) {
    super(context, attrs, defStyleAttr);

    mTintManager = TintManager.get(getContext());
    mBackgroundTintHelper = new AppCompatBackgroundHelper(this, mTintManager);
    mBackgroundTintHelper.loadFromAttributes(attrs, defStyleAttr);

    mTextHelper = AppCompatTextHelper.create(this);
    mTextHelper.loadFromAttributes(attrs, defStyleAttr);
    mTextHelper.applyCompoundDrawablesTints();
}
這裡我們看到AppCompatTextHelper對TextView的某一些屬性進行了處理,處理的代碼在loadFromAttributes(attrs, defStyleAttr):
void loadFromAttributes(AttributeSet attrs, int defStyleAttr) {
        final Context context = mView.getContext();
        final TintManager tintManager = TintManager.get(context);

        // First read the TextAppearance style id
        TypedArray a = context.obtainStyledAttributes(attrs, VIEW_ATTRS, defStyleAttr, 0);
        final int ap = a.getResourceId(0, -1);

        // Now read the compound drawable and grab any tints
        if (a.hasValue(1)) {
            mDrawableLeftTint = createTintInfo(context, tintManager, a.getResourceId(1, 0));
        }
        if (a.hasValue(2)) {
            mDrawableTopTint = createTintInfo(context, tintManager, a.getResourceId(2, 0));
        }
        if (a.hasValue(3)) {
            mDrawableRightTint = createTintInfo(context, tintManager, a.getResourceId(3, 0));
        }
        if (a.hasValue(4)) {
            mDrawableBottomTint = createTintInfo(context, tintManager, a.getResourceId(4, 0));
        }
        a.recycle();

        // Now check TextAppearance's textAllCaps value
        if (ap != -1) {
            TypedArray appearance = context.obtainStyledAttributes(ap, R.styleable.TextAppearance);
            if (appearance.hasValue(R.styleable.TextAppearance_textAllCaps)) {
                setAllCaps(appearance.getBoolean(R.styleable.TextAppearance_textAllCaps, false));
            }
            appearance.recycle();
        }

        // Now read the style's value
        a = context.obtainStyledAttributes(attrs, TEXT_APPEARANCE_ATTRS, defStyleAttr, 0);
        if (a.getBoolean(0, false)) {
            setAllCaps(true);
        }
        a.recycle();
    }
從代碼我們可以知道,這裡並沒有對TextView添加disaleTextColor,估計是google官方也發現這種默認添加顏色的設置不太合理,因此後續版本給改掉了。只是處理了文本是否變成大寫,和為了實現MD對四周的圖片進行著色。這也是為什麼第二個demo為什麼是正確的了。
這裡我們再來看看24.0.0的代碼:
public AppCompatTextView(Context context, AttributeSet attrs, int defStyleAttr) {
    super(TintContextWrapper.wrap(context), attrs, defStyleAttr);
    this.mDrawableManager = AppCompatDrawableManager.get();
    this.mBackgroundTintHelper = new AppCompatBackgroundHelper(this, this.mDrawableManager);
    this.mBackgroundTintHelper.loadFromAttributes(attrs, defStyleAttr);
    this.mTextHelper = AppCompatTextHelper.create(this);
    this.mTextHelper.loadFromAttributes(attrs, defStyleAttr);
    this.mTextHelper.applyCompoundDrawablesTints();
}
套路都是一樣的,這裡調用了this.mTextHelper.loadFromAttributes(attrs, defStyleAttr); 代碼如下:
void loadFromAttributes(AttributeSet attrs, int defStyleAttr) {
    final Context context = mView.getContext();
    final AppCompatDrawableManager drawableManager = AppCompatDrawableManager.get();

    // First read the TextAppearance style id
    TintTypedArray a = TintTypedArray.obtainStyledAttributes(context, attrs,
            VIEW_ATTRS, defStyleAttr, 0);
    final int ap = a.getResourceId(0, -1);
    // Now read the compound drawable and grab any tints
    if (a.hasValue(1)) {
        mDrawableLeftTint = createTintInfo(context, drawableManager, a.getResourceId(1, 0));
    }
    if (a.hasValue(2)) {
        mDrawableTopTint = createTintInfo(context, drawableManager, a.getResourceId(2, 0));
    }
    if (a.hasValue(3)) {
        mDrawableRightTint = createTintInfo(context, drawableManager, a.getResourceId(3, 0));
    }
    if (a.hasValue(4)) {
        mDrawableBottomTint = createTintInfo(context, drawableManager, a.getResourceId(4, 0));
    }
    a.recycle();

    // PasswordTransformationMethod wipes out all other TransformationMethod instances
    // in TextView's constructor, so we should only set a new transformation method
    // if we don't have a PasswordTransformationMethod currently...
    final boolean hasPwdTm =
            mView.getTransformationMethod() instanceof PasswordTransformationMethod;
    boolean allCaps = false;
    boolean allCapsSet = false;
    ColorStateList textColor = null;

    // First check TextAppearance's textAllCaps value
    if (ap != -1) {
        a = TintTypedArray.obtainStyledAttributes(context, ap, R.styleable.TextAppearance);
        if (!hasPwdTm && a.hasValue(R.styleable.TextAppearance_textAllCaps)) {
            allCapsSet = true;
            allCaps = a.getBoolean(R.styleable.TextAppearance_textAllCaps, false);
        }
        if (Build.VERSION.SDK_INT < 23
                && a.hasValue(R.styleable.TextAppearance_android_textColor)) {
            // If we're running on < API 23, the text color may contain theme references
            // so let's re-set using our own inflater
            textColor = a.getColorStateList(R.styleable.TextAppearance_android_textColor);
        }
        a.recycle();
    }

    // Now read the style's values
    a = TintTypedArray.obtainStyledAttributes(context, attrs, R.styleable.TextAppearance,
            defStyleAttr, 0);
    if (!hasPwdTm && a.hasValue(R.styleable.TextAppearance_textAllCaps)) {
        allCapsSet = true;
        allCaps = a.getBoolean(R.styleable.TextAppearance_textAllCaps, false);
    }
    if (Build.VERSION.SDK_INT < 23
            && a.hasValue(R.styleable.TextAppearance_android_textColor)) {
        // If we're running on < API 23, the text color may contain theme references
        // so let's re-set using our own inflater
        textColor = a.getColorStateList(R.styleable.TextAppearance_android_textColor);
    }
    a.recycle();

    if (textColor != null) {
        mView.setTextColor(textColor);
    }

    if (!hasPwdTm && allCapsSet) {
        setAllCaps(allCaps);
    }
}
這裡也沒有處理默認設置disable顏色,設置了大寫等情況。所以這個版本也不會出問題。
問題是解決了,可以調整對應支持包的版本,或者對TextView設置一個selector的顏色值,這樣就解決了問題,雖然正常這種文本如果需要disable狀態,應該就設置好disable顏色,但是有的時候,視覺可能效果是沒有變化的,只是不能點,所以也就沒有設置,所以一個良好的編程習慣還是最重要的。
 Android自定義實現開關按鈕代碼
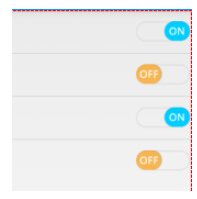
我們在應用中經常看到一些選擇開關狀態的配置文件,做項目的時候用的是android的Switch控件,但是感覺好丑的樣子子個人認為還是自定義的比較好,先上個效果圖:實現過程
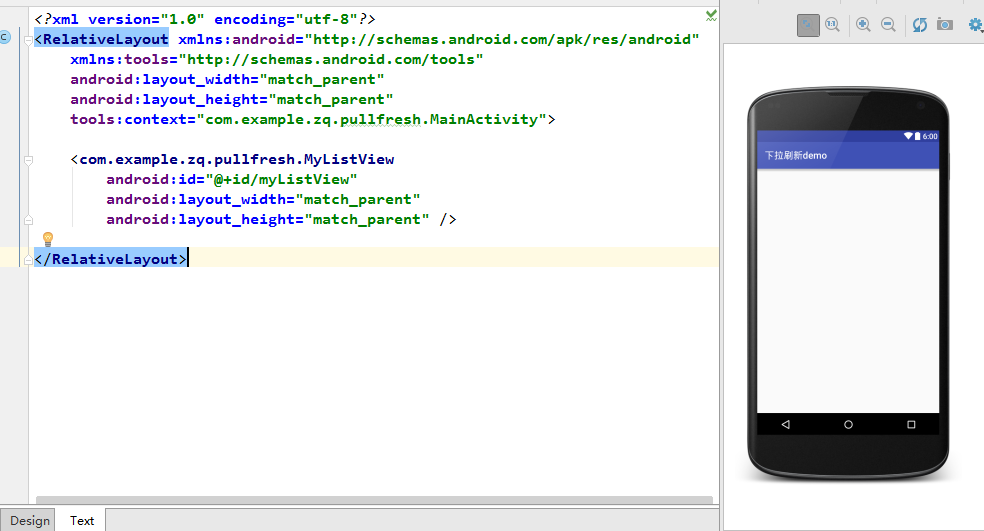 Android開發技術學習之下拉刷新功能的實現
好久沒有寫博客了,最近都在忙。有時候即使是有時間也會很懶,就會想玩一玩,放松放松!一直都沒有什麼時間更新我這個菜鳥的博客了。不過今天不一樣,我要給大家講講怎麼實現許多ap
 Android PieChart 餅圖控件
今天寫一個餅圖自定義View的文章。由於公司的項目需要用到餅圖,UI給的設計圖和自己找的一個餅圖框架的標題位置不符,所以就自己畫了一個。1,使用預覽PieChart mC
 Android應用開發性能優化完全分析
1 背景其實有點不想寫這篇文章的,但是又想寫,有些矛盾。不想寫的原因是隨便上網一搜一堆關於性能的建議,感覺大家你一總結、我一總結的都說到了很多優化注意事項,但是看過這些文