編輯:關於Android編程
android中實現截屏的方式有很多種,形如下面幾種:
1、通過view.getDrawingCache獲取屏幕的圖像數據,這也是眾多開發同行朋友經常使用的一種方式,可惜的是這種方式並不適用於surfaceview。
2、利用adb命令,adb shell screencap -p path,再利用runtime去執行,但是這種方式需要獲得系統權限方可。
3、通過framebuffer實現截屏,幀緩沖(framebuffer)是Linux為顯示設備提供的一個接口,允許上層應用程序在圖形模式下直接對顯示緩沖區進行讀寫等操,這些都是由Framebuffer設備驅動來完成的。android中的framebuffer數據是存放在 /dev/graphics/fb0 文件中的,所以只要獲取到framebuffer中的數據再轉換成圖片就實現截屏的功能啦,這不是半本片文章的重點介紹內容,這個後面或許會最為一個章節共享個大家。
4、 利用系統TakeScreenShotService截圖。android設備可以通過電源鍵+音量下鍵可以實現截屏,很多手機設備上用手下拉狀態欄也有截屏的選項,都是使用TakeScreenShotService截屏的,本文要介紹的是如何通過TakeScreenShotService實現截屏。
TakeScreenShotService源碼分析,源碼位於
frameworks\base\packages\SystemUI\src\com\android\systemui\screenshot\TakeScreenshotService.java
瞧瞧manifest文件先:
這個service是設置了exported屬性的,如果設置為true,則能夠被調用或交互,否則不能。設置為false時,只有同一個應用程序的組件或帶有相同用戶ID的應用程序才能啟動或綁定該服務。然而TakeScreenshotService所在應用程序的id是android.uid.systemui,所以一般的應用程序是沒辦法做到這一點的。
public class TakeScreenshotService extends Service {
    private static final String TAG = "TakeScreenshotService";
    private static GlobalScreenshot mScreenshot;
    private Handler mHandler = new Handler() {
        @Override
        public void handleMessage(Message msg) {
            switch (msg.what) {
            case 1:
                final Messenger callback = msg.replyTo;
                if (mScreenshot == null) {
                    mScreenshot = new GlobalScreenshot(TakeScreenshotService.this);
                }
                mScreenshot.takeScreenshot(new Runnable() {
                    @Override
                    public void run() {
                        Message reply = Message.obtain(null, 1);
                        try {
                            callback.send(reply);
                        } catch (RemoteException e) {
                        }
                    }
                }, msg.arg1 > 0, msg.arg2 > 0);
            }
        }
    };

    @Override
    public IBinder onBind(Intent intent) {
        return new Messenger(mHandler).getBinder();
    }
}
TakeScreenshotService 源碼就這麼多,可以很清晰的看見截屏的功能是由mScreenshot.takeScreenshot實現的。
void takeScreenshot(Runnable finisher, boolean statusBarVisible, boolean navBarVisible) {
    .....
}
finisher是在截屏之後的回調,誰發起的截屏在截屏完成之後就需要告訴需要者已經完成了。第二個和第三個就是截屏時是否顯示狀態欄和導航欄。
上面也提到了手機上截屏在狀態欄下拉時通常有個選項,所以我們就移步到PhoneStatusBar.java瞧瞧。
源碼路徑:frameworks\base\packages\SystemUI\src\com\android\systemui\statusbar\phone\PhoneStatusBar.java
public class PhoneStatusBar extends BaseStatusBar implements DemoMode {
    .......
    .......
    private void takeScreenshot() {
        // 截屏圖片存放位置
        String imageDir = Settings.System.getString(mContext.getContentResolver(), Settings.System.SCREENSHOT_LOCATION);
        File file = new File(imageDir + UserHandle.myUserId() + "/Screenshots");
        String text = null;
        Log.e(">>>>>>", "imageDir=" + imageDir);
        file.mkdir();
        if (!file.exists()) {
            if (imageDir.equals("/mnt/sdcard")) {
                text = mContext.getResources().getString(R.string.sdcard_unmount);
            } else if (imageDir.equals("/mnt/external_sd")) {
                text = mContext.getResources().getString(R.string.external_sd_unmount);
            } else if (imageDir.equals("/mnt/usb_storage")) {
                text = mContext.getResources().getString(R.string.usb_storage_unmount);
            }
            Toast.makeText(mContext, text, 3000).show();
            return;
        }
        synchronized (mScreenshotLock) {
            if (mScreenshotConnection != null) {
                return;
            }
            // 在這裡綁定了截屏的TakeScreenshotService
            ComponentName cn = new ComponentName("com.android.systemui",
                    "com.android.systemui.screenshot.TakeScreenshotService");
            Intent intent = new Intent();
            intent.setComponent(cn);
            ServiceConnection conn = new ServiceConnection() {
                @Override
                public void onServiceConnected(ComponentName name, IBinder service) {
                    synchronized (mScreenshotLock) {
                        if (mScreenshotConnection != this) {
                            return;
                        }
                        Messenger messenger = new Messenger(service);
                        Message msg = Message.obtain(null, 1);
                        final ServiceConnection myConn = this;
                        Handler h = new Handler(mHandler.getLooper()) {
                            @Override
                            public void handleMessage(Message msg) {
                                synchronized (mScreenshotLock) {
                                    if (mScreenshotConnection == myConn) {
                                        mContext.unbindService(mScreenshotConnection);
                                        mScreenshotConnection = null;
                                        mHandler.removeCallbacks(mScreenshotTimeout);
                                    }
                                }
                            }
                        };
                        // 截屏完成後需要回調告知,由h來處理
                        msg.replyTo = new Messenger(h);
                        // 是否顯示狀態欄
                        msg.arg1 = 0;
                        // 是否顯示導航欄
                        msg.arg2 = 1;
                        try {
                            messenger.send(msg);
                        } catch (RemoteException e) {
                        }
                    }
                }

                @Override
                public void onServiceDisconnected(ComponentName name) {
                }
            };
            if (mContext.bindService(intent, conn, Context.BIND_AUTO_CREATE)) {
                mScreenshotConnection = conn;
                mHandler.postDelayed(mScreenshotTimeout, 10000);
            }
        }
    }
    .......
}
從上述代碼中可以知道,TakeScreenshotService綁定成功後便開始往進行截屏操作,當截屏操作成功後,便會unbind這個service。
再回到TakeScreenshotService來,截屏是由GlobalScreenshot.takeScreenshot()來完成的,
    /**
     * Takes a screenshot of the current display and shows an animation.
     */
    void takeScreenshot(Runnable finisher, boolean statusBarVisible, boolean navBarVisible) {
        // We need to orient the screenshot correctly (and the Surface api seems to take screenshots
        // only in the natural orientation of the device :!)
        mDisplay.getRealMetrics(mDisplayMetrics);
        // 屏幕的高度和寬度
        float[] dims = {mDisplayMetrics.widthPixels, mDisplayMetrics.heightPixels};
        // 當前屏幕所處的角度
        float degrees = getDegreesForRotation(mDisplay.getRotation());
        boolean requiresRotation = (degrees > 0);
        if (requiresRotation) {
            // Get the dimensions of the device in its native orientation
            mDisplayMatrix.reset();
            mDisplayMatrix.preRotate(-degrees);
            mDisplayMatrix.mapPoints(dims);
            dims[0] = Math.abs(dims[0]);
            dims[1] = Math.abs(dims[1]);
        }
        // Take the screenshot 進行截屏
        mScreenBitmap = SurfaceControl.screenshot((int) dims[0], (int) dims[1]);
        if (mScreenBitmap == null) {
            // 截取的圖片為null,截屏失敗
            notifyScreenshotError(mContext, mNotificationManager);
            // 回調告知截屏結束
            finisher.run();
            return;
        }

        if (requiresRotation) {
            // Rotate the screenshot to the current orientation
            Bitmap ss = Bitmap.createBitmap(mDisplayMetrics.widthPixels,
                    mDisplayMetrics.heightPixels, Bitmap.Config.ARGB_8888);
            Canvas c = new Canvas(ss);
            c.translate(ss.getWidth() / 2, ss.getHeight() / 2);
            c.rotate(degrees);
            c.translate(-dims[0] / 2, -dims[1] / 2);
            c.drawBitmap(mScreenBitmap, 0, 0, null);
            c.setBitmap(null);
            // Recycle the previous bitmap
            mScreenBitmap.recycle();
            mScreenBitmap = ss;
        }

        // Optimizations
        mScreenBitmap.setHasAlpha(false);
        mScreenBitmap.prepareToDraw();

        // 展示動畫,就是截屏後在頁面上有個動畫展示效果
        startAnimation(finisher, mDisplayMetrics.widthPixels, mDisplayMetrics.heightPixels,
                statusBarVisible, navBarVisible);
    }
就下來就是要去重點了解下面的代碼到底干了啥
SurfaceControl.screenshot((int) dims[0], (int) dims[1])
 public static Bitmap screenshot(int width, int height) {
        // TODO: should take the display as a parameter
        IBinder displayToken = SurfaceControl.getBuiltInDisplay(
                SurfaceControl.BUILT_IN_DISPLAY_ID_MAIN);
        return nativeScreenshot(displayToken, width, height, 0, 0, true);
    }
終於發現截屏操作竟然是在natvie層實現的,native返回了一個bitmap對象。下面移步native。nativeScreenshot方法的實現在下面的源碼文件中:
frameworks\base\core\jni\android_view_SurfaceControl.cpp
static jobject nativeScreenshotBitmap(JNIEnv* env, jclass clazz, jobject displayTokenObj,
        jint width, jint height, jint minLayer, jint maxLayer, bool allLayers) {
    sp displayToken = ibinderForJavaObject(env, displayTokenObj);
    if (displayToken == NULL) {
        return NULL;
    }

    // 持有圖像的數據
    ScreenshotPixelRef* pixels = new ScreenshotPixelRef(NULL);
    if (pixels->update(displayToken, width, height,
            minLayer, maxLayer, allLayers) != NO_ERROR) {
        delete pixels;
        return NULL;
    }

    uint32_t w = pixels->getWidth();
    uint32_t h = pixels->getHeight();
    uint32_t s = pixels->getStride();
    uint32_t f = pixels->getFormat();
    ssize_t bpr = s * android::bytesPerPixel(f);

    SkBitmap* bitmap = new SkBitmap();
    bitmap->setConfig(convertPixelFormat(f), w, h, bpr);
    if (f == PIXEL_FORMAT_RGBX_8888) {
        bitmap->setIsOpaque(true);
    }

    if (w > 0 && h > 0) {
        bitmap->setPixelRef(pixels)->unref();
        bitmap->lockPixels();
    } else {
        // be safe with an empty bitmap.
        delete pixels;
        bitmap->setPixels(NULL);
    }
    // 創建bitmap對象
    return GraphicsJNI::createBitmap(env, bitmap,
            GraphicsJNI::kBitmapCreateFlag_Premultiplied, NULL);
}
 Reveal-加載利用全局斷點
在網上搜怎麼加載Reveal的,好多都是利用Reveal.frameWork來拖進工程裡面,這樣很不方便,每次更換新工程都要這樣做,這裡給大家講解一個利用配置一個全局斷點
 一步一步學android控件(之二十七)—— SlidingDrawer
對於SlidingDrawer,官網上是這樣解釋的:SlidingDrawer將內容隱藏在屏幕之外,並且允許用戶通過拖動handle將內容顯示到屏幕上。一個Sliding
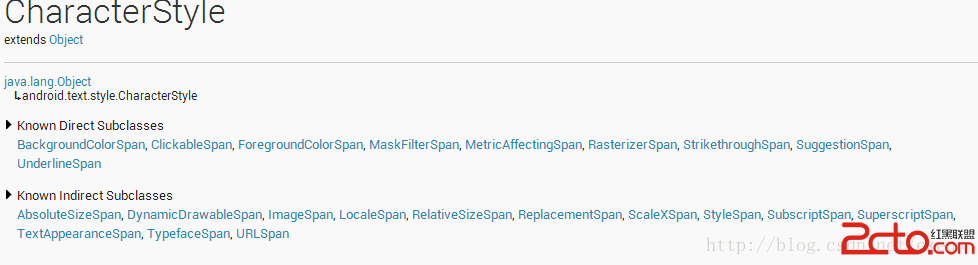 Android:通過SpannableString為TextView設置豐富的顯示效果
在使用TextView的過程中,有時候會需要將一串文本中的部分文字做特別的顯示效果處理,比如加粗、改變顏色、加著重標識、超鏈接等等,我們可以通過多個TextView拼湊來
 Android如何防止apk程序被反編譯
作為Android應用開發者,不得不面對一個尴尬的局面,就是自己辛辛苦苦開發的應用可以被別人很輕易的就反編譯出來。Google似乎也發現了這個問題,從SDK