編輯:關於Android編程
從上至下我們先從Request類開始閱讀
一.Request
每一次網絡請求都是一個Request,Request是對url,method,header,body的封裝,也是對Http協議中請求行,請求頭,實體內容的封裝
      Request request = new Request
                        .Builder()
                        .url(url)
                        .post(body)
                        .addHeader("Accept","*/*")
                        .cacheContro()
                       .build();
  private final HttpUrl url;//請求url封裝
  private final String method;//請求方法
  private final Headers headers;//請求頭
  private final RequestBody body;//請求體,也就是http協議的實體內容
  private final Object tag;//被請求的標簽

  private volatile URL javaNetUrl; // Lazily initialized.
  private volatile URI javaNetUri; // Lazily initialized.
  private volatile CacheControl cacheControl; // 緩存控制的封裝
HttpUrl主要用來規范普通的url連接,並且解析url的組成部分
我們來看一下url的構成;scheme://username:password@host:port/pathSegment/pathSegment?queryParameter#fragment;
現通過下面的例子來示例httpUrl的使用
https://www.google.com/search?q=maplejaw
使用parse解析url字符串:
HttpUrl url = HttpUrl.parse("https://www.google.com/search?q=maplejaw");
通過構造者模式來常見:
HttpUrl url = new HttpUrl.Builder()
        .scheme("https")
        .host("www.google.com")
        .addPathSegment("search")
        .addQueryParameter("q", "maplejaw")
        .build();
2.Headers
Headers用於配置請求頭,對於請求頭配置大家一定不陌生吧,比如Content-Type,User-Agent和Cache-Control等等。
創建Headers也有兩種方式。如下:
(1)of()創建:傳入的數組必須是偶數對,否則會拋出異常。
Headers.of("name1","value1","name2","value2",.....);
還可以使用它的重載方法of(Map(2)構建者模式創建:
 Headers mHeaders=new Headers.Builder()
            .set("name1","value1")//set表示name1是唯一的,會覆蓋掉已經存在的
            .add("name2","value2")//add不會覆蓋已經存在的頭,可以存在多個
            .build();
另外,數組方便取數組嗎?很方便,我們來看著兩個方法
/** Returns the field at {@code position} or null if that is out of range. */
  public String name(int index) {
    int nameIndex = index * 2;
    if (nameIndex < 0 || nameIndex >= namesAndValues.length) {
      return null;
    }
    return namesAndValues[nameIndex];
  }

  /** Returns the value at {@code index} or null if that is out of range. */
  public String value(int index) {
    int valueIndex = index * 2 + 1;
    if (valueIndex < 0 || valueIndex >= namesAndValues.length) {
      return null;
    }
    return namesAndValues[valueIndex];
  }
 @Override public String toString() {
    StringBuilder result = new StringBuilder();
    for (int i = 0, size = size(); i < size; i++) {
      result.append(name(i)).append(": ").append(value(i)).append("\n");
    }
    return result.toString();
  }
2.CacheControl
Cache-Control對應請求頭中Cache-Control中的值,我們先來看一下Http協議中Cache-Control
Cache-Control指定請求和響應遵循的緩存機制。在請求消息或響應消息中設置Cache-Control並不會修改另一個消息處理過程中的緩存處理過程。請求時的緩存指令有下幾種:
Public:所有內容都將被緩存(客戶端和代理服務器都可緩存)。Private:內容只緩存到私有緩存中(僅客戶端可以緩存,代理服務器不可緩存)no-cache:請求或者響應消息不能緩存no-store:不使用緩存,也不存儲緩存max-age:緩存的內容將在指定時間(秒)後失效, 這個選項只在HTTP 1.1可用, 並如果和Last-Modified一起使用時, 優先級較高①常用的函數
 final CacheControl.Builder builder = new CacheControl.Builder();
            builder.noCache();//不使用緩存,全部走網絡
            builder.noStore();//不使用緩存,也不存儲緩存
            builder.onlyIfCached();//只使用緩存
            builder.noTransform();//禁止轉碼
            builder.maxAge(10, TimeUnit.MILLISECONDS);//指示客戶機可以接收生存期不大於指定時間的響應。
            builder.maxStale(10, TimeUnit.SECONDS);//指示客戶機可以接收超出超時期間的響應消息
            builder.minFresh(10, TimeUnit.SECONDS);//指示客戶機可以接收響應時間小於當前時間加上指定時間的響應。
            CacheControl cache = builder.build();//cacheControl
②CacheControl的兩個常量:
 public static final CacheControl FORCE_NETWORK = new Builder().noCache().build();//不使用緩存
  public static final CacheControl FORCE_CACHE = new Builder()
      .onlyIfCached()
      .maxStale(Integer.MAX_VALUE, TimeUnit.SECONDS)
      .build();//只使用緩存
③請求時如何使用:
final CacheControl.Builder builder = new CacheControl.Builder();
            builder.maxAge(10, TimeUnit.MILLISECONDS);
            CacheControl cache = builder.build();
            final Request request = new Request.Builder().cacheControl(cache).url(requestUrl).build();
            final Call call = mOkHttpClient.newCall(request);//
            call.enqueue(new Callback() {
                @Override
                public void onFailure(Call call, IOException e) {
                    failedCallBack("訪問失敗", callBack);
                    Log.e(TAG, e.toString());
                }

                @Override
                public void onResponse(Call call, Response response) throws IOException {
                    if (response.isSuccessful()) {
                        String string = response.body().string();
                        Log.e(TAG, "response ----->" + string);
                        successCallBack((T) string, callBack);
                    } else {
                        failedCallBack("服務器錯誤", callBack);
                    }
                }
            });
            return call;
        } catch (Exception e) {
            Log.e(TAG, e.toString());
        }
     //判斷網絡是否連接
        boolean connected = NetworkUtil.isConnected(context);
         if (!connected) {
             request = request.newBuilder().cacheControl(CacheControl.FORCE_CACHE).build();
          }
以上這些就是CacheControl類的學習,源碼沒必要看了,雖然很長但是比較簡單,也就是通過方法來選擇使用哪種緩存模式而已3.RequestBody
requestBody也就是請求實體內容,我們先來看一下如何來構建一個RequestBody
(1)Request.create()方法創建
  public static final MediaType TEXT = MediaType.parse("text/plain; charset=utf-8");
     public static final MediaType STREAM = MediaType.parse("application/octet-stream");
     public static final MediaType JSON = MediaType.parse("application/json; charset=utf-8");

     //構建字符串請求體
     RequestBody body1 = RequestBody.create(TEXT, string);
     //構建字節請求體
     RequestBody body2 = RequestBody.create(STREAM, byte);
     //構建文件請求體
     RequestBody body3 = RequestBody.create(STREAM, file);
     //post上傳json
     RequestBody body4 = RequestBody.create(JSON, json);//json為String類型的

     //將請求體設置給請求方法內
     Request request = new Request.Builder()
       .url(url)
       .post(xx)// xx表示body1,body2,body3,body4中的某一個
       .build();
 //構建表單RequestBody
     RequestBody formBody=new FormBody.Builder()
                 .add("name","maplejaw")
                 .add("age","18")
                  ...
                 .build();
public static final MediaType STREAM = MediaType.parse("application/octet-stream");
      //構建表單RequestBody
      RequestBody multipartBody=new MultipartBody.Builder()
                .setType(MultipartBody.FORM)//指明為 multipart/form-data 類型
                .addFormDataPart("age","20") //添加表單數據
                .addFormDataPart("avatar","111.jpg",RequestBody.create(STREAM,file)) //添加文件,其中avatar為表單名,111.jpg為文件名。
                .addPart(..)//該方法用於添加RequestBody,Headers和添加自定義Part,一般來說以上已經夠用
                .build();
RequestBody也就是請求實體內容,對於一個Get請求時沒有實體內容的,Post提交才有,而且浏覽器與服務器通信時基本上只有表單上傳才會用到POST提交,所以RequestBody其實也就是封裝了浏覽器表單上傳時對應的實體內容
OkHttp3中RequestBody有三種創建方式
①方式一:
 public static RequestBody create(MediaType contentType, String content) {
    Charset charset = Util.UTF_8;
    if (contentType != null) {
      charset = contentType.charset();//MediaType的為請求頭中的ContentType創建方式:public static final MediaType TEXT =
                                      //MediaType.parse("text/plain; charset=utf-8")
      if (charset == null) {
        charset = Util.UTF_8;//如果contentType中沒有指定charset,默認使用UTF-8
        contentType = MediaType.parse(contentType + "; charset=utf-8");
      }
    }
    byte[] bytes = content.getBytes(charset);
    return create(contentType, bytes);
  }
最終會調用下面的方法
 /** Returns a new request body that transmits {@code content}. */
  public static RequestBody create(final MediaType contentType, final byte[] content,
      final int offset, final int byteCount) {
    if (content == null) throw new NullPointerException("content == null");
    Util.checkOffsetAndCount(content.length, offset, byteCount);
    return new RequestBody() {
      @Override public MediaType contentType() {
        return contentType;
      }

      @Override public long contentLength() {
        return byteCount;
      }

      @Override public void writeTo(BufferedSink sink) throws IOException {
        sink.write(content, offset, byteCount);
      }
    };
  }
②方式二:FormBody表單創建,我們來看一下
FormBody用於普通post表單上傳鍵值對,我們先來看一下創建的方法,再看源碼
 RequestBody formBody=new FormBody.Builder()
                 .add("name","maplejaw")
                 .add("age","18")
                  ...
                 .build();
 private static final MediaType CONTENT_TYPE =
  MediaType.parse("application/x-www-form-urlencoded");//ContentType,請求頭中

  private final List encodedNames;
  private final List encodedValues;

  private FormBody(List encodedNames, List encodedValues) {
    this.encodedNames = Util.immutableList(encodedNames);
    this.encodedValues = Util.immutableList(encodedValues);
  }

  /** The number of key-value pairs in this form-encoded body. */
  public int size() {
    return encodedNames.size();
  }

  public String encodedName(int index) {
    return encodedNames.get(index);
  }

  public String name(int index) {
    return percentDecode(encodedName(index), true);
  }

  public String encodedValue(int index) {
    return encodedValues.get(index);
  }

  public String value(int index) {
    return percentDecode(encodedValue(index), true);
  }

  @Override public MediaType contentType() {
    return CONTENT_TYPE;
  }

  @Override public long contentLength() {
    return writeOrCountBytes(null, true);
  }

  @Override public void writeTo(BufferedSink sink) throws IOException {
    writeOrCountBytes(sink, false);
  }

  private long writeOrCountBytes(BufferedSink sink, boolean countBytes) {
    long byteCount = 0L;

    Buffer buffer;
    if (countBytes) {
      buffer = new Buffer();
    } else {
      buffer = sink.buffer();
    }

    for (int i = 0, size = encodedNames.size(); i < size; i++) {
      if (i > 0) buffer.writeByte('&');
      buffer.writeUtf8(encodedNames.get(i));
      buffer.writeByte('=');
      buffer.writeUtf8(encodedValues.get(i));
    }

    if (countBytes) {
      byteCount = buffer.size();
      buffer.clear();
    }

    return byteCount;
  }
我們主要來看一下方法writeOrCountBytes,通過writeOrCountBytes來計算請求體大小和將請求體寫入BufferedSink。
至於BufferSink和Buffer類,這兩個類是Okio中的類,Buffer相當於一個緩存區,BufferedSink相當於OutputStream,它擴展了
OutputStream的功能,Okio的完整源碼我後續也會寫博客
③方式三:MultipartBody分塊表單創建
MultipartBody, 既可以添加表單,又可以也可以添加文件等二進制數據,我們就看幾個重要的方法
 public static Part createFormData(String name, String filename, RequestBody body) {
      if (name == null) {
        throw new NullPointerException("name == null");
      }
      StringBuilder disposition = new StringBuilder("form-data; name=");
      appendQuotedString(disposition, name);

      if (filename != null) {
        disposition.append("; filename=");
        appendQuotedString(disposition, filename);
      }

      return create(Headers.of("Content-Disposition", disposition.toString()), body);
    }
的Content-Disposition跟文件二進制流或者鍵值對的值
MultipartBody和FormBody大體上相同,主要區別在於writeOrCountBytes方法,分塊表單主要是將每個塊的大小進行累加來求出請求體大小,如果其中有一個塊沒有指定大小,就會返回-1。所以分塊表單中如果包含文件,默認是無法計算出大小的,除非你自己給文件的RequestBody指定contentLength。
  private long writeOrCountBytes(BufferedSink sink, boolean countBytes) throws IOException {
    long byteCount = 0L;

    Buffer byteCountBuffer = null;
    if (countBytes) {
      //如果是計算大小的話,就new個
      sink = byteCountBuffer = new Buffer();
    }
    //循環塊
    for (int p = 0, partCount = parts.size(); p < partCount; p++) {
      Part part = parts.get(p);
      //獲取每個塊的頭
      Headers headers = part.headers;
      //獲取每個塊的請求體
      RequestBody body = part.body;

      //寫 --xxxxxxxxxx 邊界
      sink.write(DASHDASH);
      sink.write(boundary);
      sink.write(CRLF);

      //寫塊的頭
      if (headers != null) {
        for (int h = 0, headerCount = headers.size(); h < headerCount; h++) {
          sink.writeUtf8(headers.name(h))
              .write(COLONSPACE)
              .writeUtf8(headers.value(h))
              .write(CRLF);
        }
      }

      //寫塊的Content_Type
      MediaType contentType = body.contentType();
      if (contentType != null) {
        sink.writeUtf8("Content-Type: ")
            .writeUtf8(contentType.toString())
            .write(CRLF);
      }

      //寫塊的大小
      long contentLength = body.contentLength();
      if (contentLength != -1) {
        sink.writeUtf8("Content-Length: ")
            .writeDecimalLong(contentLength)
            .write(CRLF);
      } else if (countBytes) {
        // We can't measure the body's size without the sizes of its components.
        //如果有個塊沒有這名大小,就返回-1.
        byteCountBuffer.clear();
        return -1L;
      }

      sink.write(CRLF);

      //如果是計算大小就累加,否則寫入BufferedSink
      if (countBytes) {
        byteCount += contentLength;
      } else {
        body.writeTo(sink);
      }

      sink.write(CRLF);
    }

 //寫 --xxxxxxxxxx-- 結束邊界
    sink.write(DASHDASH);
    sink.write(boundary);
    sink.write(DASHDASH);
    sink.write(CRLF);


    if (countBytes) {
      byteCount += byteCountBuffer.size();
      byteCountBuffer.clear();
    }

    return byteCount;
  }
 高仿微信5.2.1主界面及消息提醒
好久沒更新博客了,最近在做公司的項目,這也算是我接觸的第一個正式項目。通過項目的檢驗,發現自己積累了一年的知識還是遠遠不夠,想要提高,好的方法是 :項目+書+視頻+博客。
 Android 測試入門篇
Android構架1. Application 應用程序層:用Java語言編寫的運行在虛擬機的程序用戶直接使用的功能,其基本應用比如:電話、聯系人、短信、郵件等,還有無數
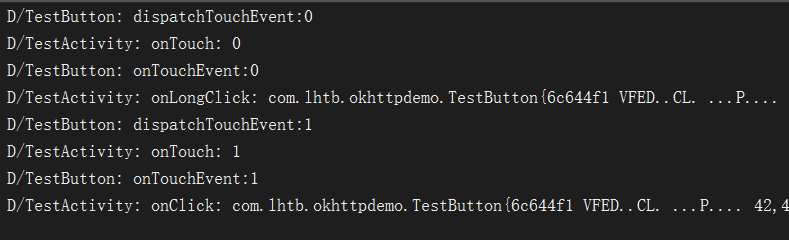
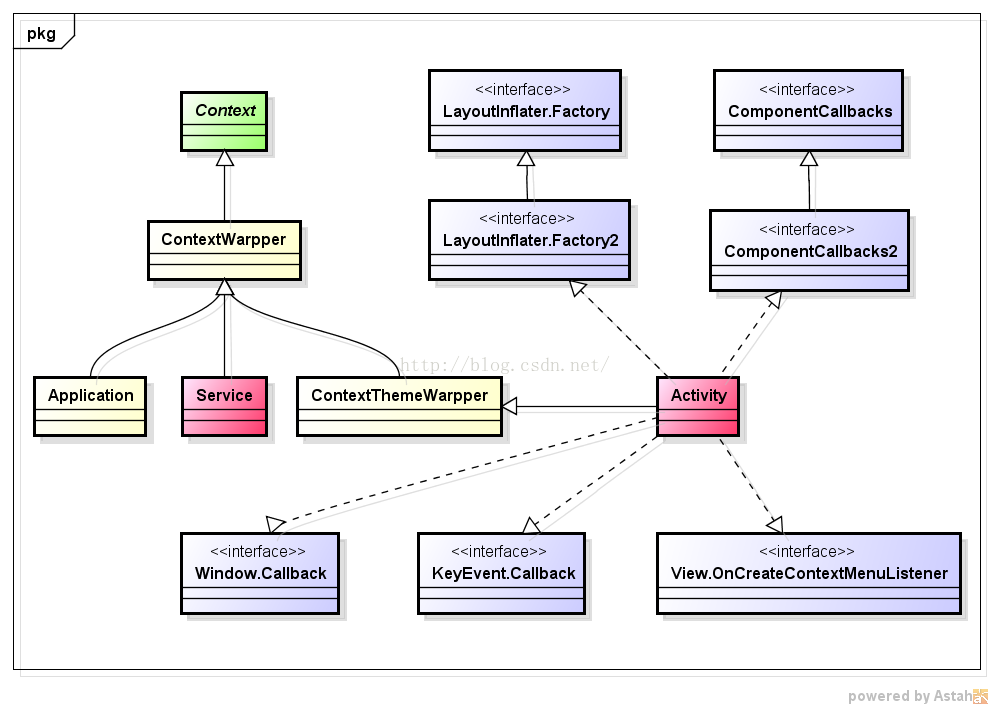
 Activity
生命周期一.正常情況下生命周期如圖正常生命周期 開起activity調用onCreate() onStart() onResume(),按下返回鍵 onPause() o
 給Android的APK程序簽名和重新簽名的方法
簽名工具的使用Android源碼編譯出來的signapk.jar既可給apk簽名,也可給rom簽名的。使用格式:java –jar signapk.jar [-w] pu