編輯:關於Android編程
上一篇博客Android中Handler原理在講到Handler的時候談到了android的Activity啟動是如何執行到onCreate方法的,這篇主要從onCreate方法裡面我們必須要寫的方法setContentView開始,研究布局視圖是如何加載到手機窗口上的。
當在執行到setContentView時,實際上執行的是
public void setContentView(int layoutResID) {
        getWindow().setContentView(layoutResID);
        initActionBar();
}
可以看到實際上是Window類的setContentView方法
private Window mWindow;
public Window getWindow() {
        return mWindow;
}
Window類是一個抽象類,下面主要是找到他的實現類。mWindow初始化在
final void attach(……) {
        ……
        mWindow = PolicyManager.makeNewWindow(this);
        mWindow.setCallback(this);
        mWindow.getLayoutInflater().setPrivateFactory(this);
	……
    }
Attach方法在main方法中。具體查看上一篇博客。調用了PolicyManager類的靜態方法makeNewWindow生成Window對象
private static final String POLICY_IMPL_CLASS_NAME =
        "com.android.internal.policy.impl.Policy";
private static final IPolicy sPolicy;
static {
        try {
            Class policyClass = Class.forName(POLICY_IMPL_CLASS_NAME);
            sPolicy = (IPolicy)policyClass.newInstance();
        }
……
    }
public static Window makeNewWindow(Context context) {
        return sPolicy.makeNewWindow(context);
}
可以看到是通過Policy類的makeNewWindow方法得到的Window對象,這裡是通過反射機制獲取的Policy的實例。
public Window makeNewWindow(Context context) {
        return new PhoneWindow(context);
}
可以看到實際上是一個PhoneWindow。那麼根據多態,其實在上面調用的就是PhoneWindow#setContentWindow
public void setContentView(int layoutResID) {
        if (mContentParent == null) {
            installDecor();//1
        } else {
            mContentParent.removeAllViews();
        }
        mLayoutInflater.inflate(layoutResID, mContentParent);//2 將layoutResID填充,他的父View是mContentParent是在installDecor方法裡面mContentParent = generateLayout(mDecor);得到的
        final Callback cb = getCallback();
        if (cb != null && !isDestroyed()) {
            cb.onContentChanged();
        }
}
執行到installDecor()
private void installDecor() {
    if (mDecor == null) {
        mDecor = generateDecor();//生成裝飾窗口,裝飾窗口繼承自FrameLayout
        mDecor.setDescendantFocusability(ViewGroup.FOCUS_AFTER_DESCENDANTS);
        mDecor.setIsRootNamespace(true);
        if (!mInvalidatePanelMenuPosted && mInvalidatePanelMenuFeatures != 0) {
            mDecor.postOnAnimation(mInvalidatePanelMenuRunnable);
        }
    }
    if (mContentParent == null) {
        mContentParent = generateLayout(mDecor);// 產生布局,返回父布局,暫時這樣理解,具體進去看代碼
        mDecor.makeOptionalFitsSystemWindows();
        mTitleView = (TextView)findViewById(com.android.internal.R.id.title);
        ......
        }
    }
}
generateLayout的代碼如下
protected ViewGroup generateLayout(DecorView decor) {
        // Apply data from current theme.

        TypedArray a = getWindowStyle();// 獲取當前設置的主題
		......
        if (a.getBoolean(com.android.internal.R.styleable.Window_windowNoTitle, false)) {
            requestFeature(FEATURE_NO_TITLE);//可以看到平時在AndroidManifest配置的窗口等各其實在代碼裡都是在這裡修改的
        } else if (a.getBoolean(com.android.internal.R.styleable.Window_windowActionBar, false)) {
            // Don't allow an action bar if there is no title.
            requestFeature(FEATURE_ACTION_BAR);
        }

        if (a.getBoolean(com.android.internal.R.styleable.Window_windowActionBarOverlay, false)) {
            requestFeature(FEATURE_ACTION_BAR_OVERLAY);
        }
	......
	//19-63行根據我們指定的有無標題等各種窗口風格得到對應的默認布局,
	//這些布局在D:\SoftWare\Java\android4.2-source\frameworks\base\core\res\res\layout
        int layoutResource;
        int features = getLocalFeatures();
        if ((features & ((1 << FEATURE_LEFT_ICON) | (1 << FEATURE_RIGHT_ICON))) != 0) {
            if (mIsFloating) {
                TypedValue res = new TypedValue();
                getContext().getTheme().resolveAttribute(
                        com.android.internal.R.attr.dialogTitleIconsDecorLayout, res, true);
                layoutResource = res.resourceId;
            } else {
                layoutResource = com.android.internal.R.layout.screen_title_icons;
            }
            removeFeature(FEATURE_ACTION_BAR);
        } else if ((features & ((1 << FEATURE_PROGRESS) | (1 << FEATURE_INDETERMINATE_PROGRESS))) != 0
                && (features & (1 << FEATURE_ACTION_BAR)) == 0) {
            layoutResource = com.android.internal.R.layout.screen_progress;
        } else if ((features & (1 << FEATURE_CUSTOM_TITLE)) != 0) {
            if (mIsFloating) {
                TypedValue res = new TypedValue();
                getContext().getTheme().resolveAttribute(
                        com.android.internal.R.attr.dialogCustomTitleDecorLayout, res, true);
                layoutResource = res.resourceId;
            } else {
                layoutResource = com.android.internal.R.layout.screen_custom_title;
            }
            removeFeature(FEATURE_ACTION_BAR);
        } else if ((features & (1 << FEATURE_NO_TITLE)) == 0) {
            if (mIsFloating) {
                TypedValue res = new TypedValue();
                getContext().getTheme().resolveAttribute(
                        com.android.internal.R.attr.dialogTitleDecorLayout, res, true);
                layoutResource = res.resourceId;
            } else if ((features & (1 << FEATURE_ACTION_BAR)) != 0) {
                if ((features & (1 << FEATURE_ACTION_BAR_OVERLAY)) != 0) {
                    layoutResource = com.android.internal.R.layout.screen_action_bar_overlay;
                } else {
                    layoutResource = com.android.internal.R.layout.screen_action_bar;
                }
            } else {
                layoutResource = com.android.internal.R.layout.screen_title;
            }
        } else if ((features & (1 << FEATURE_ACTION_MODE_OVERLAY)) != 0) {
            layoutResource = com.android.internal.R.layout.screen_simple_overlay_action_mode;
        } else {
            layoutResource = com.android.internal.R.layout.screen_simple;
        }

        mDecor.startChanging();

        View in = mLayoutInflater.inflate(layoutResource, null);//根據上面的判斷選擇的layoutResource填充成View
        decor.addView(in, new ViewGroup.LayoutParams(MATCH_PARENT, MATCH_PARENT));//調用裝飾窗口的addView方法將上一步生成的View添加到最外層的裝飾窗口

        ViewGroup contentParent = (ViewGroup)findViewById(ID_ANDROID_CONTENT);//ID_ANDROID_CONTENT對應的都是@android:id/content其實是一個FrameLayout
        ......
        mDecor.finishChanging();
        return contentParent;
    }
下面是最常用的layoutResource布局文件他們在D:\SoftWare\Java\android4.2-source\frameworks\base\core\res\res\layout文件夾下
Screen-title.xml
    <frameLayout
        android:layout_width="match_parent"
        android:layout_height="?android:attr/windowTitleSize"
        style="?android:attr/windowTitleBackgroundStyle">

    </frameLayout>
    <frameLayout android:id="@android:id/content"
        android:layout_width="match_parent"
        android:layout_height="0dip"
        android:layout_weight="1"
        android:foregroundGravity="fill_horizontal|top"
        android:foreground="?android:attr/windowContentOverlay" />
最外層是線性布局,包含幀布局(包含一個TextView其實就是標題)和幀布局。其實這個就是最常見的樣子。默認生成的程序就是這個樣子。
Screen-simple.xml
    <frameLayout
         android:id="@android:id/content"
         android:layout_width="match_parent"
         android:layout_height="match_parent"
         android:foregroundInsidePadding="false"
         android:foregroundGravity="fill_horizontal|top"
         android:foreground="?android:attr/windowContentOverlay" />
顯而易見這個就是全屏設置時默認加載的布局。
我們可以看到id為content的FrameLayout都存在的,因為他要裝載我們填充的xml
依Screen-title.xml為例,大致是這樣子的
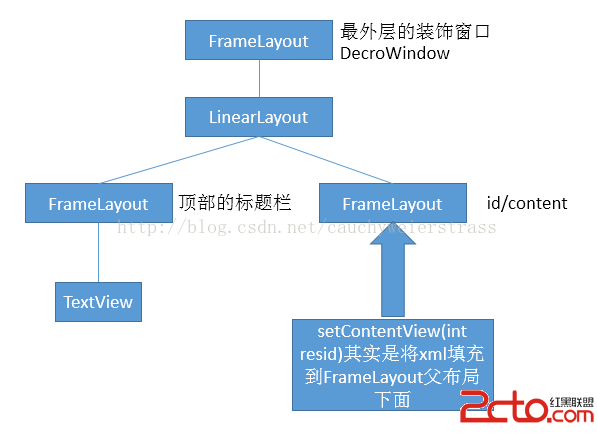
通過以上分析明白了以下幾點:
1. Activity呈現出來的界面其實是一個PhoneWindow類在管理的,這個類中有一個DecorView成員就是最外層的一個容器。
2. 上面這張圖是非常重要的,顯示了窗口的結構。
3. Activity到底是個什麼東西?還真不好說清楚…^_^總之和剛開始的認識是不同的。
4. 遇到不懂得問題就去查看源碼。代碼是最好的老師!
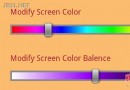 Android顏色編輯器的制作中遇到的問題分析
Android沒有自帶顏色編輯器,為了讓用戶直觀的選擇顏色,做了這麼一個控件,效果圖如下:上方顏色條為主顏色條,用戶可以選擇大致需要的顏色,下方是該顏色的平衡調節,可以調
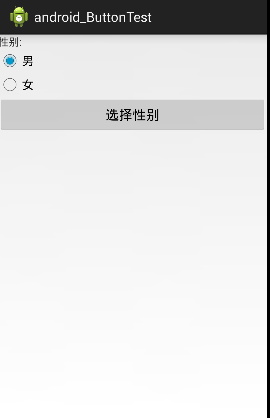 UI控件之RadioButton(單選按鈕)&Checkbox(復選按鈕)
(一)概述: (二)RadioButton的基本用法與事件處理: 效果圖: 實現代碼:xml文件M
 Android SpannableString設置超鏈接、顏色、字體等屬性
Android SpannableString設置超鏈接、顏色、字體等屬性在Android中,TextView是我們最常用的用來顯示文本的控件。 一般情況下,
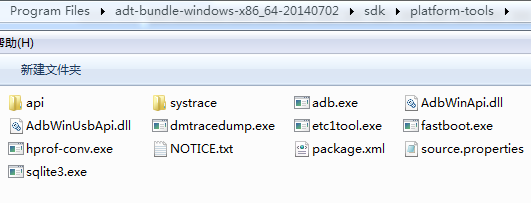 【安卓學習之工具學習】adb初步學習--adb命令和shell命令學習
一 、 測試環境講解:1.一台win7電腦2.安裝好sdk,在 sdk\platform-tools 目錄下,可以看到adb.exe 文件3.為了方便輸入,可以設置環境變