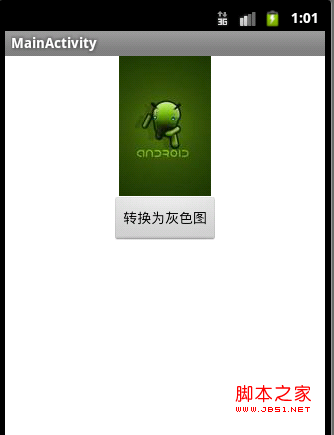
編輯:關於Android編程
HttpClientDemo.java界面就是兩個按鈕和一個文本框
/*
 * 用HttpClientlai 來訪問提交請求,接收響應
 * A,發送GET請求
 * 1,創建HttpClient對象;HttpClient httpclient=new DefaultHttpClient();
 * 2,發送GET請求,創建HttpGet對象:HttpGet httpget=new HttpGet("http://www.baidu.com");
 * 3,用HttpClient對象實行HttpGet對象會得到服務器響應對象HttpResponse的對象,響應就封裝在HttpResponse中:
 *  HttpResponse httpresponse=httpclient.execute(httpget);
 * 4,從httpresponse響應中獲得Http實例
		HttpEntity entity=httpresponse.getEntity();
 * */
public class HttpClientDemo extends Activity {
   TextView response;
   //聲明HttpClient對象
   HttpClient httpclient;
   Handler handler=new Handler(){
	  public void handleMessage(Message msg){
		  if(msg.what==0x123){
			//  使用response顯示服務器的響應
			  response.append(msg.obj.toString()+"\n");
		  }
	  }
   };
    @Override
    protected void onCreate(Bundle savedInstanceState) {
        super.onCreate(savedInstanceState);
        setContentView(R.layout.activity_http_client);
        //1,創建DefaultHttpClient對象,接口回調HttpClient是個接口
        httpclient=new DefaultHttpClient();
        response=(TextView) findViewById(R.id.response);
    }
    /*
     * 向服務發送GET請求流程
     *
     * */
    public void accessSecret(View v){
    	response.setText("");
    	//點擊按鈕,開啟線程,在線程中發送Get請求
    	new Thread(){
    		public void run(){
    			//2,創建一個HttpGet對象
    			HttpGet httpget=new HttpGet("http://localhost:8080/foo/secret.jsp");//jsp部署在To嗎cat服務器上
    			try {
    				    //3,用HttpClient對象實行HttpGet對象會得到服務器響應對象HttpResponse的對象,響應就封裝在HttpResponse中
					    HttpResponse httpresponse=httpclient.execute(httpget);
					    //4,從httpresponse響應中獲得Http實例
					    HttpEntity entity=httpresponse.getEntity();
					    if(entity!=null){
					    	//5,entity實例中獲得內容,建立輸入流,讀取服務器內容
					    	BufferedReader br=new BufferedReader(new InputStreamReader(entity.getContent()));
					    	String line=null;
					    	while((line=br.readLine())!=null){//循環從輸入流中讀取內容
					    		Message msg=new Message();
					    		msg.what=0x123;
					    		msg.obj=line;
					    	    handler.sendMessage(msg);//發給UI線程更新UI組件
					    	}
					    }

				} catch (ClientProtocolException e) {
					// TODO Auto-generated catch block
					e.printStackTrace();
				} catch (IOException e) {
					// TODO Auto-generated catch block
					e.printStackTrace();
				}


    		}
    	}.start();
    }
    /*
     * 發送Post請求流程
     *
     *
     * */
   public void showLogin(View v){
	   final View loginDialog=getLayoutInflater().inflate(R.layout.login, null);
	   new AlertDialog.Builder(HttpClientDemo.this)
	       .setTitle("登錄系統")
	       .setView(loginDialog)
	       .setPositiveButton("確定", new DialogInterface.OnClickListener(){

			@Override
			public void onClick(DialogInterface dialog, int which) {
				// 獲取對話框的用戶名和密碼

				final String name=((EditText)loginDialog.findViewById(R.id.name)).getText().toString();
				final String pass=((EditText)loginDialog.findViewById(R.id.pass)).getText().toString();
				//點擊確定,開啟線程,在線程中發送Post請求
				new Thread(){
					public void run(){
							try {
								//2,創建HttpPost對象
								HttpPost httppost=new HttpPost("http://localhost:8080/foo/login.jsp");//jsp部署在To嗎cat服務器上
								//3,對傳遞的參數進行封裝,NameValuePair是簡單名稱值對節點類型
								List params=new ArrayList();
								params.add(new BasicNameValuePair("name",name));//添加參數
								params.add(new BasicNameValuePair("pass",pass));
								//3,設置編碼
								httppost.setEntity(new UrlEncodedFormEntity(params,HTTP.UTF_8));
								//4,HttpClient對象執行HttpPost請求,獲得相應
								HttpResponse httpresponse=httpclient.execute(httppost);
								//5,如果狀態碼是200就表示服務器成功相應
								if(httpresponse.getStatusLine().getStatusCode()==200){
									//200:響應成功,301/302:重定向,404:not found未找到資源 ,501服務器遇到錯誤,使其無法對請求提供服務
									String msg = EntityUtils.toString(httpresponse.getEntity());
									Looper.prepare();
									//提示登錄成功
									Toast.makeText(HttpClientDemo.this, msg, Toast.LENGTH_LONG).show();
									Looper.loop();
								}
							} catch (ParseException e) {
								// TODO Auto-generated catch block
								e.printStackTrace();
							} catch (IOException e) {
								// TODO Auto-generated catch block
								e.printStackTrace();
							}
					}
				}.start();

			}
	       }).setNegativeButton("取消", null).show();


}
 淘淘商城---8.6
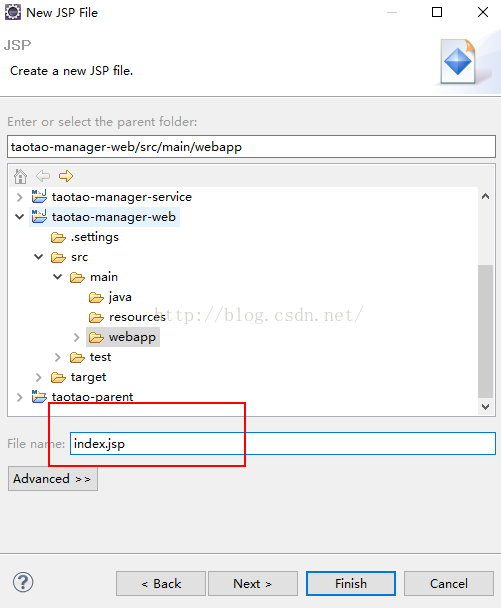
1、測試Maven工程1.1、創建歡迎頁在webapp下創建一個index.jsp的歡迎頁index.jsp: <%@ page language=&qu
 Android Studio 打包及引用 aar
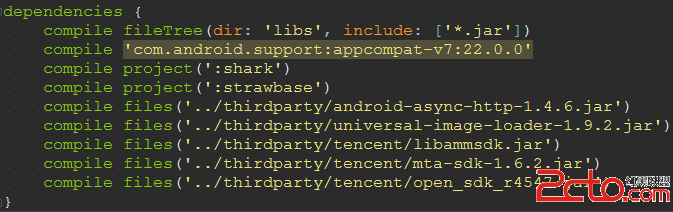
Android Studio 打包及引用 aar1、 簡述在比較大的 Android 項目的開發中,我們經常會遇到工程、jar 包等等之間相互引用的方式。一般我們通過在
 Android Notification通知詳解
Android Notification通知詳解 Notification: (一)、簡介: 顯示在手機狀態欄的通知。Notification所代表
 andorid 自定義SwitchButton
因項目緣故需重新定制SwitchButton,效果如下: 過程如下:1.圓角矩形的繪制2.字體繪制3.小圓繪制4.左右滑動動畫效果繪制代碼如下: package