編輯:關於Android編程
下面代碼設計了異步任務、JSon解析、自定義組件、IO流、文件下載、適配器原理等知識點。
代碼實現從服務器上讀取Json字符串。
Json字符串如下。
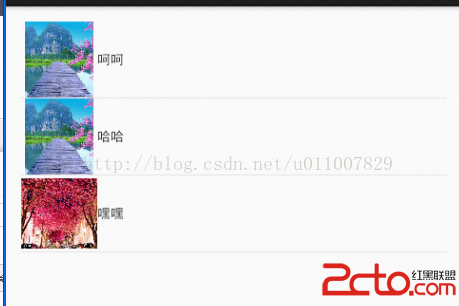
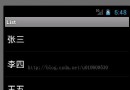
{object:{persons:[{name:'呵呵',image:'http://10.0.159.12:8080/Web/s1.png'},{name:'哈哈',image:'http://10.0.159.12:8080/Web/s1.png'},{name:'嘿嘿',image:'http://10.0.159.12:8080/Web/s2.jpg'}]}}
利用ListView控件將name和image圖片顯示出來。效果如圖:
思路(解析json字符串,然後再次讀取服務器上的圖片解析成byte[]格式。)
新建ImageInfo類存儲ListView顯示的數據:一個是顯示名字name屬性,一個圖片數據。
package com.example.day22_domain;

import java.util.Arrays;

public class ImageInfo {

	private String name;
	private byte[] imagebit;


	public ImageInfo() {
		super();
		// TODO Auto-generated constructor stub
	}


	public ImageInfo(String name, byte[] imagebit) {
		super();
		this.name = name;
		this.imagebit = imagebit;
	}


	public String getName() {
		return name;
	}


	public void setName(String name) {
		this.name = name;
	}


	public byte[] getImagebit() {
		return imagebit;
	}


	public void setImagebit(byte[] imagebit) {
		this.imagebit = imagebit;
	}


	@Override
	public String toString() {
		return ImageInfo [name= + name + , imagebit=
				+ Arrays.toString(imagebit) + ];
	}


}
package com.example.day22_tools;

import java.io.ByteArrayOutputStream;
import java.io.IOException;
import java.io.InputStream;
import java.net.HttpURLConnection;
import java.net.URL;
import java.util.ArrayList;
import java.util.List;

import org.json.JSONArray;
import org.json.JSONException;
import org.json.JSONObject;

import com.example.day22_domain.ImageInfo;

public class HttpUtils {

	public HttpUtils() {

	}
	public static String getJsonString(String path)
	{
		try {
			URL url = new URL(path);
			HttpURLConnection conn = (HttpURLConnection)url.openConnection();
			conn.setRequestMethod(GET);
			conn.setConnectTimeout(5000);
			conn.setDoInput(true);

			if(conn.getResponseCode()==200)
			{
				InputStream inputStream = conn.getInputStream();
				return changetToString(inputStream);
			}
	}catch(Exception e)
	{
	   e.printStackTrace();
	}
		return null;
	}

	private static String changetToString(InputStream inputStream) {
		ByteArrayOutputStream bos = new ByteArrayOutputStream();
		byte[] arr = new byte[1024];
		int len = 0;
		try {
			while((len = inputStream.read(arr))!=-1)
			{
				bos.write(arr,0,len);
			}
		} catch (IOException e) {
			// TODO Auto-generated catch block
			e.printStackTrace();
		}

		byte[] b = bos.toByteArray();
		String ss = new String(b,0,b.length);
		return ss;
	}

	public static List getImageInfo(String jsonString)
	{
		List list = new ArrayList();
		try {
			JSONObject obj = new JSONObject(jsonString);
			JSONObject jsonObj = obj.getJSONObject(object);
			JSONArray array = jsonObj.getJSONArray(persons);
			for(int i=0;i

主界面:通過異步任務進行後台下載圖片解析Json數據,然後顯示在自定義的ListView組件中。  package com.example.day22_all;

import java.io.IOException;
import java.util.ArrayList;
import java.util.HashMap;
import java.util.List;
import java.util.Map;

import com.example.day22_domain.ImageInfo;
import com.example.day22_tools.HttpUtils;

import android.app.Activity;
import android.content.Context;
import android.graphics.Bitmap;
import android.graphics.BitmapFactory;
import android.os.AsyncTask;
import android.os.Bundle;
import android.view.LayoutInflater;
import android.view.View;
import android.view.ViewGroup;
import android.widget.BaseAdapter;
import android.widget.ImageView;
import android.widget.ListView;
import android.widget.TextView;

public class MainActivity extends Activity {
	private ListView listView;
	private String path=http://10.0.159.12:8080/Web/servlet/JsonServlet;
	@Override
	protected void onCreate(Bundle savedInstanceState) {
		super.onCreate(savedInstanceState);
		setContentView(R.layout.activity_main);
		listView = (ListView) findViewById(R.id.listView);
		new DownText().execute(path);
	}

	class DownText extends AsyncTask>>
	{

		@Override
		protected List> doInBackground(String... params) {
			String jsonStr=HttpUtils.getJsonString(params[0]);
			System.out.println(jsonStr+jsonStr);
			List list=HttpUtils.getImageInfo(jsonStr);
			System.out.println(ImageInfo);
			List> imageinfo=new ArrayList>();
			for(int i=0;i map=new HashMap();
				String name=list.get(i).getName();
				byte[] arr=list.get(i).getImagebit();
				Bitmap bitMap = BitmapFactory.decodeByteArray(arr, 0, arr.length);
				map.put(name, name);
				map.put(bitmap, bitMap);
				imageinfo.add(map);
			}

			return imageinfo;
		}
		@Override
		protected void onPostExecute(List> result) {

			super.onPostExecute(result);

			MyAdapter  adapter = new MyAdapter(MainActivity.this,result);

			listView.setAdapter(adapter);

		}

		class MyAdapter extends BaseAdapter
		{
			private Context context;
			private List> list;
			public MyAdapter(Context context, List> list) {
				this.context = context;
				this.list = list;
			}

			@Override
			public int getCount() {
				// TODO Auto-generated method stub
				return list.size();
			}

			@Override
			public Object getItem(int position) {
				// TODO Auto-generated method stub
				return list.get(position);
			}

			@Override
			public long getItemId(int position) {
				// TODO Auto-generated method stub
				return position;
			}

			@Override
			public View getView(int position, View convertView, ViewGroup parent) {
				ViewHolder viewHolder = null;
				if(convertView==null)
				{

					convertView = LayoutInflater.from(context).inflate(R.layout.other_image, nu
					viewHolder = new ViewHolder();
					viewHolder.imageView = (ImageView) convertView.findViewById(R.id.image);
					viewHolder.textView = (TextView) convertView.findViewById(R.id.text);
					convertView.setTag(viewHolder);
				}
				else
					viewHolder = (ViewHolder) convertView.getTag();

			//	viewHolder.imageView.setImageResource(Integer.parseInt(list.get(position).get(bitmap).toString()));
				viewHolder.textView.setText(list.get(position).get(name).toString());
				viewHolder.imageView.setImageBitmap((Bitmap)list.get(position).get(bitmap));
				return convertView;

			}

	    class  ViewHolder
	    {
	    	ImageView imageView;
	    	TextView textView;
	    }

		}
	}

}

注釋:

/*

在實際開發中LayoutInflater這個類還是非常有用的,它的作用類似於findViewById()。不同點是LayoutInflater是用來找res/layout/下的xml布局文件,並且實例化;而findViewById()是找xml布局文件下的具體widget控件(如Button、TextView等)。

具體作用:

1、對於一個沒有被載入或者想要動態載入的界面,都需要使用LayoutInflater.inflate()來載入;

2、對於一個已經載入的界面,就可以使用Activiyt.findViewById()方法來獲得其中的界面元素。

LayoutInflater 是一個抽象類,在文檔中如下聲明:

public abstract class LayoutInflater extends Object

獲得 LayoutInflater 實例的三種方式

1. LayoutInflater inflater = getLayoutInflater();//調用Activity的getLayoutInflater()

2. LayoutInflater inflater = LayoutInflater.from(context);

3. LayoutInflater inflater = (LayoutInflater)context.getSystemService

(Context.LAYOUT_INFLATER_SERVICE);

其實,這三種方式本質是相同的,從源碼中可以看出:

getLayoutInflater():

Activity 的 getLayoutInflater() 方法是調用 PhoneWindow 的getLayoutInflater()方法,看一下該源代碼:

public PhoneWindow(Context context)

{

super(context);

mLayoutInflater = LayoutInflater.from(context);

}

可以看出它其實是調用 LayoutInflater.from(context)。

LayoutInflater.from(context):

public static LayoutInflater from(Context context)

{

LayoutInflater LayoutInflater = (LayoutInflater) context.getSystemService

(Context.LAYOUT_INFLATER_SERVICE);

if (LayoutInflater == null)

{

throw new AssertionError(LayoutInflater not found.);

}

return LayoutInflater;

}

可以看出它其實調用 context.getSystemService()。

結論:所以這三種方式最終本質是都是調用的Context.getSystemService()。

注意:

·inflate 方法與 findViewById 方法不同;

·inflater 是用來找 res/layout 下的 xml 布局文件,並且實例化;

·findViewById() 是找具體 xml 布局文件中的具體 widget 控件(如:Button、TextView 等)。

*/
寫一下布局文件和服務器就好了:
activity_main.xml
 Android最佳性能實踐(三)——高性能編碼優化
在前兩篇文章當中,我們主要學習了Android內存方面的相關知識,包括如何合理地使用內存,以及當發生內存洩露時如何定位出問題的原因。那麼關於內存的知識就討論到這裡,今天開
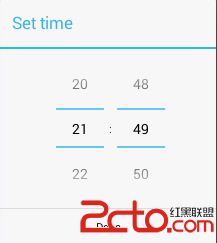 Android筆記——date&time(日期時間選擇對話框)
TimePickerDialog(時間選擇對話框) 創建TimePickerDialog時間選擇對話框: 1.創建一個類繼承DialogFra
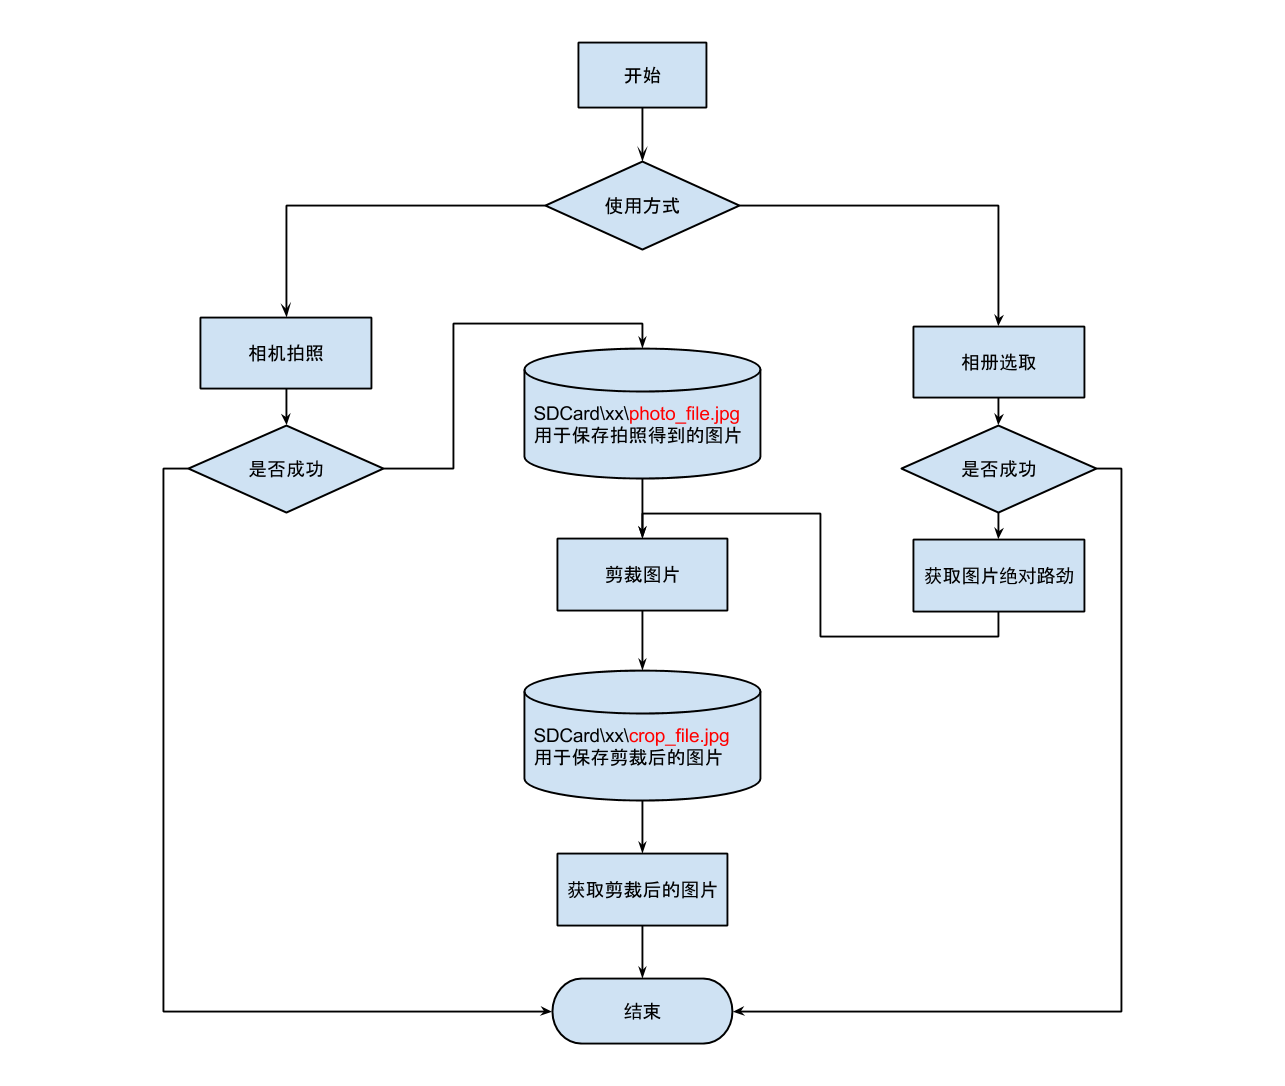 Android實現讀取相機(相冊)圖片並進行剪裁
我們先說一下思路,在android系統中就自帶了圖片剪切的應用,所以,我們只需要將我們獲取到的相片傳給圖片剪切應用,再將剪切好的相片返回到我們自己的界面顯示就ok了在開發
 Android開發系列(十四):ListView用法、對ListView監聽的三種方法以及ListView中Adapter的使用方法
一、ArrayAdapter的介紹以及ListView的用法: Adapter是數據和視圖之間的橋梁,數據在adapter中做處理,然後顯示到視圖上面。就是用來綁定數據用