編輯:關於Android編程
		AlertDialog dialog = builder.setTitle("消息列表")
							.setView(layout)
							.create();
		dialog.show();
		//設置窗口的大小
dialog.getWindow().setLayout(300, 200);另一種實現:
WindowManager.LayoutParams params = dialog.getWindow().getAttributes();
params.width = 300;
params.height = 200;
dialog.getWindow().setAttributes(params);
        final WindowManager.LayoutParams attrs = getAttributes();
        attrs.width = width;
        attrs.height = height;
        if (mCallback != null) {
            mCallback.onWindowAttributesChanged(attrs);
}通過WindowManager來實現添加View:
mWindowManager = getWindowManager();
        LayoutInflater inflater = (LayoutInflater) getSystemService(LAYOUT_INFLATER_SERVICE);
        mDialogView = inflater.inflate(R.layout.dialogview, null);
        WindowManager.LayoutParams params = new WindowManager.LayoutParams();
        params.height = WindowManager.LayoutParams.WRAP_CONTENT;
        params.width = WindowManager.LayoutParams.WRAP_CONTENT;
        params.y += 100;
        params.x += -30;
        initDialogComponents(mDialogView);
        //添加對話框
mWindowManager.addView(mDialogView, params);package ui;
import android.content.Context;
import android.util.AttributeSet;
import android.util.DisplayMetrics;
import android.util.Log;
import android.view.MotionEvent;
import android.view.WindowManager;
import android.view.animation.AlphaAnimation;
import android.view.animation.Animation;
import android.view.animation.AnimationSet;
import android.view.animation.ScaleAnimation;
import android.widget.Button;
/**
*
* @author chenxiruanhai
*
*
*/
public class MenuButton extends Button {
private Context mContext;
private WindowManager mWm;
int lastX;
int lastY;
int screenWidth;
int screenHeight;
public MenuButton(Context context, AttributeSet attrs) {
super(context, attrs);
this.mContext = context;
mWm = (WindowManager) mContext.getSystemService(Context.WINDOW_SERVICE);
DisplayMetrics dm = mContext.getResources().getDisplayMetrics();
screenWidth = dm.widthPixels;
screenHeight = dm.heightPixels;
}
@Override
public boolean onTouchEvent(MotionEvent event) {
super.onTouchEvent(event);
measure(0, 0);
switch (event.getAction()) {
case MotionEvent.ACTION_DOWN:
lastX = (int) event.getRawX();
lastY = (int) event.getRawY();
break;
case MotionEvent.ACTION_MOVE:
int dx = (int) event.getRawX() - lastX;
int dy = (int) event.getRawY() - lastY;
int left = this.getLeft() + dx;
int top = this.getTop() + dy;
int right = this.getRight() + dx;
int bottom = this.getBottom() + dy;
if (left < 0) {
left = 0;
right = left + this.getWidth();
}
if (right > screenWidth) {
right = screenWidth;
left = right - this.getWidth();
}
if (top < 0) {
top = 0;
bottom = top + this.getHeight();
}
if (bottom > screenHeight) {
bottom = screenHeight;
top = bottom - this.getHeight();
}
this.layout(left, top, right, bottom);
lastX = (int) event.getRawX();
lastY = (int) event.getRawY();
lastX = (int) event.getRawX();
lastY = (int) event.getRawY();
break;
case MotionEvent.ACTION_UP:{
Animation alphaAnimation = new AlphaAnimation( 0.5f,1f);
alphaAnimation.setDuration(1000);
Animation scaleAnimation2 = new ScaleAnimation(1.0f, .5f,1.0f,.5f);
scaleAnimation2.setDuration(500);
AnimationSet animationSet = new AnimationSet(true);
animationSet.addAnimation(alphaAnimation);
animationSet.addAnimation(scaleAnimation);
animationSet.addAnimation(scaleAnimation2);
animationSet.setFillAfter(true);
Animation currentAnima = getAnimation();
if(null!=currentAnima) {
currentAnima.cancel();
animationSet.reset();
}
startAnimation(animationSet);
}
break;
}
return true;
}
}
	imageView.setScaleType(ImageView.FIT_START);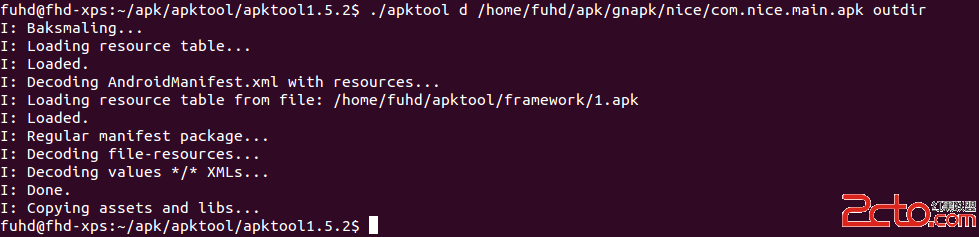
imageView.setAdjustViewBounds(true); Android反編譯和二次打包實戰
作為Android開發者,工作中少不了要反編譯別人的apk,當然主要目的還是為了學習到更多,取彼之長,補己之短。今天就來總結一下Android反編譯和二次打包的一些知識。
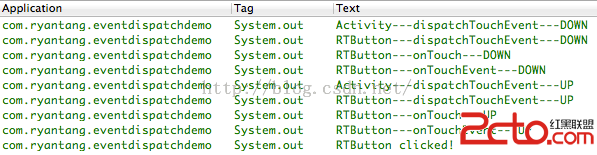
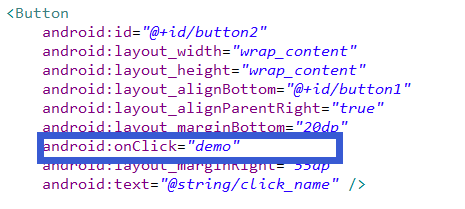 Android為按鈕控件綁定事件的五種實現方式
一、寫在最前面本次,來介紹一下安卓中為控件--Button綁定事件的五種方式。二、具體的實現第一種:直接綁定在Button控件上:步驟1.在Button控件上設置andr
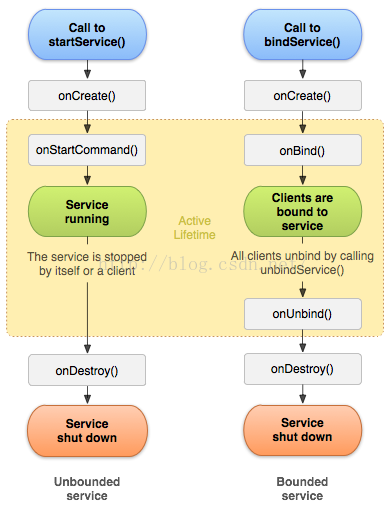
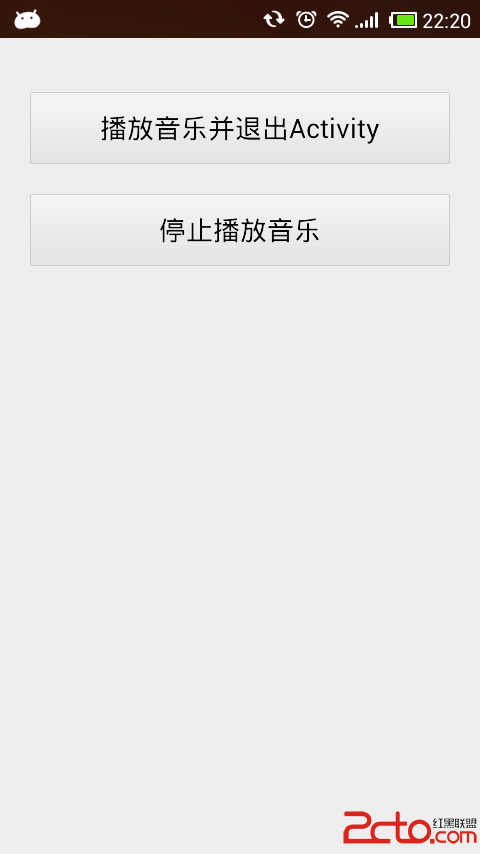 Android通過startService播放背景音樂簡單示例
關於startService的基本使用概述及其生命周期可參見博客《Android中startService的使用及Service生命周期》。本文通過播放背景音樂的簡單示例
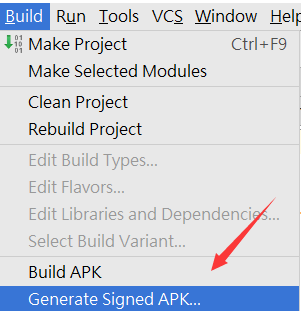 android中簽名、證書、公鑰密鑰的概念及使用
公鑰和私鑰的概念在現代密碼體制中加密和解密是采用不同的密鑰(公開密鑰),也就是公開密鑰算法(也叫非對稱算法、雙鑰算法)”,每個通信方均需要兩個密鑰,即公鑰和私