編輯:關於Android編程
android_apk的在線安裝,除了要設計Android 客戶端的代碼外,還要搭建服務器的代碼,仿真實現中Android軟件的在線升級。
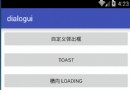
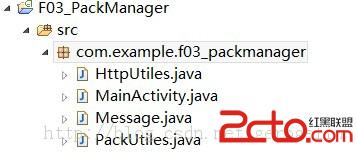
Android 客戶端的代碼截圖如下。
MainActivity
package com.example.f03_packmanager;

import java.io.File;
import java.util.concurrent.ExecutionException;

import android.net.Uri;
import android.os.AsyncTask;
import android.os.Bundle;
import android.app.Activity;
import android.app.AlertDialog;
import android.app.ProgressDialog;
import android.content.DialogInterface;
import android.content.Intent;
import android.content.DialogInterface.OnClickListener;
import android.util.Log;
import android.view.View;
import android.widget.Button;

public class MainActivity extends Activity {
	// 先在文件清單添加獲取網絡訪問權限和准許讀寫sdcard的permission;
	private Button button;
	private ProgressDialog dialog;// 查詢版本更新信息的進度對話框
	private String messagePath = "http://111.0.124.108:8080/http/servlet/Install";// 獲取版本更新的URL
	private Message message;
	private PackUtiles packUtiles;// 獲取當前版本信息的封裝類
	private AlertDialog.Builder builder;// 下載更新的對話框

	@Override
	protected void onCreate(Bundle savedInstanceState) {
		super.onCreate(savedInstanceState);
		setContentView(R.layout.activity_main);
		dialog = new ProgressDialog(MainActivity.this);
		dialog.setTitle("提示");
		dialog.setMessage("download.....");
		builder = new AlertDialog.Builder(MainActivity.this);
		builder.setTitle("下載更新");
		builder.setMessage("是否下載最新的版本?");
		builder.setCancelable(false);// 設置不能隨意關閉提示下載更新的對話框
		button = (Button) this.findViewById(R.id.button1);
		packUtiles = new PackUtiles(MainActivity.this);
		button.setOnClickListener(new View.OnClickListener() {

			@Override
			public void onClick(View v) {
				// TODO Auto-generated method stub
				try {
					message = new getAPKUrl().execute(messagePath)
							.get();
					boolean flag = packUtiles.update(packUtiles.getVersion(),
							message.getVsersionCode());
					Log.i("tag", "------->" + flag);
					if (flag) {

						builder.setPositiveButton("確定", new OnClickListener() {

							@Override
							public void onClick(DialogInterface arg0, int arg1) {
								// TODO Auto-generated method stub
								new downLoadAPK().execute(message.getApkUrl());
							}
						});
						builder.setNegativeButton("取消", new OnClickListener() {

							@Override
							public void onClick(DialogInterface arg0, int arg1) {
								// TODO Auto-generated method stub

							}
						});
						builder.create().show();
					}

				} catch (InterruptedException e) {
					// TODO Auto-generated catch block
					e.printStackTrace();
				} catch (ExecutionException e) {
					// TODO Auto-generated catch block
					e.printStackTrace();
				}
			}
		});
	}

	// 獲取版本更新信息的異步任務
	public class getAPKUrl extends AsyncTask {
		@Override
		protected void onPreExecute() {
			// TODO Auto-generated method stub
			super.onPreExecute();
			dialog.show();
		}

		@Override
		protected Message doInBackground(String... params) {
			// TODO Auto-generated method stub
			return HttpUtiles.getMessage(params[0]);
		}

		@Override
		protected void onPostExecute(Message result) {
			// TODO Auto-generated method stub
			super.onPostExecute(result);
			dialog.dismiss();
		}
	}

	public class downLoadAPK extends AsyncTask {
		@Override
		protected void onPreExecute() {
			// TODO Auto-generated method stub
			super.onPreExecute();
		}

		@Override
		protected Void doInBackground(String... params) {
			// TODO Auto-generated method stub
			String uri=HttpUtiles.downLoadApk(params[0]);
			Log.i("TAG2", "-------->"+uri);
			//通過文件路徑安裝指定版本
			Uri uri2=Uri.fromFile(new File(uri));
			Intent intent=new Intent(Intent.ACTION_VIEW);
			intent.setDataAndType(uri2, "application/vnd.android.package-archive");
			startActivity(intent);
			return null;
		}

		@Override
		protected void onPostExecute(Void result) {
			// TODO Auto-generated method stub
			super.onPostExecute(result);
		}
	}

}
package com.example.f03_packmanager;
import java.io.File;
import java.io.FileOutputStream;
import java.io.IOException;
import org.apache.http.HttpResponse;
import org.apache.http.client.ClientProtocolException;
import org.apache.http.client.HttpClient;
import org.apache.http.client.methods.HttpPost;
import org.apache.http.impl.client.DefaultHttpClient;
import org.apache.http.util.EntityUtils;
import org.json.JSONException;
import org.json.JSONObject;

import android.os.Environment;
import android.util.Log;

public class HttpUtiles {
     //下載版本信息,格式為json
	public static Message getMessage(String path) {
		Message message = new Message();
		HttpClient client = new DefaultHttpClient();
		HttpPost httpPost = new HttpPost(path);
		try {
			HttpResponse httpResponse = client.execute(httpPost);
			if(httpResponse.getStatusLine().getStatusCode()==200){
				String json=EntityUtils.toString(httpResponse.getEntity());
				try {
					JSONObject  jsonObject=new JSONObject(json).getJSONObject("message");
					message.setVsersionCode(jsonObject.getInt("vsersionCode"));
					message.setApkUrl(jsonObject.getString("apkUrl"));
				} catch (JSONException e) {
					// TODO Auto-generated catch block
					e.printStackTrace();
				}
			}
		} catch (ClientProtocolException e) {
			// TODO Auto-generated catch block
			e.printStackTrace();
		} catch (IOException e) {
			// TODO Auto-generated catch block
			e.printStackTrace();
		}

		return message;

	}
	//下載指定版本到sdcard中
	public static String downLoadApk(String path){
		byte[]data=null;
		String uri=null;
		HttpClient client = new DefaultHttpClient();
		HttpPost httpPost = new HttpPost(path);
		FileOutputStream fileOutputStream=null;
		try {
			HttpResponse httpResponse = client.execute(httpPost);
			if(httpResponse.getStatusLine().getStatusCode()==200){
				data=EntityUtils.toByteArray(httpResponse.getEntity());
				if(Environment.getExternalStorageState().equals(Environment.MEDIA_MOUNTED)){
				    File file=Environment.getExternalStorageDirectory();
				    String name=path.substring(path.lastIndexOf("/")+1,path.length());
					fileOutputStream=new FileOutputStream(new File(file, name));
					fileOutputStream.write(data, 0, data.length);
					uri=file.getAbsolutePath()+"/"+name;
				}
			}
		} catch (ClientProtocolException e) {
			// TODO Auto-generated catch block
			e.printStackTrace();
		} catch (IOException e) {
			// TODO Auto-generated catch block
			e.printStackTrace();
		}finally{
			if(fileOutputStream!=null){
				try {
					fileOutputStream.close();
				} catch (IOException e) {
					// TODO Auto-generated catch block
					e.printStackTrace();
				}
			}
		}
		Log.i("HTTP", "-------->"+uri);
		return uri;

	}

}
Message類指定數據返回的格式
package com.example.f03_packmanager;

public class Message {

	private int vsersionCode;
	private String apkUrl;
	public int getVsersionCode() {
		return vsersionCode;
	}
	public void setVsersionCode(int vsersionCode) {
		this.vsersionCode = vsersionCode;
	}
	public String getApkUrl() {
		return apkUrl;
	}
	public void setApkUrl(String apkUrl) {
		this.apkUrl = apkUrl;
	}
	@Override
	public String toString() {
		return "Message [vsersionCode=" + vsersionCode + ", apkUrl=" + apkUrl
				+ "]";
	}


}PackUtilse獲取軟件當前的版本信息package com.example.f03_packmanager;
import android.content.Context;
import android.content.pm.PackageInfo;
import android.content.pm.PackageManager;
import android.content.pm.PackageManager.NameNotFoundException;
public class PackUtiles {
private Context context;
private PackageManager manager;
private PackageInfo info;
public PackUtiles(Context context) {
// TODO Auto-generated constructor stub
this.context = context;
initDate();
}
public void initDate() {
manager = context.getPackageManager();
try {
info = manager.getPackageInfo(context.getPackageName(),
PackageManager.GET_ACTIVITIES);
} catch (NameNotFoundException e) {
// TODO Auto-generated catch block
e.printStackTrace();
}
}
public int getVersion() {
return info.versionCode;
}
public String getVersionName(){
return info.versionName;
}
//比較本地版本和服務器的版本號的大小
public boolean update(int oldVersion,int newVersion){
boolean flag=newVersion>oldVersion?true:false;
return flag;
}
}
package com.login.install;

import java.io.IOException;
import java.io.PrintWriter;
import java.util.HashMap;
import java.util.Map;

import javax.servlet.ServletException;
import javax.servlet.http.HttpServlet;
import javax.servlet.http.HttpServletRequest;
import javax.servlet.http.HttpServletResponse;

import net.sf.json.JSONSerializer;

public class Install extends HttpServlet {

	/**
	 * Constructor of the object.
	 */
	public Install() {
		super();
	}

	/**
	 * Destruction of the servlet.

	 */
	public void destroy() {
		super.destroy(); // Just puts "destroy" string in log
		// Put your code here
	}

	/**
	 * The doGet method of the servlet.

	 *
	 * This method is called when a form has its tag value method equals to get.
	 *
	 * @param request the request send by the client to the server
	 * @param response the response send by the server to the client
	 * @throws ServletException if an error occurred
	 * @throws IOException if an error occurred
	 */
	public void doGet(HttpServletRequest request, HttpServletResponse response)
			throws ServletException, IOException {

		this.doPost(request, response);
	}

	/**
	 * The doPost method of the servlet.

	 *
	 * This method is called when a form has its tag value method equals to post.
	 *
	 * @param request the request send by the client to the server
	 * @param response the response send by the server to the client
	 * @throws ServletException if an error occurred
	 * @throws IOException if an error occurred
	 */
	public void doPost(HttpServletRequest request, HttpServletResponse response)
			throws ServletException, IOException {

		response.setContentType("text/html");
		PrintWriter out = response.getWriter();
		Message message=new Message();
		message.setVsersionCode(2);
		message.setApkUrl("http://111.0.124.108:8080/http/F03_PackManager.apk");
	    Map map=new HashMap();
	    map.put("message", message);
	    out.print(JSONSerializer.toJSON(map));
		out.flush();
		out.close();
	}

	/**
	 * Initialization of the servlet.

	 *
	 * @throws ServletException if an error occurs
	 */
	public void init() throws ServletException {
		// Put your code here
	}

}
 Android三步顯示gif動態圖片
今天給大家帶來一個顯示gif動態圖片的類庫,使用方法很簡單,只需三步。 1.把GifView.jar加入你的項目。 2.在布局xml中這樣寫: 3.在Activity中
 Android EventBus的初步使用
項目使用的技術呢,說白了,就是將要傳遞的event(一個Object對象,可任意自定義),發送到公共的組件EventBus中進行存儲, 在通過
 如何節約Android設備的流量使用
Android開放的平台,獲得高度自由度,用戶也要承受系統當中一些潛在的問題,比如後台流量的消耗。那麼怎樣才能有效控制Android的流量使用呢?下面這5個
 android自定義View——Bitmap使用詳解
先看一個效果圖本節課程實現完成右圖效果(三步)以及保存塗鴉過的圖片步驟【1】將背景Bitmap圖片畫到底層canvas上 bitmapBackground = Bitma