編輯:Android開發教程
如果想根據屏幕的方向自定義UI,除了把views錨定在屏幕的四周(上一節講過"錨定"視圖) ,更簡單的辦法就是創建一個獨立的res/layout文件夾,它包含了不同屏幕方向下的UI布局。如果想要支持 landscape橫屏模式,那麼就可以在res文件夾下面創建一個layout-land文件夾(land代表landscape)。
基本上,在layout文件夾下面的main.xml定義了在portrait豎屏模式下activity的布局。但在 layyout-land文件夾下面的main.xml定義了橫屏模式下的UI布局。
1. 在layout文件夾下面的 main.xml文件:
<pre name="code" class="html"><?xml version="1.0" encoding="utf-8"?>
<RelativeLayout
    android:layout_width="fill_parent"
    android:layout_height="fill_parent"
    xmlns:android="http://schemas.android.com/apk/res/android">
    <Button
        android:id="@+id/button1"
        android:layout_width="wrap_content"
        android:layout_height="wrap_content"
        android:text="Top Left"
        android:layout_alignParentLeft="true"
        android:layout_alignParentTop="true" />
    <Button
        android:id="@+id/button2"
        android:layout_width="wrap_content"
        android:layout_height="wrap_content"
        android:text="Top Right"
        android:layout_alignParentTop="true"
        android:layout_alignParentRight="true" />
    <Button
        android:id="@+id/button3"
        android:layout_width="wrap_content"
        android:layout_height="wrap_content"
        android:text="Bottom Left"
        android:layout_alignParentLeft="true"
        android:layout_alignParentBottom="true" />
    <Button
        android:id="@+id/button4"
        android:layout_width="wrap_content"
        android:layout_height="wrap_content"
        android:text="Bottom Right"
        android:layout_alignParentRight="true"
        android:layout_alignParentBottom="true" />
    <Button
        android:id="@+id/button5"
        android:layout_width="fill_parent"
        android:layout_height="wrap_content"
        android:text="Middle"
        android:layout_centerVertical="true"
        android:layout_centerHorizontal="true" />
</RelativeLayout>
2、在layout-land文件夾下面的main.xml文件,注意,它比上面的代碼 多了兩個Button視圖:
<?xml version="1.0" encoding="utf-8"?>
<RelativeLayout
    android:layout_width="fill_parent"
    android:layout_height="fill_parent"
    xmlns:android="http://schemas.android.com/apk/res/android">
    <Button
        android:id="@+id/button1"
        android:layout_width="wrap_content"
        android:layout_height="wrap_content"
        android:text="Top Left"
        android:layout_alignParentLeft="true"
        android:layout_alignParentTop="true" />
    <Button
        android:id="@+id/button2"
        android:layout_width="wrap_content"
        android:layout_height="wrap_content"
        android:text="Top Right"
        android:layout_alignParentTop="true"
        android:layout_alignParentRight="true" />
    <Button
        android:id="@+id/button3"
        android:layout_width="wrap_content"
        android:layout_height="wrap_content"
        android:text="Bottom Left"
        android:layout_alignParentLeft="true"
        android:layout_alignParentBottom="true" />
    <Button
        android:id="@+id/button4"
        android:layout_width="wrap_content"
        android:layout_height="wrap_content"
        android:text="Bottom Right"
        android:layout_alignParentRight="true"
        android:layout_alignParentBottom="true" />
    <Button
        android:id="@+id/button5"
        android:layout_width="fill_parent"
        android:layout_height="wrap_content"
        android:text="Middle"
        android:layout_centerVertical="true"
        android:layout_centerHorizontal="true" />
    <!-- 新增加的兩個Button -->
    <Button
        android:id="@+id/button6"
        android:layout_width="180px"
        android:layout_height="wrap_content"
        android:text="Top Middle"
        android:layout_centerVertical="true"
        android:layout_centerHorizontal="true"
        android:layout_alignParentTop="true" />
    <Button
        android:id="@+id/button7"
        android:layout_width="180px"
        android:layout_height="wrap_content"
        android:text="Bottom Middle"
        android:layout_centerVertical="true"
        android:layout_centerHorizontal="true"
        android:layout_alignParentBottom="true" />
</RelativeLayout>
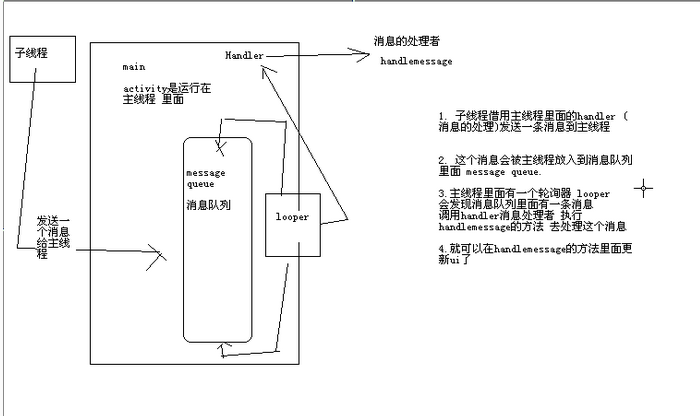 android中子線程更新UI的方式
一、為何寫作此文你是不是經常看到很多書籍中說:不能在子線程中操作ui,不然會報錯。你是不是也遇到了如下的疑惑(見下面的代碼): (Bundle savedI
 Android滑動菜單特效實現,仿人人客戶端側滑效果,史上最簡單的側滑實現
人人客戶端有一個特效還是挺吸引人的,在主界面手指向右滑動,就可以將菜單展示出來,而主界面會被 隱藏大部分,但是仍有左側的一小部分同菜單一起展示。據說人人客戶端的這個特效是
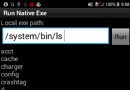 android技巧:如何在android程序中執行adb shell命令
package net.gimite.nativeexe; import java.io.BufferedReader; import java.io.F
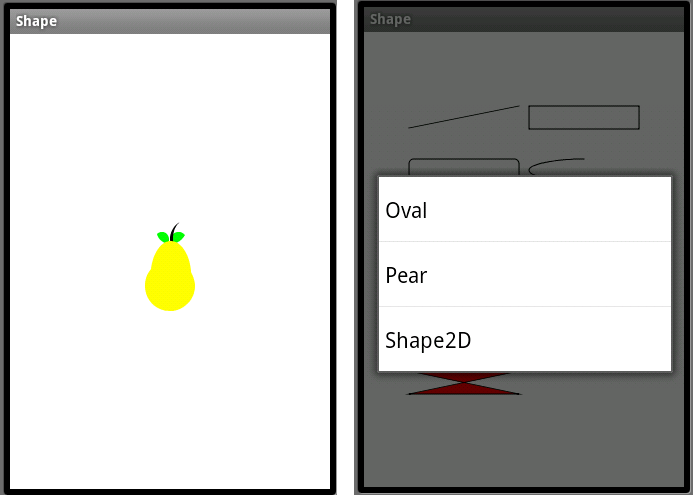
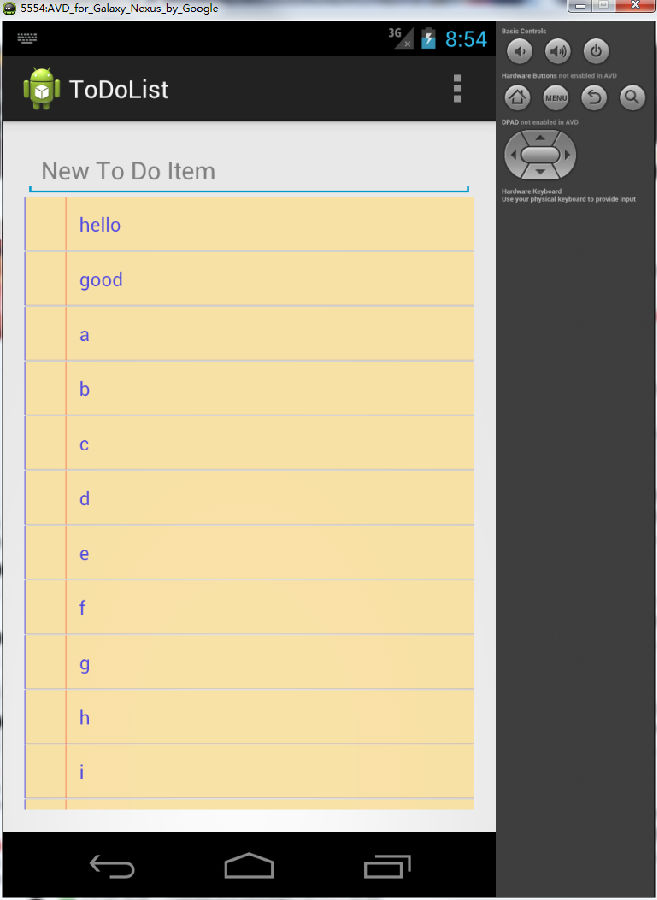 Android中的ToDoList(定制樣式) 詳解
Android允許從已有的視圖工具箱(Widget Tool Box)派生子類 或 實現自己的視圖控件;通過重寫事件處理程序 和onDraw()方法, 但是仍然回調超類(