編輯:Android技術基礎
嘿嘿,看到這個題目,相信部分讀者會問,你前面的Fragment寫完了嗎?嗯,沒寫完,因為想例子,需要 一點時間,為了提高效率,所以決定像多線程一樣,並發的來寫教程,這樣可能可以加快寫教程的進度, 到現在為止,剛好寫了60篇,離完成入門教程還很遠呢,而前面也說過,想在一個半到兩個月之內完成 這套教程,今天已經9.1號了,要加吧勁~好的,廢話就這麼多,本節給大家介紹的是Android數據存儲與 訪問方式中的一個——文件存儲與讀寫,當然除了這種方式外,我們可以存到SharedPreference,數據庫, 或者Application中,當然這些後面都會講,嗯,開始本節內容~
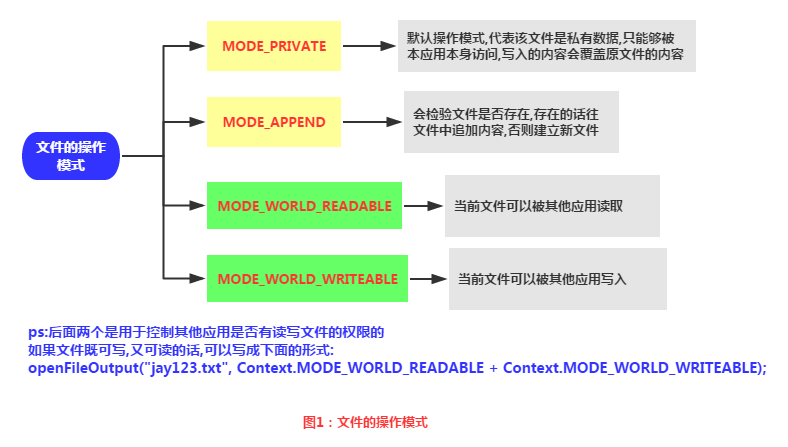
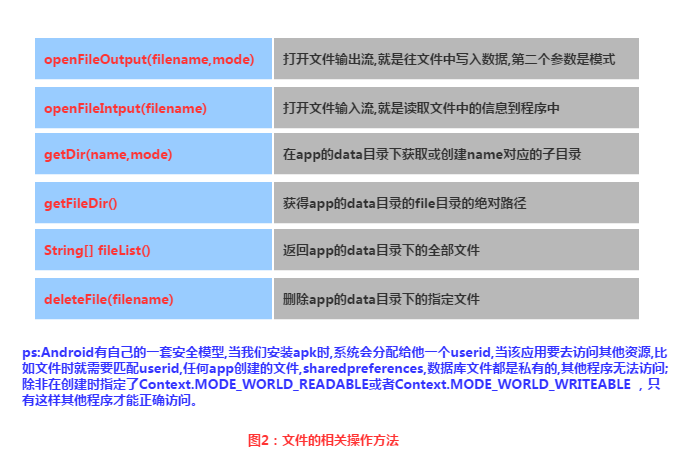
學過Java的同學都知道,我們新建文件,然後就可以寫入數據了,但是Android卻不一樣,因為Android是 基於Linux的,我們在讀寫文件的時候,還需加上文件的操作模式,Android中的操作模式如下:
Android中的文件讀寫和Java中的文件I/O相同,流程也很簡單,下面我們來寫個簡單的示例:
實現效果圖:
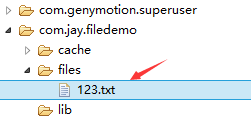
PS:這裡用的是模擬器,因為筆者的N5並沒有root,看不到文件的存儲目錄,下面我們打開DDMS 的File Exploer可以看到,在data/data/<包名>/file中有我們寫入的文件:
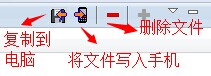
我們可以點擊右上角的響應圖標將文件導入到電腦中,並且打開驗證寫入的內容:
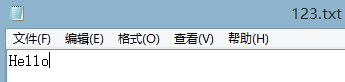
代碼實現:
首先是布局文件:main_activity.xml
<LinearLayout xmlns:android="http://schemas.android.com/apk/res/android"
    xmlns:tools="http://schemas.android.com/tools"
    android:id="@+id/LinearLayout1"
    android:layout_width="match_parent"
    android:layout_height="match_parent"
    android:orientation="vertical"
    tools:context="com.jay.example.filedemo1.MainActivity">

    <TextView
        android:layout_width="wrap_content"
        android:layout_height="wrap_content"
        android:text="@string/nametitle" />

    <EditText
        android:id="@+id/editname"
        android:layout_width="match_parent"
        android:layout_height="wrap_content" />

    <TextView
        android:layout_width="wrap_content"
        android:layout_height="wrap_content"
        android:text="@string/detailtitle" />

    <EditText
        android:id="@+id/editdetail"
        android:layout_width="match_parent"
        android:layout_height="wrap_content"
        android:minLines="2" />

    <LinearLayout
        android:layout_width="fill_parent"
        android:layout_height="wrap_content"
        android:orientation="horizontal">

        <Button
            android:id="@+id/btnsave"
            android:layout_width="wrap_content"
            android:layout_height="wrap_content"
            android:text="@string/btnwrite" />

        <Button
            android:id="@+id/btnclean"
            android:layout_width="wrap_content"
            android:layout_height="wrap_content"
            android:text="@string/btnclean" />
    </LinearLayout>

    <Button
        android:id="@+id/btnread"
        android:layout_width="wrap_content"
        android:layout_height="wrap_content"
        android:text="@string/btnread" />

</LinearLayout>
然後我們來寫一個文件協助類:FileHelper.java
/**
 * Created by Jay on 2015/9/1 0001.
 */
public class FileHelper {

    private Context mContext;

    public FileHelper() {
    }

    public FileHelper(Context mContext) {
        super();
        this.mContext = mContext;
    }

    /*
    * 這裡定義的是一個文件保存的方法,寫入到文件中,所以是輸出流
    * */
    public void save(String filename, String filecontent) throws Exception {
        //這裡我們使用私有模式,創建出來的文件只能被本應用訪問,還會覆蓋原文件哦
        FileOutputStream output = mContext.openFileOutput(filename, Context.MODE_PRIVATE);
        output.write(filecontent.getBytes());  //將String字符串以字節流的形式寫入到輸出流中
        output.close();         //關閉輸出流
    }


    /*
    * 這裡定義的是文件讀取的方法
    * */
    public String read(String filename) throws IOException {
        //打開文件輸入流
        FileInputStream input = mContext.openFileInput(filename);
        byte[] temp = new byte[1024];
        StringBuilder sb = new StringBuilder("");
        int len = 0;
        //讀取文件內容:
        while ((len = input.read(temp)) > 0) {
            sb.append(new String(temp, 0, len));
        }
        //關閉輸入流
        input.close();
        return sb.toString();
    }

}
最後是MainActivity.java,我們在這裡完成相關操作:
public class MainActivity extends AppCompatActivity implements View.OnClickListener {

    private EditText editname;
    private EditText editdetail;
    private Button btnsave;
    private Button btnclean;
    private Button btnread;
    private Context mContext;

    @Override
    protected void onCreate(Bundle savedInstanceState) {
        super.onCreate(savedInstanceState);
        setContentView(R.layout.activity_main);
        mContext = getApplicationContext();
        bindViews();
    }


    private void bindViews() {
        editdetail = (EditText) findViewById(R.id.editdetail);
        editname = (EditText) findViewById(R.id.editname);
        btnclean = (Button) findViewById(R.id.btnclean);
        btnsave = (Button) findViewById(R.id.btnsave);
        btnread = (Button) findViewById(R.id.btnread);

        btnclean.setOnClickListener(this);
        btnsave.setOnClickListener(this);
        btnread.setOnClickListener(this);
    }


    @Override
    public void onClick(View v) {
        switch (v.getId()) {
            case R.id.btnclean:
                editdetail.setText("");
                editname.setText("");
                break;
            case R.id.btnsave:
                FileHelper fHelper = new FileHelper(mContext);
                String filename = editname.getText().toString();
                String filedetail = editdetail.getText().toString();
                try {
                    fHelper.save(filename, filedetail);
                    Toast.makeText(getApplicationContext(), "數據寫入成功", Toast.LENGTH_SHORT).show();
                } catch (Exception e) {
                    e.printStackTrace();
                    Toast.makeText(getApplicationContext(), "數據寫入失敗", Toast.LENGTH_SHORT).show();
                }
                break;
            case R.id.btnread:
                String detail = "";
                FileHelper fHelper2 = new FileHelper(getApplicationContext());
                try {
                    String fname = editname.getText().toString();
                    detail = fHelper2.read(fname);
                } catch (IOException e) {
                    e.printStackTrace();
                }
                Toast.makeText(getApplicationContext(), detail, Toast.LENGTH_SHORT).show();
                break;
        }
    }
}
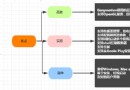
讀取流程圖:

代碼示例:
運行效果圖:
同樣打開DDMS的File Explorer,在舊版本的系統上我們可以直接在mmt\sdcard上找到,但是新版本 的就可能需要我們自己找找了,首先我們來到這個路徑下:
點開sdcard,但是沒東西,我們繼續找唠叨後面這個/storage/emulated/legacy下找:

好吧,他又跳到別的地方去了,我們繼續找/storage/shell/emilated/0

果然找到了,我們在SD卡裡生成的test.txt!導出到電腦看下裡面的內容:
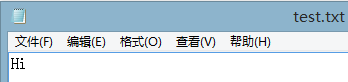
嘿嘿,果然讀寫SD卡成功~接下來我們來看下代碼是怎麼寫的:
代碼實現:
main_activity.xml:
<LinearLayout xmlns:android="http://schemas.android.com/apk/res/android"
    xmlns:tools="http://schemas.android.com/tools"
    android:id="@+id/LinearLayout1"
    android:layout_width="match_parent"
    android:layout_height="match_parent"
    android:orientation="vertical"
    tools:context="com.jay.example.filedemo2.MainActivity">

    <TextView
        android:layout_width="wrap_content"
        android:layout_height="wrap_content"
        android:text="清輸入文件名" />

    <EditText
        android:id="@+id/edittitle"
        android:layout_width="match_parent"
        android:layout_height="wrap_content"
        android:hint="文件名" />


    <TextView
        android:layout_width="wrap_content"
        android:layout_height="wrap_content"
        android:text="清輸入文件內容" />

    <EditText
        android:id="@+id/editdetail"
        android:layout_width="match_parent"
        android:layout_height="wrap_content"
        android:hint="文件內容" />

    <Button
        android:id="@+id/btnsave"
        android:layout_width="wrap_content"
        android:layout_height="wrap_content"
        android:text="保存到SD卡" />

    <Button
        android:id="@+id/btnclean"
        android:layout_width="wrap_content"
        android:layout_height="wrap_content"
        android:text="清空" />

    <Button
        android:id="@+id/btnread"
        android:layout_width="wrap_content"
        android:layout_height="wrap_content"
        android:text="讀取sd卡中的文件" />

</LinearLayout>
接著我們來寫一個SD操作類: SDFileHelper.java
/**
 * Created by Jay on 2015/9/1 0001.
 */
public class SDFileHelper {

    private Context context;

    public SDFileHelper() {
    }

    public SDFileHelper(Context context) {
        super();
        this.context = context;
    }

    //往SD卡寫入文件的方法
    public void savaFileToSD(String filename, String filecontent) throws Exception {
        //如果手機已插入sd卡,且app具有讀寫sd卡的權限
        if (Environment.getExternalStorageState().equals(Environment.MEDIA_MOUNTED)) {
            filename = Environment.getExternalStorageDirectory().getCanonicalPath() + "/" + filename;
            //這裡就不要用openFileOutput了,那個是往手機內存中寫數據的
            FileOutputStream output = new FileOutputStream(filename);
            output.write(filecontent.getBytes());
            //將String字符串以字節流的形式寫入到輸出流中
            output.close();
            //關閉輸出流
        } else Toast.makeText(context, "SD卡不存在或者不可讀寫", Toast.LENGTH_SHORT).show();
    }

    //讀取SD卡中文件的方法
    //定義讀取文件的方法:
    public String readFromSD(String filename) throws IOException {
        StringBuilder sb = new StringBuilder("");
        if (Environment.getExternalStorageState().equals(Environment.MEDIA_MOUNTED)) {
            filename = Environment.getExternalStorageDirectory().getCanonicalPath() + "/" + filename;
            //打開文件輸入流
            FileInputStream input = new FileInputStream(filename);
            byte[] temp = new byte[1024];

            int len = 0;
            //讀取文件內容:
            while ((len = input.read(temp)) > 0) {
                sb.append(new String(temp, 0, len));
            }
            //關閉輸入流
            input.close();
        }
        return sb.toString();
    }


}
接著MainActivity.java實現相關邏輯:
public class MainActivity extends AppCompatActivity implements View.OnClickListener{

    private EditText editname;
    private EditText editdetail;
    private Button btnsave;
    private Button btnclean;
    private Button btnread;
    private Context mContext;

    @Override
    protected void onCreate(Bundle savedInstanceState) {
        super.onCreate(savedInstanceState);
        setContentView(R.layout.activity_main);
        mContext = getApplicationContext();
        bindViews();
    }

    private void bindViews() {
        editname = (EditText) findViewById(R.id.edittitle);
        editdetail = (EditText) findViewById(R.id.editdetail);
        btnsave = (Button) findViewById(R.id.btnsave);
        btnclean = (Button) findViewById(R.id.btnclean);
        btnread = (Button) findViewById(R.id.btnread);

        btnsave.setOnClickListener(this);
        btnclean.setOnClickListener(this);
        btnread.setOnClickListener(this);
    }

    @Override
    public void onClick(View v) {
        switch (v.getId()){
            case R.id.btnclean:
                editdetail.setText("");
                editname.setText("");
                break;
            case R.id.btnsave:
                String filename = editname.getText().toString();
                String filedetail = editdetail.getText().toString();
                SDFileHelper sdHelper = new SDFileHelper(mContext);
                try
                {
                    sdHelper.savaFileToSD(filename, filedetail);
                    Toast.makeText(getApplicationContext(), "數據寫入成功", Toast.LENGTH_SHORT).show();
                }
                catch(Exception e){
                    e.printStackTrace();
                    Toast.makeText(getApplicationContext(), "數據寫入失敗", Toast.LENGTH_SHORT).show();
                }
                break;
            case R.id.btnread:
                String detail = "";
                SDFileHelper sdHelper2 = new SDFileHelper(mContext);
                try
                {
                    String filename2 = editname.getText().toString();
                    detail = sdHelper2.readFromSD(filename2);
                }
                catch(IOException e){e.printStackTrace();}
                Toast.makeText(getApplicationContext(), detail, Toast.LENGTH_SHORT).show();
                break;
        }
    }
}
最後別忘記在AndroidManifest.xml寫上讀寫SD卡的權限哦!
<!-- 在SDCard中創建與刪除文件權限 -->
<uses-permission android:name="android.permission.MOUNT_UNMOUNT_FILESYSTEMS"/>
<!-- 往SDCard寫入數據權限 -->
<uses-permission android:name="android.permission.WRITE_EXTERNAL_STORAGE"/>
如果是真機調試的話通常都是可以的,對於原生虛擬機的話就問題多多了,再我們前面使用 Environment.getExternalStorageState().equals(Environment.MEDIA_MOUNTED)可能 一直返回的是false,就是SD卡不存在,這個是主要的問題,現在新版本的SDK都會在 創建AVD的時候會同時申請一塊SD卡的存儲區域的
對於舊版本的sdk或者其他原因可能需要手動關聯下sd卡,設置如下:
①找到創建好的avd的鏡像的路徑:
點擊打開avd界面,點擊detail,查看avd鏡像的目錄下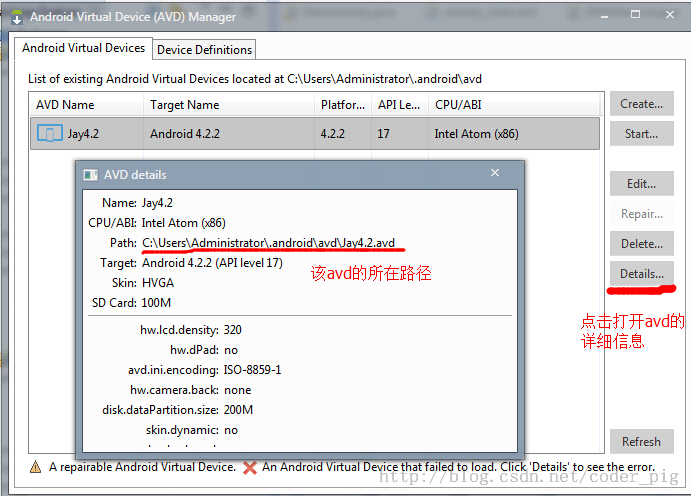
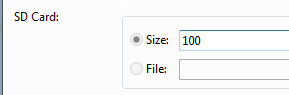
②來到avd鏡像所在的路徑下,復制sdcard.img的路徑:
比如我的:-sdcard C:\Users\Administrator.android\avd\Jay4.2.avd\sdcard.img③接著點擊
來到以下界面:
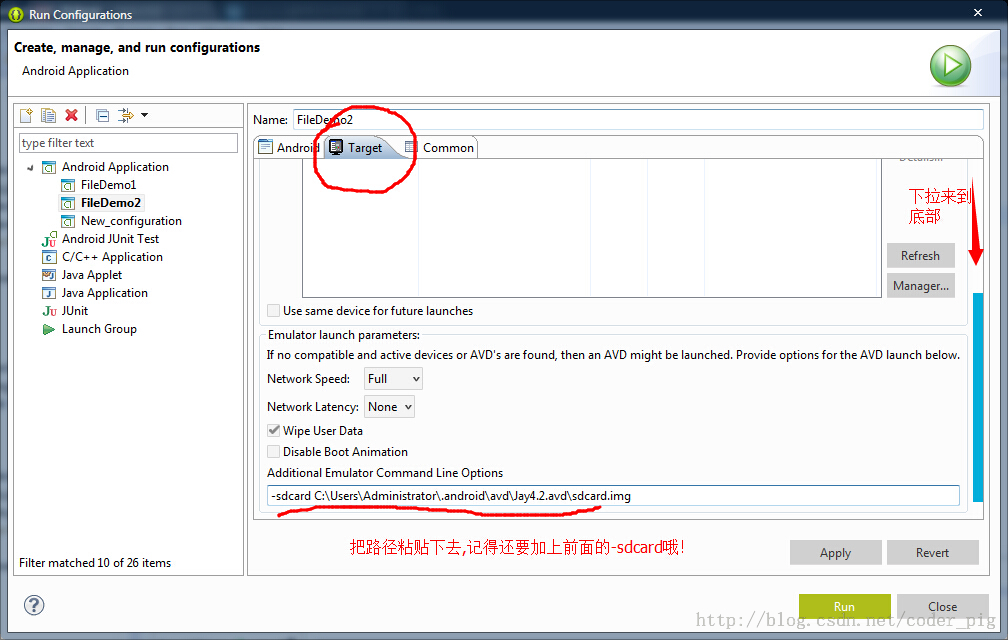
最後apply以下,然後Run就可以了!
相信大家對兩個文件夾並不陌生,如果我們不想自己的文件被編譯成二進制文件的話, 我們可以把文件放到這兩個目錄下,而兩者的區別如下:
- res/raw:文件會被映射到R.java文件中,訪問的時候直接通過資源ID即可訪問,而且 他不能有目錄結構,就是不能再創建文件夾
- assets:不會映射到R.java文件中,通過AssetManager來訪問,能有目錄結構,即, 可以自行創建文件夾
讀取文件資源:
res/raw:
InputStream is =getResources().openRawResource(R.raw.filename);
assets:
AssetManager am =  getAssets();
InputStream is = am.open("filename");
好的,關於Android的數據存儲與訪問的第一節——文件讀寫就到這裡,如果在學習本文中 遇到什麼問題,或者覺得有些纰漏的地方,歡迎提出,萬分感激,謝謝~
 1.4 Genymotion模擬器安裝
1.本節引言如果你符合下述三種情況的話,你可以考慮安裝一個Genymotion Android模擬器:沒有真機調試,只能用模擬器嫌SDK內置的AVD
 第82章、異步處理工具類:AsyncTask(從零開始學Android)
(一) AsyncTask,是android提供的輕量級的異步類。可以直接繼承AsyncTask,在類中實現異步操作,可以通過接口實現UI進度更新,最後反饋執行的結果給
 2.5.7 Toast(吐司)的基本使用
本節引言:好的,終於學習完Adapter類相關的一些控件,當然除了講解的那幾個,還有其他很多的相關的控件,就不慢慢講解了~有需要的自行查閱文檔,查看
 8.2.1 Bitmap(位圖)全解析 Part 1
本節引言:在上一節中我們對Android中的13種類型的Drawable的類型進行了講解,有沒有應用到自己的項目當中呢?而本節我們來探討的是Bitm