編輯:關於android開發
RadioButton(單選框)和CheckBox(復選框)講解:
一、基本用法和事件處理
(1)RadioButton單選框,就是只能選擇其中的一個,我們在使用的時候需要將RadioButton放到RadioGroup中使用,同時我們還可以在RadioGroup中設置 orientation屬性來控制單選框的方向。
<?xml version="1.0" encoding="utf-8"?>
<LinearLayout
    xmlns:android="http://schemas.android.com/apk/res/android"
    android:layout_width="match_parent"
    android:layout_height="match_parent"
    android:orientation="vertical"
    android:background="#ffffff">
   <TextView
       android:id="@+id/text1"
       android:layout_width="match_parent"
       android:layout_height="wrap_content"
       android:text="請選擇你的性別"
       android:text
       android:textSize="30sp"/>
    <RadioGroup
        android:id="@+id/rg1"
        android:layout_width="match_parent"
        android:layout_height="wrap_content"
        android:orientation="horizontal">
        <RadioButton
            android:id="@+id/rb1"
            android:layout_width="wrap_content"
            android:layout_height="wrap_content"
            android:text="男"/>
        <RadioButton
            android:id="@+id/rb2"
            android:layout_width="wrap_content"
            android:layout_height="wrap_content"
            android:text="女"/>
    </RadioGroup>
    <Button
        android:id="@+id/btn1"
        android:layout_width="match_parent"
        android:layout_height="wrap_content"
        android:text="提交"/>
</LinearLayout>
(2)我們如何獲取單選按鈕選中的值呢,這裡有兩種方法
a:為RadioGroup(radioButton)設置setonCheckChangeListener
package com.example.test3;

import android.app.Activity;
import android.os.Bundle;
import android.widget.RadioButton;
import android.widget.RadioGroup;
import android.widget.Toast;


public class MainActivity extends Activity {
    private RadioGroup radioGroup;
    @Override
    protected void onCreate(Bundle savedInstanceState) {
        super.onCreate(savedInstanceState);
        setContentView(R.layout.activity_main);
        radioGroup = (RadioGroup) findViewById(R.id.rg1);
        radioGroup.setOnCheckedChangeListener(new RadioGroup.OnCheckedChangeListener() {
            @Override
            public void onCheckedChanged(RadioGroup radioGroup, int checkId) {
                RadioButton radioButton = (RadioButton) findViewById(checkId);
                Toast.makeText(MainActivity.this,"你選中了" + radioButton.getText().toString(),Toast.LENGTH_LONG).show();
            }
        });
    }
}
b:為RadioGroup設置setOnClickListener,但是在使用這個方法的時候需要對RadioGroup內的每一個id
package com.example.test3;

import android.app.Activity;
import android.os.Bundle;
import android.view.View;
import android.widget.Button;
import android.widget.RadioButton;
import android.widget.RadioGroup;
import android.widget.Toast;


public class MainActivity extends Activity {
    private RadioGroup radioGroup;
    @Override
    protected void onCreate(Bundle savedInstanceState) {
        super.onCreate(savedInstanceState);
        setContentView(R.layout.activity_main);
        radioGroup = (RadioGroup) findViewById(R.id.rg1);
        Button btn = (Button) findViewById(R.id.btn1);
        btn.setOnClickListener(new View.OnClickListener() {
            @Override
            public void onClick(View view) {
                for (int i = 0; i < radioGroup.getChildCount(); i++) {
                    RadioButton radioButton = (RadioButton) radioGroup.getChildAt(i);
                    if (radioButton.isChecked()) {
                        Toast.makeText(MainActivity.this, "你選擇了" + radioButton.getText(), Toast.LENGTH_LONG).show();
                        break;
                    }
                }
            }
        });
    }
}
(3)CheckedButto和RadioButton差不多就不多說,直接看代碼吧
<?xml version="1.0" encoding="utf-8"?>
<LinearLayout
    xmlns:android="http://schemas.android.com/apk/res/android"
    android:layout_width="match_parent"
    android:layout_height="match_parent"
    android:orientation="vertical"
    android:background="#ffffff">
   <TextView
       android:id="@+id/text1"
       android:layout_width="match_parent"
       android:layout_height="wrap_content"
       android:text="請選擇你的喜歡的水果(可以多選)"
       android:text
       android:textSize="22sp"/>
   <CheckBox
       android:id="@+id/cb1"
       android:layout_width="wrap_content"
       android:layout_height="wrap_content"
       android:text="蘋果"/>
    <CheckBox
        android:id="@+id/cb2"
        android:layout_width="wrap_content"
        android:layout_height="wrap_content"
        android:text="香蕉"/>
    <CheckBox
        android:id="@+id/cb3"
        android:layout_width="wrap_content"
        android:layout_height="wrap_content"
        android:text="梨子"/>
    <Button
        android:id="@+id/btn1"
        android:layout_width="match_parent"
        android:layout_height="wrap_content"
        android:text="提交"/>
</LinearLayout>
package com.example.test3;

import android.app.Activity;
import android.os.Bundle;
import android.view.View;
import android.widget.Button;
import android.widget.CheckBox;
import android.widget.CompoundButton;
import android.widget.Toast;


public class MainActivity extends Activity implements CompoundButton.OnCheckedChangeListener,View.OnClickListener{
    private CheckBox checkBox1;
    private CheckBox checkBox2;
    private CheckBox checkBox3;
    private Button btn1;
    @Override
    protected void onCreate(Bundle savedInstanceState) {
        super.onCreate(savedInstanceState);
        setContentView(R.layout.activity_main);
        checkBox1 = (CheckBox) findViewById(R.id.cb1);
        checkBox2 = (CheckBox) findViewById(R.id.cb2);
        checkBox3 = (CheckBox) findViewById(R.id.cb3);
        btn1 = (Button) findViewById(R.id.btn1);
        checkBox1.setOnCheckedChangeListener(this);
        checkBox2.setOnCheckedChangeListener(this);
        checkBox3.setOnCheckedChangeListener(this);
        btn1.setOnClickListener(this);
    }

    @Override
    public void onCheckedChanged(CompoundButton compoundButton, boolean b) {
        if (compoundButton.isChecked()){
            Toast.makeText(MainActivity.this,"你選中了" + compoundButton.getText(),Toast.LENGTH_LONG).show();
        }
    }

    @Override
    public void onClick(View view) {
        String choose = "";
        if(checkBox1.isChecked()){
           choose += checkBox1.getText().toString();
        }
        if(checkBox2.isChecked()){
            choose += checkBox2.getText().toString();
        }
        if(checkBox3.isChecked()){
           choose += checkBox3.getText().toString();
        }
        Toast.makeText(MainActivity.this,"你選中了" + choose,Toast.LENGTH_LONG).show();
    }
}
二、自定義點擊的效果或者說是點擊框的自定義(以checkBox為例)
一共有兩種方法,但是兩種方法的本質還是一樣的,效果圖在兩種方法之後一並附上
(1)第一種:方法簡單和前面講的Button一樣的
定義StateListDrawable文件
<?xml version="1.0" encoding="utf-8"?>
<selector xmlns:android="http://schemas.android.com/apk/res/android">
    <item android:state_checked="true"
          android:state_enabled="true"
          android:drawable="@mipmap/btn_radio_on"/>
    <item android:state_checked="false"
          android:state_enabled="true"
          android:drawable="@mipmap/btn_radio_off"/>
</selector>
在布局文件使用button屬性即可
(2)自定義style
第一步:還是先定義StateListDrawable文件,上面已經有了
第二步:在style文件定義自定義的樣式
第三步:在布局文件中使用style
效果圖:
 Android環境搭建和編寫helloworld,androidhelloworld
Android環境搭建和編寫helloworld,androidhelloworld一、配置jdk環境(學過java的請無視) 1.安裝jdk jdk下
 Android-通過Java代碼來實現屬性動畫
Android-通過Java代碼來實現屬性動畫 Android-通過Java代碼來實現屬性動畫 除了可以使用定義xml文件來設置動畫之外,還可以使用java代碼來進行控
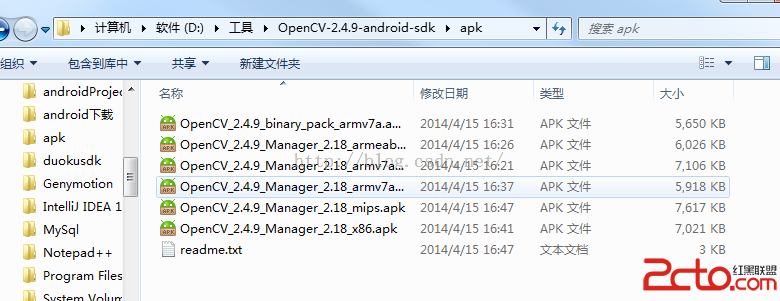 通過jni調用OpenCv跟直接調用android版openCv對圖片進行簡單的變換
通過jni調用OpenCv跟直接調用android版openCv對圖片進行簡單的變換 看看效果圖,如果運行時提示需要安裝xxxx.mamager,那麼就去現在Opencv
 Android應用去掉標題欄的方法,android去掉標題欄
Android應用去掉標題欄的方法,android去掉標題欄1.在代碼裡實現 this.requestWindowFeature(Window.FEATURE_NO_TI
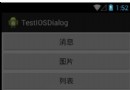 (轉)android底部彈出iOS7風格對話選項框(QQ對話框)--第三方開源--IOS_Dialog_Library,android刷ios7
(轉)android底部彈出iOS7風格對話選項框(QQ對話框)--第三