編輯:關於android開發
<RelativeLayout xmlns:android="http://schemas.android.com/apk/res/android"
    xmlns:tools="http://schemas.android.com/tools"
    android:layout_width="fill_parent"
    android:layout_height="fill_parent"
    android:orientation="vertical" >

    <!-- 定義提示用戶點擊拍照的標簽控件 -->
    <TextView
        android:id="@+id/Tv"
        android:layout_width="match_parent"
        android:layout_height="wrap_content"
        android:hint="點擊拍照預覽效果"
        />

    <!-- 定義顯示照相結果的圖片控件 -->
    <ImageView
        android:id="@+id/Iv"
        android:layout_width="match_parent"
        android:layout_height="wrap_content"
        android:src="@drawable/ic_launcher"
        android:layout_above="@+id/Btn" />

    <!-- 定義用戶點擊拍照的按鈕控件 -->
    <Button
        android:id="@+id/Btn"
        android:layout_width="match_parent"
        android:layout_height="wrap_content"
        android:text="點擊按鈕使用攝像頭拍照"
        android:layout_centerVertical="true"
        android:layout_alignParentLeft="true"
        android:layout_alignParentStart="true" />

</RelativeLayout>
package com.example.yanlei.yl;

import android.graphics.Color;
import android.support.v7.app.AppCompatActivity;
import android.os.Bundle;

import android.view.Menu;
import android.view.MenuItem;
import android.widget.TextView;
import android.text.Html;
import android.text.Html.ImageGetter;

import java.util.regex.Matcher;
import java.util.regex.Pattern;

import android.text.Editable;
import android.text.TextWatcher;
import android.widget.EditText;
import android.widget.Button;


import android.app.Activity;
import android.content.Intent;
import android.graphics.Bitmap;
import android.os.Bundle;
import android.provider.MediaStore;
import android.view.View;
import android.view.View.OnClickListener;
import android.widget.Button;
import android.widget.ImageView;
import android.widget.TextView;

public class MainActivity extends AppCompatActivity {
    // 定義布局中的點擊拍照的Button控件
    private Button btn;
    // 定義布局中給用戶的提示內容的控件
    private TextView Tv;
    // 定義布局中顯示的圖片控件
    private ImageView Iv;


    @Override
    protected void onCreate(Bundle savedInstanceState) {
        super.onCreate(savedInstanceState);
        setContentView(R.layout.activity_main);
        //得到浏覽器中的控件對象
        findView();
        //設置對象的監聽器
        setListener();


    }

    private void setListener() {
        // 設置btn的點擊監聽器
        btn.setOnClickListener(new OnClickListener() {
            @Override
            public void onClick(View v) {
                //設置Intent的參數為通過攝像頭獲取的ACTION_IMAGE_CAPTURE
                Intent intent = new Intent(MediaStore.ACTION_IMAGE_CAPTURE);
                //啟動activity返回照片結果,設置返回的requestCode為1
                startActivityForResult(intent, 1);
            }
        });
    }

    private void findView() {
        // 得到布局中的開始加載的Button的對象
        btn = (Button) findViewById(R.id.Btn);
        // 得到布局中的開始加載的EditText的對象
        Tv = (TextView) findViewById(R.id.Tv);
        // 得到布局中的開始加載的ImageView的對象
        Iv = (ImageView) findViewById(R.id.Iv);
    }

    /*
     * 系統的intent結果返回回調函數
     */
    @Override
    protected void onActivityResult(int requestCode, int resultCode, Intent data) {
        //接受用戶通過其他activity返回的數據
        super.onActivityResult(requestCode, resultCode, data);
        //如果請求的requestCode為1的話,進行處理
        if (requestCode == 1) {
            //得到返回的處理狀態,如果是成功得到了照片返回RESULT_OK值
            if (resultCode == RESULT_OK) {
                //成功得到照片後,得到data對象中的data值,並且轉換為Bitmap對象
                Bitmap bmPhoto = (Bitmap) data.getExtras().get("data");
                //設置Iv的顯示對象為此Bitmap
                Iv.setImageBitmap(bmPhoto);
            }
        }
    }


}
 Android ExpandableListView相關介紹
Android ExpandableListView相關介紹 一、ExpandableListView介紹 一個垂直滾動的顯示兩個級別(Child,Group)列
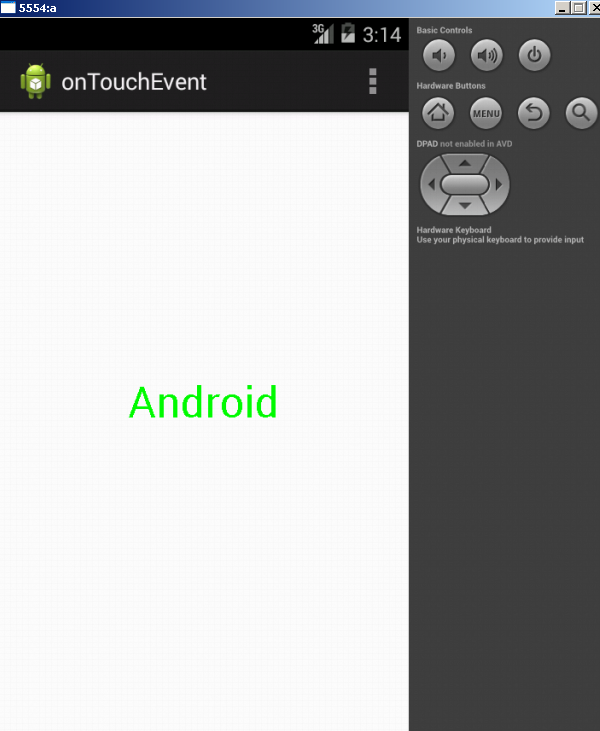 onTouchEvent,ontouchevent使用
onTouchEvent,ontouchevent使用新建MyView類 package onTouchEvent; import android.content.C
 AndroidAnnnotations注入框架使用之第三方框架集成RoboGuice(十三)
AndroidAnnnotations注入框架使用之第三方框架集成RoboGuice(十三) (一).前言: 前面我們已經對於AndroidA
 React Native控件之PullToRefreshViewAndroid下拉刷新組件講解
React Native控件之PullToRefreshViewAndroid下拉刷新組件講解 (一)前言 今天我們一起來看一下PullToRefreshViewAn