編輯:關於android開發
本文地址:http://www.cnblogs.com/wuyudong/p/5906735.html,轉載請注明源地址。
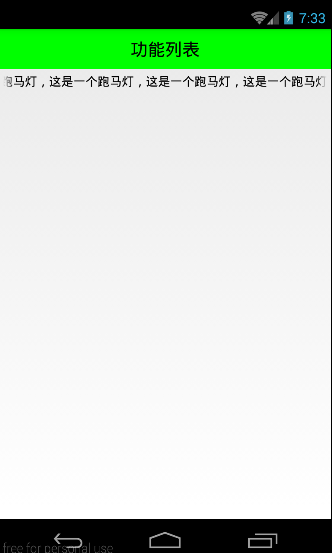
本文將實現標題欄下面的textview中的文字跑馬燈的效果,就是將一行文字水平循環滾動,效果如下:
實現代碼如下:
    <!-- android:ellipsize="end"添加省略點的所在位置 -->
    <!-- 想讓文字出現跑馬燈效果,必須讓其獲取焦點 -->
    <!-- android:marqueeRepeatLimit="marquee_forever"一直滾動屬性 -->
    <!-- 自定義控件達到滾動效果(其實就是重新原有的TextView,讓其一直能夠獲取焦點即可) -->
    <TextView
        android:text="這是一個跑馬燈,這是一個跑馬燈,這是一個跑馬燈,這是一個跑馬燈,這是一個跑馬燈,"
        android:layout_width="match_parent"
        android:layout_height="wrap_content"
        android:ellipsize="marquee"
        android:focusable="true"
        android:focusableInTouchMode="true"
        android:marqueeRepeatLimit="marquee_forever"
        android:padding="5dp"
        android:textColor="#000"
        android:singleLine="true"
        />
如果其他地方也需要這樣的跑馬燈效果,復制代碼比較麻煩。這裡使用自定義控件來實現滾動效果(其實就是重新原有的TextView,讓其一直能夠獲取焦點即可)
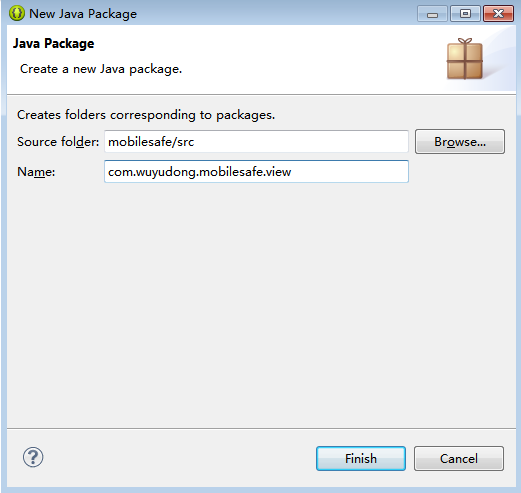
新建一個包view,專門放自定義控件文件
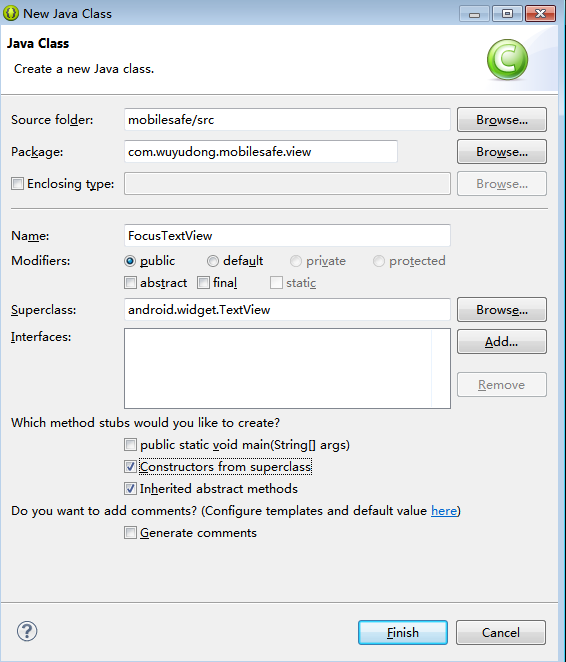
新建FocusTextView類
添加代碼:
package com.wuyudong.mobilesafe.view;

import android.content.Context;
import android.util.AttributeSet;
import android.widget.TextView;

/**
 * @author wuyudong
 * 能夠獲取焦點的自定義TextView
 *
 */
public class FocusTextView extends TextView {

    // 使用在通過java代碼創建控件
    public FocusTextView(Context context) {

        super(context);
    }

    // 由系統調用(帶屬性+上下文環境構造方法)
    public FocusTextView(Context context, AttributeSet attrs) {

        super(context, attrs);
    }

    // 由系統調用(帶屬性+上下文環境構造方法+布局文件中定義樣式文件構造方法)
    public FocusTextView(Context context, AttributeSet attrs, int defStyle) {
        super(context, attrs, defStyle);
    }

    // 重寫獲取焦點的方法
    @Override
    public boolean isFocused() {
        // return super.isFocused();
        return true;
    }
}
布局代碼替換為:
<?xml version="1.0" encoding="utf-8"?>
<LinearLayout xmlns:android="http://schemas.android.com/apk/res/android"
    android:layout_width="match_parent"
    android:layout_height="match_parent"
    android:orientation="vertical" >

    <TextView
        style="@style/TitleStyle"
        android:text="功能列表" />

    <!-- android:ellipsize="end"添加省略點的所在位置 -->
    <!-- 想讓文字出現跑馬燈效果,必須讓其獲取焦點 -->
    <!-- android:marqueeRepeatLimit="marquee_forever"一直滾動屬性 -->
    <!-- 自定義控件達到滾動效果(其實就是重新原有的TextView,讓其一直能夠獲取焦點即可) -->
    <!--
      <TextView
        android:text="這是一個跑馬燈,這是一個跑馬燈,這是一個跑馬燈,這是一個跑馬燈,這是一個跑馬燈,"
        android:layout_width="match_parent"
        android:layout_height="wrap_content"
        android:ellipsize="marquee"
        android:focusable="true"
        android:focusableInTouchMode="true"
        android:marqueeRepeatLimit="marquee_forever"
        android:padding="5dp"
        android:textColor="#000"
        android:singleLine="true"/> -->

    <com.wuyudong.mobilesafe.view.FocusTextView
        android:text="這是一個跑馬燈,這是一個跑馬燈,這是一個跑馬燈,這是一個跑馬燈,這是一個跑馬燈,"
        android:layout_width="match_parent"
        android:layout_height="wrap_content"
        android:ellipsize="marquee"
        android:marqueeRepeatLimit="marquee_forever"
        android:padding="5dp"
        android:textColor="#000"
        android:singleLine="true">
    </com.wuyudong.mobilesafe.view.FocusTextView>

</LinearLayout>
總結一下自定義控件
自定義控件編寫流程
創建一個默認就能獲取焦點的TextView
1、創建一個類繼承至TextView,FocusTextView
2、重寫其構造方法
public class FocusTextView extends TextView {

    // 使用在通過java代碼創建控件
    public FocusTextView(Context context) {

        super(context);
    }

    // 由系統調用(帶屬性+上下文環境構造方法)
    public FocusTextView(Context context, AttributeSet attrs) {

        super(context, attrs);
    }

    // 由系統調用(帶屬性+上下文環境構造方法+布局文件中定義樣式文件構造方法)
    public FocusTextView(Context context, AttributeSet attrs, int defStyle) {
        super(context, attrs, defStyle);
    }

    // 重寫獲取焦點的方法
    @Override
    public boolean isFocused() {
        // return super.isFocused();
        return true;
    }
}
3、將原有TextView上的isFocus方法默認修改為,能夠獲取焦點
    // 重寫獲取焦點的方法
    @Override
    public boolean isFocused() {
        // return super.isFocused();
        return true;
    }
4.使用過程
獲取當前類的全路徑名稱,作為xml中的標簽存在,其余屬性的使用方式和TextView一致
 手把手帶你畫一個動態錯誤提示 Android自定義view
手把手帶你畫一個動態錯誤提示 Android自定義view 廢話不多說,看效果圖: 首先 構造函數 測量... 這裡就一筆帶過了。 public ErrorView
 Android百度地圖API集成一《基礎地圖》,集成百度地圖api
Android百度地圖API集成一《基礎地圖》,集成百度地圖api 在使用百度地圖API集成百度地圖時,碰到了一些坑,特開此貼記錄。。。 直接開始代碼 1.新建
 easy touch利用playmaker拖動ngui對象
easy touch利用playmaker拖動ngui對象 最近在學習unity3d的幾個插件。easy touch,playmaker,ngui。為了使幾個能夠一起
 利用懸浮窗進一步降低屏幕亮度保護眼睛(app based on Android),appandroid
利用懸浮窗進一步降低屏幕亮度保護眼睛(app based on Android),appandroid項目地址:https://github.com/hwding/mak