編輯:關於android開發
最近手機界開始流行雙攝像頭,大光圈功能也應用而生。所謂大光圈功能就是能夠對照片進行後期重新對焦,其實現的原理主要是對拍照期間獲取的深度圖片與對焦無窮遠的圖像通過算法來實現重新對焦的效果。
在某雙攝手機的大光圈操作界面有個光圈的操作圖標,能夠模擬光圈調節時的真實效果,感覺還不錯,於是想著實現該效果。現在把我的實現方法貢獻給大家,萬一你們公司也要做雙攝手機呢?( ̄┰ ̄*)
首先,百度一下光圈圖片,觀察觀察,就可以發現其關鍵在於計算不同的光圈值時各個光圈葉片的位置。為了計算簡便,我以六個直邊葉片的光圈效果為例來實現(其他形式,比如七個葉片,也就是位置計算稍微沒那麼方便;而一些圓弧的葉片,只要滿足葉片兩邊的圓弧半徑是一樣的就行。為什麼要圓弧半徑一樣呢?仔細觀察就可以發現,相鄰兩葉片之間要相互滑動,而且要保持一樣的契合距離,根據我曾今小學幾何科打滿分的經驗可以判斷出,等徑的圓弧是不錯滴,其他高級曲線能不能實現該效果,請問數學家( ̄┰ ̄*)!其他部分原理都是一樣的)。
制作效果圖:

先說明一下本自定義view的主要內容:
代碼
可以在GitHub上下載:https://github.com/willhua/CameraAperture.git
  1 package com.example.cameraaperture;
  2
  3 import android.content.Context;
  4 import android.content.res.TypedArray;
  5 import android.graphics.Bitmap;
  6 import android.graphics.Bitmap.Config;
  7 import android.graphics.Canvas;
  8 import android.graphics.Paint;
  9 import android.graphics.Path;
 10 import android.graphics.PointF;
 11 import android.util.AttributeSet;
 12 import android.util.Log;
 13 import android.view.MotionEvent;
 14 import android.view.View;
 15
 16 /**
 17  * 上下滑動可以調節光圈大小;
 18  * 調用setApertureChangedListener設置光圈值變動監聽接口;
 19  * 繪制的光圈最大直徑將填滿整個view
 20  * @author willhua http://www.cnblogs.com/willhua/
 21  *
 22  */
 23 public class ApertureView extends View {
 24
 25     public interface ApertureChanged {
 26         public void onApertureChanged(float newapert);
 27     }
 28
 29     private static final float ROTATE_ANGLE = 30;
 30     private static final String TAG = "ApertureView";
 31     private static final float COS_30 = 0.866025f;
 32     private static final int WIDTH = 100; // 當設置為wrap_content時測量大小
 33     private static final int HEIGHT = 100;
 34     private int mCircleRadius;
 35     private int mBladeColor;
 36     private int mBackgroundColor;
 37     private int mSpace;
 38     private float mMaxApert = 1;
 39     private float mMinApert = 0.2f;
 40     private float mCurrentApert = 0.5f;
 41
 42     //利用PointF而不是Point可以減少計算誤差,以免葉片之間間隔由於計算誤差而不均衡
 43     private PointF[] mPoints = new PointF[6];
 44     private Bitmap mBlade;
 45     private Paint mPaint;
 46     private Path mPath;
 47     private ApertureChanged mApertureChanged;
 48
 49     private float mPrevX;
 50     private float mPrevY;
 51
 52     public ApertureView(Context context, AttributeSet attrs) {
 53         super(context, attrs);
 54         init(context, attrs);
 55     }
 56
 57     private void init(Context context, AttributeSet attrs) {
 58         //讀取自定義布局屬性
 59         TypedArray array = context.obtainStyledAttributes(attrs, R.styleable.ApertureView);
 60         mSpace = (int)array.getDimension(R.styleable.ApertureView_blade_space, 5);
 61         mBladeColor = array.getColor(R.styleable.ApertureView_blade_color, 0xFF000000);
 62         mBackgroundColor = array.getColor(R.styleable.ApertureView_background_color, 0xFFFFFFFF);
 63         array.recycle();
 64         mPaint = new Paint(Paint.FILTER_BITMAP_FLAG | Paint.DITHER_FLAG);
 65         mPaint.setAntiAlias(true);
 66         for (int i = 0; i < 6; i++) {
 67             mPoints[i] = new PointF();
 68         }
 69     }
 70
 71     @Override
 72     protected void onMeasure(int widthMeasureSpec, int heightMeasureSpec) {
 73         super.onMeasure(widthMeasureSpec, heightMeasureSpec);
 74         int widthSpecMode = MeasureSpec.getMode(widthMeasureSpec);
 75         int heightSpecMode = MeasureSpec.getMode(heightMeasureSpec);
 76         int widthSpecSize = MeasureSpec.getSize(widthMeasureSpec);
 77         int heightSpecSize = MeasureSpec.getSize(heightMeasureSpec);
 78         int paddX = getPaddingLeft() + getPaddingRight();
 79         int paddY = getPaddingTop() + getPaddingBottom();
 80         //光圈的大小要考慮減去view的padding值
 81         mCircleRadius = widthSpecSize - paddX < heightSpecSize - paddY ? (widthSpecSize - paddX) / 2
 82                 : (heightSpecSize - paddY) / 2;
 83         //對布局參數為wrap_content時的處理
 84         if (widthSpecMode == MeasureSpec.AT_MOST
 85                 && heightSpecMode == MeasureSpec.AT_MOST) {
 86             setMeasuredDimension(WIDTH, HEIGHT);
 87             mCircleRadius = (WIDTH - paddX) / 2;
 88         } else if (widthSpecMode == MeasureSpec.AT_MOST) {
 89             setMeasuredDimension(WIDTH, heightSpecSize);
 90             mCircleRadius = WIDTH - paddX < heightSpecSize - paddY ? (WIDTH - paddX) / 2
 91                     : (heightSpecSize - paddY) / 2;
 92         } else if (heightSpecMode == MeasureSpec.AT_MOST) {
 93             setMeasuredDimension(widthSpecSize, HEIGHT);
 94             mCircleRadius = widthSpecSize - paddX < HEIGHT - paddY ? (widthSpecSize - paddX) / 2
 95                     : (HEIGHT - paddY) / 2;
 96         }
 97         if (mCircleRadius < 1) {
 98             mCircleRadius = 1;
 99         }
100         //measure之後才能知道所需要繪制的光圈大小
101         mPath = new Path();
102         mPath.addCircle(0, 0, mCircleRadius, Path.Direction.CW);
103         createBlade();
104     }
105
106     @Override
107     public void onDraw(Canvas canvas) {
108         canvas.save();
109         calculatePoints();
110         //先把canbvas平移到view的中間
111         canvas.translate(getWidth() / 2, getHeight() / 2);
112         //讓光圈的葉片整體旋轉,更加貼合實際
113         canvas.rotate(ROTATE_ANGLE * (mCurrentApert - mMinApert) / (mMaxApert - mMinApert));
114         canvas.clipPath(mPath);
115         canvas.drawColor(mBackgroundColor);
116
117         for (int i = 0; i < 6; i++) {
118             canvas.save();
119             canvas.translate(mPoints[i].x, mPoints[i].y);
120             canvas.rotate(-i * 60);
121             canvas.drawBitmap(mBlade, 0, 0, mPaint);
122             canvas.restore();
123         }
124         canvas.restore();
125     }
126
127     @Override
128     public boolean onTouchEvent(MotionEvent event) {
129         if (event.getPointerCount() > 1) {
130             return false;
131         }
132         switch (event.getAction()) {
133         case MotionEvent.ACTION_DOWN:
134             mPrevX = event.getX();
135             mPrevY = event.getY();
136             break;
137         case MotionEvent.ACTION_MOVE:
138             float diffx = Math.abs((event.getX() - mPrevX));
139             float diffy = Math.abs((event.getY() - mPrevY));
140             if (diffy > diffx) {  // 豎直方向的滑動
141                 float diff = (float) Math.sqrt(diffx * diffx + diffy * diffy)
142                         / mCircleRadius * mMaxApert;
143                 if (event.getY() > mPrevY) {  //判斷方向
144                     setCurrentApert(mCurrentApert - diff);
145                 } else {
146                     setCurrentApert(mCurrentApert + diff);
147                 }
148                 mPrevX = event.getX();
149                 mPrevY = event.getY();
150             }
151             break;
152         default:
153             break;
154         }
155         return true;
156     }
157
158     private void calculatePoints() {
159         if (mCircleRadius - mSpace <= 0) {
160             Log.e(TAG, "the size of view is too small and Space is too large");
161             return;
162         }
163         //mCircleRadius - mSpace可以保證內嵌六邊形在光圈內
164         float curRadius = mCurrentApert / mMaxApert * (mCircleRadius - mSpace);
165         //利用對稱關系,減少計算
166         mPoints[0].x = curRadius / 2;
167         mPoints[0].y = -curRadius * COS_30;
168         mPoints[1].x = -mPoints[0].x;
169         mPoints[1].y = mPoints[0].y;
170         mPoints[2].x = -curRadius;
171         mPoints[2].y = 0;
172         mPoints[3].x = mPoints[1].x;
173         mPoints[3].y = -mPoints[1].y;
174         mPoints[4].x = -mPoints[3].x;
175         mPoints[4].y = mPoints[3].y;
176         mPoints[5].x = curRadius;
177         mPoints[5].y = 0;
178     }
179
180     //創建光圈葉片,讓美工MM提供更好
181     private void createBlade() {
182         mBlade = Bitmap.createBitmap(mCircleRadius,
183                 (int) (mCircleRadius * 2 * COS_30), Config.ARGB_8888);
184         Path path = new Path();
185         Canvas canvas = new Canvas(mBlade);
186         path.moveTo(mSpace / 2 / COS_30, mSpace);
187         path.lineTo(mBlade.getWidth(), mBlade.getHeight());
188         path.lineTo(mBlade.getWidth(), mSpace);
189         path.close();
190         canvas.clipPath(path);
191         canvas.drawColor(mBladeColor);
192     }
193
194     /**
195      * 設置光圈片的顏色
196      * @param bladeColor
197      */
198     public void setBladeColor(int bladeColor) {
199         mBladeColor = bladeColor;
200     }
201
202     /**
203      * 設置光圈背景色
204      */
205     public void setBackgroundColor(int backgroundColor) {
206         mBackgroundColor = backgroundColor;
207     }
208
209     /**
210      * 設置光圈片之間的間隔
211      * @param space
212      */
213     public void setSpace(int space) {
214         mSpace = space;
215     }
216
217     /**
218      * 設置光圈最大值
219      * @param maxApert
220      */
221     public void setMaxApert(float maxApert) {
222         mMaxApert = maxApert;
223     }
224
225     /**
226      * 設置光圈最小值
227      * @param mMinApert
228      */
229     public void setMinApert(float mMinApert) {
230         this.mMinApert = mMinApert;
231     }
232
233     public float getCurrentApert() {
234         return mCurrentApert;
235     }
236
237     public void setCurrentApert(float currentApert) {
238         if (currentApert > mMaxApert) {
239             currentApert = mMaxApert;
240         }
241         if (currentApert < mMinApert) {
242             currentApert = mMinApert;
243         }
244         if (mCurrentApert == currentApert) {
245             return;
246         }
247         mCurrentApert = currentApert;
248         invalidate();
249         if (mApertureChanged != null) {
250             mApertureChanged.onApertureChanged(currentApert);
251         }
252     }
253
254     /**
255      * 設置光圈值變動的監聽
256      * @param listener
257      */
258     public void setApertureChangedListener(ApertureChanged listener) {
259         mApertureChanged = listener;
260     }
261 }
自定義屬性的xml:
<?xml version="1.0" encoding="utf-8"?>
<resources>
    <declare-styleable name="ApertureView">
        <attr name="blade_color" format="color" />
        <attr name="background_color" format="color" />
        <attr name="blade_space" format="dimension" />
    </declare-styleable>
</resources>
 Android百度地圖API集成三《搜索》,android《搜索》
Android百度地圖API集成三《搜索》,android《搜索》 書接上回↑ 一、基礎地圖界面地址:http://www.cnblogs.com/dhr125/p
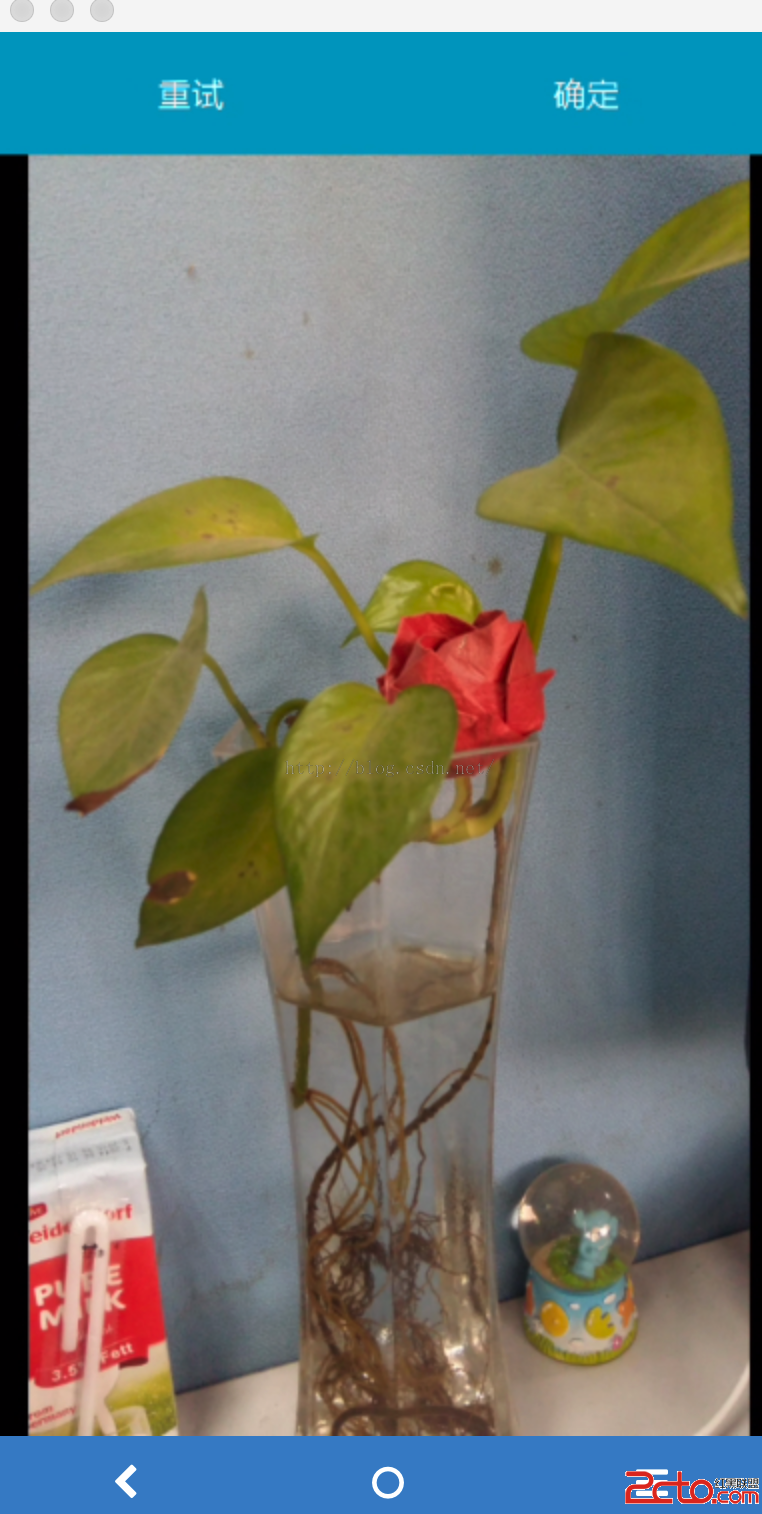 Android開發學習之路--Camera之初體驗
Android開發學習之路--Camera之初體驗 顧名思義Camera就是拍照和錄像的功能,像微信裡面,我們想拍照傳一下照片,就可以通過camera來拍照,然後存儲
 Android與JS之間跨平台異步調用,androidjs異步
Android與JS之間跨平台異步調用,androidjs異步 為什麼突然要搞這個問題呢? 在開發浏覽器的時候遇到這個狗血的問題,花了將近1天的
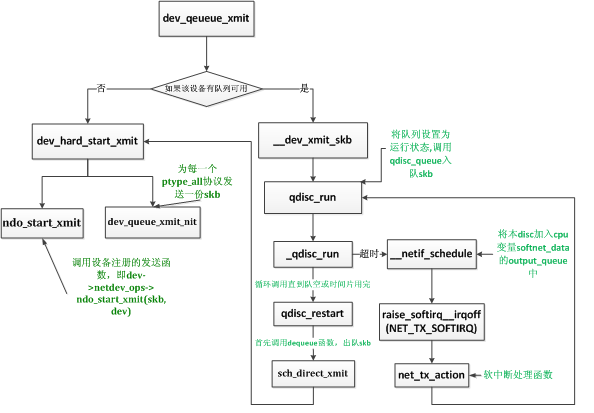 二層(鏈路層)數據包發送過程分析
二層(鏈路層)數據包發送過程分析二層(鏈路層)數據包發送過程分析 ——lvyilong316 說明:本系列博文所涉及內核版本為2.6.32 當上層准備好一個包之後,交