編輯:關於android開發
上一篇文章我們對自定義控件進行了一個大體的知識介紹。今天就來學習自定義一個簡單的寫字板控件。
先來看看效果圖
就是簡單的根據手指寫下的軌跡去畫出內容
在上一篇文章裡提到了android官方給出的自定義控件需要考慮以下幾點:
就按照這個步驟來完成今天的自定義控件
上篇提到創建View這一步的時候要考慮的就是很簡單的自定義屬性的聲明、使用。
今天的控件可以有一些什麼自定義屬性呢?要實現寫字板,其實就是三個東西:寫字板的顏色、筆的顏色、筆的粗細。所以接下來自定義屬性。
<?xml version="1.0" encoding="utf-8"?>
<resources>

    <declare-styleable name="WritingBoardView">
        <attr name="boardBackground" format="color"></attr> <!--畫板顏色-->
        <attr name="paintColor" format="color"></attr> <!--畫筆顏色-->
        <attr name="paintWidth" format="dimension"></attr> <!--畫筆寬度-->
    </declare-styleable>
</resources>
定義了就是為了要使用
<?xml version="1.0" encoding="utf-8"?>
<RelativeLayout xmlns:android="http://schemas.android.com/apk/res/android"
    xmlns:tools="http://schemas.android.com/tools"
    android:layout_width="match_parent"
    android:layout_height="match_parent"
    xmlns:custom="http://schemas.android.com/apk/res-auto"
    android:paddingBottom="@dimen/activity_vertical_margin"
    android:paddingLeft="@dimen/activity_horizontal_margin"
    android:paddingRight="@dimen/activity_horizontal_margin"
    android:paddingTop="@dimen/activity_vertical_margin"
    tools:context="com.qiangyu.test.writingboardview.MainActivity">

    <com.qiangyu.test.writingboardview.view.WritingBoardView
        android:layout_width="match_parent"
        android:layout_height="match_parent"
        custom:paintColor="@color/colorAccent"
        custom:boardBackground="@color/colorPrimary"
        custom:paintWidth="3dp"/>
</RelativeLayout>
簡單的設置了boardBackground、paintWidth和paintColor屬性
使用這裡只需要注意命名空間,android提供給我們的用android,我們可以自定義我們屬性的命名空間
寫法為:xmlns:你取的名=”http://schemas.android.com/apk/res-auto”,這裡的res-auto可以換成你控件的包名
在XML布局文件中設置的屬性要在自定義屬性中獲取到,所以我們必須實現帶有Context, AttributeSet的構造方法
   private int mBoardBackground;//畫板顏色
    private int mPaintColor;//畫筆顏色
    private int mPaintWidth;//畫筆寬度
    private Path mPath;
    private Paint mPaint;//畫筆

    public WritingBoardView(Context context) {
        this(context,null);
    }

    public WritingBoardView(Context context, AttributeSet attrs) {
        this(context, attrs,0);
    }

    public WritingBoardView(Context context, AttributeSet attrs, int defStyleAttr) {
        super(context, attrs, defStyleAttr);
        init(context,attrs);
    }


 private void init(Context context,AttributeSet attrs) {
        TypedArray a = context.obtainStyledAttributes(attrs,R.styleable.WritingBoardView);
        mBoardBackground =   a.getColor(R.styleable.WritingBoardView_boardBackground,Color.WHITE);
        mPaintColor =   a.getColor(R.styleable.WritingBoardView_paintColor,Color.BLUE);
        mPaintWidth = a.getDimensionPixelSize(R.styleable.WritingBoardView_paintWidth,
                (int) TypedValue.applyDimension(TypedValue.COMPLEX_UNIT_DIP,5,getResources().getDisplayMetrics()));
        a.recycle();
        mPaint = new Paint();
        mPath = new Path();
        setBackgroundColor(mBoardBackground);
        mPaint.setColor(mPaintColor);
        mPaint.setStrokeWidth(mPaintWidth);
        mPaint.setStyle(Paint.Style.STROKE);
        mPaint.setAntiAlias(true);
    }
上面代碼確保了每個構造方法最終都調用了第三個構造方法裡的init(context,attrs) 方法來獲取自定義屬性和初始化一些信息
通過固定的寫法、簡單的獲取到自定義屬性,並且給當前view設置背景、為Paint設置了樣式和顏色。完成寫字板很重要的就是這裡的Path類。
先來介紹一下Path類
看構造方法的注釋
/**
 * The Path class encapsulates compound (multiple contour) geometric paths
 * consisting of straight line segments, quadratic curves, and cubic curves.
 * It can be drawn with canvas.drawPath(path, paint), either filled or stroked
 * (based on the paint's Style), or it can be used for clipping or to draw
 * text on a path.
 */
public class Path {

    ...

}
大體就是說Path封裝了由了直線和各種曲線組成幾何圖形信息。我們可以調用canvas通過drawPath方法來畫一些東西。
我們最終的draw就是需要用到drawPath
Path裡包含了很多設置幾何圖形的方法如addRect、addArc。
今天重點說用到的兩個方法:
  /**
     * Set the beginning of the next contour to the point (x,y).
     *
     * @param x The x-coordinate of the start of a new contour
     * @param y The y-coordinate of the start of a new contour
     */
    public void moveTo(float x, float y) {
        native_moveTo(mNativePath, x, y);
    }
moveTo方法就是設置下一個連線或者圖形最開始的位置。
/**
     * Add a line from the last point to the specified point (x,y).
     * If no moveTo() call has been made for this contour, the first point is
     * automatically set to (0,0).
     *
     * @param x The x-coordinate of the end of a line
     * @param y The y-coordinate of the end of a line
     */
    public void lineTo(float x, float y) {
        isSimplePath = false;
        native_lineTo(mNativePath, x, y);
    }
lineTo方法簡單的添加一條上一個點到當前點的線。
有了這兩個方法我們就可以實線寫字板了
由於這個自定義控件本身就需要一塊內容當寫字板,所以就不用特別的布局處理了,只是在mode為UNSPECIFIED的時候可能會導致布局顯示不出來。
在這裡就不進行特殊處理了。
由於該控件本身就需要交互才產生效果,所以之前的兩步放在一起考慮了。
上面說到過Canvas有一個drawPath方法。drawPath最後繪制出來什麼樣其實是看Path裡包含的信息。
我們要實現實時顯示手寫的內容,只需要在滑動的時候獲取的坐標通過Path的lineTo方法將線一點一點的連起來。
當手指抬起再落下的時候應該又是一條新的線,所以在落下的時候我們需要調用moveTo方法來為下一條軌跡設置一個起點。
 @Override
    public boolean onTouchEvent(MotionEvent event) {
        float touchX = event.getX();
        float touchY = event.getY();
        switch (event.getAction()){
            case MotionEvent.ACTION_DOWN:
                mPath.moveTo(touchX,touchY);//重新設置即將出現的線的起點
                break;
            case MotionEvent.ACTION_MOVE:
                mPath.lineTo(touchX,touchY);//連線
                break;
            case MotionEvent.ACTION_UP:
                break;
        }
        invalidate();//通知系統重繪
        return true;//要處理當前事件
    }
在onTouch中return true表示要處理當前事件。並且在每一次操作調用invalidate來繪制界面,我們的onDraw 方法只需要簡單的調用drawPath就可以了
 @Override
    protected void onDraw(Canvas canvas) {
        super.onDraw(canvas);
        canvas.drawPath(mPath,mPaint);
    }
其實就是通過手指的觸摸事件來控制軌跡的改變,按照固定的模式,一個簡單的自定義控件就大功告成啦!
一個簡單的寫字板就基本完成了,當然你感興趣可以擴展一下,加上在運行時改變畫筆的顏色、畫板的顏色。添加字體擦除去的功能。
最後別忘記給我點個贊評論支持下!哈哈
源碼下載
 Android性能優化之使用線程池處理異步任務
Android性能優化之使用線程池處理異步任務 說到線程,我想大家都不陌生,因為在開發時候或多或少都會用到線程,而通常創建線程有兩種方式: 1、繼承Thread類
 Android RecyclerView的使用,androidrecycler
Android RecyclerView的使用,androidrecyclerRecyclerView是什麼? RecyclerView是一種新的視圖組,目標是為任何基於
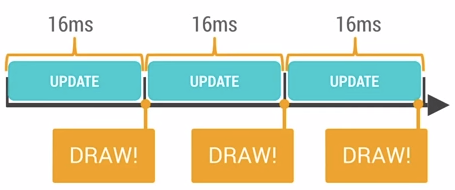 Android性能優化的淺談,android性能優化
Android性能優化的淺談,android性能優化一、概要: 本文主要以Android的渲染機制、UI優化、多線程的處理、緩存處理、電量優化以及代碼規范等幾方面
 【轉】連接MySQL數據庫(android,php,MySQL),mysqlandroid
【轉】連接MySQL數據庫(android,php,MySQL),mysqlandroid管理MySQL數據庫最簡單和最便利的方式是PHP腳本。運行PHP腳本使用HTTP