編輯:關於android開發
初始化對象
private Paint mPaint;//畫筆
	private int count;//點擊次數
	private Rect rect;//矩形
	public CounstomView(Context context, AttributeSet attrs, int defStyle) {
		super(context, attrs, defStyle);
		//初始化畫筆
		mPaint = new Paint();
		rect = new Rect();
		setOnClickListener(this);
	}
1.畫textview。並且設置可點擊。//渲染文本,Canvas類除了上面的還可以描繪文字,參數一是String類型的文本,參數二x軸,參數三y軸,參數四是Paint對象。
String text = null;
	@SuppressLint("DrawAllocation") @Override
	protected void onDraw(Canvas canvas) {
		super.onDraw(canvas);
		//設置paint
		mPaint.setStyle(Style.FILL);//實心
		//mPaint.setColor(Color.BLUE);//黃色
		//mPaint.setAlpha(50);//透明度15
		canvas.drawColor(Color.YELLOW);
		canvas.drawRect(0, 0, getHeight(), getWidth(), mPaint);//畫矩形

		mPaint.setColor(Color.RED);
		mPaint.setTextSize(25.0f);
		 text = String.valueOf(count);
		mPaint.getTextBounds(text, 0, text.length(), rect);//將內容的長和寬。添加到rect矩形中
		float width = rect.width();//獲取寬
		float height = rect.height();
		canvas.drawText(text, getWidth() / 2  - width / 2, getHeight() / 2 + height/2, mPaint);//設置文本位置
//

	}
	@Override
	public void onClick(View arg0) {
		count++;
		invalidate();//重繪
	}
2.畫簡單的bitmap。參數一就是我們常規的Bitmap對象,參數二是源區域(這裡是bitmap),參數三是目標區域(應該在canvas的位置和大小),參數四是Paint畫刷對象,因為用到了縮放和拉伸的可能,當原始Rect不等於目標Rect時性能將會有大幅損失。
protected void onDraw(Canvas canvas) {
		super.onDraw(canvas);
		//偏左和偏上的位置
		Bitmap bitmap = BitmapFactory.decodeResource(getResources(), R.drawable.login_backgroud);
		canvas.drawBitmap(bitmap,0,0, mPaint);

	}
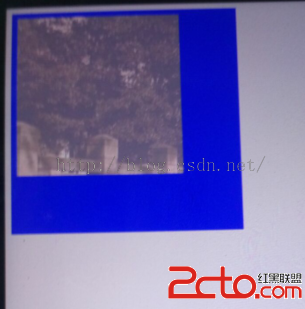
3.利用canvas.drawBitmap(bitmap, src, dst, paint)畫裁剪過的bitmap//參數一就是我們常規的Bitmap對象,參數二是源區域(這裡是bitmap),參數三是目標區域(應該在canvas的位置和大小),參數四是Paint畫刷對象,因為用到了縮放和拉伸的可能,當原始Rect不等於目標Rect時性能將會有大幅損失。
protected void onDraw(Canvas canvas) {
		super.onDraw(canvas);
		// 偏左和偏上的位置
		Bitmap bitmap = BitmapFactory.decodeResource(getResources(),
				R.drawable.login_backgroud);

		Paint paint = new Paint();
		canvas.save();
		// left----距離屏幕左側距離。。。
		// top------距離頂部距離。。。
		// right-----矩形的寬度
		// buttom-----矩形的高度
		Rect rect = new Rect(10, 10, 500, 500);
		canvas.clipRect(rect); // 設置裁剪區域
		canvas.drawColor(Color.BLUE);// 裁剪區域的rect變為藍色
		Rect rec = new Rect(20, 20, 300, 300);
		canvas.drawBitmap(bitmap, rect, rec, paint);

		canvas.restore();
	}
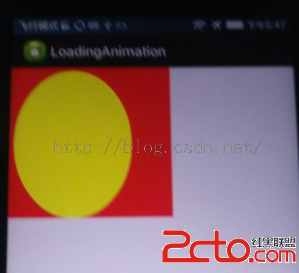
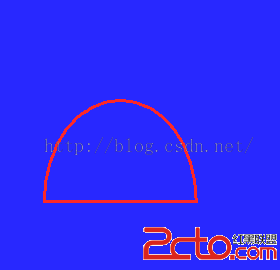
4:利用canvas.drawOval畫橢圓。畫橢圓,參數一是掃描區域,參數二為paint對象;
	protected void onDraw(Canvas canvas) {
		super.onDraw(canvas);
		// 偏左和偏上的位置
		Paint paint = new Paint();
		canvas.save();
		// left----距離屏幕左側距離。。。A
		// top------距離頂部距離。。。B
		// right-----橢圓的寬度.....C
		// buttom-----橢圓的高度......D
		RectF dst = new RectF(10,10,300, 400);//2a=100-30,2b=310-260
		paint.setColor(Color.YELLOW);
		canvas.drawColor(Color.RED);
		canvas.drawOval(dst, paint);
		canvas.restore();
	}
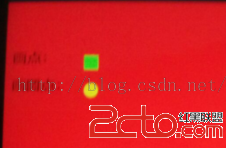
5.利用canvas畫點。//畫點,參數一水平x軸,參數二垂直y軸,第三個參數為Paint對象。
@Override
	protected void onDraw(Canvas canvas) {
		super.onDraw(canvas);
		Paint paint = new Paint();
		canvas.save();
		canvas.drawColor(Color.RED);//有背景先畫背景
		canvas.restore();

		canvas.save();
		paint.setColor(Color.BLACK);
		paint.setTextSize(20.0f);
		canvas.drawText("畫點:", 10, 90, paint);//文本
		canvas.restore();

		canvas.save();
		paint.setColor(Color.GREEN);
		paint.setStrokeWidth(20.0f);//設置點的大小
		canvas.drawPoint(120, 90, paint);//參數一水平x軸,參數二垂直y軸,第三個參數為Paint對象。
//		canvas.drawPoints(new float[]{60,400,65,400,70,40}, paint);//畫多個點
		canvas.restore();

		canvas.save();
		paint.setColor(Color.BLACK);
		paint.setStyle(Style.FILL);
		canvas.drawText("這樣可以當圓點用麼:", 10, 130, paint);

		paint.setAntiAlias(true);//去除抗鋸齒
		paint.setColor(Color.YELLOW);
		canvas.drawCircle(120, 130, 10, paint);//參數一水平x軸,參數二垂直y軸,參數三圓半徑,參數四Paint對象
		canvas.restore();


	}
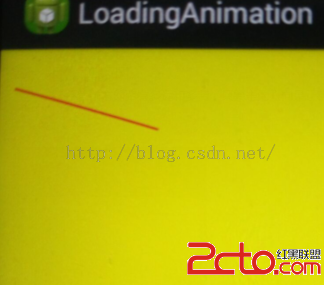
6:畫線。drawLine(float startX, float startY, float stopX, float stopY, Paintpaint)//參數一起始點的x軸位置,參數二起始點的y軸位置,參數三終點的x軸水平位置,參數四y軸垂直位置,最後一個參數為Paint 畫刷對象。
protected void onDraw(Canvas canvas) {
		super.onDraw(canvas);
		Paint paint = new Paint();
		canvas.drawColor(Color.YELLOW);
		paint.setAntiAlias(true);//抗鋸齒
		paint.setDither(true);//抖動,讓圖形看起來沒有毛邊
		paint.setColor(Color.RED);
		paint.setStrokeWidth(3);//設置線的粗細
		canvas.drawLine(20, 50, 200, 100, paint);//參數一起始點的x軸位置,參數二起始點的y軸位置,參數三終點的x軸水平位置,參數四y軸垂直位置,最後一個參數為Paint 畫刷對象。


	}
7:畫弧線:
	protected void onDraw(Canvas canvas) {
		super.onDraw(canvas);
		Paint paint = new Paint();
		canvas.drawColor(Color.BLUE);
		//畫弧
		paint.setStyle(Style.STROKE);//設置空心
		paint.setColor(Color.RED);//設置顏色
		paint.setStrokeWidth(3);//設置粗細
		RectF oval = new RectF();
		oval.set(50, 50, 200, 200);
//		oval.contains(100, 55, 205, 205);
//		canvas.drawArc(oval, 180, 180, true, paint);
		canvas.drawArc(oval, 180, 180, false, paint);

	}
當為true時
canvas.drawArc(oval, 180, 180, true, paint);
當為false時
canvas.drawArc(oval, 180, 180, false, paint);

8:畫多邊形。path1.quadTo(x1, y1, x2, y2)//x1第一圈扭曲的x軸,y1第一圈扭曲的y軸。x2結束x軸位置,結束的y位置
protected void onDraw(Canvas canvas) {
		super.onDraw(canvas);
		Paint paint = new Paint();
		canvas.drawColor(Color.YELLOW);
		paint.setColor(Color.BLACK);
		paint.setTextSize(20);
		paint.setTextScaleX(0.5f);
		canvas.drawText("畫多邊形:", 50, 50, paint);

		paint.setColor(Color.RED);
		paint.setStrokeWidth(3);
		Path path = new Path();
		paint.setStyle(Style.STROKE);//設置空心
		path.moveTo(120, 50);//起點位置
		path.lineTo(190, 100);//第一條線
		path.lineTo(190, 50);//第二條線
		path.lineTo(120, 50);//第三條線
		path.close();//關閉
		canvas.drawPath(path, paint);

		Path path1 = new Path();
		paint.setColor(Color.BLUE);
//		path1.addPath(path);
		path1.moveTo(100, 150);//起始點
		path1.quadTo(10, 280, 10, 350);//
//		path1.quadTo(x1, y1, x2, y2)//x1第一圈扭曲的x軸,y1第一圈扭曲的y軸。x2結束x軸位置,結束的y位置

		path1.setLastPoint(90, 60);
		canvas.drawPath(path1, paint);
	}
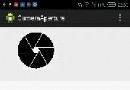 實用控件分享:自定義逼真相機光圈View,控件相機光圈view
實用控件分享:自定義逼真相機光圈View,控件相機光圈view最近手機界開始流行雙攝像頭,大光圈功能也應用而生。所謂大光圈功能就是能夠對照片進行後期重新對焦,其實現的原理
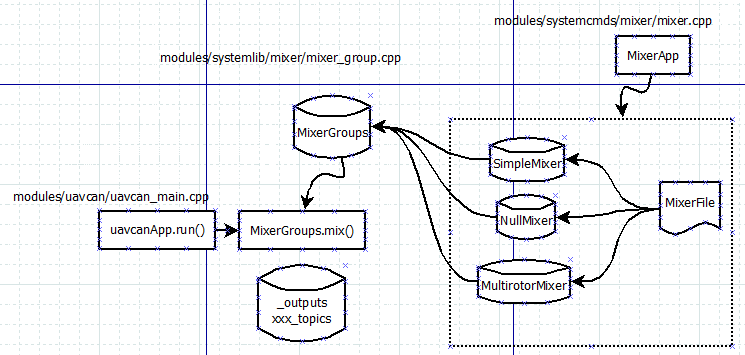 mixer 結構分析[uavcan為例]
mixer 結構分析[uavcan為例]mixer指令為系統的app命令,位置在Firmware/src/systemcmds/mixer目錄下面,其功能是裝載mix文件
 Android學習指南之二十七:如何使用Handler
當用戶點擊一個按鈕時如果執行的是一個常耗時操作的話,處理不好會導致系統假死,用
 【原】tinker dex文件格式的dump工具tinker-dex-dump,dextinker-dex-dump
【原】tinker dex文件格式的dump工具tinker-dex-dump,dextinker-dex-dump序言 Tinker是微信推出的熱更新開源項目,同其它熱