編輯:關於android開發
一般白色就是0,黑色就是1
單色位圖:
8位表示一個字節,
大小:長*寬/8,表示大小,還有一些文件信息如創建時間,什麼工具創建之類的
24位位圖
一個像素表示24位
大小:長*寬*24/8
256色
1個像素可以表示256種顏色 一個字節它的長度剛好是256 ,那麼一個像素點就是一個字節
大小:長*寬
安卓中默認使用32位的
將一個圖片放在SD卡上,使用BitmapFactory.decodeFile解析得Bitmap設置ImageView顯示
   ImageView iv = (ImageView) findViewById(R.id.iv);
    //加載圖片
    //Bitmap bitmap =BitmapFactory.decodeFile("/mnt/sdcard/img7.jpg");

    Bitmap bitmap =BitmapFactory.decodeFile(Environment.getExternalStorageDirectory()+"/img7.jpg");
    //設置圖片
    iv.setImageBitmap(bitmap);
以上的圖片可以正常加載
異常現象---加載 的圖片過大,如2560*1520之類的,加載 時就會報OutMemoryError內存溢出
java.lang.OutOfMemoryError
獲取屏幕的大小寬和高
//1. 獲取到屏幕分辨率
WindowManager manager = (WindowManager) getSystemService(WINDOW_SERVICE);

Display display = manager.getDefaultDisplay();

Point outSize = new Point();
display.getSize(outSize);
int x = outSize.x;
使用圖片的大小寬和屏幕的寬相除,圖片的高與屏幕的高相除,比大小,取最大值,或者取中間值
    /**
圖片設置縮放比例

@author 劉楠 *

2016-3-3下午1:20:28 */ @SuppressLint("NewApi") public class MainActivity extends Activity {

private static final String TAG = "MainActivity";
/*
 * 源圖片
 */
private ImageView src;

@Override
protected void onCreate(Bundle savedInstanceState) {
    super.onCreate(savedInstanceState);
    setContentView(R.layout.activity_main);
    // 源圖片
    src = (ImageView) findViewById(R.id.src);
    /*Options options = new Options();
    options.inJustDecodeBounds=true;
     BitmapFactory.decodeFile(Environment.getExternalStorageDirectory() + "/2.jpg",options);*/

    /**
     * 得到屏幕的寬高
     */
    WindowManager manager = (WindowManager) getSystemService(WINDOW_SERVICE);

    Display defaultDisplay = manager.getDefaultDisplay();
    Point point = new Point();
    defaultDisplay.getRealSize(point);

    int screenWidth = point.x;
    int screenHeight = point.y;

    Log.d(TAG, "屏幕寬:"+screenWidth);
    Log.d(TAG, "屏幕高:"+screenHeight);
    /*
     * jpg圖片解析
     */
    try {
        ExifInterface jpgExifInterface = new ExifInterface(
                Environment.getExternalStorageDirectory() + "/2.jpg");
        /*
         * 圖片的寬度
         */
        String width = jpgExifInterface
                .getAttribute(ExifInterface.TAG_IMAGE_WIDTH);
        /*
         * 得到圖片的高度
         */
        String height = jpgExifInterface
                .getAttribute(ExifInterface.TAG_IMAGE_LENGTH);

        Log.d(TAG, "圖片寬:"+width);
        Log.d(TAG, "圖片高:"+height);
        //計算比例
        int scale=Integer.parseInt(width)/screenWidth>Integer.parseInt(height)/screenHeight?Integer.parseInt(width)/screenWidth:Integer.parseInt(height)/screenHeight;

        //設置顯示
        Log.d(TAG,"比例:"+scale);
        //調置采樣率,比例
        Options opts = new Options();
        opts.inSampleSize=scale;
        //使用工廠再次解析
        Bitmap decodeFile = BitmapFactory.decodeFile(Environment.getExternalStorageDirectory() + "/2.jpg", opts);

        //設置圖片顯示
        src.setImageBitmap(decodeFile);
    } catch (IOException e) {
        e.printStackTrace();
    }
}
只需要更改Matrix
Matrix matrix = new Matrix();
    //移動第一個參數x 水平, 第二個參數y高度,可以是負值
    /*
     * degrees角度:
     * px:開始旋轉的水平坐標
     * py:開始旋轉的垂直坐標
     */
    matrix.setRotate(90, bitmap.getWidth()/2, bitmap.getHeight()/2);
前者是在原圖基礎上做變化,後者是在目前的效果基礎上做變化
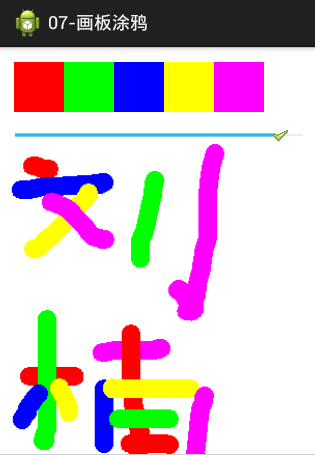
布局文件 <LinearLayout xmlns:android="http://schemas.android.com/apk/res/android" android:layoutwidth="matchparent" android:layoutheight="matchparent" android:orientation="vertical" >

        <LinearLayout
            android:layout_width="match_parent"
            android:layout_height="wrap_content"
            android:layout_margin="15dp"
            android:orientation="horizontal" >
    <!-- 畫筆顏色 -->
            <View
                android:id="@+id/red"
                android:layout_width="50dp"
                android:layout_height="50dp"
                android:background="#ff0000" />

            <View
                android:id="@+id/green"
                android:layout_width="50dp"
                android:layout_height="50dp"
                android:background="#00ff00" />

            <View
                android:id="@+id/blue"
                android:layout_width="50dp"
                android:layout_height="50dp"
                android:background="#0000ff" />

            <View
                android:id="@+id/yellow"
                android:layout_width="50dp"
                android:layout_height="50dp"
                android:background="#ffff00" />

            <View
                android:id="@+id/purple"
                android:layout_width="50dp"
                android:layout_height="50dp"
                android:background="#ff00ff" />
        </LinearLayout>
    <!-- 畫筆粗細 -->
        <SeekBar
            android:id="@+id/seekbar"
            android:layout_width="match_parent"
            android:layout_height="wrap_content"
            android:max="20"
            android:progress="5"
            android:thumb="@drawable/ok" />
    <!-- 塗鴉的地方 -->
        <ImageView
            android:id="@+id/iv_result"
            android:layout_width="match_parent"
            android:layout_height="match_parent"/>
    </LinearLayout>
菜單R.menu.main
<menu xmlns:android="http://schemas.android.com/apk/res/android" >

<item
    android:id="@+id/save"
    android:orderInCategory="100"
    android:showAsAction="never"
    android:title="保存塗鴉"/>
<item
    android:id="@+id/clear"
    android:orderInCategory="100"
    android:showAsAction="never"
    android:title="清除數據"/>
  </menu>
Activity
    /**
     * 畫板塗鴉
     * 1.在內存中生成一張圖片
     * 2.為ImageView設置這張圖片
     * 3.設置畫布,畫筆
     * 4.為ImageView設置監聽事件

     * @author 劉楠
     *
     * 2016-3-3下午7:28:20
     */
    public class MainActivity extends Activity  implements OnClickListener, OnSeekBarChangeListener, OnTouchListener{
        private static final String TAG = "MainActivity";
        /*
         * 進度條,用來改變畫筆粗細
         */
        private SeekBar seekBar;
        /*
         * 畫筆的顏色
         */
        private View red;
        private View green;
        private View blue;
        private View yellow;
        private View purple;
        /*
         * 畫板
         */
        Canvas canvas ;
        /*
         * 畫筆
         */
        Paint paint;

        private ImageView ivResult;
        @Override
        protected void onCreate(Bundle savedInstanceState) {
            super.onCreate(savedInstanceState);
            setContentView(R.layout.activity_main);
            /*
             * 畫板要畫的地方
             */
            ivResult = (ImageView) findViewById(R.id.iv_result);
            /*
             * 進度條,用來改變畫筆粗細
             */
            seekBar = (SeekBar) findViewById(R.id.seekbar);
            /*
             * 畫筆的顏色
             */
            red = findViewById(R.id.red);
            green = findViewById(R.id.green);
            blue = findViewById(R.id.blue);
            yellow = findViewById(R.id.yellow);
            purple = findViewById(R.id.purple);
            /*
             * 設置監聽事件
             */
            red.setOnClickListener(this);
            green.setOnClickListener(this);
            blue.setOnClickListener(this);
            yellow.setOnClickListener(this);
            purple.setOnClickListener(this);
            seekBar.setOnSeekBarChangeListener(this);
            /*
             * 內存中的圖
             */
            buffImage = Bitmap.createBitmap(300, 300, Config.ARGB_8888);
            /*
             * 畫板
             */
            canvas = new Canvas(buffImage);
            canvas.drawColor(Color.WHITE);
            /*
             * 畫布
             */
            paint = new Paint();

            paint.setStrokeCap(Cap.ROUND);


            ivResult.setImageBitmap(buffImage);

            ivResult.setOnTouchListener(this);
        }

        /**
         * 進度條改變時
         */
        @Override
        public void onProgressChanged(SeekBar seekBar, int progress,
                boolean fromUser) {

        }
        /**
         * 進度條觸摸時
         */
        @Override
        public void onStartTrackingTouch(SeekBar seekBar) {

        }
        /**
         * 進度條停止
         */
        @Override
        public void onStopTrackingTouch(SeekBar seekBar) {
            int progress = seekBar.getProgress();
            paint.setStrokeWidth(progress);
            Toast.makeText(this, "當前畫筆粗細是:"+progress, Toast.LENGTH_SHORT).show();
        }

        /**
         * 單擊事件監聽器
         */
        @Override
        public void onClick(View v) {
            switch (v.getId()) {
            case R.id.red:
                paint.setColor(Color.RED);
                Log.d(TAG,"畫筆顏色:紅色");
                break;
            case R.id.green:
                paint.setColor(Color.GREEN);
                Log.d(TAG,"畫筆顏色:綠色");
                break;
            case R.id.blue:
                paint.setColor(Color.BLUE);
                Log.d(TAG,"畫筆顏色:藍色");
                break;
            case R.id.yellow:
                paint.setColor(Color.YELLOW);
                Log.d(TAG,"畫筆顏色:黃色");
                break;
            case R.id.purple:
                paint.setColor(0xffff00ff);
                Log.d(TAG,"畫筆顏色:祡色");
                break;


            }
        }
        float startX ;
        float startY;
        /*
         * 內存中的圖
         */
        private Bitmap buffImage;
        /**
         * ImageView觸摸事件
         */
        @Override
        public boolean onTouch(View v, MotionEvent event) {
            switch (event.getAction()) {
            case MotionEvent.ACTION_DOWN:
                Log.d(TAG, "down---"+event.getX()+" ::: "+event.getY());
                 startX = event.getX();
                 startY = event.getY();
                 canvas.drawLine(startX, startY, startX, startY, paint);
                 ivResult.setImageBitmap(buffImage);
                break;
            case MotionEvent.ACTION_MOVE:
                Log.d(TAG, "move---"+event.getX()+" ::: "+event.getY());

                 float stopX = event.getX();
                 float stopY = event.getY();

                 canvas.drawLine(startX, startY, stopX, stopY, paint);
                 ivResult.setImageBitmap(buffImage);
                 startX = event.getX();
                 startY = event.getY();
                break;
            case MotionEvent.ACTION_UP:
                Log.d(TAG, "up---"+event.getX()+" ::: "+event.getY());
                break;
            }
            return true;
        }

    /**
     * 添加菜單
     */
    @Override
    public boolean onCreateOptionsMenu(Menu menu) {
        getMenuInflater().inflate(R.menu.main, menu);
        return true;
    }

        /**
         * 菜單被選擇時的事件保存圖片與清除圖片
         */
        @Override
        public boolean onMenuItemSelected(int featureId, MenuItem item) {
            switch (item.getItemId()) {
            case R.id.save:
                File file = new File(Environment.getExternalStorageDirectory(), System.currentTimeMillis()+".jpg");
                try {
                    OutputStream out = new FileOutputStream(file);
                    buffImage.compress(CompressFormat.JPEG, 100, out);
                    Toast.makeText(this, "保存成功", Toast.LENGTH_SHORT).show();
                } catch (FileNotFoundException e) {

                    e.printStackTrace();
                }
                /*
                 * 發送通知告訴系統新增加了一張圖片
                 */
                Intent intent =new Intent();
                intent.setAction(Intent.ACTION_MEDIA_SCANNER_SCAN_FILE);
                //發送數據
                intent.setData(Uri.fromFile(file));
                //發送廣播
                sendBroadcast(intent);

                break;
            case R.id.clear:
                /*
                 * 清除畫板
                 */
                canvas.drawColor(Color.WHITE);
                ivResult.setImageBitmap(buffImage);
                break;


            }
            return super.onMenuItemSelected(featureId, item);
        }
    }
保存在SD卡上的權限
<uses-permission android:name="android.permission.WRITE_EXTERNAL_STORAGE"/>
getX和getRawX的區別
當前的觸摸位置到控件的左邊間距
當前的觸摸位置到屏幕的左邊間距

原理:
布局

<RelativeLayout xmlns:android="http://schemas.android.com/apk/res/android"
xmlns:tools="http://schemas.android.com/tools"
android:layout_width="match_parent"
android:layout_height="match_parent"
android:paddingBottom="@dimen/activity_vertical_margin"
android:paddingLeft="@dimen/activity_horizontal_margin"
android:paddingRight="@dimen/activity_horizontal_margin"
android:paddingTop="@dimen/activity_vertical_margin"
tools:context=".MainActivity" >

    <ImageView

        android:layout_width="wrap_content"
        android:layout_height="wrap_content"
        android:src="@drawable/after" />
<ImageView
    android:id="@+id/pre"
        android:layout_width="wrap_content"
        android:layout_height="wrap_content"/>
</RelativeLayout>
Activty實現
    /**
 * 撕衣服
 * 1.准備兩張一樣的圖片,一張是穿有衣服的,另一張是沒有穿衣服的。
    2.通過FrameLayout進行布局或者相對布局這裡使用相對,穿衣服的放上面,沒穿衣服的圖片放下面。
    3.通過觸摸事件進行判斷,手指劃過的地方,讓穿衣服的圖片變成透明,就顯示到了下面沒穿衣服的圖片。

     * @author 劉楠
     *
     * 2016-3-3下午11:22:08
     */
    public class MainActivity extends Activity implements OnTouchListener {

        private static final String TAG = "MainActivity";

        /*
         * 前面的一張圖片
         */
        private ImageView pre;

        private Canvas canvas;

        private Bitmap buffImage;

        private static final int RADIUS = 10;

        @Override
        protected void onCreate(Bundle savedInstanceState) {
            super.onCreate(savedInstanceState);
            setContentView(R.layout.activity_main);

            pre = (ImageView) findViewById(R.id.pre);
            /*
             * 通過這種方法讀取的bitmap是只讀的,不可修改
             */
            Bitmap bitmap = BitmapFactory.decodeResource(getResources(),
                    R.drawable.pre);
            /*
             * 內存中的生成一張同樣大小與配置的圖片
             */
            buffImage = Bitmap.createBitmap(bitmap.getWidth(), bitmap.getHeight(),
                    bitmap.getConfig());

            canvas = new Canvas(buffImage);

            Paint paint = new Paint();

            Matrix matrix = new Matrix();
            /*
             * 畫圖
             */
            canvas.drawBitmap(bitmap, matrix, paint);
            pre.setImageBitmap(buffImage);

            /*
             * 設置監聽事件
             */
            pre.setOnTouchListener(this);
        }

        @Override
        public boolean onTouch(View v, MotionEvent event) {
            switch (event.getAction()) {
            case MotionEvent.ACTION_MOVE:
                Log.d(TAG, "move" + event.getX() + "------->" + event.getY());
                int stopX = (int) event.getX();
                int stopY = (int) event.getY();
                // 這個判斷是計算邊界,因為超過了邊界為負值時會報錯
                if (stopX >= RADIUS && stopX <= pre.getWidth() - RADIUS
                        && stopY >= RADIUS && stopY <= pre.getHeight() - RADIUS) {
                    /**
                     * 計算圓,挖空一個半徑為RADIUS的實心圓
                     */
                    for (int radius = 0; radius <= RADIUS; radius++) {
                        for (double angle = 0; angle <= 360; angle++) {

                            int newX = (int) (stopX + radius * Math.cos(angle));
                            int newY = (int) (stopY + radius * Math.sin(angle));
                            buffImage.setPixel(newX, newY, Color.TRANSPARENT);

                        }
                    }
                    pre.setImageBitmap(buffImage);
                }
                break;

            }
            return true;
        }

    }
布局
<LinearLayout xmlns:android="http://schemas.android.com/apk/res/android"
xmlns:tools="http://schemas.android.com/tools"
android:layout_width="match_parent"
android:layout_height="match_parent"
android:gravity="center_horizontal"
android:orientation="vertical"
android:paddingBottom="@dimen/activity_vertical_margin"
android:paddingLeft="@dimen/activity_horizontal_margin"
android:paddingRight="@dimen/activity_horizontal_margin"
android:paddingTop="@dimen/activity_vertical_margin"
tools:context=".MainActivity" >
<TextView
android:layout_width="wrap_content"
android:layout_height="wrap_content"
android:textSize="30sp"
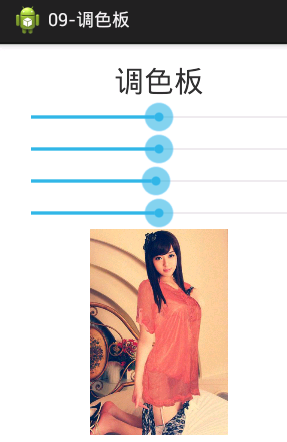
android:text="調色板" />
<SeekBar
android:id="@+id/seekbar_red"
android:layout_width="match_parent"
android:layout_height="wrap_content"
android:progress="50"
android:max="100"/>
<SeekBar
android:id="@+id/seekbar_green"
android:layout_width="match_parent"
android:layout_height="wrap_content"
android:progress="50"
android:max="100"/>
<SeekBar
android:id="@+id/seekbar_blue"
android:layout_width="match_parent"
android:layout_height="wrap_content"
android:progress="50"
android:max="100"/>
<SeekBar
android:id="@+id/seekbar_alpha"
android:layout_width="match_parent"
android:layout_height="wrap_content"
android:progress="50"
android:max="100"/>
<ImageView
android:id="@+id/iv"
android:layout_width="wrap_content"
android:layout_height="wrap_content" />
</LinearLayout>
Activity
    /**
     * 簡易調色板 步驟: 1.使用SeekBar來控制顏色的顯示比例
     *
     *
     * @author 劉楠
     *
     *         2016-3-3下午10:58:24
     */
    public class MainActivity extends Activity {

        private SeekBar seekbarRed;
        private ImageView iv;
        private Paint paint;
        private Matrix matrix;
        private Canvas canvas;
        private SeekBar seekbarGreen;
        private SeekBar seekbarBlue;
        private SeekBar seekbarAlpha;

        @Override
        protected void onCreate(Bundle savedInstanceState) {
            super.onCreate(savedInstanceState);
            setContentView(R.layout.activity_main);
            seekbarRed = (SeekBar) findViewById(R.id.seekbar_red);
            seekbarGreen = (SeekBar) findViewById(R.id.seekbar_green);
            seekbarBlue = (SeekBar) findViewById(R.id.seekbar_blue);
            seekbarAlpha = (SeekBar) findViewById(R.id.seekbar_alpha);
            iv = (ImageView) findViewById(R.id.iv);
            // 通過這種方法讀取的bitmap是只讀的,不可修改
            final Bitmap bitmap = BitmapFactory.decodeResource(getResources(),
                    R.drawable.pre14);

            final Bitmap buffImage = Bitmap.createBitmap(bitmap.getWidth(),
                    bitmap.getHeight(), bitmap.getConfig());

            canvas = new Canvas(buffImage);

            paint = new Paint();
            matrix = new Matrix();

            canvas.drawBitmap(bitmap, matrix, paint);

            iv.setImageBitmap(buffImage);

            seekbarRed.setOnSeekBarChangeListener(new OnSeekBarChangeListener() {

                @Override
                public void onStopTrackingTouch(SeekBar seekBar) {
                    int progress = seekBar.getProgress();
                    float value = progress / 50.0f;
                    ColorMatrix cm = new ColorMatrix();
                    /*
                     *
                     * 顏色矩陣
                     */
                    cm.set(new float[] { 1 * value, 0, 0, 0, 0,// 紅色
                            0, 1, 0, 0, 0,// 綠色
                            0, 0, 1, 0, 0,// 藍色
                            0, 0, 0, 1, 0,// 透明度
                    });
                    // 給畫筆添加過濾器
                    // 給畫筆添加顏色過濾器

                    paint.setColorFilter(new ColorMatrixColorFilter(cm));

                    canvas.drawBitmap(bitmap, matrix, paint);
                    iv.setImageBitmap(buffImage);

                }

                @Override
                public void onStartTrackingTouch(SeekBar seekBar) {

                }

                @Override
                public void onProgressChanged(SeekBar seekBar, int progress,
                        boolean fromUser) {

                    float value = progress / 50.0f;
                    ColorMatrix cm = new ColorMatrix();
                    /*
                     *
                     * 顏色矩陣
                     */
                    cm.set(new float[] { 1 * value, 0, 0, 0, 0,// 紅色
                            0, 1, 0, 0, 0,// 綠色
                            0, 0, 1, 0, 0,// 藍色
                            0, 0, 0, 1, 0,// 透明度
                    });
                    // 給畫筆添加過濾器
                    // 給畫筆添加顏色過濾器

                    paint.setColorFilter(new ColorMatrixColorFilter(cm));

                    canvas.drawBitmap(bitmap, matrix, paint);
                    iv.setImageBitmap(buffImage);

                }
            });
            seekbarGreen.setOnSeekBarChangeListener(new OnSeekBarChangeListener() {

                @Override
                public void onStopTrackingTouch(SeekBar seekBar) {
                    int progress = seekBar.getProgress();
                    float value = progress / 50.0f;
                    ColorMatrix cm = new ColorMatrix();
                    /*
                     *
                     * 顏色矩陣
                     */
                    cm.set(new float[] { 1, 0, 0, 0, 0,// 紅色
                            0, 1 * value, 0, 0, 0,// 綠色
                            0, 0, 1, 0, 0,// 藍色
                            0, 0, 0, 1, 0,// 透明度
                    });
                    // 給畫筆添加過濾器
                    // 給畫筆添加顏色過濾器

                    paint.setColorFilter(new ColorMatrixColorFilter(cm));

                    canvas.drawBitmap(bitmap, matrix, paint);
                    iv.setImageBitmap(buffImage);

                }

                @Override
                public void onStartTrackingTouch(SeekBar seekBar) {

                }

                @Override
                public void onProgressChanged(SeekBar seekBar, int progress,
                        boolean fromUser) {

                    float value = progress / 50.0f;
                    ColorMatrix cm = new ColorMatrix();
                    /*
                     *
                     * 顏色矩陣
                     */
                    cm.set(new float[] { 1, 0, 0, 0, 0,// 紅色
                            0, 1 * value, 0, 0, 0,// 綠色
                            0, 0, 1, 0, 0,// 藍色
                            0, 0, 0, 1, 0,// 透明度
                    });
                    // 給畫筆添加過濾器
                    // 給畫筆添加顏色過濾器

                    paint.setColorFilter(new ColorMatrixColorFilter(cm));

                    canvas.drawBitmap(bitmap, matrix, paint);
                    iv.setImageBitmap(buffImage);

                }
            });
            seekbarBlue.setOnSeekBarChangeListener(new OnSeekBarChangeListener() {

                @Override
                public void onStopTrackingTouch(SeekBar seekBar) {
                    int progress = seekBar.getProgress();
                    float value = progress / 50.0f;
                    ColorMatrix cm = new ColorMatrix();
                    /*
                     *
                     * 顏色矩陣
                     */
                    cm.set(new float[] { 1, 0, 0, 0, 0,// 紅色
                            0, 1, 0, 0, 0,// 綠色
                            0, 0, 1 * value, 0, 0,// 藍色
                            0, 0, 0, 1, 0,// 透明度
                    });
                    // 給畫筆添加過濾器
                    // 給畫筆添加顏色過濾器

                    paint.setColorFilter(new ColorMatrixColorFilter(cm));

                    canvas.drawBitmap(bitmap, matrix, paint);
                    iv.setImageBitmap(buffImage);

                }

                @Override
                public void onStartTrackingTouch(SeekBar seekBar) {

                }

                @Override
                public void onProgressChanged(SeekBar seekBar, int progress,
                        boolean fromUser) {

                    float value = progress / 50.0f;
                    ColorMatrix cm = new ColorMatrix();
                    cm.set(new float[] { 1, 0, 0, 0, 0,// 紅色
                            0, 1, 0, 0, 0,// 綠色
                            0, 0, 1 * value, 0, 0,// 藍色
                            0, 0, 0, 1, 0,// 透明度
                    });
                    // 給畫筆添加過濾器
                    // 給畫筆添加顏色過濾器

                    paint.setColorFilter(new ColorMatrixColorFilter(cm));

                    canvas.drawBitmap(bitmap, matrix, paint);
                    iv.setImageBitmap(buffImage);

                }
            });
            seekbarAlpha.setOnSeekBarChangeListener(new OnSeekBarChangeListener() {

                @Override
                public void onStopTrackingTouch(SeekBar seekBar) {
                    int progress = seekBar.getProgress();
                    float value = progress / 50.0f;
                    ColorMatrix cm = new ColorMatrix();
                    cm.set(new float[] { 1, 0, 0, 0, 0,// 紅色
                            0, 1, 0, 0, 0,// 綠色
                            0, 0, 1, 0, 0,// 藍色
                            0, 0, 0, 1 * value, 0,// 透明度
                    });
                    // 給畫筆添加過濾器
                    // 給畫筆添加顏色過濾器

                    paint.setColorFilter(new ColorMatrixColorFilter(cm));

                    canvas.drawBitmap(bitmap, matrix, paint);
                    iv.setImageBitmap(buffImage);

                }

                @Override
                public void onStartTrackingTouch(SeekBar seekBar) {

                }

                @Override
                public void onProgressChanged(SeekBar seekBar, int progress,
                        boolean fromUser) {

                    float value = progress / 50.0f;
                    ColorMatrix cm = new ColorMatrix();
                    cm.set(new float[] { 1, 0, 0, 0, 0,// 紅色
                            0, 1, 0, 0, 0,// 綠色
                            0, 0, 1, 0, 0,// 藍色
                            0, 0, 0, 1 * value, 0,// 透明度
                    });
                    // 給畫筆添加過濾器
                    // 給畫筆添加顏色過濾器

                    paint.setColorFilter(new ColorMatrixColorFilter(cm));

                    canvas.drawBitmap(bitmap, matrix, paint);
                    iv.setImageBitmap(buffImage);

                }
            });
        }

    }
 Android自定義View入門(一),androidview
Android自定義View入門(一),androidview最近在寫一個關於音樂播放的應用,寫到播放界面UI時,就想自己實現的一個播放界面。那麼如何實現自定義View呢
 Android開發案例,android案例
Android開發案例,android案例所有電商APP的商品詳情頁面幾乎都是和淘寶的一模一樣(見下圖): 采用上下分頁的模式 商品基本參數 & 選購參數在上頁
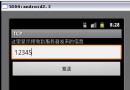 Android編程之客戶端通過socket與服務器通信的方法
Android編程之客戶端通過socket與服務器通信的方法 Android編程之客戶端通過socket與服務器通信的方法 &n
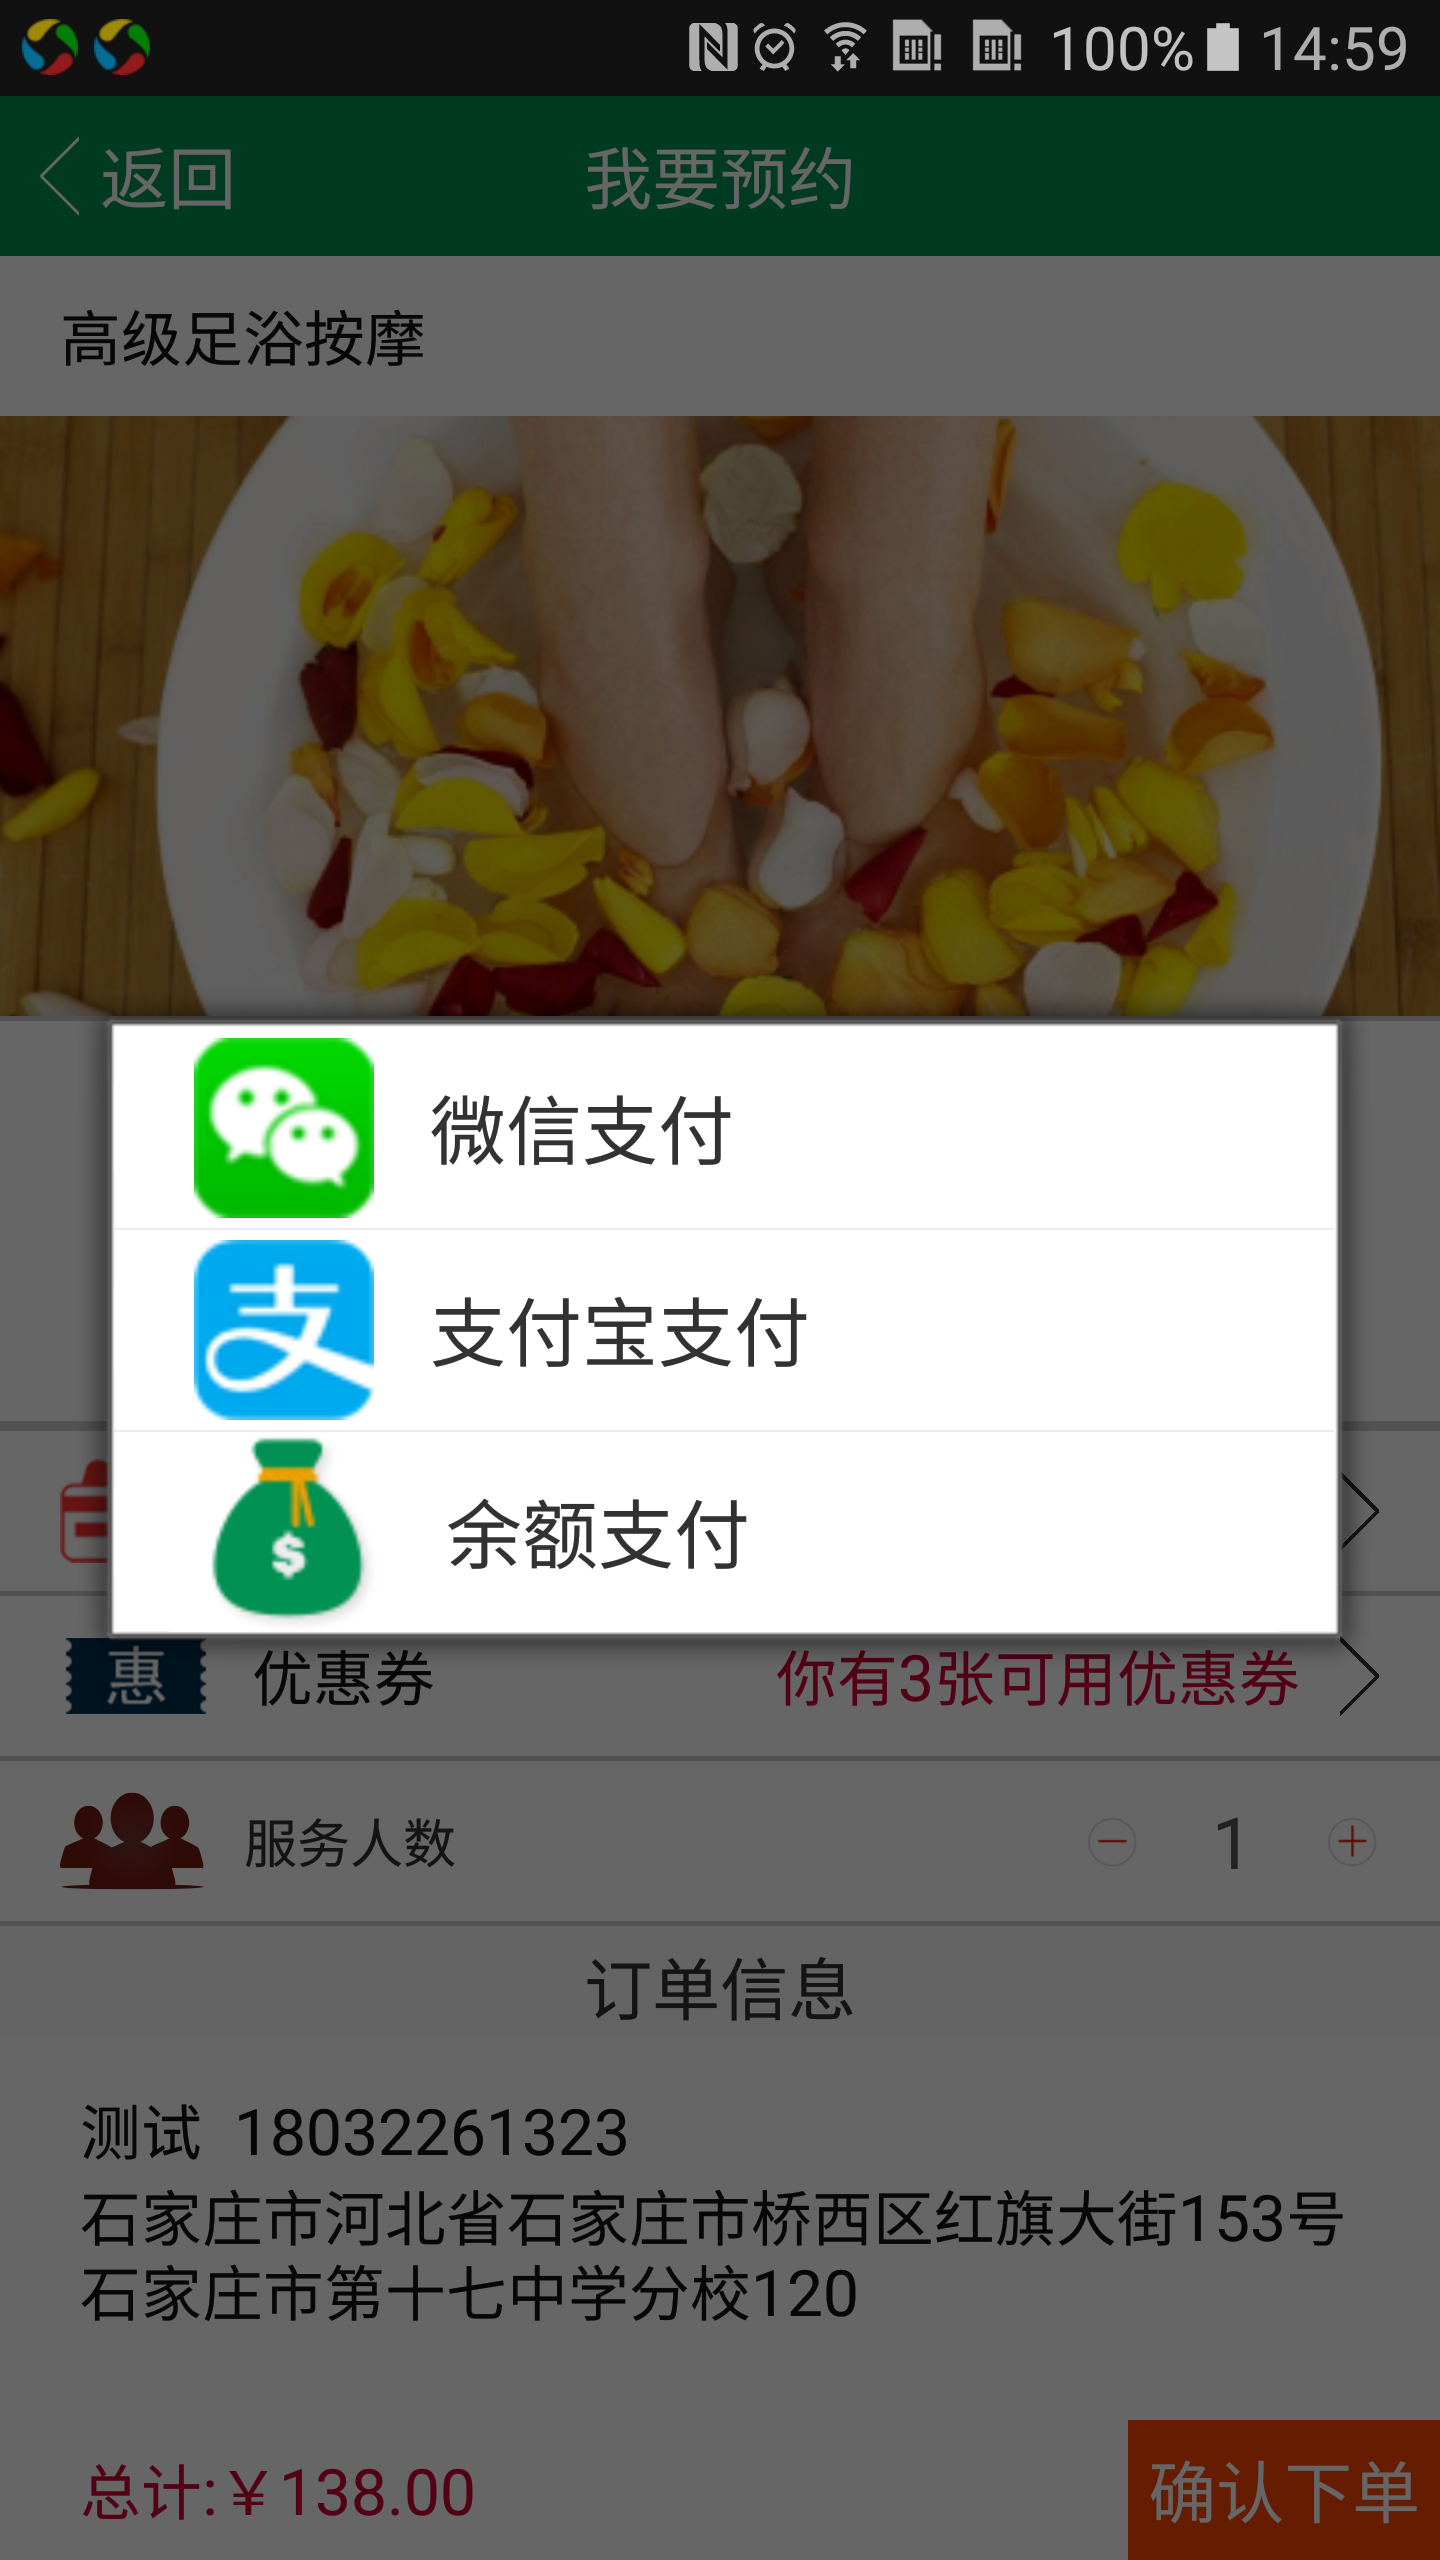 Android系統默認對話框添加圖片,
Android系統默認對話框添加圖片,開發工具Android Studio 今天公司UI要求軟件對話框改成加圖片的,以前沒有做過,所以就學習了一下,廢話不多說, 看效果: