編輯:Android開發實例
android中listView的實現有多種方式,但是當我們利用simpleAdapter實現listView的時候,SimpleAdapter並沒有提供顯示一個ratingBar的功能(即上面的星星用來評分的控件)。要實現上面的功能,我們可以通過繼承SimpleAdapter類重寫其中一些方法來實現。下面即是此類的實現:
package nate.android.Service;

import java.util.List;
import java.util.Map;
import com.nate.wte.LocalSql.StoresInfoDB;
import android.content.Context;
import android.graphics.Bitmap;
import android.view.LayoutInflater;
import android.view.View;
import android.view.ViewGroup;
import android.widget.Checkable;
import android.widget.ImageView;
import android.widget.RatingBar;
import android.widget.SimpleAdapter;
import android.widget.TextView;

public class MySimpleAdapter extends SimpleAdapter {
	private int[] mTo;
    private String[] mFrom;
    private ViewBinder mViewBinder;
    private List<? extends Map<String, ?>> mData;
    private int mResource;
    private int mDropDownResource;
    private LayoutInflater mInflater;
	public MySimpleAdapter(Context context,
			List<? extends Map<String, ?>> data, int resource, String[] from,
			int[] to) {
		super(context, data, resource, from, to);
		mData = data;
        mResource = mDropDownResource = resource;
        mFrom = from;
        mTo = to;
        mInflater = (LayoutInflater) context.getSystemService(Context.LAYOUT_INFLATER_SERVICE);
	}
	 /**
     * @see android.widget.Adapter#getView(int, View, ViewGroup)
     */
    public View getView(int position, View convertView, ViewGroup parent) {
        return createViewFromResource(position, convertView, parent, mResource);
    }
    private View createViewFromResource(int position, View convertView,
            ViewGroup parent, int resource) {
        View v;
        if (convertView == null) {
            v = mInflater.inflate(resource, parent, false);

            final int[] to = mTo;
            final int count = to.length;
            final View[] holder = new View[count];

            for (int i = 0; i < count; i++) {
                holder[i] = v.findViewById(to[i]);
            }

            v.setTag(holder);
        } else {
            v = convertView;
        }
        bindView(position, v);

        return v;
    }

    private void bindView(int position, View view) {
        final Map dataSet = mData.get(position);
        if (dataSet == null) {
            return;
        }
        final ViewBinder binder = mViewBinder;
        final View[] holder = (View[]) view.getTag();
        final String[] from = mFrom;
        final int[] to = mTo;
        final int count = to.length;

        for (int i = 0; i < count; i++) {
            final View v = holder[i];
            if (v != null) {
                final Object data = dataSet.get(from[i]);
                String text = data == null ? "" : data.toString();
                if (text == null) {
                    text = "";
                }
                boolean bound = false;
                if (binder != null) {
                    bound = binder.setViewValue(v, data, text);
                }
                if (!bound) {
                    if (v instanceof Checkable) {
                        if (data instanceof Boolean) {
                            ((Checkable) v).setChecked((Boolean) data);
                        } else {
                            throw new IllegalStateException(v.getClass().getName() +
                                    " should be bound to a Boolean, not a " + data.getClass());
                        }
                    } else if (v instanceof TextView) {
                        // Note: keep the instanceof TextView check at the bottom of these
                        // ifs since a lot of views are TextViews (e.g. CheckBoxes).
                        //setViewText((TextView) v, text);
                        ((TextView) v).setText(text);
                    } else if (v instanceof ImageView) {
                    	if (data instanceof Integer) {
                            setViewImage((ImageView) v, (Integer) data);
                        }
                    	else if(data instanceof byte[]) {      //備注1
								Bitmap bmp;
								byte[] image = (byte[])data;
								if(b.length!=0){
								bmp = BitmapFactory.decodeByteArray(b, 0, b.length);
								((ImageView) v).setImageBitmap(bmp);
                        	}
                        }
                    else if(v instanceof RatingBar){
                    	float score = Float.parseFloat(data.toString());  //備注2
                    	((RatingBar)v).setRating(score);
                    }
                    else {
                        throw new IllegalStateException(v.getClass().getName() + " is not a " +
                                " view that can be bounds by this SimpleAdapter");
                    }
                }
            }
        }
    }

    public void setViewImage(ImageView v, int value) {
        v.setImageResource(value);
}
以上MySimpleAdapter類繼承自SimpleAdapter,我們要實現的效果主要在 private void bindView(int position, View view) 函數中添加(更改)就行。這個函數中相當於將控件與數據對應,然後在應用此類時,如下
MySimpleAdapter myListAdapter = new MySimpleAdapter(this,list,R.layout.stores,
					new String[]{"store_name", "store_score","store_pic","store_scores","phone"},
					new int[]{R.id.store_name, R.id.store_score,R.id.store_pic,R.id.store_score_bar,R.id.showPhone});
此adapter內容與上面圖中顯示的listView中的item內容一致。
myListView.setAdapter(myListAdapter);
在備注2處實現了當View是一個RatingBar的類型時也能在listView中顯示的效果的功能。此時我們的data就是我們要顯示的ratingBar中star的個數(也就是評分數) !!!
在備注1處,我們將網絡或者是從數據庫等地方取來的圖片數據(Blob類型然後轉成byte[]類型)(比如我們之前可以使用
public byte[] Bitmap2Bytes(Bitmap bm){ ByteArrayOutputStream baos = new ByteArrayOutputStream(); bm.compress(Bitmap.CompressFormat.PNG, 100, baos); return baos.toByteArray(); }將圖片轉成byte[]類型存儲)。扯遠了!這個轉換在這篇文章中有將詳細的說明。
總之備注一處就是運用上面添加ratingBar同樣的原理將byte[]類型的圖片還原(這是原來的SimpleAdapter中沒有實現的)。
記錄下自己的所學,雖然淺薄!!!如果我是一只蝸牛,那就只能慢慢向上爬!
 android顯示TextView文字的倒影效果實現代碼
今天記錄一下TextView的倒影效果,顯示一串文字,然後在文字的下方顯示出它的倒影,先上效果圖: 最重要的就是View中getDrawingCache()方法
 Android之網絡通信案例分析
由於一個項目的需要,我研究了一下android的網絡通信方式,大體和java平台的很相似! android平台也提供了很多的API供開發者使用,請按示
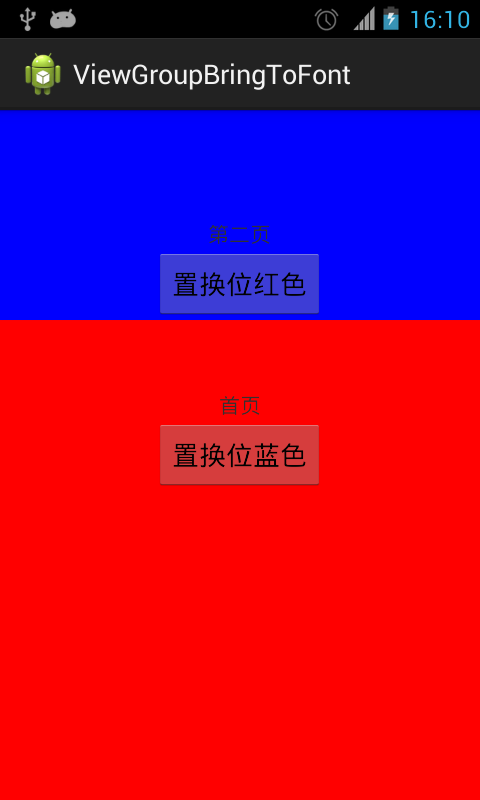
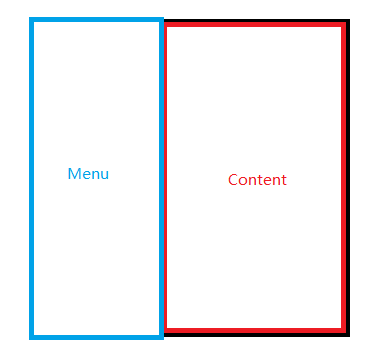 Android自定義ViewGroup打造各種風格的SlidingMenu
首先我們先來看一看效果圖,第一個效果圖是一個最普通的側滑菜單,我們一會兒會先做出這種側滑菜單,然後再在此基礎上實現另外兩個效果 第一種 第二種
 cocos2d
我用的是cocos2d-2.0-x-2.0.3 之前弄了一天也沒成功 今天來了下載了最新的ndk8 更新了sdk 又重新是了一遍 居然成功了,不知道是工具的版本問