編輯:關於Android編程
Android 解決TextView排版參差不齊的問題
在app中,展示數據時,裡面有漢字、數字、特殊字符時,由於全角、半角問題導致TextView參差不齊。在網上找了許多,半角轉全角並沒什麼用,還有其他自定義TextView都有問題。最後終於找到一個,就像Word一樣,可以使文字左右兩端對齊:
package com.monkey.monkeymushroom.view;

import android.content.Context;
import android.graphics.Canvas;
import android.graphics.Paint;
import android.text.Layout;
import android.text.StaticLayout;
import android.text.TextPaint;
import android.util.AttributeSet;
import android.widget.TextView;

/**
 * 解決文字排版混亂參差不齊的問題
 */
public class JustifyTextView extends TextView {

 private int mLineY;
 private int mViewWidth;
 public static final String TWO_CHINESE_BLANK = " ";

 public JustifyTextView(Context context, AttributeSet attrs) {
  super(context, attrs);
 }

 @Override
 protected void onLayout(boolean changed, int left, int top, int right, int bottom) {
  super.onLayout(changed, left, top, right, bottom);
 }

 @Override
 protected void onDraw(Canvas canvas) {
  TextPaint paint = getPaint();
  paint.setColor(getCurrentTextColor());
  paint.drawableState = getDrawableState();
  mViewWidth = getMeasuredWidth();
  String text = getText().toString();
  mLineY = 0;
  mLineY += getTextSize();
  Layout layout = getLayout();

  // layout.getLayout()在4.4.3出現NullPointerException
  if (layout == null) {
   return;
  }

  Paint.FontMetrics fm = paint.getFontMetrics();

  int textHeight = (int) (Math.ceil(fm.descent - fm.ascent));
  textHeight = (int) (textHeight * layout.getSpacingMultiplier() + layout
    .getSpacingAdd());
  //解決了最後一行文字間距過大的問題
  for (int i = 0; i < layout.getLineCount(); i++) {
   int lineStart = layout.getLineStart(i);
   int lineEnd = layout.getLineEnd(i);
   float width = StaticLayout.getDesiredWidth(text, lineStart,
     lineEnd, getPaint());
   String line = text.substring(lineStart, lineEnd);

   if (i < layout.getLineCount() - 1) {
    if (needScale(line)) {
     drawScaledText(canvas, lineStart, line, width);
    } else {
     canvas.drawText(line, 0, mLineY, paint);
    }
   } else {
    canvas.drawText(line, 0, mLineY, paint);
   }
   mLineY += textHeight;
  }
 }

 private void drawScaledText(Canvas canvas, int lineStart, String line, float lineWidth) {
  float x = 0;
  if (isFirstLineOfParagraph(lineStart, line)) {
   String blanks = " ";
   canvas.drawText(blanks, x, mLineY, getPaint());
   float bw = StaticLayout.getDesiredWidth(blanks, getPaint());
   x += bw;

   line = line.substring(3);
  }

  int gapCount = line.length() - 1;
  int i = 0;
  if (line.length() > 2 && line.charAt(0) == 12288
    && line.charAt(1) == 12288) {
   String substring = line.substring(0, 2);
   float cw = StaticLayout.getDesiredWidth(substring, getPaint());
   canvas.drawText(substring, x, mLineY, getPaint());
   x += cw;
   i += 2;
  }

  float d = (mViewWidth - lineWidth) / gapCount;
  for (; i < line.length(); i++) {
   String c = String.valueOf(line.charAt(i));
   float cw = StaticLayout.getDesiredWidth(c, getPaint());
   canvas.drawText(c, x, mLineY, getPaint());
   x += cw + d;
  }
 }

 private boolean isFirstLineOfParagraph(int lineStart, String line) {
  return line.length() > 3 && line.charAt(0) == ' '
    && line.charAt(1) == ' ';
 }

 private boolean needScale(String line) {
  if (line == null || line.length() == 0) {
   return false;
  } else {
   return line.charAt(line.length() - 1) != '\n';
  }
 }
}
感謝閱讀,希望能幫助到大家,謝謝大家對本站的支持!
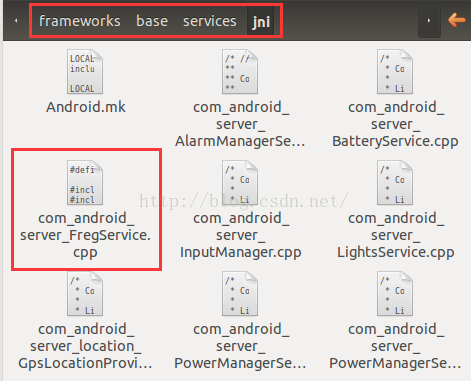
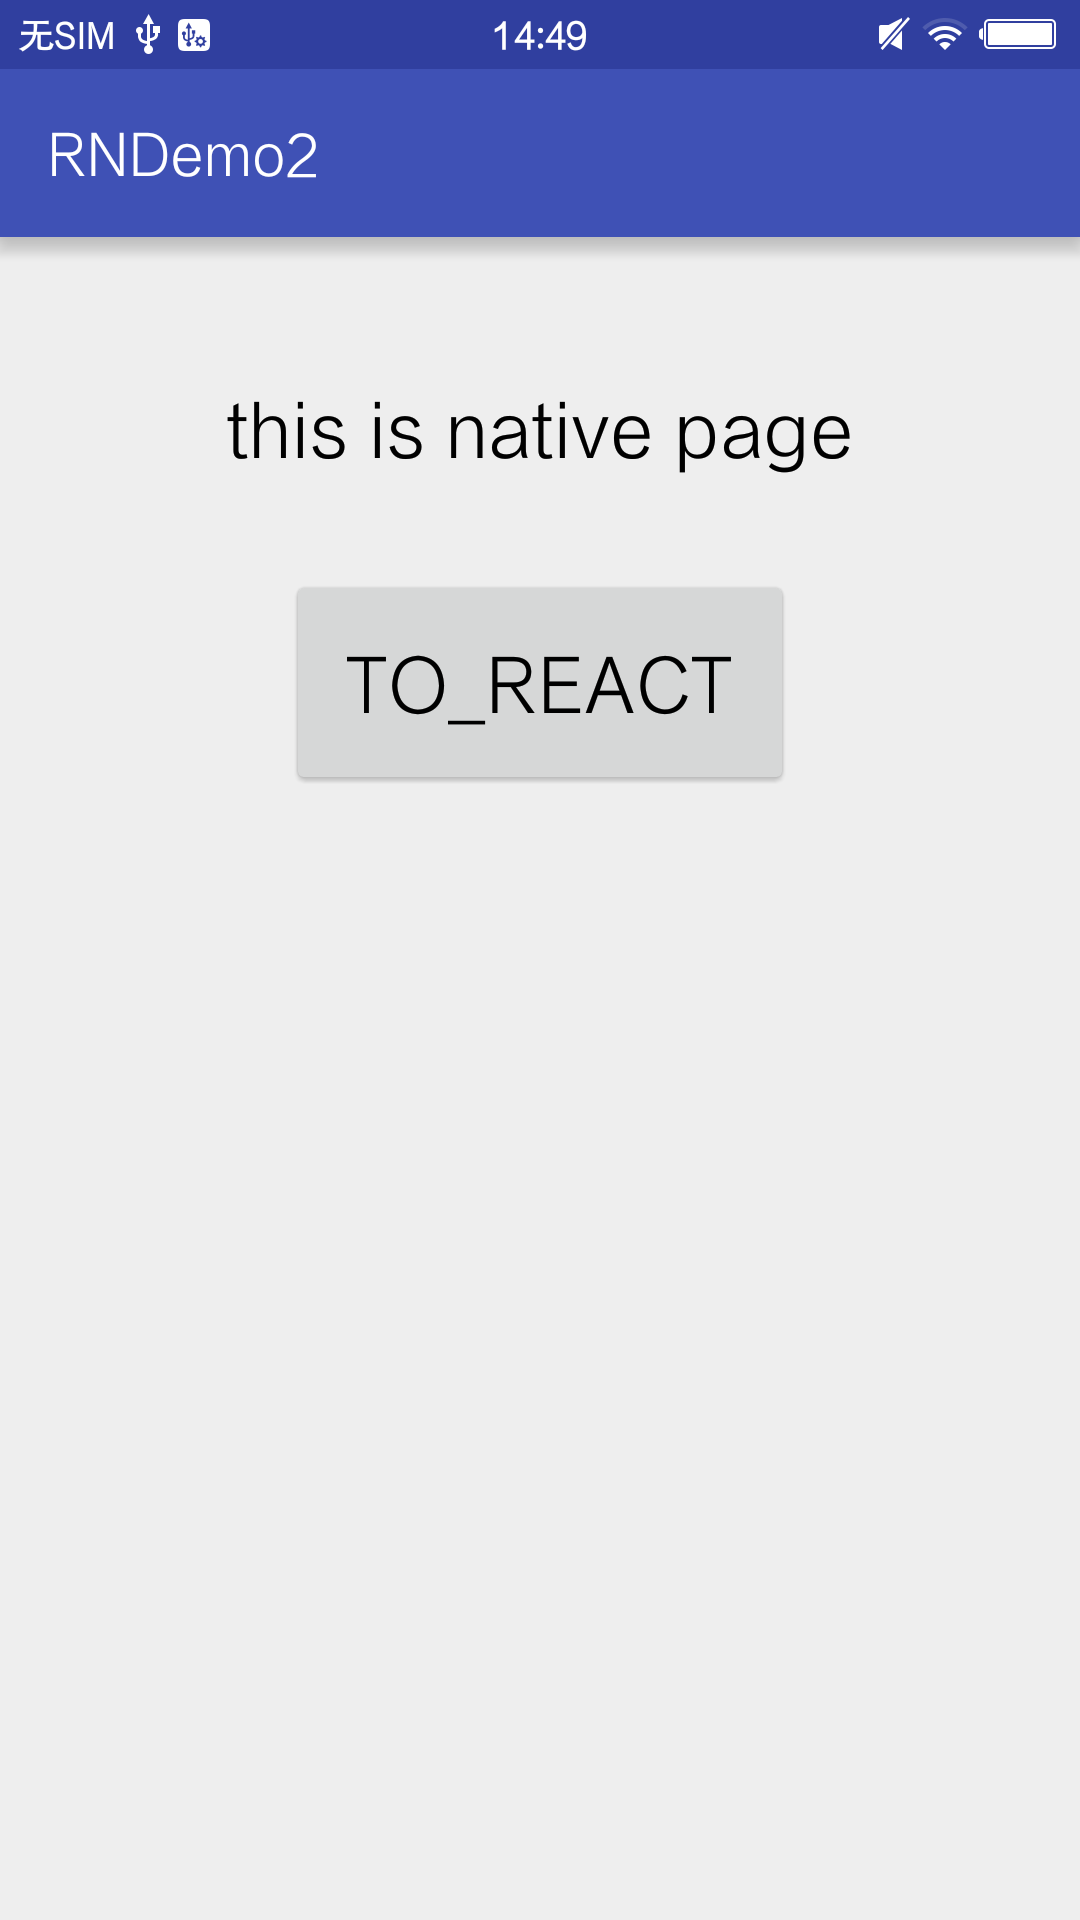 React Native 集成到已有項目
前言React Native已經出現很久了,有很多應用也在進行嘗試,前面我們也講述了怎麼創建React Native工程以及怎麼搭建原生語言與js的開發環境。但是在實際應
 Android使用WindowManager制作一個可拖動的控件
效果圖如下第一步:新建DragView繼承RelativeLayoutpackage com.rong.activity;import com.rong.test.R;i
 Android初級教程以動畫的形式彈出窗體
這一篇集合動畫知識和彈出窗體知識,綜合起來以動畫的形式彈出窗體。動畫的知識前幾篇已經做過詳細的介紹,可翻閱前面寫的有關動畫博文。先簡單介紹一下彈出窗體效果的方法:首先,需
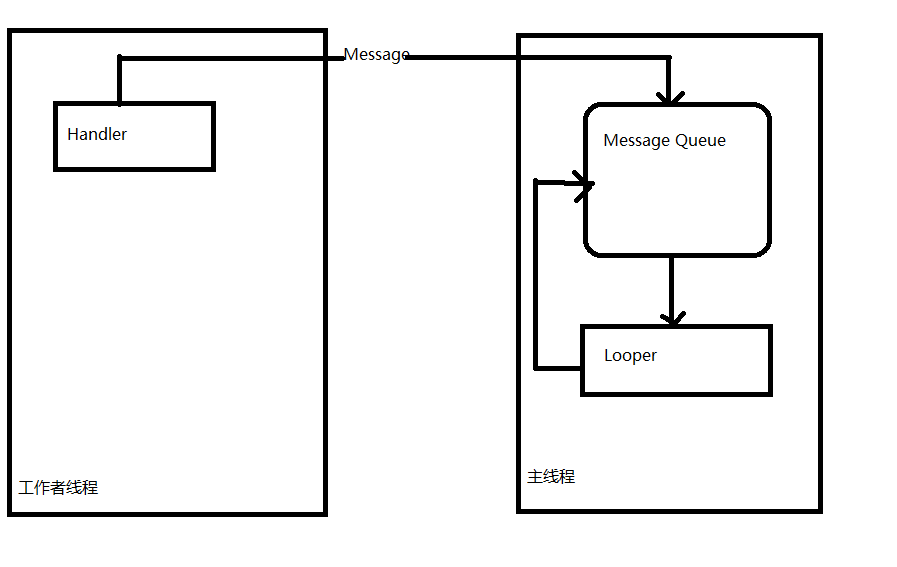 Android學習總結(3)——Handler深入詳解
什麼是HandlerHandler是Android消息機制的上層接口,它為我們封裝了許多底層的細節,讓我們能夠很方便的使用底層的消息機制。Handler的最常見應用場景之