編輯:關於Android編程
如果不考慮更深層的性能問題,我個人認為ScrollerView還是很好用的。而且單用ScrollerView就可以實現分類型的RecyclerView或ListView所能實現的效果。
下面我單單從效果展示方面考慮,使用ScrollerView實現如下圖所示的可滾動的多條目分類,只是為了跟大家一起分享一下新思路。(平時:若從復用性等方面考慮,這顯然是存在瑕疵的~)

特點描述:
1.可上下滾動
2.有類似於網格布局的樣式
3.子條目具有點擊事件
剛看到這個效果時,首先想到的是使用分類型的RecyclerView 或者 ListView ,裡面再嵌套GridView來實現。
但轉而又一想ScrollerView也可以滾動,只要往裡面循環添加子item不就可以了嗎。
實現的邏輯大致如下:
具體的實現如下:
第一步:布局裡寫一個ScrollerView,裡面添加一個豎直的線性布局
第二步:實例化垂直線性布局
allhonor_hscroll = (LinearLayout) findViewById(R.id.allhonor_hscroll);
第三步:聯網請求獲取數據
setAllHonorData();
/**
  * 使用okhttp
  */
  public void setAllHonorData() {
    OkHttpUtils
        .get()
        .url(url)
        .build()
        .execute(new StringCallback() {
          @Override
          public void onError(okhttp3.Call call, Exception e, int id) {
            Log.e("TAG", "111");
            Log.e("TAG", "onError" + e.getMessage());
          }

          @Override
          public void onResponse(String response, int id) {
            Log.e("TAG", "222");
            Log.e("TAG", "onRespons" + response);

            //聯網成功後使用fastjson來解析數據
            processData(response);
          }

          @Override
          public void onBefore(Request request, int id) {
          }

          @Override
          public void onAfter(int id) {
          }

        });
  }
/**
* 使用fastjson進行解析
*
* @param json
*/
private void processData(String json) {
//使用GsonFormat生成對應的bean類
com.alibaba.fastjson.JSONObject jsonObject = JSON.parseObject(json);
String data = jsonObject.getString("data");
List<AllHonorBean.HornorBean> hornorsList = JSON.parseArray(data, AllHonorBean.HornorBean.class);
//測試是否解析數據成功
// String strTest = hornorsList.get(0).getRegion();
// Log.e("TAG", strTest);
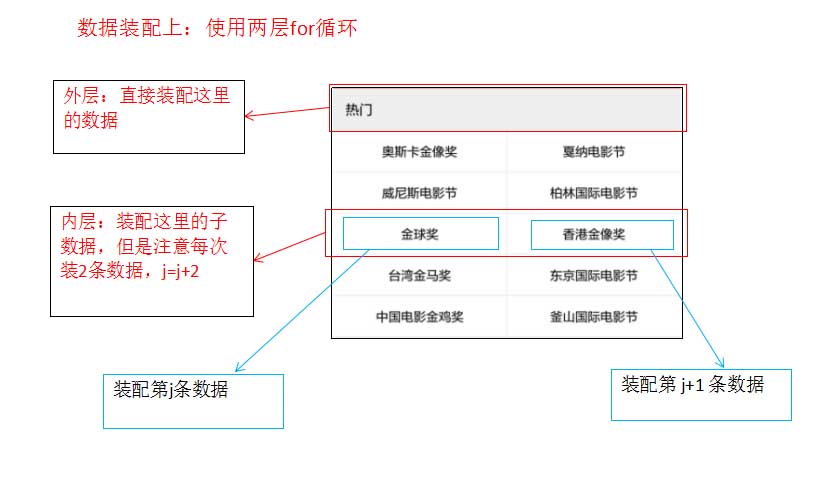
//第四步:裝配數據,使用兩層for循環
}
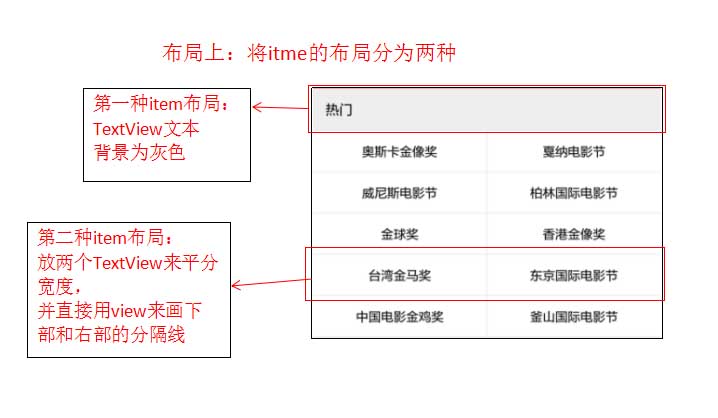
第四步:設置兩種item的布局
第一種item布局:item_allhornors0.xml
<?xml version="1.0" encoding="utf-8"?>
<LinearLayout xmlns:android="http://schemas.android.com/apk/res/android"
  android:layout_width="match_parent"
  android:layout_height="match_parent"
  android:background="#ffffff"
  android:orientation="vertical">

  <TextView
    android:id="@+id/tv_allhornors_big"
    android:layout_width="match_parent"
    android:layout_height="wrap_content"
    android:background="#11000000"
    android:gravity="center_vertical"
    android:paddingBottom="12dp"
    android:paddingLeft="13dp"
    android:paddingTop="12dp"
    android:text="熱門"
    android:textColor="#000000"
    android:textSize="14sp" />

  <View
    android:layout_width="match_parent"
    android:layout_height="1dp"
    android:background="#11000000" />

</LinearLayout>
第二種item布局:item_allhornors1.xml
<?xml version="1.0" encoding="utf-8"?>
<LinearLayout xmlns:android="http://schemas.android.com/apk/res/android"
  android:layout_width="match_parent"
  android:layout_height="wrap_content"
  android:background="#ffffff"
  android:orientation="vertical">

  <LinearLayout
    android:layout_width="match_parent"
    android:layout_height="wrap_content"
    android:orientation="horizontal">

    <TextView
      android:id="@+id/tv_allhornors_sn0"
      android:layout_width="0dp"
      android:layout_height="wrap_content"
      android:layout_weight="1"
      android:clickable="true"
      android:gravity="center"
      android:paddingBottom="12sp"
      android:paddingTop="12sp"
      android:text="你好你好"
      android:textColor="#000000"
      android:textSize="13sp" />

    <View
      android:layout_width="1dp"
      android:layout_height="match_parent"
      android:background="#11000000" />

    <!--注意這裡的text文本一定要為空,不要設置任何內容-->
    <TextView
      android:id="@+id/tv_allhornors_sn1"
      android:layout_width="0dp"
      android:layout_height="wrap_content"
      android:layout_weight="1"
      android:clickable="true"
      android:gravity="center"
      android:paddingBottom="12sp"
      android:paddingTop="12sp"
      android:text=""
      android:textColor="#000000"
      android:textSize="13sp" />
  </LinearLayout>

  <View
    android:layout_width="match_parent"
    android:layout_height="1dp"
    android:background="#11000000" />

</LinearLayout>
第五步:裝配數據
if (hornorsList != null && hornorsList.size() > 0) {
      //-->外層
      for (int i = 0; i < hornorsList.size(); i++) {
        //創建並添加第一種item布局
        View globalView = View.inflate(this, R.layout.item_allhornors0, null);
        TextView tv_allhornors_big = (TextView) globalView.findViewById(R.id.tv_allhornors_big);
        AllHonorBean.HornorBean hornorsListBean = hornorsList.get(i);
        String region = hornorsListBean.getRegion();
        //外層for中直接裝配數據
        tv_allhornors_big.setText(region);
        //將布局添加進去
        allhonor_hscroll.addView(globalView);

        List<AllHonorBean.HornorBean.FestivalsBean> festivalsList = hornorsListBean.getFestivals();
        //-->內層,每次裝兩個數據
        for (int j = 0; j < festivalsList.size(); j = j + 2) {
          //創建並添加第二種item布局
          View smallView = View.inflate(this, R.layout.item_allhornors1, null);
          final TextView tv_sn0 = (TextView) smallView.findViewById(R.id.tv_allhornors_sn0);
          TextView tv_sn1 = (TextView) smallView.findViewById(R.id.tv_allhornors_sn1);

          //順帶在這裡就直接添加點擊事件的監聽
          if (j < festivalsList.size() - 1) {
            setListener(tv_sn0, tv_sn1);
          }

          //裝配左邊的數據
          honorName0 = festivalsList.get(j).getFestivalName();
          tv_sn0.setText(honorName0);

          //判讀越界否
          if (j < festivalsList.size() - 1) {
            //裝配右邊的數據
            honorName1 = festivalsList.get(j + 1).getFestivalName();
            tv_sn1.setText(honorName1);
          }

          //添加進去
          allhonor_hscroll.addView(smallView);
        }
      }
    }
點擊事件的監聽:
private void setListener(final TextView tv_sn0, final TextView tv_sn1) {
    //給左邊的TextView 設置監聽
    tv_sn0.setOnClickListener(new View.OnClickListener() {
      @Override
      public void onClick(View view) {
        Toast.makeText(MainActivity.this, "" + tv_sn0.getText(), Toast.LENGTH_SHORT).show();
      }
    });

    //給右邊的TextView 設置監聽
    tv_sn1.setOnClickListener(new View.OnClickListener() {
      @Override
      public void onClick(View view) {
        Toast.makeText(MainActivity.this, "" + tv_sn1.getText(), Toast.LENGTH_SHORT).show();
      }
    });
  }
完成~
再看一眼最後效果:
以上就是本文的全部內容,希望對大家的學習有所幫助,也希望大家多多支持本站。
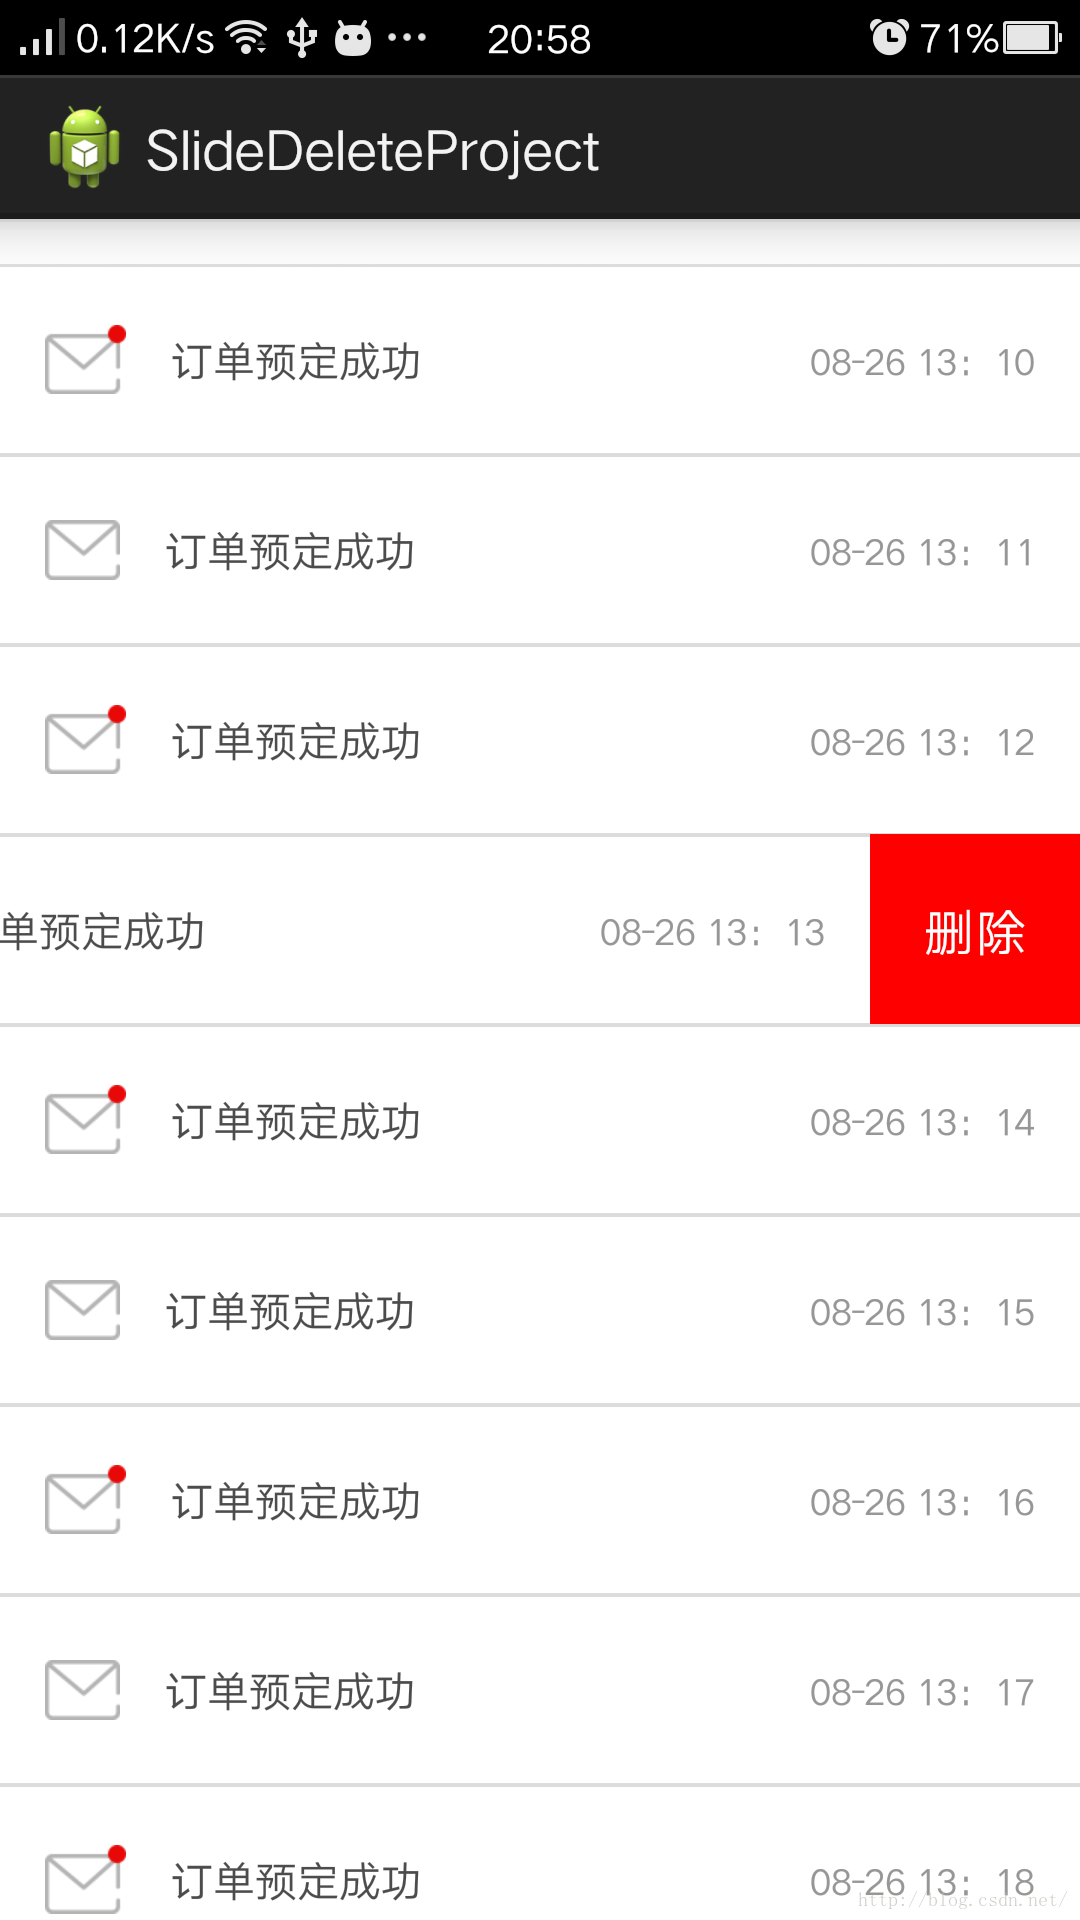 ListView側滑刪除的實現,SlideDeleteListView,針對ScrollView嵌套ListView視圖和手勢沖突優化
關於ListView側滑刪除這是個老話題,大多數APP都具有這樣類似的功能,對於一位Android初涉者來說,實現這樣的功能確實有一點難度,網上的實現方法也層出不窮,我仔
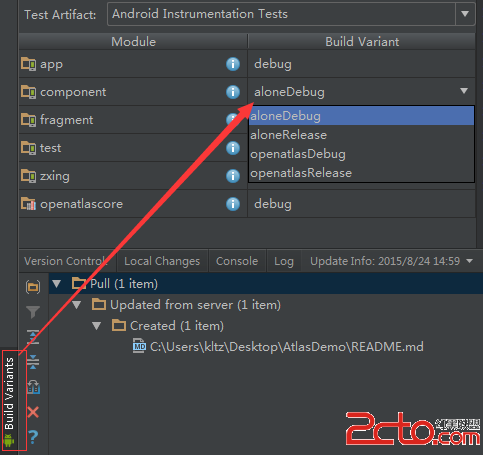 Android插件化開發之OpenAtlas中四大組件與Application功能的驗證
使用OpenAtlas進行插件化開發,插件的開發幾乎可以按照正常程序的開發流程進行,無需添加額外的東西。為了驗證四大組件是否能夠正常工作,這裡編寫一個插件,驗證其功能。除
 Android 開發:繪制多條線,帶緩存,帶觸控的圖表(基金圖表的實現)
對之前的幾篇文章裡的model進行補充後期會把這個功能類,添加到這個框架裡,有興趣的可以下載下來看,這個框架會經常更新:public class BaseFundChar
 ANDROID 中設計模式的采用--創建型模式
所謂模式就是在某一情景下解決某個問題的固定解決方案。 所有的創建型模式都是用作對象的創建或實例化的解