編輯:關於Android編程
綜述
View的繪制流程可以分為三大步,它們分別是measure,layout和draw過程。measure表示View的測量過程,用於測量View的寬度和高度;layout用於確定View在父容器的位置;draw則是負責將View繪制到屏幕中。下面主要來看一下View的Measure過程。
測量過程
View的繪制流程是從ViewRoot的performTraversals方法開始的,ViewRoot對應ViewRootImpl類。ViewRoot在performTraversals中會調用performMeasure方法來進行對根View的測量過程。而在performMeasure方法中又會調用View的measure方法。對於View的measure方法它是一個final類型,也就是說這個measure方法不能被子類重寫。但是在measure方法中調用了onMeasure方法。所以View的子類可以重寫onMeasure方法來實現各自的Measure過程。在這裡也就是主要對onMeasure方法進行分析。
MeasureSpec
MeasureSpec是View類中的一個靜態內部類。一個MeasureSpec封裝了父布局傳遞給子布局的布局要求。每個MeasureSpec都代表著一個高度或寬度的要求。每個MesureSpec都是由specSize和specMode組成,它代表著一個32位的int值,其中高2位代表specSize,低30位代表specMode。
MeasureSpec的測量模式有三種,下面介紹一下這三種測量模式:
UNSPECIFIED
父容器對子View沒有任何的限制,子View可以是任何的大小。
EXACTLY
父容器為子View大小指定一個具體值,View的最終大小就是specSize。對應View屬性match_parent和具體值。
AT_MOST
子View的大小最大只能是specSize,也就是所子View的大小不能超過specSize。對應View屬性的wrap_content.
在MeasureSpec中可以通過specSize和specMode並使用makeMeasureSpec方法來創建一個MeasureSpec,還可以通過getMode和getSize來獲取MeasureSpec的specMode和specSize。
View的測量過程
在上面已經說到,View的Measure過程是由measure方法來完成的,而measure方法通過調用onMeasure方法來完成View的Measure過程。那麼就來看一下onMeasure方法。
protected void onMeasure(int widthMeasureSpec, int heightMeasureSpec) {
  setMeasuredDimension(getDefaultSize(getSuggestedMinimumWidth(), widthMeasureSpec),
      getDefaultSize(getSuggestedMinimumHeight(), heightMeasureSpec));
}
在View的onMeasure方法中只是調用了setMeasuredDimension方法,setMeasuredDimension方法的作用就是設置View的高和寬的測量值。對於View測量後寬和高的值是通過getDefaultSize方法來獲取的。下面就來一下這個getDefaultSize方法。
public static int getDefaultSize(int size, int measureSpec) {
  int result = size;
  int specMode = MeasureSpec.getMode(measureSpec);
  int specSize = MeasureSpec.getSize(measureSpec);

  switch (specMode) {
  case MeasureSpec.UNSPECIFIED:
    result = size;
    break;
  case MeasureSpec.AT_MOST:
  case MeasureSpec.EXACTLY:
    result = specSize;
    break;
  }
  return result;
}
對於MeasureSpec的AT_MOST和EXACTLY模式下,直接返回的就是MeasureSpec的specSize,也就是說這個specSize就是View測量後的大小。而對於在UNSPECIFIED模式下,View的測量值則為getDefaultSize方法中的第一個參數size。這個size所對應的寬和高是通過getSuggestedMinimumWidth和getSuggestedMinimumHeight兩個方法獲取的。下面就來看一下這兩個方法。
protected int getSuggestedMinimumHeight() {
  return (mBackground == null) ? mMinHeight : max(mMinHeight, mBackground.getMinimumHeight());

}

protected int getSuggestedMinimumWidth() {
  return (mBackground == null) ? mMinWidth : max(mMinWidth, mBackground.getMinimumWidth());
}
在這裡可以看到對於View寬和高的取值是根據View是否存在背景進行設置的。在這裡以View的寬度來進行說明。若是View沒有背景則是View的寬度mMinWidth。對於mMinWidth值得設置可以在XML布局文件中設置minWidth屬性,它的默認值為0。也可以通過調用View的setMinimumWidth()方法其賦值。若是View存在背景的話,則取View本身最小寬度mMinWidth和View背景的最小寬度它們中的最大值。
ViewGroup的測量過程
對於ViewGroup的Measure過程,ViewGroup處理Measure自己本身的大小,還需要遍歷子View,並調用它們的measure方法,然後各個子元素再去遞歸執行Measure過程。在ViewGroup中並沒有重寫onMeasure方法,因為ViewGroup它是一個抽象類,對於不同的具體ViewGroup它的onMeasure方法中所實現的過程不一樣。但是在ViewGroup中提供了一個measureChildren方法,對子View進行測量。下面就來看一下這個measureChildren方法。
protected void measureChildren(int widthMeasureSpec, int heightMeasureSpec) {
  final int size = mChildrenCount;
  final View[] children = mChildren;
  for (int i = 0; i < size; ++i) {
    final View child = children[i];
    if ((child.mViewFlags & VISIBILITY_MASK) != GONE) {
      measureChild(child, widthMeasureSpec, heightMeasureSpec);
    }
  }
}
在這裡獲取ViewGroup中所有的子View。然後遍歷ViewGroup中子View並調用measureChild方法來完成對子View的測量。下面看一下measureChild方法。
protected void measureChild(View child, int parentWidthMeasureSpec,
    int parentHeightMeasureSpec) {
  final LayoutParams lp = child.getLayoutParams();

  final int childWidthMeasureSpec = getChildMeasureSpec(parentWidthMeasureSpec,
      mPaddingLeft + mPaddingRight, lp.width);
  final int childHeightMeasureSpec = getChildMeasureSpec(parentHeightMeasureSpec,
      mPaddingTop + mPaddingBottom, lp.height);

  child.measure(childWidthMeasureSpec, childHeightMeasureSpec);
}
在這段代碼中通過getChildMeasureSpec方法獲取子View寬和高的MeasureSpec。然後調用子View的measure方法開始對View進行測量。下面就來看一下是如何通過getChildMeasureSpec方法來獲取View的MeasureSpec的。
public static int getChildMeasureSpec(int spec, int padding, int childDimension) {
  int specMode = MeasureSpec.getMode(spec);
  int specSize = MeasureSpec.getSize(spec);

  int size = Math.max(0, specSize - padding);

  int resultSize = 0;
  int resultMode = 0;

  switch (specMode) {
  // Parent has imposed an exact size on us
  case MeasureSpec.EXACTLY:
    if (childDimension >= 0) {
      resultSize = childDimension;
      resultMode = MeasureSpec.EXACTLY;
    } else if (childDimension == LayoutParams.MATCH_PARENT) {
      // Child wants to be our size. So be it.
      resultSize = size;
      resultMode = MeasureSpec.EXACTLY;
    } else if (childDimension == LayoutParams.WRAP_CONTENT) {
      // Child wants to determine its own size. It can't be
      // bigger than us.
      resultSize = size;
      resultMode = MeasureSpec.AT_MOST;
    }
    break;

  // Parent has imposed a maximum size on us
  case MeasureSpec.AT_MOST:
    if (childDimension >= 0) {
      // Child wants a specific size... so be it
      resultSize = childDimension;
      resultMode = MeasureSpec.EXACTLY;
    } else if (childDimension == LayoutParams.MATCH_PARENT) {
      // Child wants to be our size, but our size is not fixed.
      // Constrain child to not be bigger than us.
      resultSize = size;
      resultMode = MeasureSpec.AT_MOST;
    } else if (childDimension == LayoutParams.WRAP_CONTENT) {
      // Child wants to determine its own size. It can't be
      // bigger than us.
      resultSize = size;
      resultMode = MeasureSpec.AT_MOST;
    }
    break;

  // Parent asked to see how big we want to be
  case MeasureSpec.UNSPECIFIED:
    if (childDimension >= 0) {
      // Child wants a specific size... let him have it
      resultSize = childDimension;
      resultMode = MeasureSpec.EXACTLY;
    } else if (childDimension == LayoutParams.MATCH_PARENT) {
      // Child wants to be our size... find out how big it should
      // be
      resultSize = View.sUseZeroUnspecifiedMeasureSpec ? 0 : size;
      resultMode = MeasureSpec.UNSPECIFIED;
    } else if (childDimension == LayoutParams.WRAP_CONTENT) {
      // Child wants to determine its own size.... find out how
      // big it should be
      resultSize = View.sUseZeroUnspecifiedMeasureSpec ? 0 : size;
      resultMode = MeasureSpec.UNSPECIFIED;
    }
    break;
  }
  return MeasureSpec.makeMeasureSpec(resultSize, resultMode);
}
在這段代碼對於MeasureSpec的獲取主要是根據父容器的MeasureSpec和View本身的LayoutParams。下面通過一張表格來看一下它們之間的對應關系。

到這裡通過getChildMeasureSpec方法獲取到子View的MeasureSpec以後,便調用View的Measure方法,開始對View進行測量。
正如剛才說的那樣對於ViewGroup它是一個抽象類,並沒有重寫View的onMeasure方法。但是到具體的ViewGroup時,例如FrameLayout,LinearLayout,RelativeLayout等,它們通過重寫onMeasure方法來來完成自身以及子View的Measure過程。下面以FrameLayout為例,看一下的Measure過程。在FrameLayout中,它的Measure過程也算是比較簡單,下面就來看一下FrameLayout中的onMeasure方法。
protected void onMeasure(int widthMeasureSpec, int heightMeasureSpec) {
  int count = getChildCount();

  final boolean measureMatchParentChildren =
      MeasureSpec.getMode(widthMeasureSpec) != MeasureSpec.EXACTLY ||
      MeasureSpec.getMode(heightMeasureSpec) != MeasureSpec.EXACTLY;
  mMatchParentChildren.clear();

  int maxHeight = 0;
  int maxWidth = 0;
  int childState = 0;

  for (int i = 0; i < count; i++) {
    final View child = getChildAt(i);
    if (mMeasureAllChildren || child.getVisibility() != GONE) {
      measureChildWithMargins(child, widthMeasureSpec, 0, heightMeasureSpec, 0);
      final LayoutParams lp = (LayoutParams) child.getLayoutParams();
      maxWidth = Math.max(maxWidth,
          child.getMeasuredWidth() + lp.leftMargin + lp.rightMargin);
      maxHeight = Math.max(maxHeight,
          child.getMeasuredHeight() + lp.topMargin + lp.bottomMargin);
      childState = combineMeasuredStates(childState, child.getMeasuredState());
      if (measureMatchParentChildren) {
        if (lp.width == LayoutParams.MATCH_PARENT ||
            lp.height == LayoutParams.MATCH_PARENT) {
          mMatchParentChildren.add(child);
        }
      }
    }
  }

  // Account for padding too
  maxWidth += getPaddingLeftWithForeground() + getPaddingRightWithForeground();
  maxHeight += getPaddingTopWithForeground() + getPaddingBottomWithForeground();

  // Check against our minimum height and width
  maxHeight = Math.max(maxHeight, getSuggestedMinimumHeight());
  maxWidth = Math.max(maxWidth, getSuggestedMinimumWidth());

  // Check against our foreground's minimum height and width
  final Drawable drawable = getForeground();
  if (drawable != null) {
    maxHeight = Math.max(maxHeight, drawable.getMinimumHeight());
    maxWidth = Math.max(maxWidth, drawable.getMinimumWidth());
  }

  setMeasuredDimension(resolveSizeAndState(maxWidth, widthMeasureSpec, childState),
      resolveSizeAndState(maxHeight, heightMeasureSpec,
          childState << MEASURED_HEIGHT_STATE_SHIFT));

  count = mMatchParentChildren.size();
  if (count > 1) {
    for (int i = 0; i < count; i++) {
      final View child = mMatchParentChildren.get(i);
      final MarginLayoutParams lp = (MarginLayoutParams) child.getLayoutParams();

      final int childWidthMeasureSpec;
      if (lp.width == LayoutParams.MATCH_PARENT) {
        final int width = Math.max(0, getMeasuredWidth()
            - getPaddingLeftWithForeground() - getPaddingRightWithForeground()
            - lp.leftMargin - lp.rightMargin);
        childWidthMeasureSpec = MeasureSpec.makeMeasureSpec(
            width, MeasureSpec.EXACTLY);
      } else {
        childWidthMeasureSpec = getChildMeasureSpec(widthMeasureSpec,
            getPaddingLeftWithForeground() + getPaddingRightWithForeground() +
            lp.leftMargin + lp.rightMargin,
            lp.width);
      }

      final int childHeightMeasureSpec;
      if (lp.height == LayoutParams.MATCH_PARENT) {
        final int height = Math.max(0, getMeasuredHeight()
            - getPaddingTopWithForeground() - getPaddingBottomWithForeground()
            - lp.topMargin - lp.bottomMargin);
        childHeightMeasureSpec = MeasureSpec.makeMeasureSpec(
            height, MeasureSpec.EXACTLY);
      } else {
        childHeightMeasureSpec = getChildMeasureSpec(heightMeasureSpec,
            getPaddingTopWithForeground() + getPaddingBottomWithForeground() +
            lp.topMargin + lp.bottomMargin,
            lp.height);
      }

      child.measure(childWidthMeasureSpec, childHeightMeasureSpec);
    }
  }
}
在這部分代碼中邏輯也很簡單,主要完成了兩件事。首先FrameLayout完成自身的測量過程,然後在遍歷子View,執行View的measure方法,完成View的Measure過程。在這裡代碼比較簡單就不在進行詳細描述。
總結
最後對View和ViewGroup的Measure過程做一下總結。對於View,它的Measure很簡單,在獲取到View的高和寬的測量值之後,便為其設置高和寬。而對於ViewGroup來說,除了完成自身的Measure過程以外,還需要遍歷子View,完成子View的測量過程。
 手機QQ浏覽器屏蔽廣告方法
1.打開手機QQ浏覽器,點擊底欄【菜單】 2.向左滑動,選擇【省流加速】 3.看到【廣告過濾】了嗎,點擊進入 4.在這裡即可選擇是否打開【廣告過濾】
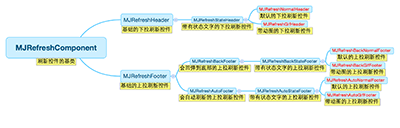 Android開發中MJRefresh自定義刷新動畫效果
【一】常見用法最原始的用法,耦合度低,但是不能統一管理。我們需要在每一個控制器都寫以下代碼,很繁瑣,以後項目修改起來更繁瑣,得一個控制器一個控制器的去定位、修改。1.1
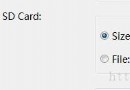 Eclipse中查看Android模擬器SD卡目錄
有時候用到Android模擬器來模擬SD卡相關操作,在Eclipse中可以直接查看SD卡目錄; 首先,新建模擬器的時候要創建SD卡,存儲的大小根據需要創建; 啟動模擬
 Android仿京東首頁輪播文字(又名垂直跑馬燈)
京東客戶端的輪播文字效果: 本次要實現的只是後面滾動的文字(前面的用ImageView或者TextView實現即可),看一下實現的效果 實