編輯:關於Android編程
Android CalendarView,DatePicker,TimePicker,以及NumberPicker的使用
簡單復習下基礎UI組件,做個簡單的總結,Android的這些組件封裝的特別好,基本套上就能使用,當然,這個減輕了開發者的負擔!不過如果想要深入研究,這裡面還是有很大的空間值得深度分析!簡單的幾個例子!僅供參考:
不多說,先上效果圖:

CalendarView

ChooseView

NumberPicker
CalendarView代碼區 :
main.xml代碼區:CalendarView組件的使用加上一些簡單的屬性即可!
<LinearLayout
  xmlns:android="http://schemas.android.com/apk/res/android"
  android:orientation="vertical"
  android:layout_width="match_parent"
  android:layout_height="match_parent">
  <TextView
    android:layout_width="match_parent"
    android:layout_height="wrap_content"
    android:text="選擇您的生日:"/>
  <!-- 設置以星期二作為每周第一天
  設置該組件總共顯示4個星期
  並對該組件的日期時間進行了定制 -->
  <CalendarView
    android:layout_width="match_parent"
    android:layout_height="match_parent"
    android:firstDayOfWeek="3"
    android:shownWeekCount="4"
    android:selectedWeekBackgroundColor="#aff"
    android:focusedMonthDateColor="#f00"
    android:weekSeparatorLineColor="#ff0"
    android:unfocusedMonthDateColor="#f9f"
    android:id="@+id/calendarView" />
</LinearLayout>
Activity區代碼:
public class MainActivity extends Activity
{
  CalendarView cv;
  @Override
  protected void onCreate(Bundle savedInstanceState)
  {
    super.onCreate(savedInstanceState);
    setContentView(R.layout.main);
    cv = (CalendarView)findViewById(R.id.calendarView);
    // 為CalendarView組件的日期改變事件添加事件監聽器
    cv.setOnDateChangeListener(new OnDateChangeListener()
    {
      @Override
      public void onSelectedDayChange(CalendarView view, int year,
        int month, int dayOfMonth)
      {
        // 使用Toast顯示用戶選擇的日期
        Toast.makeText(MainActivity.this,
            "你生日是" + year + "年" + month + "月"
                + dayOfMonth + "日",
            Toast.LENGTH_SHORT).show();
      }
    });
  }
}
DatePicker,TimePicker,結合Calerdar的使用,可以供用戶選擇日期時使用:
代碼區:
main.xml代碼:
<?xml version="1.0" encoding="utf-8"?>
<LinearLayout xmlns:android="http://schemas.android.com/apk/res/android"
  android:orientation="vertical"
  android:layout_width="match_parent"
  android:layout_height="match_parent">
  <TextView
    android:layout_width="match_parent"
    android:layout_height="wrap_content"
    android:text="選擇購買本書的具體時間"/>
  <!-- 定義一個DatePicker組件 -->
  <DatePicker android:id="@+id/datePicker"
    android:layout_width="wrap_content"
    android:layout_height="200dp"
    android:layout_gravity="center_horizontal"
    android:startYear="2000"
    android:endYear="2016"
    android:calendarViewShown="true"
    android:spinnersShown="true"/>
  <!-- 定義一個TimePicker組件 -->
  <TimePicker android:id="@+id/timePicker"
    android:layout_width="wrap_content"
    android:layout_height="100dp"
    android:layout_gravity="center_horizontal"/>
  <!-- 顯示用戶輸入日期、時間的控件 -->
  <EditText android:id="@+id/show"
    android:layout_width="match_parent"
    android:layout_height="wrap_content"
    android:editable="false"
    android:cursorVisible="false"/>
</LinearLayout>
Activity代碼:
public class MainActivity extends Activity
{
  // 定義5個記錄當前時間的變量
  private int year;
  private int month;
  private int day;
  private int hour;
  private int minute;
  @Override
  public void onCreate(Bundle savedInstanceState)
  {
    super.onCreate(savedInstanceState);
    setContentView(R.layout.main);
    DatePicker datePicker = (DatePicker)
        findViewById(R.id.datePicker);
    TimePicker timePicker = (TimePicker)
        findViewById(R.id.timePicker);
    // 獲取當前的年、月、日、小時、分鐘
    Calendar c = Calendar.getInstance();
    year = c.get(Calendar.YEAR);
    month = c.get(Calendar.MONTH);
    day = c.get(Calendar.DAY_OF_MONTH);
    hour = c.get(Calendar.HOUR);
    minute = c.get(Calendar.MINUTE);
    // 初始化DatePicker組件,初始化時指定監聽器
    datePicker.init(year, month, day, new OnDateChangedListener()
    {
      @Override
      public void onDateChanged(DatePicker arg0, int year
          , int month, int day)
      {
        MainActivity.this.year = year;
        MainActivity.this.month = month;
        MainActivity.this.day = day;
        // 顯示當前日期、時間
        showDate(year, month, day, hour, minute);
      }
    });
    timePicker.setEnabled(true);
    // 為TimePicker指定監聽器
    timePicker.setOnTimeChangedListener(new OnTimeChangedListener()
    {
      @Override
      public void onTimeChanged(TimePicker view
          , int hourOfDay, int minute)
      {
        MainActivity.this.hour = hourOfDay;
        MainActivity.this.minute = minute;
        // 顯示當前日期、時間
        showDate(year, month, day, hour, minute);
      }
    });
  }
  // 定義在EditText中顯示當前日期、時間的方法
  private void showDate(int year, int month
      , int day, int hour, int minute)
  {
    EditText show = (EditText) findViewById(R.id.show);
    show.setText("您的購買日期為:" + year + "年"
        + (month + 1) + "月" + day + "日 "
        + hour + "時" + minute + "分");
  }
}
NumberPicker主要使用在給用戶提供數字選擇時使用。
main.xml代碼:
<TableLayout
  xmlns:android="http://schemas.android.com/apk/res/android"
  android:layout_width="match_parent"
  android:layout_height="wrap_content">
  <TableRow
    android:layout_width="match_parent"
    android:layout_height="wrap_content">
    <TextView
      android:text="選擇低價:"
      android:layout_width="120dp"
      android:layout_height="wrap_content" />
    <NumberPicker
      android:id="@+id/np1"
      android:layout_width="match_parent"
      android:layout_height="80dp"
      android:focusable="true"
      android:focusableInTouchMode="true" />
  </TableRow>
  <TableRow
    android:layout_width="match_parent"
    android:layout_height="wrap_content">
    <TextView
      android:text="選擇高價:"
      android:layout_width="120dp"
      android:layout_height="wrap_content" />
    <NumberPicker
      android:id="@+id/np2"
      android:layout_width="match_parent"
      android:layout_height="80dp"
      android:focusable="true"
      android:focusableInTouchMode="true" />
  </TableRow>
</TableLayout>
Activity代碼:
public class MainActivity extends Activity
{
  NumberPicker np1, np2;
  // 定義最低價格、最高價格的初始值
  int minPrice = 25, maxPrice = 75;
  @Override
  protected void onCreate(Bundle savedInstanceState)
  {
    super.onCreate(savedInstanceState);
    setContentView(R.layout.main);
    np1 = (NumberPicker) findViewById(R.id.np1);
    // 設置np1的最小值和最大值
    np1.setMinValue(10);
    np1.setMaxValue(50);
    // 設置np1的當前值
    np1.setValue(minPrice);
    np1.setOnValueChangedListener(new OnValueChangeListener()
    {
      // 當NumberPicker的值發生改變時,將會激發該方法
      @Override
      public void onValueChange(NumberPicker picker,
        int oldVal, int newVal)
      {
        minPrice = newVal;
        showSelectedPrice();
      }
    });
    np2 = (NumberPicker) findViewById(R.id.np2);
    // 設置np2的最小值和最大值
    np2.setMinValue(60);
    np2.setMaxValue(100);
    // 設置np2的當前值
    np2.setValue(maxPrice);
    np2.setOnValueChangedListener(new OnValueChangeListener()
    {
      // 當NumberPicker的值發生改變時,將會激發該方法
      @Override
      public void onValueChange(NumberPicker picker, int oldVal,
                   int newVal)
      {
        maxPrice = newVal;
        showSelectedPrice();
      }
    });
  }
  private void showSelectedPrice()
  {
    Toast.makeText(this, "您選擇最低價格為:" + minPrice
        + ",最高價格為:" + maxPrice, Toast.LENGTH_SHORT)
        .show();
  }
}
感謝閱讀,希望能幫助到大家,謝謝大家對本站的支持!
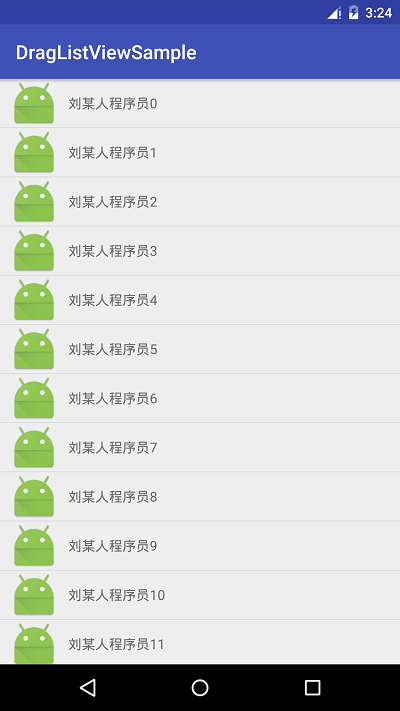 Android自定義ListView實現仿QQ可拖拽列表功能
我們大致的思路,其實是這樣子的,也是我的設想,我們可以先去實現一個簡單的ListView的數據,但是他的Adapter,我們可以用系統封裝好的,然後傳遞進去一個實體類,最
 Android時光軸實現淘寶物流信息浏覽效果
本文實例為大家分享了Android時光軸的制作方法,供大家參考,具體內容如下1. 效果2.分析和實現2.1效果實現: 之前想了一下這種效果,因為只需要用到自己的項目中所
 新浪微博客戶端怎麼取消自動定位
新浪微博擁有超過5億注冊用戶通過140字記錄,“織圍脖”是網友隨時隨地記錄生活、分享社會新鮮事的生活方式。新浪微博客戶端的朋友登錄之
 Android 5.0新特性
Android 5.0 是 Google 於 2014 年 10 月 15 日(美國太平洋時間)發布的全新 Android 操作系統,英文名為Lollipop,翻譯過來就