編輯:關於Android編程
前言:
在進入今天正題前,還是老樣子先談談感想吧,最近感覺整個都失去了方向感,好迷茫!找工作又失敗了,難道Android真的飽和了?這兩天我一直沒出門,除了下樓哪外賣就是宅宿捨了,靜想了許久,我還是不能忘了初心,我相信我找不到工作的原因有很多,最關鍵的還是要技術夠硬才行啊,奔跑吧孩子!接下來我就給大家介紹怎樣快速打造沉浸式狀態欄吧,雖然感覺有點相見恨晚,但其實不完!
一:何為沉浸式狀態欄?
沉浸式狀態欄是Google從Android 4.4開始,給我們開發者提供的一套能透明的系統ui樣式,這樣樣式是給狀態欄和導航欄的,這樣的話就不用向以前那樣每天面對著黑乎乎的上下兩條黑欄了,還可以調成跟Activity一樣的樣式,形成一個完整的主題,和IOS7.0以上系統一樣了。
先給你們來對比一下加了沉浸式和沒加沉浸式的樣式效果圖吧,如下圖所示:
(非沉浸式)

(沉浸式)

在此相信大家都了解什麼是沉浸式狀態欄了;目前打開很多APP都會有這種效果,可想而知,沉浸式狀態欄還是挺實用的!
二、使用沉浸式狀態欄高仿QQ:
實現沉浸式狀態欄的步驟灰常簡單:因為沉浸式狀態欄是Android4.4後才推出的,所以首先在程序中加上判斷,即:當系統版本為4.4或者4.4以上時可以使用沉浸式狀態欄,接著在語句中設置狀態欄和導航欄為透明即可:
//當系統版本為4.4或者4.4以上時可以使用沉浸式狀態欄
if (Build.VERSION.SDK_INT >= Build.VERSION_CODES.KITKAT) {
 //透明狀態欄
 getWindow().addFlags(WindowManager.LayoutParams.FLAG_TRANSLUCENT_STATUS);
 //透明導航欄
 getWindow().addFlags(WindowManager.LayoutParams.FLAG_TRANSLUCENT_NAVIGATION);
}
最後在布局文件中加上、、、
android:fitsSystemWindows="true"
android:clipToPadding="true"
這樣就實現沉浸式狀態欄了!
就是這麼簡單,就是這麼耐使!源碼是最好的導師,快看看整體代碼吧:
xml布局文件:
<?xml version="1.0" encoding="utf-8"?>
<LinearLayout xmlns:android="http://schemas.android.com/apk/res/android"
    xmlns:tools="http://schemas.android.com/tools"
    xmlns:app="http://schemas.android.com/apk/res-auto"
    android:layout_width="match_parent"
    android:layout_height="match_parent"
    android:background="#ffffff"
    android:orientation="vertical"
    tools:context=".MainActivity">
 <RelativeLayout
  android:fitsSystemWindows="true"
  android:clipToPadding="true"
  android:layout_width="match_parent"
  android:layout_height="80dp"
  android:background="#0099cc">
  <de.hdodenhof.circleimageview.CircleImageView
   android:id="@+id/img_head"
   android:layout_width="40dp"
   android:layout_height="40dp"
   android:layout_gravity="center_horizontal"
   android:layout_marginTop="13dp"
   android:layout_marginLeft="15dp"
   app:civ_border_width="2dp"
   app:civ_border_color="#FFFFFF"
   android:src="@mipmap/meinv">
  </de.hdodenhof.circleimageview.CircleImageView>
  <TextView
   android:id="@+id/tv_title"
   android:layout_width="wrap_content"
   android:layout_height="wrap_content"
   android:layout_marginTop="26dp"
   android:layout_centerHorizontal="true"
   android:text="聯系人"
   android:textColor="@android:color/white"
   android:textSize="18sp" />
  <TextView
   android:id="@+id/tv_right_add"
   android:layout_width="wrap_content"
   android:layout_height="wrap_content"
   android:layout_marginTop="26dp"
   android:layout_marginRight="15dp"
   android:layout_alignParentRight="true"
   android:text="添加"
   android:textColor="@android:color/white"
   android:textSize="18sp" />
 </RelativeLayout>
 <TextView
  android:layout_width="match_parent"
  android:layout_height="match_parent"
  android:gravity="center"
  android:text="沉浸式狀態欄"
  android:textSize="22sp"
  android:background="#E0FFFF"/>
</LinearLayout>
MainActivity中:
package com.zsml.chaotranstintbar;
import android.app.Activity;
import android.os.Build;
import android.os.Bundle;
import android.view.Window;
import android.view.WindowManager;
public class MainActivity extends Activity{
 @Override
 protected void onCreate(Bundle savedInstanceState) {
  super.onCreate(savedInstanceState);
  this.requestWindowFeature(Window.FEATURE_NO_TITLE);
  setContentView(R.layout.activity_main);
  //當系統版本為4.4或者4.4以上時可以使用沉浸式狀態欄
  if (Build.VERSION.SDK_INT >= Build.VERSION_CODES.KITKAT) {
   //透明狀態欄
   getWindow().addFlags(WindowManager.LayoutParams.FLAG_TRANSLUCENT_STATUS);
   //透明導航欄
   getWindow().addFlags(WindowManager.LayoutParams.FLAG_TRANSLUCENT_NAVIGATION);
  }
 }
}
實現沉浸式狀態欄的其他方法:動態加入、第三方庫。
1、動態實現:
動態實現也是比較簡單的,首先是隱藏布局,最後動態計算狀態欄高度並設置,都是在MainActivity中操作的,布局文件也就不用加上 Android:fitsSystemWindows="true"、 android:clipToPadding="true" 這兩句了!
所以直接給源碼吧:
MainActivity中:
import android.app.Activity;
import android.os.Build;
import android.os.Bundle;
import android.view.View;
import android.view.Window;
import android.view.WindowManager;
import android.widget.LinearLayout;
import java.lang.reflect.Field;
public class TwoActivity extends Activity {
 @Override
 protected void onCreate(Bundle savedInstanceState) {
  super.onCreate(savedInstanceState);
  //去掉標題
  this.requestWindowFeature(Window.FEATURE_NO_TITLE);
  setContentView(R.layout.activity_two);
  //當系統版本為4.4或者4.4以上時可以使用沉浸式狀態欄
  if (Build.VERSION.SDK_INT >= Build.VERSION_CODES.KITKAT) {
   //透明狀態欄
   getWindow().addFlags(WindowManager.LayoutParams.FLAG_TRANSLUCENT_STATUS);
   //透明導航欄
   getWindow().addFlags(WindowManager.LayoutParams.FLAG_TRANSLUCENT_NAVIGATION);
   LinearLayout linear_bar=(LinearLayout)findViewById(R.id.linear_bar);
   linear_bar.setVisibility(View.VISIBLE);
   int statusHeight=getStatusBarHeight();
   LinearLayout.LayoutParams params=(LinearLayout.LayoutParams )linear_bar.getLayoutParams();
   params.height=statusHeight;
   linear_bar.setLayoutParams(params);
  }
 }
 /**
  * 獲取狀態欄的高度
  * @return
  */
 private int getStatusBarHeight(){
  try
  {
   Class<?> c=Class.forName("com.android.internal.R$dimen");
   Object obj=c.newInstance();
   Field field=c.getField("status_bar_height");
   int x=Integer.parseInt(field.get(obj).toString());
   return getResources().getDimensionPixelSize(x);
  }catch(Exception e){
   e.printStackTrace();
  }
  return 0;
 }
}
這樣就完事了,是不是一樣那麼簡單、、、
2、第三方庫實現(SystemBarTint):
SystemBarTint是開源到github上的一個開源庫來的;
地址:https://github.com/jgilfelt/SystemBarTint
使用步驟:
關聯庫:compile'com.readystatesoftware.systembartint:systembartint:1.0.3'
xml布局中添加:
android:fitsSystemWindows="true"
android:clipToPadding="true"
MainActivity中實現:
import android.app.Activity;
import android.os.Build;
import android.os.Bundle;
import android.view.Window;
import android.view.WindowManager;
import com.readystatesoftware.systembartint.SystemBarTintManager;
public class ThreeActivity extends Activity {
 @Override
 protected void onCreate(Bundle savedInstanceState) {
  super.onCreate(savedInstanceState);
  this.requestWindowFeature(Window.FEATURE_NO_TITLE);
  setContentView(R.layout.activity_three);
  //當系統版本為4.4或者4.4以上時可以使用沉浸式狀態欄
  if (Build.VERSION.SDK_INT >= Build.VERSION_CODES.KITKAT) {
   //透明狀態欄
   getWindow().addFlags(WindowManager.LayoutParams.FLAG_TRANSLUCENT_STATUS);
   //透明導航欄
   getWindow().addFlags(WindowManager.LayoutParams.FLAG_TRANSLUCENT_NAVIGATION);
   SystemBarTintManager tintManager = new SystemBarTintManager(this);
   // 激活狀態欄
   tintManager.setStatusBarTintEnabled(true);
   // enable navigation bar tint 激活導航欄
   tintManager.setNavigationBarTintEnabled(true);
   //設置系統欄設置顏色
   //tintManager.setTintColor(R.color.red);
   //給狀態欄設置顏色
   tintManager.setStatusBarTintResource(R.color.middle_color);
   // 設置導航欄設置資源
   tintManager.setNavigationBarTintResource(R.color.androidColorE);
  }
 }
}
都是大同小異來的,我個人覺得第一種方法是最好實現和理解的,大家都可以嘗試一下,希望對你們有所幫助!最後貼出沉浸式狀態欄-高仿QQ的效果圖如下:

以上所述是小編給大家介紹的Android 高仿QQ 沉浸式狀態欄,希望對大家有所幫助,如果大家有任何疑問請給我留言,小編會及時回復大家的。在此也非常感謝大家對本站網站的支持!
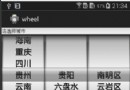 android開發之wheel控件使用詳解
出門在外生不起病呀,隨便兩盒藥60多塊錢。好吧,不廢話了,今天我們來看看wheel控件的使用,這是GitHub上的一個開源控件,用起來十分方便,我們可以用它做許多事情,比
 魅藍metal能刷安卓嗎 魅藍metal刷基於安卓Android的flyme OS教程
魅族這次推出的魅藍metal是基於yunos版本的flymeOS,一些喜歡搞機的用戶當然希望能用回基於Android的flyme,那麼小編來給出一些消息和刷
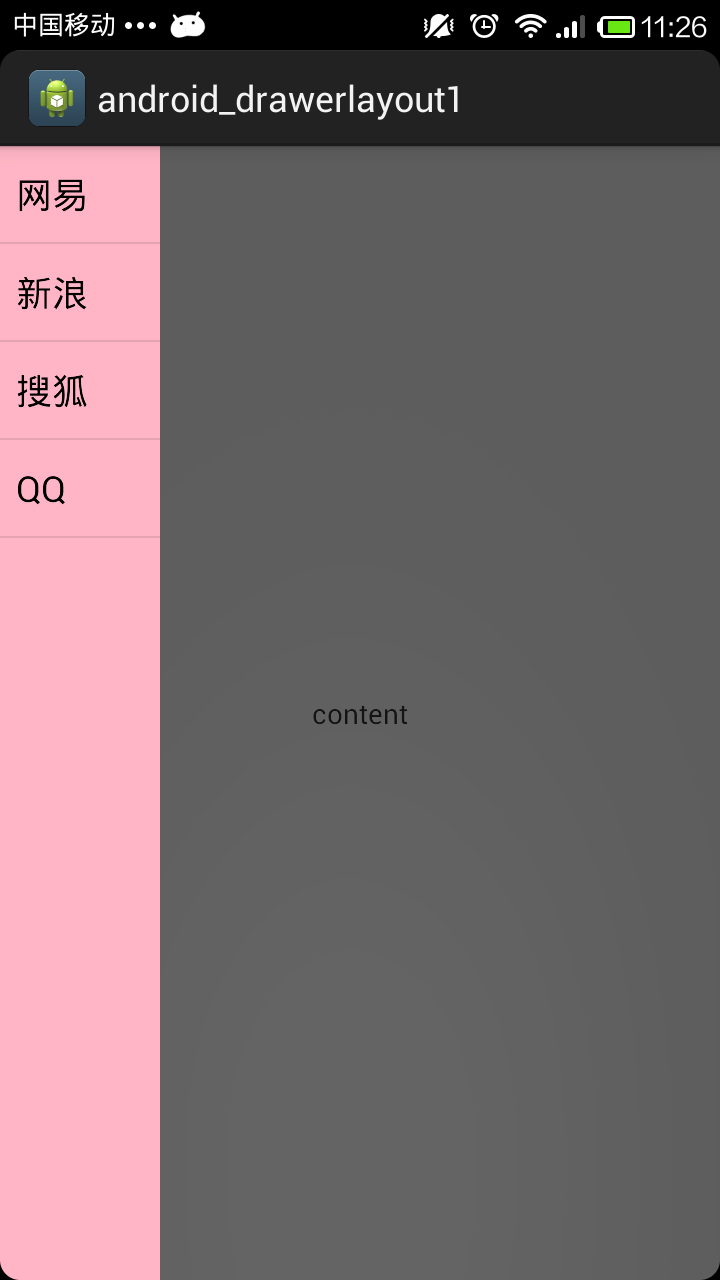
 android_handler(一)
只是一個簡單的handler的例子,目的就是對handler有一個初步的接觸。 在layout上添加一個button,點擊按鈕,然後打印出利用handler傳送的數據。(
 android開源項目:圖片下載緩存庫picasso
picasso是Square公司開源的一個Android圖形緩存庫,地址http://square.github.io/picasso/,可以實現圖片下載和緩存功能。