編輯:關於Android編程
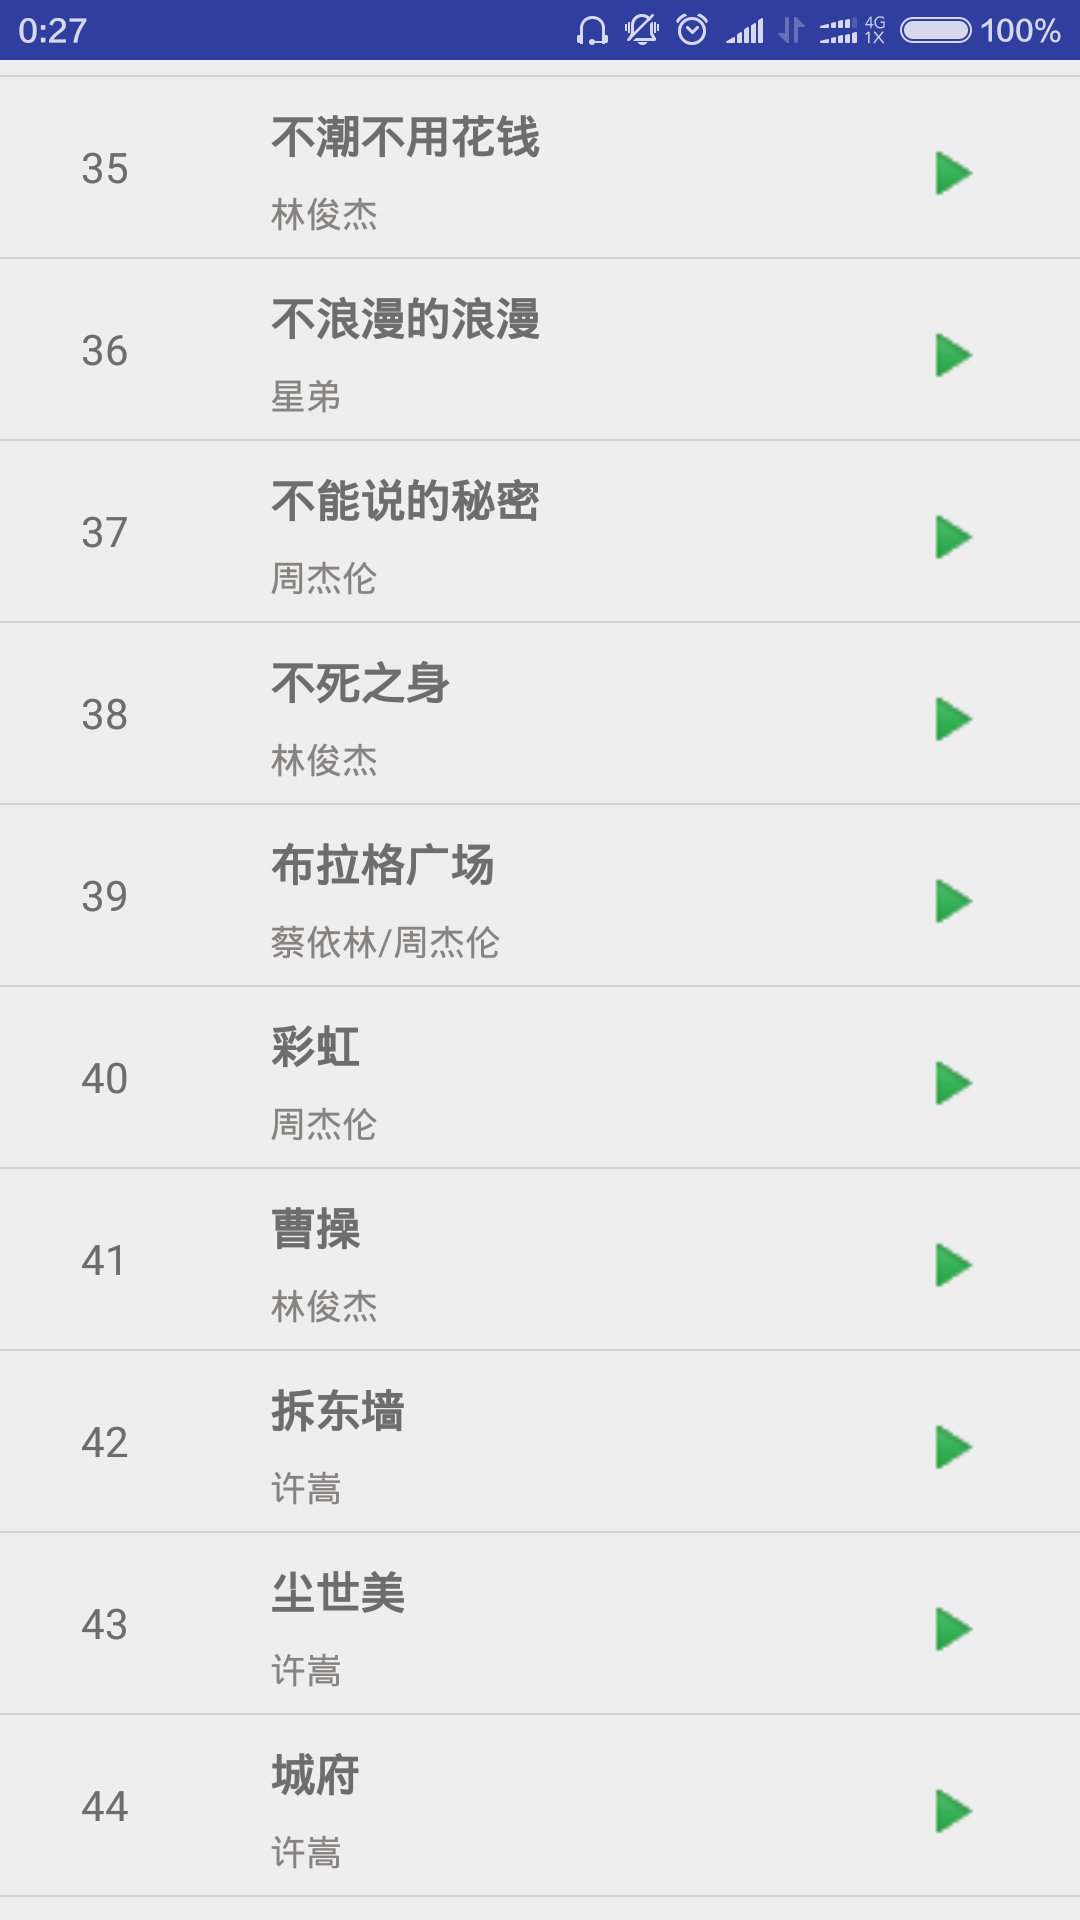
最近閒來無事,於是研究了一下qq的左滑刪除效果,嘗試著實現了一下,先上效果圖:

大致思路原理:
- 通過設置margin實現菜單的顯示與隱藏
- 監聽onTouchEvent,處理滑動事件
上代碼
import android.content.Context;
import android.util.AttributeSet;
import android.util.DisplayMetrics;
import android.view.MotionEvent;
import android.view.ViewGroup;
import android.view.WindowManager;
import android.widget.LinearLayout;
import android.widget.ListView;

/**
 * Created by MooreLi on 2016/8/8.
 */
public class SlideListView extends ListView {
  private String TAG = getClass().getSimpleName();

  private int mScreenWidth;
  private int mDownX;
  private int mDownY;
  private int mMenuWidth;

  private boolean isMenuShow;
  private boolean isMoving;

  private int mOperatePosition = -1;
  private ViewGroup mPointChild;
  private LinearLayout.LayoutParams mLayoutParams;

  public SlideListView(Context context) {
    super(context);
    getScreenWidth(context);
  }

  public SlideListView(Context context, AttributeSet attrs) {
    super(context, attrs);
    getScreenWidth(context);
  }

  public SlideListView(Context context, AttributeSet attrs, int defStyleAttr) {
    super(context, attrs, defStyleAttr);
    getScreenWidth(context);
  }

  private void getScreenWidth(Context context) {
    WindowManager manager = (WindowManager) context.getSystemService(Context.WINDOW_SERVICE);
    DisplayMetrics dm = new DisplayMetrics();
    manager.getDefaultDisplay().getMetrics(dm);
    mScreenWidth = dm.widthPixels;
  }

  @Override
  public boolean onTouchEvent(MotionEvent ev) {
    switch (ev.getAction()) {
      case MotionEvent.ACTION_DOWN:
        performActionDown(ev);
        break;
      case MotionEvent.ACTION_MOVE:
        performActionMove(ev);
        break;
      case MotionEvent.ACTION_UP:
        performActionUp();
        break;
    }
    return super.onTouchEvent(ev);
  }

  private void performActionDown(MotionEvent ev) {
    mDownX = (int) ev.getX();
    mDownY = (int) ev.getY();
    //如果點擊的不是同一個item,則關掉正在顯示的菜單
    int position = pointToPosition(mDownX, mDownY);
    if (isMenuShow && position != mOperatePosition) {
      turnToNormal();
    }
    mOperatePosition = position;
    mPointChild = (ViewGroup) getChildAt(position - getFirstVisiblePosition());
    if (mPointChild != null) {
      mMenuWidth = mPointChild.getChildAt(1).getLayoutParams().width;
      mLayoutParams = (LinearLayout.LayoutParams) mPointChild.getChildAt(0).getLayoutParams();
      mLayoutParams.width = mScreenWidth;
      setChildLayoutParams();
    }
  }

  private boolean performActionMove(MotionEvent ev) {
    int nowX = (int) ev.getX();
    int nowY = (int) ev.getY();
//    if (isMoving) {
//      if (Math.abs(nowY - mDownY) > 0) {
//        Log.e(TAG, "kkkkkkk");
//        onInterceptTouchEvent(ev);
//      }
//    }
    if (Math.abs(nowX - mDownX) > 0) {
      //左滑 顯示菜單
      if (nowX < mDownX) {
        if (isMenuShow) {
          mLayoutParams.leftMargin = -mMenuWidth;
        } else {
          //計算顯示的寬度
          int scroll = (nowX - mDownX);
          if (-scroll >= mMenuWidth) {
            scroll = -mMenuWidth;
          }
          mLayoutParams.leftMargin = scroll;
        }
      }
      //右滑 如果菜單顯示狀態,則關閉菜單
      if (isMenuShow && nowX > mDownX) {
        int scroll = nowX - mDownX;
        if (scroll >= mMenuWidth) {
          scroll = mMenuWidth;
        }
        mLayoutParams.leftMargin = scroll - mMenuWidth;
      }
      setChildLayoutParams();
      isMoving = true;
      return true;
    }

    return super.onTouchEvent(ev);
  }

  private void performActionUp() {
    //超過一半時,顯示菜單,否則隱藏
    if (-mLayoutParams.leftMargin >= mMenuWidth / 2) {
      mLayoutParams.leftMargin = -mMenuWidth;
      setChildLayoutParams();
      isMenuShow = true;
    } else {
      turnToNormal();
    }
    isMoving = false;
  }

  private void setChildLayoutParams(){
    if(mPointChild != null){
      mPointChild.getChildAt(0).setLayoutParams(mLayoutParams);
    }
  }

  /**
   * 正常顯示
   */
  public void turnToNormal() {
    mLayoutParams.leftMargin = 0;
    mOperatePosition = -1;
    setChildLayoutParams();
    isMenuShow = false;
  }
}
item的布局要注意,因為在自定義view中寫死的是獲取第一個子布局為顯示內容,所以需要將顯示的樣式寫在一個容器中,將菜單寫在另一個容器中,兩個平行的關系。
xml文件定義如下:
<?xml version="1.0" encoding="utf-8"?>
<LinearLayout xmlns:android="http://schemas.android.com/apk/res/android"
  android:layout_width="match_parent"
  android:layout_height="wrap_content"
  android:background="#FFFFFF"
  android:orientation="horizontal">

  <LinearLayout
    android:layout_width="match_parent"
    android:layout_height="60dp"
    android:orientation="horizontal">

    <TextView
      android:id="@+id/main_tv_title"
      android:layout_width="wrap_content"
      android:layout_height="match_parent"
      android:layout_marginLeft="10dp"
      android:gravity="center_vertical"
      android:textSize="18sp" />
  </LinearLayout>

  <LinearLayout
    android:layout_width="180dp"
    android:layout_height="60dp"
    android:orientation="horizontal">

    <TextView
      android:id="@+id/main_tv_delete"
      android:layout_width="0dp"
      android:layout_height="match_parent"
      android:layout_weight="1"
      android:background="#FF0000"
      android:gravity="center"
      android:text="刪除"
      android:textColor="#FFFFFF" />

    <TextView
      android:id="@+id/main_tv_top"
      android:layout_width="0dp"
      android:layout_height="match_parent"
      android:layout_weight="1"
      android:background="#DFCDBF"
      android:gravity="center"
      android:text="置頂"
      android:textColor="#FFFFFF" />
  </LinearLayout>
</LinearLayout>
最後就是刪除操作與置頂操作,這個就比較簡單,給按鈕添加點擊事件即可。我是在adapter中定義實現,記得操作後要將菜單關掉!
上部分代碼:
    holder.tvTitle.setText(mInfos.get(position));
    holder.tvDelete.setOnClickListener(new View.OnClickListener() {
      @Override
      public void onClick(View v) {
        mInfos.remove(position);
        notifyDataSetChanged();
        mListView.turnToNormal();
      }
    });
    holder.tvTop.setOnClickListener(new View.OnClickListener() {
      @Override
      public void onClick(View v) {
        String temp = mInfos.get(position);
        mInfos.remove(position);
        mInfos.add(0, temp);
        notifyDataSetChanged();
        mListView.turnToNormal();
      }
    });
最後還有一個遺留問題,ListView左右滑動的時候上下也會滑動,這個有待探索與改進,也希望大家提提意見,幫我改進!
以上就是本文的全部內容,希望對大家的學習有所幫助,也希望大家多多支持本站。
 《極簡筆記》源碼分析(一)
0. 介紹此文將對Github上lguipeng大神所開發的 極簡筆記 v2.0 (點我下載源碼)代碼進行分析學習。通過此文你將學到:應用源碼的研讀方法 MVP架構模式
 仿墨跡天氣在Android App中實現自定義zip皮膚更換
在這裡談一下墨跡天氣的換膚實現方式,不過首先聲明我只是通過反編譯以及參考了一些網上其他資料的方式推測出的換膚原理, 在這裡只供參考. 若大家有更好的方式, 歡迎交流.墨跡
 Android練習項目 Mp3播放器實現(一)
對於Android的學習,需要掌握的東西有點多,需要我們認真,小心,不斷的進取。前天突然有個想法,覺得Mp3播放器是一個可以練習的項目,於是在網上搜了下,發現有人已經寫了
 RecycleView從顯示到下拉刷新和加載更多
RecycleView出來已經有一兩個年頭了最近在項目中完全替換掉了ListView很有必要的寫一篇記錄一下使用過程,以便以後溫故而知新。RecycleView的使用場景