編輯:關於Android編程
使用了RecyclerView嵌套RecyclerView的方案。
購物車的第一個界面為RecyclerView,每個Item裡面包含一個店鋪。在Item中使用RecyclerView包含店鋪和店鋪的多個商品。
實現思路:
使用接口回調將第二個adapter的商品選擇的監聽事件回調給第一個adapter後再在第一個adapter中回調給MainActivity。
使用接口回調將第一個adapter的商品選擇的監聽事件回調給MainActivity。
在MainActivity中處理第一個adapter和第二個adapter的事件監聽。
MainActivity:
public class MainActivity extends AppCompatActivity {
private RecyclerView recyclerView;
private CheckBox checkBox;
private recyclerAdapter adapter;
private RecyclerView.LayoutManager manager;
private List<bean> list;
private List<cbean> cbeanList,cbeanListcp;
@Override
protected void onCreate(Bundle savedInstanceState) {
super.onCreate(savedInstanceState);
setContentView(R.layout.activity_main);
recyclerView = (RecyclerView) findViewById(R.id.recyclerview);
checkBox = (CheckBox) findViewById(R.id.shop_checkbox);
list = new ArrayList<>();
//第一個店鋪的數據
cbeanList = new ArrayList<>();
cbean c = new cbean();
c.setText("商品");
c.setIscheck(false);
cbean c1 = new cbean();
c1.setText("商品1");
c1.setIscheck(false);
cbeanList.add(c);
cbeanList.add(c1);
bean b = new bean();
b.setIscheck(false);
b.setText("店名");
b.setList(cbeanList);
//第二個店鋪的數據
cbeanListcp = new ArrayList<>();
cbean c2 = new cbean();
c2.setText("商品2");
c2.setIscheck(false);
cbean c3 = new cbean();
c3.setText("商品3");
c3.setIscheck(false);
cbeanListcp.add(c2);
cbeanListcp.add(c3);
bean b1 = new bean();
b1.setIscheck(false);
b1.setText("店名1");
b1.setList(cbeanListcp);
//不能添加有重復變量的數據
list.add(b);
list.add(b1);
manager = new LinearLayoutManager(this);
recyclerView.setLayoutManager(manager);
//優化性能
recyclerView.setHasFixedSize(true);
adapter = new recyclerAdapter(list);
recyclerView.setAdapter(adapter);
//全選CheckBox監聽
checkBox.setOnCheckedChangeListener(new CompoundButton.OnCheckedChangeListener() {
@Override
public void onCheckedChanged(CompoundButton buttonView, boolean isChecked) {
if (isChecked){
for (int i = 0;i < list.size();i++){
//選擇店鋪
if (!list.get(i).ischeck()){
list.get(i).setIscheck(true);
}
for (int j = 0;j < list.get(i).getList().size();j++){
//選擇店鋪的商品
if (!list.get(i).getList().get(j).ischeck()){
list.get(i).getList().get(j).setIscheck(true);
}
}
}
}else {
//只有當點擊全不選時才執行
// 解決點擊取消選擇店鋪或商品時,
// 全選按鈕取消選擇狀態,不會不變成全不選
if (allSelect() == list.size()){
for (int i = 0;i < list.size();i++){
if (list.get(i).ischeck()){
list.get(i).setIscheck(false);
}
for (int j = 0;j < list.get(i).getList().size();j++){
if (list.get(i).getList().get(j).ischeck()){
list.get(i).getList().get(j).setIscheck(false);
}
}
}
}
}
//更新
UpdateRecyclerView();
}
});
adapter.setCallBack(new recyclerAdapter.allCheck() {
@Override
public void OnCheckListener(boolean isSelected, int position) {
//保存店鋪點擊狀態
list.get(position).setIscheck(isSelected);
//通知全選CheckBox的選擇狀態
if (allSelect() == list.size()){
checkBox.setChecked(true);
}else {
checkBox.setChecked(false);
}
if (isSelected){
for (int i = 0;i < list.get(position).getList().size();i++){
if (!list.get(position).getList().get(i).ischeck()){
list.get(position).getList().get(i).setIscheck(true);
}
}
}else {
// 解決點擊取消選擇商品時,
// 店鋪全選按鈕取消選擇狀態,不會不變成全不選
if (allChildSelect(position) == list.get(position).getList().size()){
for (int i = 0;i < list.get(position).getList().size();i++){
if (list.get(position).getList().get(i).ischeck()){
list.get(position).getList().get(i).setIscheck(false);
}
}
}
}
//更新
UpdateRecyclerView();
}
@Override
public void OnItemCheckListener(boolean isSelected, int parentposition, int chaildposition) {
//保存商品點擊狀態
list.get(parentposition).getList().get(chaildposition).setIscheck(isSelected);
//通知店鋪選擇的狀態
if (allChildSelect(parentposition) == list.get(parentposition).getList().size()){
list.get(parentposition).setIscheck(true);
}else {
list.get(parentposition).setIscheck(false);
}
UpdateRecyclerView();
}
});
}
/*
*解決Recycleyview刷新報錯問題
*/
private void UpdateRecyclerView() {
Handler handler = new Handler();
final Runnable r = new Runnable() {
public void run() {
adapter.notifyDataSetChanged();
}
};
handler.post(r);
}
//計算店鋪的選擇數量
private int allSelect(){
int sum = 0;
for (int i = 0; i < list.size(); i++) {
if (list.get(i).ischeck()){
sum++;
}
}
System.out.println(sum);
return sum;
}
//計算每個店鋪商品的選擇數量
private int allChildSelect(int position){
int sum = 0;
for (int i = 0; i < list.get(position).getList().size(); i++) {
if (list.get(position).getList().get(i).ischeck()){
sum++;
System.out.println(position+":"+i+":"+list.get(position).getList().get(i).ischeck());
}
}
return sum;
}
}
第一個Adapter:
public class recyclerAdapter extends RecyclerView.Adapter<recyclerAdapter.MyHolder> {
private List<bean> list;
public recyclerAdapter(List<bean> list){
this.list = list;
}

public static class MyHolder extends RecyclerView.ViewHolder{
private RecyclerView recyclerView;
private TextView textView;
private CheckBox checkBox;
private recyclerAdapter1 adapter;
private RecyclerView.LayoutManager manager;
public CheckBox getCheckBox() {
return checkBox;
}
public RecyclerView getRecyclerView() {
return recyclerView;
}
public TextView getTextView() {
return textView;
}
public MyHolder(View itemView) {
super(itemView);
recyclerView = (RecyclerView) itemView.findViewById(R.id.list_items);
textView = (TextView) itemView.findViewById(R.id.tv_name);
checkBox = (CheckBox) itemView.findViewById(R.id.checkbox0);
manager = new LinearLayoutManager(itemView.getContext());
recyclerView.setLayoutManager(manager);
}
}
@Override
public MyHolder onCreateViewHolder(ViewGroup parent, int viewType) {
View view = LayoutInflater.from(parent.getContext()).inflate(R.layout.shop_item,null);
MyHolder holder = new MyHolder(view);
return holder;
}
@Override
public void onBindViewHolder(final MyHolder holder, final int position) {
holder.adapter = new recyclerAdapter1(list.get(position).getList());
holder.recyclerView.setAdapter(holder.adapter);
holder.getTextView().setText(list.get(position).getText());
holder.getCheckBox().setChecked(list.get(position).ischeck());
holder.getCheckBox().setOnCheckedChangeListener(new CompoundButton.OnCheckedChangeListener() {
@Override
public void onCheckedChanged(CompoundButton buttonView, boolean isChecked) {
//將店鋪的checkbox的點擊變化事件進行回調
if (mCallBack!=null){
mCallBack.OnCheckListener(isChecked,position);
}
}
});
//實現第二層RecyclerView的回調接口
holder.adapter.setCallBack(new recyclerAdapter1.allCheck() {
@Override
public void OnCheckListener(boolean isChecked, int childpostion) {
//將店鋪商品的checkbox的點擊變化事件進行回調
if (mCallBack!=null){
mCallBack.OnItemCheckListener(isChecked,position,childpostion);
}
}
});
holder.itemView.setTag(list.get(position));
}
@Override
public int getItemCount() {
return list.size();
}
private allCheck mCallBack;
public void setCallBack(allCheck callBack) {
mCallBack = callBack;
}
public interface allCheck{
//回調函數 將店鋪的checkbox的點擊變化事件進行回調
public void OnCheckListener(boolean isSelected,int position);
//回調函數 將店鋪商品的checkbox的點擊變化事件進行回調
public void OnItemCheckListener(boolean isSelected,int parentposition,int chaildposition);
}
}
第二個Adapter:
public class recyclerAdapter1 extends RecyclerView.Adapter<recyclerAdapter1.MyHolder> {
private List<cbean> cbeanList, cbeanList1;
public recyclerAdapter1(List<cbean> cbeanList) {
this.cbeanList = cbeanList;
cbeanList1 = cbeanList;
}
public static class MyHolder extends RecyclerView.ViewHolder {
private TextView textView;
private CheckBox checkBox;

public TextView getTextView() {
return textView;
}
public CheckBox getCheckBox() {
return checkBox;
}
public MyHolder(View itemView) {
super(itemView);
textView = (TextView) itemView.findViewById(R.id.checkbox_tv);
checkBox = (CheckBox) itemView.findViewById(R.id.checkbox1);
}
}
@Override
public MyHolder onCreateViewHolder(ViewGroup parent, int viewType) {
View view = LayoutInflater.from(parent.getContext()).inflate(R.layout.check_item, null);
MyHolder holder = new MyHolder(view);
return holder;
}
@Override
public void onBindViewHolder(final MyHolder holder, final int position) {
holder.getTextView().setText(cbeanList.get(position).getText());
holder.getCheckBox().setChecked(cbeanList.get(position).ischeck());
holder.getCheckBox().setOnCheckedChangeListener(new CompoundButton.OnCheckedChangeListener() {
@Override
public void onCheckedChanged(CompoundButton buttonView, boolean isChecked) {
//將商品的checkbox的點擊變化事件進行回調給第一個Recyclerview
if (mCallBack != null) {
mCallBack.OnCheckListener(isChecked, position);
}
}
});
holder.itemView.setId(position);
}
@Override
public int getItemCount() {
return cbeanList.size();
}
private allCheck mCallBack;
public void setCallBack(allCheck callBack) {
mCallBack = callBack;
}
public interface allCheck {
//回調函數 將店鋪商品的checkbox的點擊變化事件進行回調
public void OnCheckListener(boolean isChecked, int childpostion);
}
}
實體類保存數據和選擇狀態:
public class bean {
private boolean ischeck;
private String text;
private List<cbean> list;
public boolean ischeck() {
return ischeck;
}
public void setIscheck(boolean ischeck) {
this.ischeck = ischeck;
}
public String getText() {
return text;
}
public void setText(String text) {
this.text = text;
}
public List<cbean> getList() {
return list;
}
public void setList(List<cbean> list) {
this.list = list;
}
}
public class cbean {
private boolean ischeck;
private String text;
public boolean ischeck() {
return ischeck;
}
public void setIscheck(boolean ischeck) {
this.ischeck = ischeck;
}
public String getText() {
return text;
}
public void setText(String text) {
this.text = text;
}
}
布局文件:activity_main.xml
<?xml version="1.0" encoding="utf-8"?>
<LinearLayout xmlns:android="http://schemas.android.com/apk/res/android"
xmlns:tools="http://schemas.android.com/tools"
android:id="@+id/activity_main"
android:layout_width="match_parent"
android:layout_height="match_parent"
android:orientation="vertical"
tools:context="com.example.cuboo.myapplication.MainActivity">
<android.support.v7.widget.RecyclerView
android:id="@+id/recyclerview"
android:layout_width="match_parent"
android:layout_height="wrap_content"
android:layout_weight="1">
</android.support.v7.widget.RecyclerView>
<LinearLayout
android:layout_width="match_parent"
android:layout_height="wrap_content">
<CheckBox
android:id="@+id/shop_checkbox"
android:layout_marginLeft="12dp"
android:layout_width="24dp"
android:layout_height="24dp"
android:layout_gravity="left|center"
android:padding="12dp"
android:gravity="center" />
</LinearLayout>
</LinearLayout>
shop_item.xml:
<?xml version="1.0" encoding="utf-8"?>
<LinearLayout xmlns:android="http://schemas.android.com/apk/res/android"
android:orientation="vertical"
android:layout_width="match_parent"
android:layout_height="match_parent">
<LinearLayout
android:layout_width="match_parent"
android:layout_height="wrap_content">
<CheckBox
android:id="@+id/checkbox0"
android:layout_width="24dp"
android:layout_height="24dp" />
<TextView
android:id="@+id/tv_name"
android:text="店名"
android:gravity="center"
android:layout_width="match_parent"
android:layout_height="wrap_content" />
</LinearLayout>
<View
android:layout_width="match_parent"
android:layout_height="0.5dp"
android:background="@color/colorAccent"/>
<android.support.v7.widget.RecyclerView
android:id="@+id/list_items"
android:layout_width="match_parent"
android:layout_height="wrap_content">
</android.support.v7.widget.RecyclerView>
<View
android:layout_width="match_parent"
android:layout_height="48dp"
android:background="@color/colorAccent"/>
</LinearLayout>
check_item:
<?xml version="1.0" encoding="utf-8"?>
<LinearLayout xmlns:android="http://schemas.android.com/apk/res/android"
android:orientation="horizontal"
android:layout_width="match_parent"
android:layout_height="60dp">
<CheckBox
android:layout_gravity="center"
android:id="@+id/checkbox1"
android:layout_width="24dp"
android:layout_height="24dp" />
<TextView
android:id="@+id/checkbox_tv"
android:text="222"
android:layout_weight="1"
android:layout_gravity="center"
android:gravity="center"
android:layout_width="wrap_content"
android:layout_height="wrap_content" />
</LinearLayout>
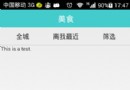
簡單的效果圖:

以上所述是小編給大家介紹的Android中實現淘寶購物車RecyclerView或LIstView的嵌套選擇的邏輯,希望對大家有所幫助,如果大家有任何疑問請給我留言,小編會及時回復大家的。在此也非常感謝大家對本站網站的支持!
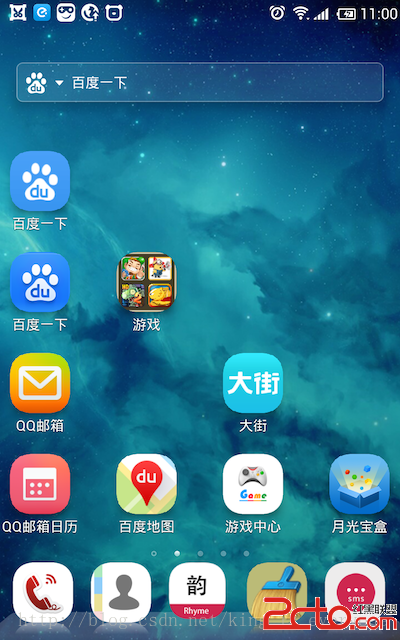 android實現qq郵箱多個圖標效果
前幾天,蛋疼的技術主管非要實現類似裝一個qq郵箱,然後可以使用qq郵箱日歷的那麼一個東西,相當於一個應用生成兩個圖標,但是不同的是點擊不同的圖標可以進入不同
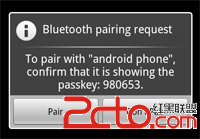 android Bluetooth程序設計
Bluetooth簡介 藍牙,是一種支持設備短距離通信(一般10m內)的無線電技術。能在包括移動電話、PDA、無線耳機、筆記本電腦、相關外設等眾多設備之間進行無線信息交換
 Android GridView簡單實例
也是今天用到的一個東西,就是簡單實現九宮格的Demo1.就是定義各種layout 和對應的item 我的:<?xml version=1.0 encodin
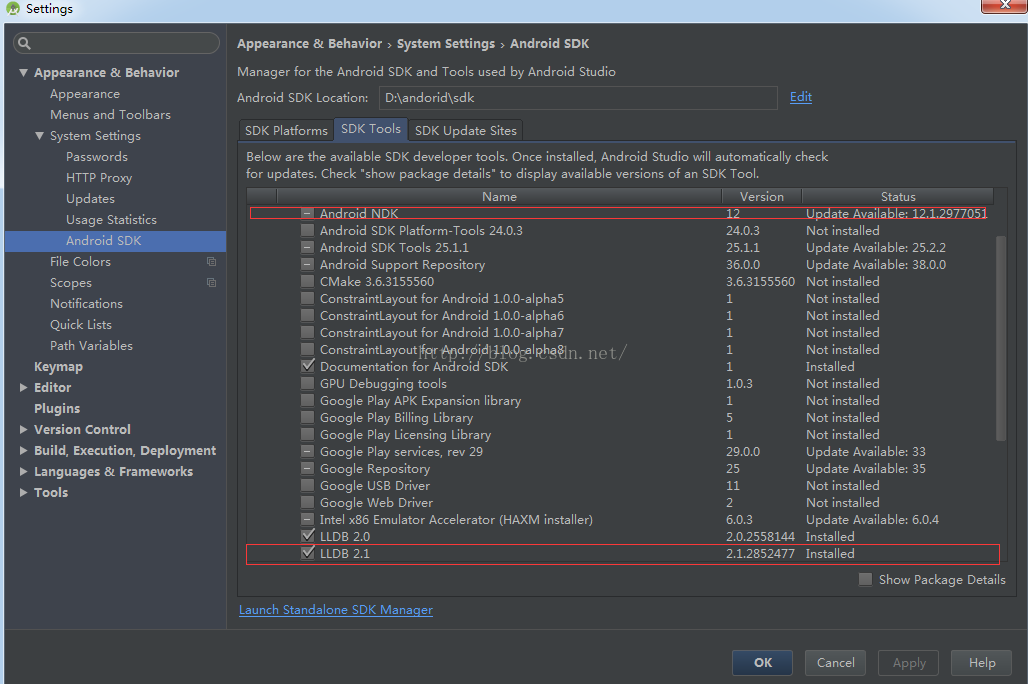 android studio 可調試、可查看源碼的jni開發環境搭建圖文講解
1.環境配置(溫馨提示,圖片看不清楚的,可以點擊鼠標右鍵,在新選項卡中查看圖片^^)1)打開studio建立新的工程,打開如下位置,下載紅線所示的ndk及LLDB工具。&