編輯:關於Android編程
效果圖:

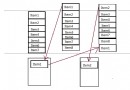
看網上的都是兩個view拼接,默認右側的不顯示,水平移動的時候把右側的view顯示出來。但是看最新版QQ上的效果不是這樣的,但給人的感覺卻很好,所以獻丑來一發比較高仿的。
知識點:
1、ViewDragHelper 的用法;
2、滑動沖突的解決;
3、自定義viewgroup。
ViewDragHelper 出來已經比較久了 相信大家都比較熟悉,不熟悉的話google一大把這裡主要簡單用一下它的幾個方法
1、tryCaptureView(View child, int pointerId) :確定那個子view可以滑動
2、 getViewHorizontalDragRange(View child):用我蹩腳的英語翻譯一下是‘返回的是子view在水平方向上可移動的大小,以像素為單位,返回0的時候表示水平方向上不能拖動'
3、clampViewPositionHorizontal(View child, int left, int dx):在這裡可以對邊界進行檢查,left和dx分別代表即將移動到的位置
4、onViewPositionChanged(View changedView, int left, int top,
int dx, int dy):當要捕獲view,由於拖曳或者設定而發生位置變更時回調
它的基本用法是:
public SwipeLayout(Context context, AttributeSet attrs, int defStyle) {
    super(context, attrs, defStyle);
    init();
  }
  private void init() {
    viewDragHelper = ViewDragHelper.create(this, callback);
  }
   public boolean onInterceptTouchEvent(MotionEvent ev) {
    boolean result = viewDragHelper.shouldInterceptTouchEvent(ev);
   }
   public boolean onTouchEvent(MotionEvent event) {
    viewDragHelper.processTouchEvent(event);
    return true;
  }
1)、在構造方法中創建
2)、在onInterceptTouchEvent 中判斷是否攔截
3 )、 在 onTouchEvent出來事件
好了 最不好理解的已經搞定了。接下來看看具體實現:
首先看布局:
<LinearLayout xmlns:android="http://schemas.android.com/apk/res/android"
  android:layout_width="match_parent"
  android:layout_height="wrap_content"
  android:orientation="vertical" >
  <scrollviewgroup.lly.com.swiplayout.SwipeLayout
    android:id="@+id/swipeLayout"
    android:layout_width="match_parent"
    android:layout_height="wrap_content" >
    <!-- delete區域的布局 -->
    <include layout="@layout/layout_delete" />
    <!-- item內容的布局 -->
    <include layout="@layout/layout_content" />
  </scrollviewgroup.lly.com.swiplayout.SwipeLayout>
</LinearLayout>
這個沒什麼好說的,一個自定義viewgroup包含兩個子控件。
接著看看SwipeLayout是怎麼實現的:
@Override
  protected void onFinishInflate() {
    super.onFinishInflate();
    deleteView = getChildAt(0);
    contentView = getChildAt(1);
  }
  @Override
  protected void onSizeChanged(int w, int h, int oldw, int oldh) {
    super.onSizeChanged(w, h, oldw, oldh);
    deleteHeight = deleteView.getMeasuredHeight();
    deleteWidth = deleteView.getMeasuredWidth();
    contentWidth = contentView.getMeasuredWidth();
    screenWidth = getWidth();
  }
  @Override
  protected void onLayout(boolean changed, int left, int top, int right,
              int bottom) {
    // super.onLayout(changed, left, top, right, bottom);
    deleteView.layout(screenWidth - deleteWidth, 0, (screenWidth - deleteWidth)
        + deleteWidth, deleteHeight);
    contentView.layout(0, 0, contentWidth, deleteHeight);
  }
上面代碼進行了一些初始化的操作,重點看看onlayout裡面的,我們繼承的是framelayout 這裡先畫出來 deleteView並讓他在右邊,然後在上面改了一層contentView,這樣顯示的時候只會顯示contentView。
接下來看ontouch方法
public boolean onTouchEvent(MotionEvent event) {
    //如果當前有打開的,則下面的邏輯不能執行
    if(!SwipeLayoutManager.getInstance().isShouldSwipe(this)){
      requestDisallowInterceptTouchEvent(true);
      return true;
    }
    switch (event.getAction()) {
      case MotionEvent.ACTION_DOWN:
        downX = event.getX();
        downY = event.getY();
        break;
      case MotionEvent.ACTION_MOVE:
        //1.獲取x和y方向移動的距離
        float moveX = event.getX();
        float moveY = event.getY();
        float delatX = moveX - downX;//x方向移動的距離
        float delatY = moveY - downY;//y方向移動的距離
        if(Math.abs(delatX)>Math.abs(delatY)){
          //表示移動是偏向於水平方向,那麼應該SwipeLayout應該處理,請求父view不要攔截
          requestDisallowInterceptTouchEvent(true);
        }
        //更新downX,downY
        downX = moveX;
        downY = moveY;
        break;
      case MotionEvent.ACTION_UP:
        break;
    }
    viewDragHelper.processTouchEvent(event);
    return true;
  }
上面主要就是對事件沖突的處理,當是水平移動的時候就請求父視圖不要攔截。
接下來來重點就來了
private ViewDragHelper.Callback callback = new ViewDragHelper.Callback() {
    @Override
    public boolean tryCaptureView(View child, int pointerId) {
      return child==contentView;
    }
    @Override
    public int getViewHorizontalDragRange(View child) {
      return deleteWidth;
    }
    @Override
    public int clampViewPositionHorizontal(View child, int left, int dx) {
      if(child==contentView){
        if(left>0)left = 0;
        if(left<-deleteWidth)left = -deleteWidth;
      }
      return left;
    }
    @Override
    public void onViewPositionChanged(View changedView, int left, int top,
                     int dx, int dy) {
      super.onViewPositionChanged(changedView, left, top, dx, dy);
      //判斷開和關閉的邏輯
      if(contentView.getLeft()==0 && currentState!=SwipeState.Close){
        //說明應該將state更改為關閉
        currentState = SwipeState.Close;
        //回調接口關閉的方法
        if(listener!=null){
          listener.onClose(getTag());
        }
        //說明當前的SwipeLayout已經關閉,需要讓Manager清空一下
        SwipeLayoutManager.getInstance().clearCurrentLayout();
      }else if (contentView.getLeft()==-deleteWidth && currentState!=SwipeState.Open) {
        //說明應該將state更改為開
        currentState = SwipeState.Open;
        //回調接口打開的方法
        if(listener!=null){
          listener.onOpen(getTag());
        }
        //當前的Swipelayout已經打開,需要讓Manager記錄一下下
        SwipeLayoutManager.getInstance().setSwipeLayout(SwipeLayout.this);
      }
    }
    @Override
    public void onViewReleased(View releasedChild, float xvel, float yvel) {
      super.onViewReleased(releasedChild, xvel, yvel);
      if(contentView.getLeft()<-deleteWidth/2){
        //應該打開
        open();
      }else {
        //應該關閉
        close();
      }
    }
  };
上面這段代碼裡面的方法一開始我們都說過了,在來看下在tryCaptureView中我們讓 contentView可以滑動,在getViewHorizontalDragRange中卻東滑動范圍是deleteWidth,在clampViewPositionHorizontal中對邊界進行了下限制,在onViewPositionChanged中進行狀態的更新, 最後在手指抬起的時候讓view自動回滾,
 /**
   * 打開的方法
   */
  public void open() {
    viewDragHelper.smoothSlideViewTo(contentView,-deleteWidth,contentView.getTop());
    ViewCompat.postInvalidateOnAnimation(SwipeLayout.this);
  }
  /**
   * 關閉的方法
   */
  public void close() {
    viewDragHelper.smoothSlideViewTo(contentView,0,contentView.getTop());
    ViewCompat.postInvalidateOnAnimation(SwipeLayout.this);
  };
  public void computeScroll() {
    if(viewDragHelper.continueSettling(true)){
      ViewCompat.postInvalidateOnAnimation(this);
    }
  }
這裡注意一定要重寫computeScroll方法,不然滑動效果動一下就不動了。
至此這個自定義framelayout就完成了
但是發現一個問題,我們在已經滑動出來的view中上下滑動時,這個view的deleteView還是顯示狀態,所以還要在activity中處理一下:
 recyView.setOnScrollListener(new RecyclerView.OnScrollListener() {
      @Override
      public void onScrollStateChanged(RecyclerView recyclerView, int newState) {
        super.onScrollStateChanged(recyclerView, newState);
      }
      @Override
      public void onScrolled(RecyclerView recyclerView, int dx, int dy) {
        super.onScrolled(recyclerView, dx, dy);
        if(dy>0 || dy<0){
          SwipeLayoutManager.getInstance().closeCurrentLayout();
        }
      }
    });
當這個RecyclerView是上下滑動時,讓子view復位。
收工。
ps:本來是在eclipse中listview中實現的,但是想想google都已經不支持eclipse了,而listview也快被RecyclerView代替了,所以最後還是切換到Android studio,用RecyclerView實現了一套。
源碼地址
以上所述是小編給大家介紹的Android中自定義view實現側滑效果,希望對大家有所幫助,如果大家有任何疑問請給我留言,小編會及時回復大家的。在此也非常感謝大家對本站網站的支持!
 android源碼解析之(五)--)Log相關介紹
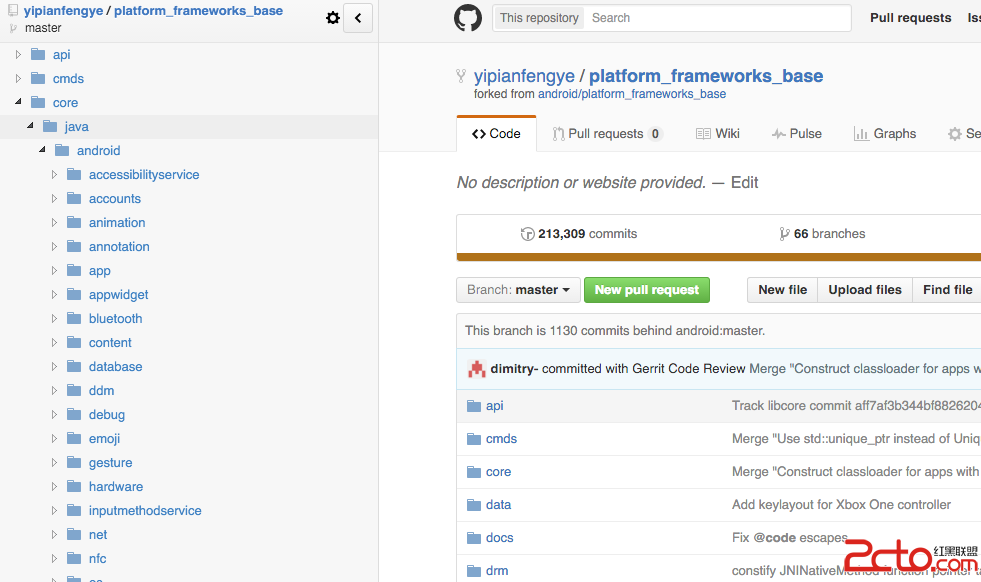
這裡面基本都是android framework層的源碼了。而且最近發現了一個比較不錯的github插件:OctoTree,它 是一個浏覽器插件,它可以讓你在Github
 Android中使用Bitmap類將矩形圖片轉為圓形的方法
一般要做正圓形圖片,只能是正方形的基礎上才能實現,否則就變成橢圓了,下面說說如何使長方形的圖片生成正圓形圖片廢話不多說,沒圖沒真相,先上圖吧:原圖:變成正圓後:下面上代碼
 Android實現ListView異步加載圖片的方法
本文實例講述了Android實現ListView異步加載圖片的方法。分享給大家供大家參考。具體如下:ListView異步加載圖片是非常實用的方法,凡是是要通過網絡獲取圖片
 android實現簡單的乘法計算代碼
開發環境:android4.1.實驗功能:在第一個界面中的2個乘數輸入處分別輸入2個數字,按下結果button,會自動跳到第二個界面並顯示輸入2個數字相乘的結果。如果在第