編輯:關於Android編程
本文實例講述了Android自定義控件eBook實現翻書效果的方法。分享給大家供大家參考,具體如下:
效果圖:


Book.java文件:
package com.book;
import android.app.Activity;
import android.os.Bundle;
import android.util.Log;
import android.view.View;
import android.widget.ImageView;
public class Book extends Activity {
  /** Called when the activity is first created. */
 eBook mBook;
  public void onCreate(Bundle savedInstanceState) {
    super.onCreate(savedInstanceState);
    setContentView(R.layout.main);
    mBook = (eBook)findViewById(R.id.my_book);
    mBook.addLayoutRecForPage(R.layout.page,21);
    mBook.setListener(new eBook.Listener() {
  public void onPrevPage() {
  updateContent();
  }
  public void onNextPage() {
  updateContent();
  }
  public void onInit() {
  updateContent();
  }
 });
  }
  private void updateContent(){
   int index = mBook.getIndexForLeftPage();
   View left = mBook.getLeftPage(),right = mBook.getRightPage();
    View next1 = mBook.getNextPage1(),next2 = mBook.getNextPage2();
    View prev1 = mBook.getPrevPage1(),prev2 = mBook.getPrevPage2();
    if(left != null)setImg(left,index);
    if(right != null)setImg(right,index+1);
    if(next1 != null)setImg(next1,index+2);
    if(next2 != null)setImg(next2,index+3);
    if(prev1 != null)setImg(prev1,index-1);
    if(prev2 != null)setImg(prev2,index-2);
    mBook.invalidate();
  }
 private void setImg(View v , int index){
 if(index >= 0 && index < 20){
  ImageView img = (ImageView)v.findViewById(R.id.book_img);
  if(img == null)return;
  Log.d("eBook","set Img");
  switch(index%6){
  case 0:
  img.setImageResource(R.drawable.p1);
  break;
  case 1:
  img.setImageResource(R.drawable.p2);
  break;
  case 2:
  img.setImageResource(R.drawable.p3);
  break;
  case 3:
  img.setImageResource(R.drawable.p4);
  break;
  case 4:
  img.setImageResource(R.drawable.p5);
  break;
  case 5:
  img.setImageResource(R.drawable.p6);
  break;
  default:
  break;
  }
 }
 }
}
main.xml文件:
<?xml version="1.0" encoding="utf-8"?>
<LinearLayout xmlns:android="http://schemas.android.com/apk/res/android"
  android:orientation="vertical"
  android:layout_width="fill_parent"
  android:layout_height="fill_parent">
 <com.book.eBook android:id="@+id/my_book"
  android:layout_width="fill_parent"
  android:layout_height="fill_parent"/>
</LinearLayout>
page.xml文件:
<?xml version="1.0" encoding="utf-8"?>
<LinearLayout xmlns:android="http://schemas.android.com/apk/res/android"
  android:orientation="vertical"
  android:layout_width="fill_parent"
  android:layout_height="fill_parent"
  android:padding="20dip"
  android:background="#FFFFDD">
  <ImageView android:layout_width="fill_parent" android:id="@+id/book_img"
  android:layout_height="fill_parent" android:layout_weight="1"
  android:scaleType="fitXY" android:src="http://wallage.blog.163.com/blog/@drawable/p1"/>
  <com.book.TelEdit
  android:id="@+id/book_text"
  android:layout_width="fill_parent"
  android:background="#ffffdd"
  android:gravity="top"
  android:typeface="sans"
  android:capitalize="sentences"
  android:lineSpacingExtra="5dip"
  android:textSize="15dip"
  android:textColor="#000000"
  android:layout_height="fill_parent"
  android:paddingTop="30dip"
  android:layout_weight="1"/>
</LinearLayout>
控件TelEdit.java代碼:
package com.book;
import android.content.Context;
import android.graphics.Canvas;
import android.graphics.Color;
import android.graphics.Paint;
import android.util.AttributeSet;
import android.view.WindowManager;
import android.widget.EditText;
public class TelEdit extends EditText {
 Context mContext;
 public TelEdit(Context context) {
 super(context);
 mContext = context;
 }
 public TelEdit(Context context, AttributeSet attrs) {
 super(context, attrs);
 mContext = context;
 }
 public TelEdit(Context context, AttributeSet attrs, int defStyle) {
 super(context, attrs, defStyle);
 mContext = context;
 }
 protected void onDraw(Canvas canvas) {
 WindowManager wm = (WindowManager) mContext.getSystemService("window");
 int windowWidth = wm.getDefaultDisplay().getWidth();
 int windowHeight = wm.getDefaultDisplay().getHeight();
 Paint paint = new Paint();
 paint.setStyle(Paint.Style.FILL);
 paint.setColor(Color.BLACK);
 int paddingTop = getPaddingTop();
 int paddingBottom = getPaddingBottom();
 int scrollY = getScrollY();
 int scrollX = getScrollX() + windowWidth;
 int innerHeight = scrollY + getHeight() - paddingBottom;
 int lineHeight = getLineHeight();
 int baseLine = scrollY
  + (lineHeight - ((scrollY - paddingTop) % lineHeight));
 int x = 8;
 while (baseLine < innerHeight) {
  canvas.drawLine(x, baseLine, scrollX - x, baseLine, paint);
  baseLine += lineHeight;
 }
 super.onDraw(canvas);
 }
}
eBook.java文件部分代碼:
package com.book;
import java.util.ArrayList;
import java.util.Date;
import java.util.List;
import android.content.Context;
import android.graphics.Bitmap;
import android.graphics.Canvas;
import android.graphics.Color;
import android.graphics.LinearGradient;
import android.graphics.Paint;
import android.graphics.Path;
import android.graphics.Point;
import android.graphics.PorterDuffXfermode;
import android.graphics.Shader;
import android.graphics.PorterDuff.Mode;
import android.util.AttributeSet;
import android.util.Log;
import android.view.GestureDetector;
import android.view.LayoutInflater;
import android.view.MotionEvent;
import android.view.View;
import android.view.GestureDetector.OnGestureListener;
import android.widget.FrameLayout;
import android.widget.LinearLayout;
public class eBook extends FrameLayout{
 public static final String LOG_TAG = "eBook";
 List<Integer> myRecPages;
 int totalPageNum;
 Context mContext;
 boolean hasInit = false;
 final int defaultWidth = 600 , defaultHeight = 400;
 int contentWidth = 0;
 int contentHeight = 0;
 View leftPage,rightPage,llPage,lrPage,rrPage,rlPage;
 LinearLayout mView;
 bookView mBookView;
 boolean closeBook = false;
 private enum Corner {
 LeftTop,
 RightTop,
 LeftBottom,
 RightBottom,
 None
 };
 private Corner mSelectCorner;
 final int clickCornerLen = 250*250; //50dip
 float scrollX = 0,scrollY = 0;
 int indexPage = 0;
 private enum State {
 ABOUT_TO_ANIMATE,
 ANIMATING,
 ANIMATE_END,
 READY,
 TRACKING
 };
 private State mState;
 private Point aniStartPos;
 private Point aniStopPos;
 private Date aniStartTime;
 private long aniTime = 2000;
 private long timeOffset = 900;
 Listener mListener;
 private GestureDetector mGestureDetector;
 private BookOnGestureListener mGestureListener;
 public eBook(Context context) {
 super(context);
 Init(context);
 }
 public eBook(Context context, AttributeSet attrs) {
 super(context, attrs);
 Init(context);
 }
...省略
}
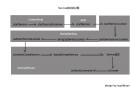
該控件大致實現方法:
eBook繼承FrameLayout,好處在於FrameLayout有圖層效果,後添加的View類能覆蓋前面的View。
初始化:定義一個LinearLayout的成員變量mView,將page.xml inflate 成View分別用leftPage,rightPage引用,並初始化其數據,將leftPage,rightPage通過addView添加到mView,然後將mView添加到eBook。在eBook裡定義一個私有類BookView extends View。 並定義成員變量 BookView mBookView; 最後將mBookView添加的eBook中,這樣,mView中的內容為書面內容,mBookView中的內容為特效內容。
後續手勢動作:可將各種手勢的特效動作畫於mBookView的畫布中。
更多關於Android相關內容感興趣的讀者可查看本站專題:《Android圖形與圖像處理技巧總結》、《Android開發入門與進階教程》、《Android調試技巧與常見問題解決方法匯總》、《Android多媒體操作技巧匯總(音頻,視頻,錄音等)》、《Android基本組件用法總結》、《Android視圖View技巧總結》、《Android布局layout技巧總結》及《Android控件用法總結》
希望本文所述對大家Android程序設計有所幫助。
 Android提高之ListView實現自適應表格的方法
前面有文章介紹了使用GridView實現表格的方法,本文就來說說如何用ListView實現自適應的表格。GridView比ListView更容易實現自適應的表格,但是Gr
 Android Service的啟動過程
剛開始學習Service的時候以為它是一個線程的封裝,也可以執行耗時操作。其實不然,Service是運行在主線程的。直接執行耗時操作是會阻塞主線程的。長時間就直接ANR了
 淺談Android應用的內存優化及Handler的內存洩漏問題
一、Android內存基礎物理內存與進程內存物理內存即移動設備上的RAM,當啟動一個Android程序時,會啟動一個Dalvik VM進程,系統會給它分配固定的內存空間(
 學習理解Android菜單Menu操作
今天看了pro android 3中menu這一章,對Android的整個menu體系有了進一步的了解,故整理下筆記與大家分享。PS:強烈推薦《Pro Android 3