編輯:關於Android編程
1.調用撥號程序
// 給移動客服10086撥打電話
Uri uri = Uri.parse("tel:10086");
Intent intent = new Intent(Intent.ACTION_DIAL, uri);
startActivity(intent);
2. 發送短信或彩信
// 給10086發送內容為“Hello”的短信
Uri uri = Uri.parse("smsto:10086");
Intent intent = new Intent(Intent.ACTION_SENDTO, uri);
intent.putExtra("sms_body", "Hello");
startActivity(intent);
// 發送彩信(相當於發送帶附件的短信)
Intent intent = new Intent(Intent.ACTION_SEND);
intent.putExtra("sms_body", "Hello");
Uri uri = Uri.parse("content://media/external/images/media/23");
intent.putExtra(Intent.EXTRA_STREAM, uri);
intent.setType("image/png");
startActivity(intent);
3. 通過浏覽器打開網頁
// 打開Google主頁
Uri uri = Uri.parse("http://www.google.com");
Intent intent = new Intent(Intent.ACTION_VIEW, uri);
startActivity(intent);
4. 發送電子郵件
// 給someone@domain.com發郵件
Uri uri = Uri.parse("mailto:someone@domain.com");
Intent intent = new Intent(Intent.ACTION_SENDTO, uri);
startActivity(intent);
// 給someone@domain.com發郵件發送內容為“Hello”的郵件
Intent intent = new Intent(Intent.ACTION_SEND);
intent.putExtra(Intent.EXTRA_EMAIL, "someone@domain.com");
intent.putExtra(Intent.EXTRA_SUBJECT, "Subject");
intent.putExtra(Intent.EXTRA_TEXT, "Hello");
intent.setType("text/plain");
startActivity(intent);
// 給多人發郵件
Intent intent=new Intent(Intent.ACTION_SEND);
String[] tos = {"1@abc.com", "2@abc.com"}; // 收件人
String[] ccs = {"3@abc.com", "4@abc.com"}; // 抄送
String[] bccs = {"5@abc.com", "6@abc.com"}; // 密送
intent.putExtra(Intent.EXTRA_EMAIL, tos);
intent.putExtra(Intent.EXTRA_CC, ccs);
intent.putExtra(Intent.EXTRA_BCC, bccs);
intent.putExtra(Intent.EXTRA_SUBJECT, "Subject");
intent.putExtra(Intent.EXTRA_TEXT, "Hello");
intent.setType("message/rfc822");
startActivity(intent);
5. 顯示地圖與路徑規劃
// 打開Google地圖中國北京位置(北緯39.9,東經116.3)
Uri uri = Uri.parse("geo:39.9,116.3");
Intent intent = new Intent(Intent.ACTION_VIEW, uri);
startActivity(intent);
// 路徑規劃:從北京某地(北緯39.9,東經116.3)到上海某地(北緯31.2,東經121.4)
Uri uri = Uri.parse("http://maps.google.com/maps?f=d&saddr=39.9 116.3&daddr=31.2 121.4");
Intent intent = new Intent(Intent.ACTION_VIEW, uri);
startActivity(intent);
6. 播放多媒體
Intent intent = new Intent(Intent.ACTION_VIEW);
Uri uri = Uri.parse("file:///sdcard/foo.mp3");
intent.setDataAndType(uri, "audio/mp3");
startActivity(intent);

Uri uri = Uri.withAppendedPath(MediaStore.Audio.Media.INTERNAL_CONTENT_URI, "1");
Intent intent = new Intent(Intent.ACTION_VIEW, uri);
startActivity(intent);
7. 拍照
// 打開拍照程序
Intent intent = new Intent(MediaStore.ACTION_IMAGE_CAPTURE);
startActivityForResult(intent, 0);
// 取出照片數據
Bundle extras = intent.getExtras();
Bitmap bitmap = (Bitmap) extras.get("data");
8. 獲取並剪切圖片
// 獲取並剪切圖片
Intent intent = new Intent(Intent.ACTION_GET_CONTENT);
intent.setType("image/*");
intent.putExtra("crop", "true"); // 開啟剪切
intent.putExtra("aspectX", 1); // 剪切的寬高比為1:2
intent.putExtra("aspectY", 2);
intent.putExtra("outputX", 20); // 保存圖片的寬和高
intent.putExtra("outputY", 40);
intent.putExtra("output", Uri.fromFile(new File("/mnt/sdcard/temp"))); // 保存路徑
intent.putExtra("outputFormat", "JPEG");// 返回格式
startActivityForResult(intent, 0);
// 剪切特定圖片
Intent intent = new Intent("com.android.camera.action.CROP");
intent.setClassName("com.android.camera", "com.android.camera.CropImage");
intent.setData(Uri.fromFile(new File("/mnt/sdcard/temp")));
intent.putExtra("outputX", 1); // 剪切的寬高比為1:2
intent.putExtra("outputY", 2);
intent.putExtra("aspectX", 20); // 保存圖片的寬和高
intent.putExtra("aspectY", 40);
intent.putExtra("scale", true);
intent.putExtra("noFaceDetection", true);
intent.putExtra("output", Uri.parse("file:///mnt/sdcard/temp"));
startActivityForResult(intent, 0);
9. 打開Google Market
// 打開Google Market直接進入該程序的詳細頁面
Uri uri = Uri.parse("market://details?id=" + "com.demo.app");
Intent intent = new Intent(Intent.ACTION_VIEW, uri);
startActivity(intent);
10. 安裝和卸載程序
Uri uri = Uri.fromParts("package", "com.demo.app", null);
Intent intent = new Intent(Intent.ACTION_DELETE, uri);
startActivity(intent);
11. 進入設置界面
// 進入無線網絡設置界面(其它可以舉一反三)
Intent intent = new Intent(android.provider.Settings.ACTION_WIRELESS_SETTINGS);
startActivityForResult(intent, 0);
以上就是對Android Intent 的資料整理,後續繼續補充相關資料,謝謝大家對本站的支持!
 android 自定義狀態欄和導航欄分析與實現
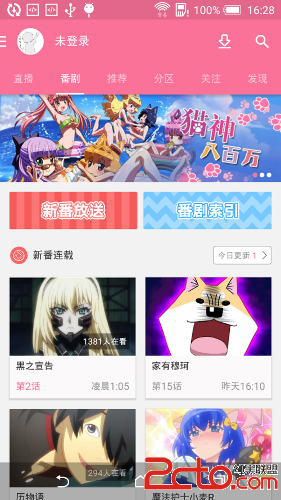
效果 android 4.4之後,系統是支持自定義狀態欄和導航欄的,舉個最典型的例子就是bilibili客戶端了(iOS版本和android版本能用兩套完全不一樣符合各
 android搜索框上下滑動變色效果
搜索框上下滑動變透明度是現在APP中很常見的效果,先看看效果:首先來看下布局骨架:<RelativeLayout xmlns:android=http://sche
 如何打開手機USB連接刷機精靈
如何打開手機USB連接刷機精靈,有時我們插入電腦,刷機精靈老是顯示叫我打開USB接口,連接。可不知道在哪裡設置。想刷機都刷機不了。現在小編來告訴怎麼打開US
 Android中RecyclerView布局代替GridView實現類似支付寶的界面
單純使用GridView通用的兩種給GridView 添加分割線的方法;http://stackoverflow.com/questions/7132030/androi