編輯:關於Android編程
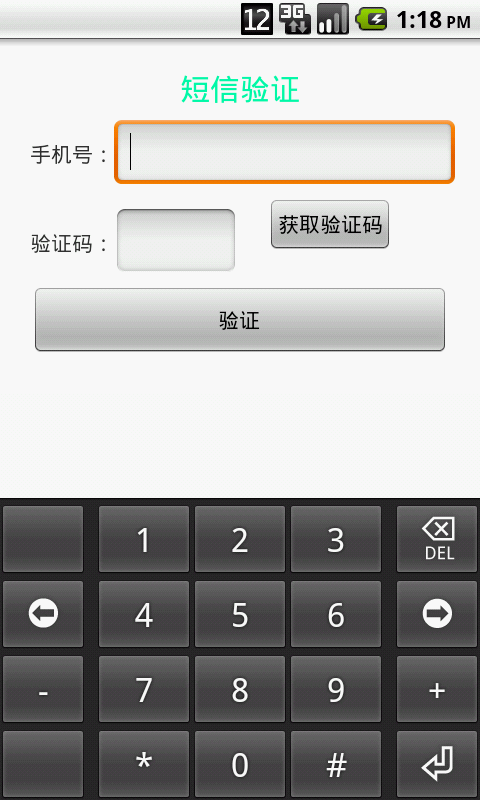
先給大家展示下效果圖,如果感覺不錯,請參考實現思路詳解
Android開發中關於短息驗證碼的設計層出不窮,越來越多的應用為了更好的提高軟件的安全性,開始使用通過服務器向用戶發送驗證碼的方式,來保護用戶個人信息的安全性。無論是用戶注冊時的信息驗證還是當用戶發出找回密碼請求時的短信驗證,他們的工作原理大致上是一致的,因為項目的需要研究了一下關於這方面的知識,本篇我將帶領大家一起實現這一當下流行的設計方案。
眾所周知,短信驗證需要服務器端生成一個驗證碼,然後發送到用戶輸入的手機上,這個過程需要服務器主動向客戶發送驗證短信,所以這是就需要一個移動或聯通的發送短息接口,由於本人目前尚處於學生階段,沒有獲得這個接口的權限,所以我就選擇了借助網上的移動開發服務平台,來完成這個功能的實現,這裡我借用的平台是:http://dashboard.mob.com/,大家可以關注一下,這個平台為我們開發移動應用提供了很好的技術指導,可以大大縮短我們的開發周期。廢話不多說,下面開始我們今天的重點。
官方為我們提供了兩種設計方式:第一種調用內部GUI實現;另一種通過自定義GUI實現,對於第一種方式,我就不再多講,因為官方文檔提供了很詳細的實行步驟,大家只需要按照上面的步驟去實現即可,沒有難度。本篇我將帶領大家通過自定義GUI實現短信驗證功能。首先開發之前你可以先查閱一下官方提供的無GUI API,然後下載一下官方提供的dome,做好這些工作之後,我們就可以開始我們的設計了。
1、將demo中的libs下的SMSSDK-1.1.5.jar和armeabi文件夾拷貝到我們項目的libs目錄下,這是官方提供的類庫jar包。
2、在AndroidManifest.xml文件添加權限和聲明Action:
<?xml version="1.0" encoding="utf-8"?>
<manifest xmlns:android="http://schemas.android.com/apk/res/android"
package="com.example.android_sms"
android:versionCode="1"
android:versionName="1.0" >
<uses-sdk
android:minSdkVersion="8"
android:targetSdkVersion="18" />
<uses-permission android:name="android.permission.READ_CONTACTS" />
<uses-permission android:name="android.permission.READ_PHONE_STATE" />
<uses-permission android:name="android.permission.WRITE_EXTERNAL_STORAGE" />
<uses-permission android:name="android.permission.ACCESS_NETWORK_STATE" />
<uses-permission android:name="android.permission.ACCESS_WIFI_STATE" />
<uses-permission android:name="android.permission.INTERNET" />
<uses-permission android:name="android.permission.RECEIVE_SMS" />
<uses-permission android:name="android.permission.GET_TASKS" />
<uses-permission android:name="android.permission.ACCESS_FINE_LOCATION" />
<application
android:allowBackup="true"
android:icon="@drawable/ic_launcher"
android:label="@string/app_name"
android:theme="@style/AppTheme" >
<activity
android:name="com.example.android_sms.MainActivity"
android:label="@string/app_name" >
<intent-filter>
<action android:name="android.intent.action.MAIN" />
<category android:name="android.intent.category.LAUNCHER" />
</intent-filter>
</activity>
<activity
android:name="cn.smssdk.SMSSDKUIShell"
android:configChanges="keyboardHidden|orientation|screenSize"
android:theme="@android:style/Theme.Translucent.NoTitleBar"
android:windowSoftInputMode="stateHidden|adjustResize" />
</application>
</manifest>
3、設計我們的布局文件:
<RelativeLayout xmlns:android="http://schemas.android.com/apk/res/android"
xmlns:tools="http://schemas.android.com/tools"
android:layout_width="match_parent"
android:layout_height="match_parent"
tools:context=".MainActivity" >
<TextView
android:id="@+id/textView2"
android:layout_width="wrap_content"
android:layout_height="wrap_content"
android:layout_centerHorizontal="true"
android:layout_marginTop="20dp"
android:text="短信驗證"
android:textColor="#00ffaa"
android:textSize="20dp" />
<TextView
android:id="@+id/textView1"
android:layout_width="wrap_content"
android:layout_height="wrap_content"
android:layout_alignParentLeft="true"
android:layout_below="@+id/textView2"
android:layout_marginLeft="20dp"
android:layout_marginTop="20dp"
android:text="手機號:" />
<EditText
android:id="@+id/phone"
android:layout_width="wrap_content"
android:layout_height="wrap_content"
android:layout_alignBaseline="@+id/textView1"
android:layout_alignBottom="@+id/textView1"
android:layout_toRightOf="@+id/textView1"
android:maxLength="11"
android:ems="11"
android:inputType="phone" >
<requestFocus />
</EditText>
<TextView
android:id="@+id/textView3"
android:layout_width="wrap_content"
android:layout_height="wrap_content"
android:layout_alignLeft="@+id/textView1"
android:layout_marginTop="40dp"
android:layout_below="@+id/phone"
android:text="驗證碼:"/>
<EditText
android:id="@+id/cord"
android:layout_width="wrap_content"
android:layout_height="wrap_content"
android:layout_marginTop="20dp"
android:layout_alignBaseline="@+id/textView3"
android:layout_alignBottom="@+id/textView3"
android:layout_alignLeft="@+id/phone"
android:ems="4"
android:maxLength="4"
android:inputType="phone" />
<Button
android:id="@+id/getcord"

android:layout_width="wrap_content"
android:layout_height="wrap_content"
android:layout_alignTop="@+id/cord"
android:layout_marginLeft="20dp"
android:layout_marginTop="10dp"
android:layout_toRightOf="@+id/cord"
android:visibility="visible"
android:text="獲取驗證碼" />
<Button
android:id="@+id/savecord"
android:layout_width="fill_parent"
android:layout_height="wrap_content"
android:layout_below="@+id/cord"
android:layout_margin="20dp"
android:text="驗證" />
<TextView
android:id="@+id/now"
android:layout_width="fill_parent"
android:layout_height="wrap_content"
android:layout_above="@+id/savecord"
android:layout_toRightOf="@+id/cord"
android:gravity="center_horizontal"
android:visibility="gone"
android:text="提示信息"
android:textColor="#aaaaaa" />
</RelativeLayout>
4、我們的MainActivity:
/**
* 自定義GUI短信驗證
* @time: 2015年7月4日
*/
public class MainActivity extends Activity implements OnClickListener{
private EditText phone;
private EditText cord;
private TextView now;
private Button getCord;
private Button saveCord;
private String iPhone;
private String iCord;
private int time = 60;
private boolean flag = true;
@Override
protected void onCreate(Bundle savedInstanceState) {
super.onCreate(savedInstanceState);
requestWindowFeature(Window.FEATURE_NO_TITLE);
setContentView(R.layout.activity_main);
init();
     SMSSDK.initSDK(this, "<您的appkey>", "<您的appsecret>");
EventHandler eh=new EventHandler(){
@Override
public void afterEvent(int event, int result, Object data) {
Message msg = new Message();
msg.arg1 = event;
msg.arg2 = result;
msg.obj = data;
handler.sendMessage(msg);
}
};
SMSSDK.registerEventHandler(eh);
}
private void init() {
phone = (EditText) findViewById(R.id.phone);
cord = (EditText) findViewById(R.id.cord);
now = (TextView) findViewById(R.id.now);
getCord = (Button) findViewById(R.id.getcord);
saveCord = (Button) findViewById(R.id.savecord);
getCord.setOnClickListener(this);
saveCord.setOnClickListener(this);
}
@Override
public void onClick(View v) {
switch (v.getId()) {
case R.id.getcord:
if(!TextUtils.isEmpty(phone.getText().toString().trim())){
if(phone.getText().toString().trim().length()==11){
iPhone = phone.getText().toString().trim();
SMSSDK.getVerificationCode("86",iPhone);
cord.requestFocus();
getCord.setVisibility(View.GONE);
}else{
Toast.makeText(MainActivity.this, "請輸入完整電話號碼", Toast.LENGTH_LONG).show();
phone.requestFocus();
}
}else{
Toast.makeText(MainActivity.this, "請輸入您的電話號碼", Toast.LENGTH_LONG).show();
phone.requestFocus();
}
break;
case R.id.savecord:
if(!TextUtils.isEmpty(cord.getText().toString().trim())){
if(cord.getText().toString().trim().length()==4){
iCord = cord.getText().toString().trim();
SMSSDK.submitVerificationCode("86", iPhone, iCord);
flag = false;
}else{
Toast.makeText(MainActivity.this, "請輸入完整驗證碼", Toast.LENGTH_LONG).show();
cord.requestFocus();
}
}else{
Toast.makeText(MainActivity.this, "請輸入驗證碼", Toast.LENGTH_LONG).show();
cord.requestFocus();
}
break;
default:
break;
}
}
//驗證碼送成功後提示文字
private void reminderText() {
now.setVisibility(View.VISIBLE);
handlerText.sendEmptyMessageDelayed(1, 1000);
}
Handler handlerText =new Handler(){
public void handleMessage(Message msg) {
if(msg.what==1){
if(time>0){
now.setText("驗證碼已發送"+time+"秒");
time--;
handlerText.sendEmptyMessageDelayed(1, 1000);
}else{
now.setText("提示信息");
time = 60;
now.setVisibility(View.GONE);
getCord.setVisibility(View.VISIBLE);
}
}else{
cord.setText("");
now.setText("提示信息");
time = 60;
now.setVisibility(View.GONE);
getCord.setVisibility(View.VISIBLE);
}
};
};
Handler handler=new Handler(){
@Override
public void handleMessage(Message msg) {
// TODO Auto-generated method stub
super.handleMessage(msg);
int event = msg.arg1;
int result = msg.arg2;
Object data = msg.obj;
Log.e("event", "event="+event);
if (result == SMSSDK.RESULT_COMPLETE) {
//短信注冊成功後,返回MainActivity,然後提示新好友
if (event == SMSSDK.EVENT_SUBMIT_VERIFICATION_CODE) {//提交驗證碼成功,驗證通過
Toast.makeText(getApplicationContext(), "驗證碼校驗成功", Toast.LENGTH_SHORT).show();
handlerText.sendEmptyMessage(2);
} else if (event == SMSSDK.EVENT_GET_VERIFICATION_CODE){//服務器驗證碼發送成功
reminderText();
Toast.makeText(getApplicationContext(), "驗證碼已經發送", Toast.LENGTH_SHORT).show();
}else if (event ==SMSSDK.EVENT_GET_SUPPORTED_COUNTRIES){//返回支持發送驗證碼的國家列表
Toast.makeText(getApplicationContext(), "獲取國家列表成功", Toast.LENGTH_SHORT).show();
}
} else {
if(flag){
getCord.setVisibility(View.VISIBLE);
Toast.makeText(MainActivity.this, "驗證碼獲取失敗,請重新獲取", Toast.LENGTH_SHORT).show();
phone.requestFocus();
}else{
((Throwable) data).printStackTrace();
int resId = getStringRes(MainActivity.this, "smssdk_network_error");
Toast.makeText(MainActivity.this, "驗證碼錯誤", Toast.LENGTH_SHORT).show();
cord.selectAll();
if (resId > 0) {
Toast.makeText(MainActivity.this, resId, Toast.LENGTH_SHORT).show();
}
}
}
}
};
@Override
protected void onDestroy() {
super.onDestroy();
SMSSDK.unregisterAllEventHandler();
}
}
注:appkey和appsecret:在http://dashboard.mob.com/注冊一個賬號後,創建一個發送短信的應用,系統會自動為生成appkey和appsecret
handlerText是我自定義設計的Handker對象,用於當服務器發送驗證碼後,提醒用戶注意。
以上所述是小編給大家介紹的Android獲取短信驗證碼的實現方法,希望對大家有所幫助,如果大家有任何疑問請給我留言,小編會及時回復大家的。在此也非常感謝大家對本站網站的支持!
 Android自定義ViewGroup之FlowLayout(三)
本篇繼續來講自定義ViewGroup,給大家帶來一個實例:FlowLayout。何為FlowLayout,就是控件根據ViewGroup的寬,自動的往右添加,如果當前行剩
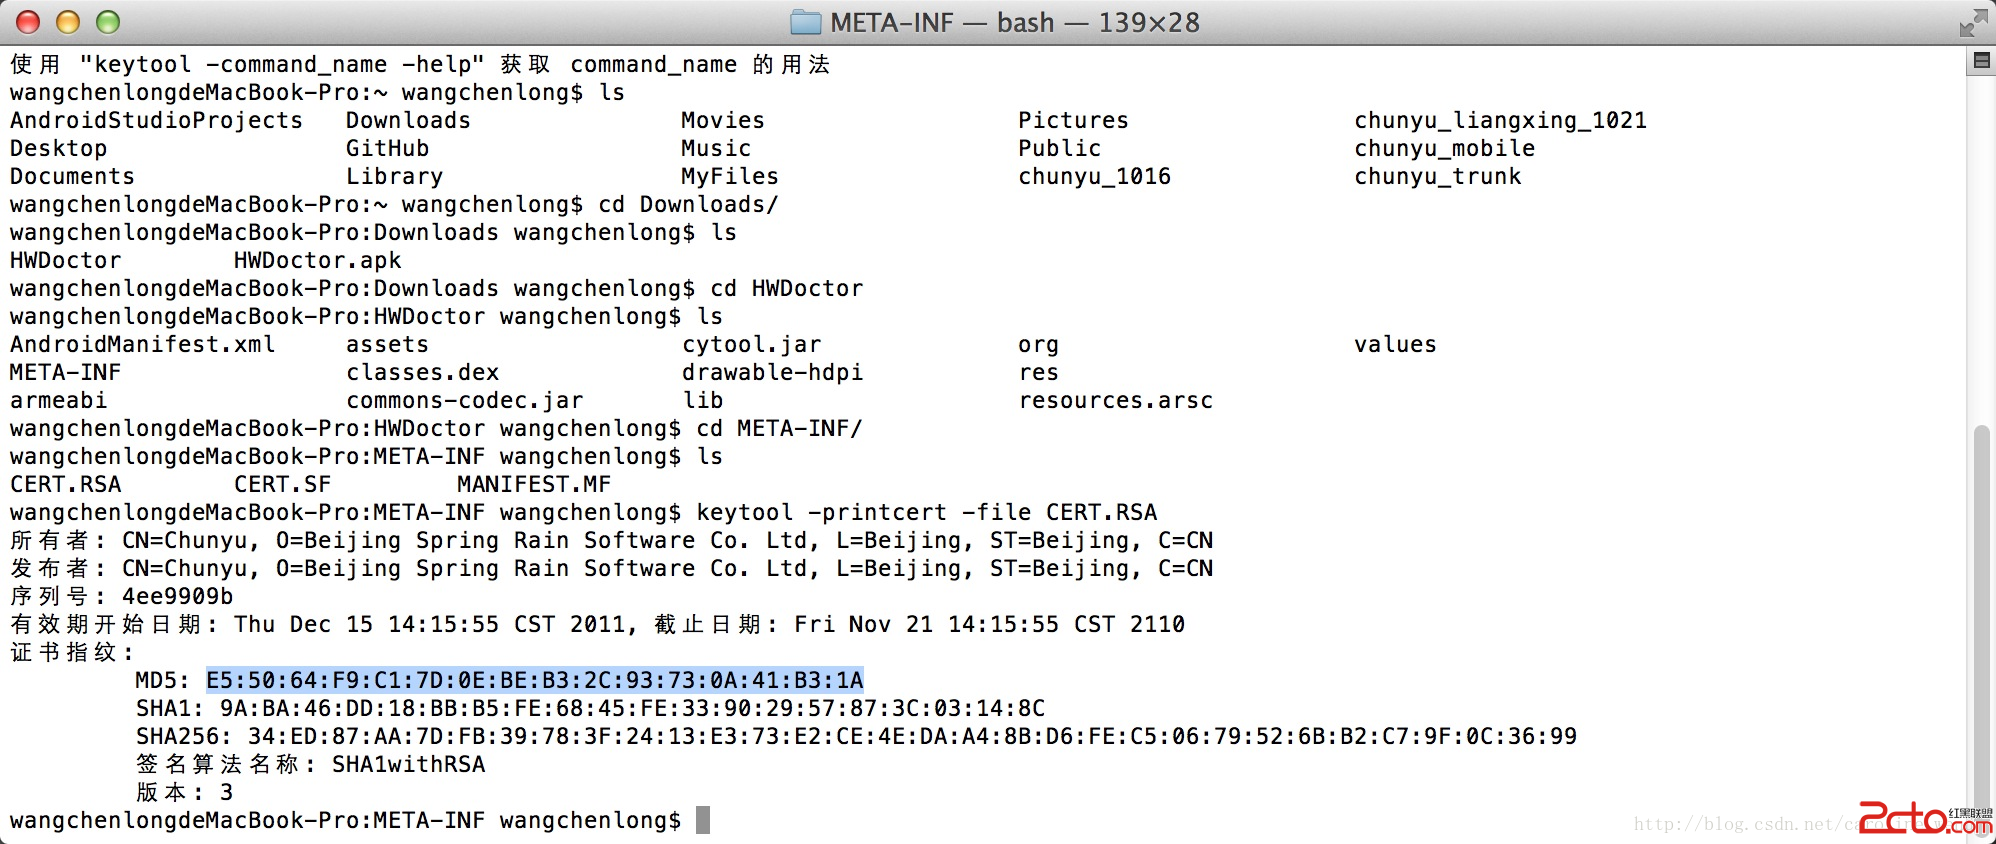 Android - 查看Android應用(apk)簽名
查看Android應用(apk)簽名 在微博、微信開放平台注冊應用時,需要填寫應用(apk)的簽名,可以使用keytool工具找
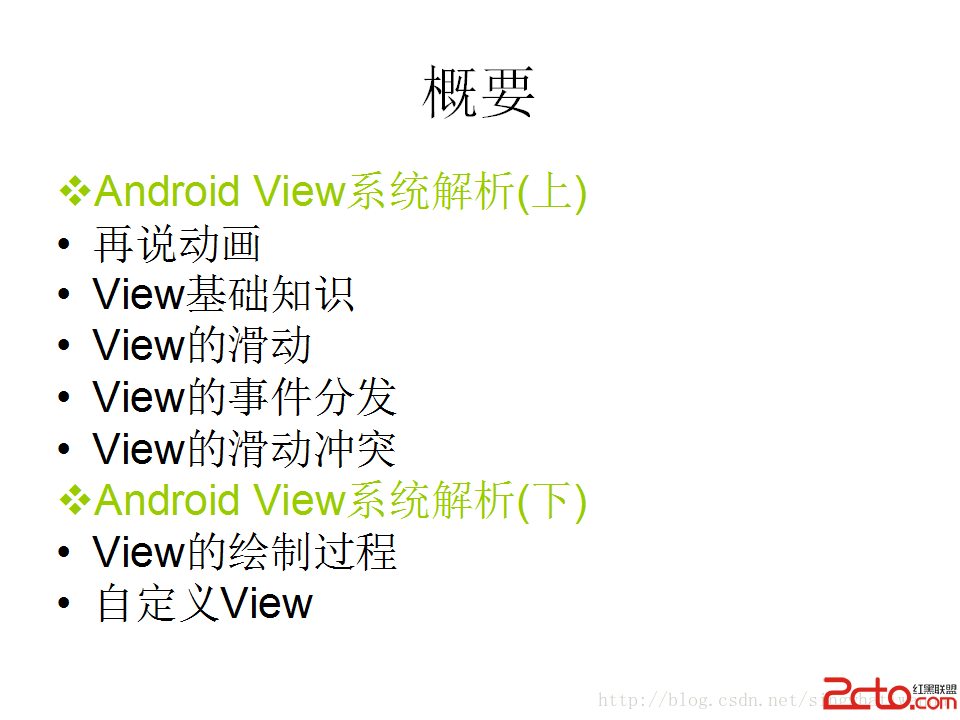 Android View系統解析(上)
 Android之高仿雅虎天氣(二)---代碼結構解析
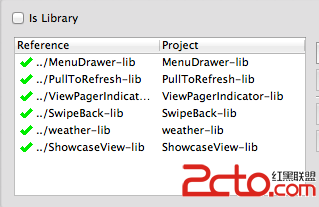
本例使用了6個庫代碼和1個主工程代碼。 一、6個庫代碼如下圖所示: 其中 ①.MenuDrawer、ViewPagerIndi