編輯:關於Android編程
本文實例講述了Android使用AsyncTask實現多線程下載的方法。分享給大家供大家參考,具體如下:
public class MainActivity extends Activity implements OnClickListener {
  private Button btn1, btn2, btn3;
  private ProgressBar progressBar1, progressBar2, progressBar3;
  private ImageView img1, img2, img3;
  private static final String IMG_URI = "http://www.jb51.net/images/logo.gif";
  @Override
  protected void onCreate(Bundle savedInstanceState) {
    super.onCreate(savedInstanceState);
    setContentView(R.layout.activity_main);
    initView();
    initListener();
  }
  /**
   * 初始化監聽器
   */
  private void initListener() {
    btn1.setOnClickListener(this);
    btn2.setOnClickListener(this);
    btn3.setOnClickListener(this);
  }
  /**
   *
   * 初始化控件
   */
  private void initView() {
    btn1 = (Button) findViewById(R.id.btn1);
    btn2 = (Button) findViewById(R.id.btn2);
    btn3 = (Button) findViewById(R.id.btn3);
    progressBar1 = (ProgressBar) findViewById(R.id.progressbar1);
    progressBar2 = (ProgressBar) findViewById(R.id.progressbar2);
    progressBar3 = (ProgressBar) findViewById(R.id.progressbar3);
    img1 = (ImageView) findViewById(R.id.img1);
    img2 = (ImageView) findViewById(R.id.img2);
    img3 = (ImageView) findViewById(R.id.img3);
  }
  @Override
  public boolean onCreateOptionsMenu(Menu menu) {
    // Inflate the menu; this adds items to the action bar if it is present.
    getMenuInflater().inflate(R.menu.main, menu);
    return true;
  }
  @Override
  public void onClick(View arg0) {
    // 點擊按鈕模擬下載
    MyDownloadAsy down = new MyDownloadAsy();
    down.execute(IMG_URI, arg0.getId() + "");
  }
  /**
   * 1.Params,傳遞給後台任務的參數類型。
   *
   * 2.Progress,後台計算執行過程中,進步單位(progress units)的類型。(就是後台程序已經執行了百分之幾了。)
   *
   * 3.Result, 後台執行返回的結果的類型。
   */
  class MyDownloadAsy extends AsyncTask<String, Integer, Bitmap> {
    private static final String TAG = "asy";
    private int clickBtn = 0;
    private void i(String object) {
      Log.i(TAG, object);
    }
    @Override
    protected void onPreExecute() {
      // TODO Auto-generated method stub
      super.onPreExecute();
      i("準備運行線程");
      progressBar1.setProgress(0);// 進度條復位
      progressBar2.setProgress(0);// 進度條復位
      progressBar3.setProgress(0);// 進度條復位
    }
    @Override
    protected Bitmap doInBackground(String... arg0) {
      switch (Integer.parseInt(arg0[1])) {
      case R.id.btn1:
        clickBtn = 1;
        break;
      case R.id.btn2:
        clickBtn = 2;
        break;
      case R.id.btn3:
        clickBtn = 3;
        break;
      default:
        break;
      }
      i("正在後台執行");
      publishProgress(0);
      // 下載圖片
      HttpClient hc = new DefaultHttpClient();
      // 等待2s
      sleepWait();
      publishProgress(50);
      HttpGet hg = new HttpGet(arg0[0]);// 獲取jb51的logo
      final Bitmap bm;
      try {
        HttpResponse hr = hc.execute(hg);
        bm = BitmapFactory.decodeStream(hr.getEntity().getContent());
      } catch (Exception e) {
        return null;
      }
      sleepWait();
      publishProgress(100);
      // mImageView.setImageBitmap(result); 不能在後台線程操作ui
      return bm;
    }
    /**
     * 等待2s鐘
     */
    private void sleepWait() {
      try {
        Thread.sleep(2000);
      } catch (InterruptedException e1) {
        // TODO Auto-generated catch block
        e1.printStackTrace();
      }
    }
    protected void onProgressUpdate(Integer... values) {
      // 動態更新
      i("進度更新");
      switch (clickBtn) {
      case 1:
        progressBar1.setProgress(values[0]);// 更新進度條的進度
        break;
      case 2:
        progressBar2.setProgress(values[0]);// 更新進度條的進度
        break;
      case 3:
        progressBar3.setProgress(values[0]);// 更新進度條的進度
        break;
      default:
        break;
      }
    }
    protected void onPostExecute(Bitmap result) {
      // TODO Auto-generated method stub
      super.onPostExecute(result);
      i("線程執行完成");
      if (result != null) {
        i("下載圖片成功");
        switch (clickBtn) {
        case 1:
          img1.setImageBitmap(result);
          break;
        case 2:
          img2.setImageBitmap(result);
          break;
        case 3:
          img3.setImageBitmap(result);
          break;
        default:
          break;
        }
      } else {
        i("下載圖片失敗");
      }
    }
    @Override
    protected void onCancelled() {
      // TODO Auto-generated method stub
      super.onCancelled();
      i("取消線程");
      switch (clickBtn) {
      case 1:
        progressBar1.setProgress(0);// 進度條復位
        break;
      case 2:
        progressBar2.setProgress(0);// 進度條復位
        break;
      case 3:
        progressBar3.setProgress(0);// 進度條復位
        break;
      default:
        break;
      }
    }
  }
}
xml:
<RelativeLayout xmlns:android="http://schemas.android.com/apk/res/android"
  xmlns:tools="http://schemas.android.com/tools"
  android:layout_width="match_parent"
  android:layout_height="match_parent"
  android:paddingBottom="@dimen/activity_vertical_margin"
  android:paddingLeft="@dimen/activity_horizontal_margin"
  android:paddingRight="@dimen/activity_horizontal_margin"
  android:paddingTop="@dimen/activity_vertical_margin"
  tools:context=".MainActivity" >
  <TableLayout
    android:layout_width="fill_parent"
    android:layout_height="fill_parent"
    android:layout_centerHorizontal="true" >
    <TableRow>
      <Button
        android:id="@+id/btn1"
        android:text="@string/btn1" />
      <ProgressBar
        android:id="@+id/progressbar1"

        android:layout_width="fill_parent"
        android:layout_height="wrap_content" />
      <ImageView
        android:id="@+id/img1"
        android:layout_width="wrap_content"
        android:layout_height="wrap_content"
        android:contentDescription="@id/img1"
        android:src="@drawable/ic_launcher" />
    </TableRow>
    <TableRow>
      <Button
        android:id="@+id/btn2"
        android:text="@string/btn2" />
      <ProgressBar
        android:id="@+id/progressbar2"

        android:layout_width="fill_parent"
        android:layout_height="wrap_content" />
      <ImageView
        android:id="@+id/img2"
        android:layout_width="wrap_content"
        android:layout_height="wrap_content"
        android:contentDescription="@id/img2"
        android:src="@drawable/ic_launcher" />
    </TableRow>
    <TableRow>
      <Button
        android:id="@+id/btn3"
        android:text="@string/btn3" />
      <ProgressBar
        android:id="@+id/progressbar3"

        android:layout_width="fill_parent"
        android:layout_height="wrap_content" />
      <ImageView
        android:id="@+id/img3"
        android:layout_width="wrap_content"
        android:layout_height="wrap_content"
        android:contentDescription="@id/img3"
        android:src="@drawable/ic_launcher" />
    </TableRow>
  </TableLayout>
</RelativeLayout>
AndroidManifast:
<?xml version="1.0" encoding="utf-8"?>
<manifest xmlns:android="http://schemas.android.com/apk/res/android"
  package="com.xunfang.asynctackdemo"
  android:versionCode="1"
  android:versionName="1.0" >
  <uses-sdk
    android:minSdkVersion="10"
    android:targetSdkVersion="10" />
  <!-- 訪問網絡的權限 -->
  <uses-permission android:name="android.permission.INTERNET" >
  </uses-permission>
  <application
    android:allowBackup="true"
    android:icon="@drawable/ic_launcher"
    android:label="@string/app_name"
    android:theme="@style/AppTheme" >
    <activity
      android:name="com.xunfang.asynctackdemo.MainActivity"
      android:label="@string/app_name" >
      <intent-filter>
        <action android:name="android.intent.action.MAIN" />
        <category android:name="android.intent.category.LAUNCHER" />
      </intent-filter>
    </activity>
  </application>
</manifest>
更多關於Android相關內容感興趣的讀者可查看本站專題:《Android調試技巧與常見問題解決方法匯總》、《Android開發入門與進階教程》、《Android多媒體操作技巧匯總(音頻,視頻,錄音等)》、《Android基本組件用法總結》、《Android視圖View技巧總結》、《Android布局layout技巧總結》及《Android控件用法總結》
希望本文所述對大家Android程序設計有所幫助。
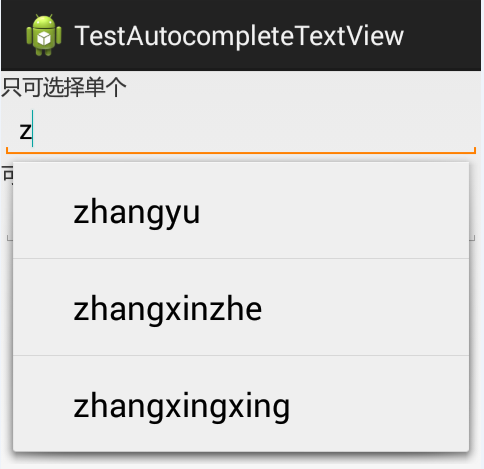 Android 自動補全提示輸入AutoCompleteTextView、 MultiAutoCompleteTextView
以在搜索框搜索時,自動補全為例:其中還涉及到一個詞,Tokenizer:分詞器,分解器。上效果圖:MainActivity.java:package com.joan.t
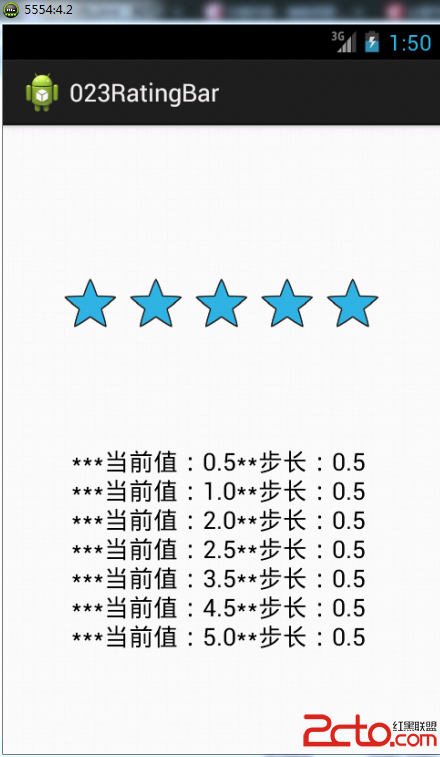 從零開始學android(RatingBar評分組件.二十三.)
如果現在用戶要對某個應用程序打分往往會使用圖所示的組件,通過選擇的“五角星”的個數來決定最終的打分成績 這樣的功能在Android之中,可以使用RatingBar組件實現
 Android 百度地圖 SDK v3.0.0 (三) 添加覆蓋物Marker與InfoWindow的使用
上篇博客已經實現了地圖的定位以及結合了方向傳感器用戶路癡定位方向,如果你還不清楚,請查看:Android 百度地圖 SDK v3.0.0 (二) 定位與結合
 nexus7一鍵刷安卓android L教程
nexus7一鍵刷安卓android L教程,谷歌之子,大家都知道他吧。現在小編給大家帶來了nexus7一鍵刷安卓android l的方法,目前的Andro