編輯:關於Android編程
SharedPreferences是Android中存儲簡單數據的一個工具類。可以想象它是一個小小的Cookie,它通過用鍵值對的方式把簡單數據類型(boolean、int、float、long和String)存儲在應用程序的私有目錄下(data/data/包名/shared_prefs/)自己定義的xml文件中。
一、簡介
它提供一種輕量級的數據存儲方式,通過eidt()方法來修改裡面的內容,通過Commit()方法來提交修改後的內容。
二、重要方法
public abstract boolean contains (String key) :檢查是否已存在該文件,其中key是xml的文件名。
edit():為preferences創建一個編輯器Editor,通過創建的Editor可以修改preferences裡面的數據,但必須執行commit()方法。
getAll():返回preferences裡面的多有數據。
getBoolean(String key, boolean defValue):獲取Boolean型數據
getFloat(String key, float defValue):獲取Float型數據
getInt(String key, int defValue):獲取Int型數據
getLong(String key, long defValue):獲取Long型數據
getString(String key, String defValue):獲取String型數據
registerOnSharedPreferenceChangeListener(SharedPreferences.OnSharedPreferenceChangeListener listener):注冊一個當preference發生改變時被調用的回調函數。
unregisterOnSharedPreferenceChangeListener(SharedPreferences.OnSharedPreferenceChangeListener listener):刪除當前回調函數。
三、重要接口SharedPreferences.Editor
1.簡介
用於修改SharedPreferences對象的內容,所有更改都是在編輯器所做的批處理,而不是復制回原來的SharedPreferences或持久化存儲,直到你調用commit(),才將持久化存儲。
2.重要方法
clear():清除內容。
commit():提交修改
remove(String key):刪除preference
下面通過“記住密碼”功能
四、實例
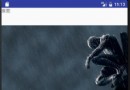
效果圖如下

首頁

登錄成功後的頁面

當第一次登錄點擊”記住密碼“後,第二次打開時的頁面
2.代碼
布局文件 login.xml
<?xml version="1.0" encoding="utf-8"?>
<LinearLayout xmlns:android="http://schemas.android.com/apk/res/android"
 android:layout_width="fill_parent" android:layout_height="fill_parent"
 android:gravity="right" android:layout_gravity="right"
 android:background="@drawable/default_bg" android:orientation="vertical">
 <TableLayout android:layout_width="fill_parent"
 android:layout_height="wrap_content" android:stretchColumns="1">
 <TableRow android:gravity="center" android:layout_gravity="center">
 <ImageView android:layout_width="fill_parent"
 android:layout_height="wrap_content" android:id="@+id/ivlogo"
 >
 </ImageView>
 </TableRow>
 </TableLayout>
 <TableLayout android:layout_width="fill_parent"
 android:layout_height="wrap_content" android:stretchColumns="1">
 <TableRow android:layout_marginTop="100dip">
 <TextView android:layout_width="wrap_content"
 android:layout_marginLeft="20dip" android:gravity="center_vertical"
 android:layout_height="wrap_content" android:id="@+id/tvaccount"
 android:text="帳號:" android:textSize="20sp">
 </TextView>

 <EditText android:layout_width="70px" android:layout_height="wrap_content"
 android:id="@+id/etaccount" android:layout_marginRight="20dip"
 android:maxLength="20"></EditText>
 </TableRow>
 <TableRow android:layout_marginTop="10dip">
 <TextView android:layout_width="wrap_content"
 android:layout_height="wrap_content" android:id="@+id/tvpw"
 android:layout_marginLeft="20dip" android:gravity="center_vertical"
 android:text="密碼:" android:textSize="20sp">
 </TextView>

 <EditText android:layout_width="70px" android:layout_height="wrap_content"
 android:layout_marginRight="20dip" android:id="@+id/etpw"
 android:inputType="textPassword"></EditText>
 </TableRow>
 </TableLayout>
<LinearLayout xmlns:android="http://schemas.android.com/apk/res/android"
 android:layout_width="wrap_content" android:layout_height="wrap_content"
 android:orientation="horizontal" android:layout_marginTop="5dip" android:layout_marginRight="20dip">

 <TextView android:layout_width="wrap_content"
 android:layout_height="wrap_content" android:id="@+id/tvclear"
 android:text="清除Cookies" android:textColor="#aa0000" android:textSize="12px"></TextView>

 </LinearLayout>
 <TableLayout android:layout_width="fill_parent"
 android:layout_height="wrap_content" android:layout_marginTop="20dip">
 <TableRow android:gravity="center" android:layout_width="fill_parent">
 <Button android:layout_width="100px" android:layout_height="wrap_content"
 android:id="@+id/btnlogin" android:layout_gravity="center"
 android:text="登錄"></Button>

 <Button android:layout_width="100px" android:layout_height="wrap_content"
 android:id="@+id/btnexit" android:layout_gravity="center"
 android:text="退出"></Button>
 </TableRow>
 </TableLayout>

 <LinearLayout xmlns:android="http://schemas.android.com/apk/res/android"
 android:layout_width="wrap_content" android:layout_height="wrap_content"
 android:orientation="horizontal" android:layout_marginTop="25dip">

 <CheckBox android:layout_width="wrap_content"
 android:layout_height="wrap_content" android:id="@+id/cbrp"
 android:text="記住密碼" android:textSize="12px"></CheckBox>
 <CheckBox android:layout_width="wrap_content"
 android:layout_height="wrap_content" android:id="@+id/cbal"
 android:text="自動登錄" android:textSize="12px"></CheckBox>
 </LinearLayout>
</LinearLayout>
java代碼
package com.wjq;

import android.app.Activity;
import android.content.Context;
import android.content.SharedPreferences;
import android.os.Bundle;
import android.util.Log;
import android.view.Display;
import android.view.View;
import android.view.View.OnClickListener;
import android.widget.Button;
import android.widget.CheckBox;
import android.widget.CompoundButton;
import android.widget.EditText;
import android.widget.TextView;
import android.widget.Toast;

import com.wjq.beans.User;
import com.wjq.func.UserMgr;

public class Login extends Activity {
 private EditText etAccount;
 private EditText etPW;
 private Button btnLogin;
 private Button btnExit;
 private CheckBox cbrp;
 private CheckBox cbal;
 private UserMgr userMgr;
 private User user;
 private SharedPreferences sp;
 private TextView tvClear;

 /*
 * (non-Javadoc)
 *
 * @see android.app.Activity#onCreate(android.os.Bundle)
 */
 @Override
 protected void onCreate(Bundle savedInstanceState) {
 // TODO Auto-generated method stub
 super.onCreate(savedInstanceState);

 setContentView(R.layout.login);

 etAccount = (EditText) findViewById(R.id.etaccount);
 etPW = (EditText) findViewById(R.id.etpw);
 cbrp = (CheckBox) findViewById(R.id.cbrp);
 cbal = (CheckBox) findViewById(R.id.cbal);
 btnLogin = (Button) findViewById(R.id.btnlogin);
 btnExit = (Button) findViewById(R.id.btnexit);
 tvClear=(TextView)findViewById(R.id.tvclear);

 InitConfig();
 cbrp
 .setOnCheckedChangeListener(new CompoundButton.OnCheckedChangeListener() {

  @Override
  public void onCheckedChanged(CompoundButton buttonView,
  boolean isChecked) {
  sp = getSharedPreferences("UserInfo", 0);
  sp.edit().putBoolean("cbrp", isChecked).commit();
  }

 });

 cbal
 .setOnCheckedChangeListener(new CompoundButton.OnCheckedChangeListener() {

  @Override
  public void onCheckedChanged(CompoundButton buttonView,
  boolean isChecked) {
  sp = getSharedPreferences("UserInfo", 0);
  sp.edit().putBoolean("cbal", isChecked).commit();
  }

 });
 btnLogin.setOnClickListener(new OnClickListener() {

 @Override
 public void onClick(View v) {
 user = new User(etAccount.getText().toString(), etPW.getText()
  .toString());

 Log.i("tag", "Account:" + etAccount.getText().toString());
 Log.i("tag", "Password:" + etPW.getText().toString());

 userMgr = new UserMgr();
 Boolean flag = userMgr.CheckUser(user, Login.this);

 if (!flag) {
  Toast.makeText(Login.this, "用戶驗證錯誤!", 1000).show();
 }

 else {
  if (cbrp.isChecked()) {
  sp = getSharedPreferences("UserInfo",
  Context.MODE_WORLD_WRITEABLE
   | Context.MODE_WORLD_READABLE);

  sp.edit().putString("account",
  etAccount.getText().toString()).commit();
  sp.edit().putString("password",
  etPW.getText().toString()).commit();
  }
 }
 }

 });

 btnExit.setOnClickListener(new OnClickListener() {

 @Override
 public void onClick(View v) {
 System.exit(0);
 }
 });

 tvClear.setOnClickListener(new OnClickListener(){

 @Override
 public void onClick(View v) {sp=getSharedPreferences("UserInfo", 0);

 sp.edit().clear().commit();
 }});
 }


//初始化配置

 private void InitConfig() {
 sp = getSharedPreferences("UserInfo", 0);
 etAccount.setText(sp.getString("account", null));
 etPW.setText(sp.getString("password", null));
 cbal.setChecked(sp.getBoolean("cbal", false));
 cbrp.setChecked(sp.getBoolean("cbrp", false));
 }
}
說明:
1.寫內容
 sp = getSharedPreferences("UserInfo", 0);
  sp.edit().putBoolean("cbal", isChecked).commit();
  UserInfo是指xml文件的文件名,如果此文件已存在則直接向其中寫內容“isChecked”的值,首先通過SharedPreferences的edit()方法創建editor,然後調用commit()方法提修改
2.讀內容
sp = getSharedPreferences("UserInfo", 0);
 etAccount.setText(sp.getString("account", null));
 etPW.setText(sp.getString("password", null));
 cbal.setChecked(sp.getBoolean("cbal", false));
 cbrp.setChecked(sp.getBoolean("cbrp", false));
以上就是本文的全部內容,希望對大家的學習有所幫助。
 仿360懸浮窗
仿360安全衛士懸浮窗雖然360安全衛士很流氓,但是我相信安裝的人不在少數,它有一個讓人很憂傷的功能,就是即時你關閉了360安全衛士,你手機的左邊距或者右邊距會有一個蟲蟲
 Android NDK環境搭建與簡單實例
一、NDK與JNI簡介 NDK全稱為native development kit本地語言(C&C++)開發包。而對應的是經常接觸的Android-SDK
 Android添加水印的正確方法 只要三步!
開門見山,添加水印的方法非常簡單,其實就只有3個步驟:1、載入原始圖片2、載入水印圖片3、保存帶有水印的圖片實現的原理就是:獲取原始圖片的寬高,然後,新建一個同樣寬高的b
 Android Crash框架Recovery
優點:擺脫原始的Crash界面處理缺點:無法自定義界面實現自定義Ui介紹:“Recovery”幫助你自動處理程序在運行時的Crash,它含有以下幾